
Sketching animals can be intimidating, especially when you’re trying to capture their unique textures and patterns. But with practice and the right techniques, anyone can master the art of sketching wildlife. Understanding anatomy is key to getting proportions right, but it’s not just about the bones – it’s also about capturing movement and energy in your drawings. Texture and pattern are crucial elements when it comes to rendering realistic animal sketches. Whether you’re an aspiring artist or a seasoned one looking to improve your skills, learning how to sketch animals can open up new creative possibilities for you. In this guide, we’ll cover the fundamentals of animal anatomy, provide expert tips on technique, and share advanced techniques for capturing movement, texture, and pattern in your sketches. By the end of this article, you’ll be able to create more realistic and engaging animal drawings.
Understanding Animal Anatomy
When sketching animals, it’s essential to understand their underlying anatomy to capture their unique proportions and features accurately. This foundation will help you draw a wide range of creatures with confidence.
Identifying Key Body Parts
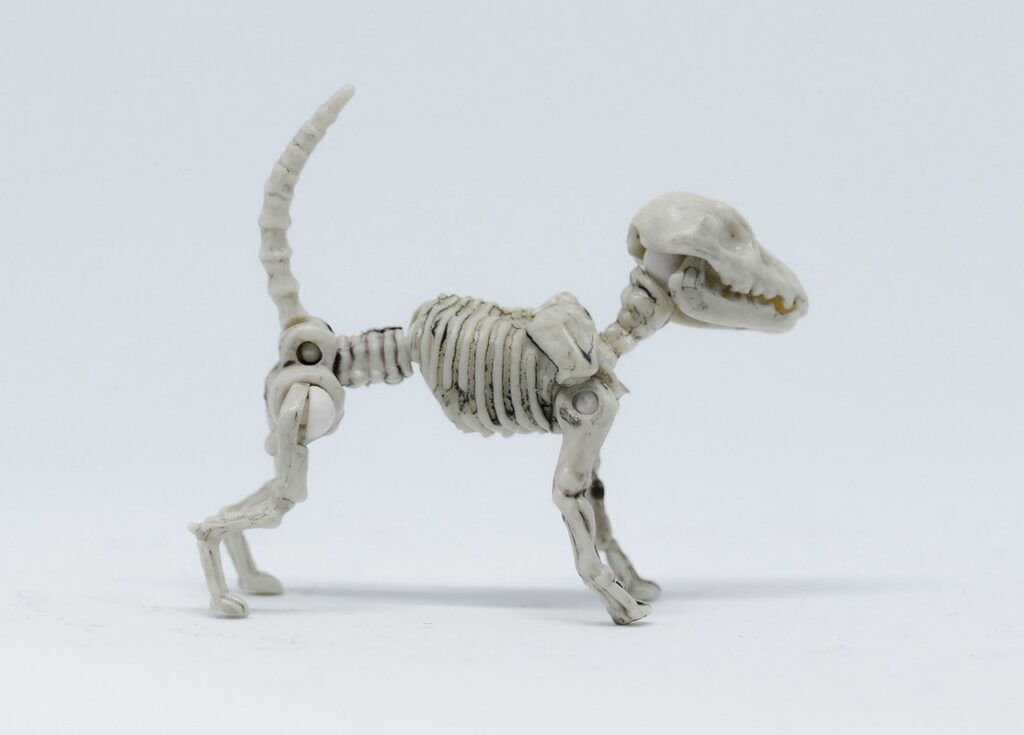
When sketching animals, it’s essential to understand the key body parts that make up their anatomy. Start by identifying the skeletal system, which includes the bones and joints that provide support and structure for the animal’s body. The ribcage, pelvis, and long bones in the limbs are crucial components of the skeleton. Next, focus on the muscles, which attach to the bones and enable movement. Major muscle groups include the quadriceps in the legs, the biceps in the arms, and the latissimus dorsi in the back.
The organs, such as the heart, lungs, liver, and stomach, should also be considered when sketching animals. These internal structures are vital for the animal’s overall health and function, but can often be inferred rather than explicitly drawn. For example, you might depict a bird’s wings as thin and light, suggesting a more efficient respiratory system.
When studying animal anatomy, look for clear diagrams or illustrations that highlight these key body parts. Pay attention to how different species have adapted their skeletal systems, muscles, and organs to suit their unique needs and environments. By understanding the underlying anatomy of animals, you’ll be better equipped to create accurate and lifelike sketches that capture their essence.
Recognizing Animal Proportions
Accurate measurement and understanding of animal proportions are crucial for creating realistic sketches. To achieve this, it’s essential to consider scale and perspective. The average adult human is about 5-6 heads tall, but animals have varying proportions based on their body type.
For example, a typical cat is roughly 7-8 heads long from nose to base of tail, while a dog can range from 4-12 heads long depending on breed. Understanding these proportions helps you place body parts in correct relation to one another and maintain a sense of realism. When sketching animals, it’s also important to consider their overall size in the context of the surrounding environment.
To measure animal proportions accurately, use a reference image or real-life observation. Study the length of the head, neck, body, legs, and tail, taking note of any significant differences from the standard human measurement. This will help you achieve more realistic sketches by ensuring that your subject’s features are in proportion to one another. When working on animal sketches, remember that proportions can vary significantly between species – take the time to research and understand the unique characteristics of each animal you’re trying to draw.
Basic Drawing Techniques
To get a solid foundation, you’ll need to learn some essential drawing techniques that will help you capture the essence of your animal subjects. Let’s start with basic shapes and proportions.
Line Art Basics
When working with line art for animal sketches, it’s essential to understand the fundamental principles of hatching, cross-hatching, stippling, and texture. Hatching is a technique where you create areas of shading by layering parallel lines that follow the contours of the subject. This can help create depth and dimension in your sketch.
Cross-hatching involves layering multiple layers of hatching lines at different angles to achieve a more detailed and textured look. Stippling, on the other hand, is a technique where you use small dots to create an image or shading effect. This method is particularly useful for capturing fine details or creating high-contrast images.
Texture is another critical aspect of line art, as it can help bring your animal sketch to life. To achieve texture, try using different line weights and styles to mimic the subject’s natural textures – for example, a dog’s fur might be rendered with loose, expressive lines. When incorporating texture into your line art, remember that less is often more; too much detail can overwhelm the image.
When practicing these techniques, start by experimenting with simple subjects before moving on to more complex animal forms. This will help you develop muscle memory and get a feel for how different line weights and styles interact with one another.
Shading and Value
When creating depth and dimension in animal sketches, shading and value are essential techniques to master. Shading refers to the darker areas of an image, while value refers to the overall lightness or darkness of a subject. To achieve believable shading and value, start by observing how light interacts with your subject’s fur, feathers, or skin. Notice where shadows fall and how they relate to the surrounding area.
To capture this subtlety in your sketch, use different values for various parts of the animal’s body. A simple way to approach this is to create a range of tonal values from pure white (the lightest areas) to dark black (deep shadows). Use hatching and cross-hatching techniques to build up gradual transitions between these values.
Pay attention to the direction and softness of your lines, as this will greatly affect the overall look of your shading. A gentle, even texture can help create a sense of smooth fur or feathers, while a more expressive line can suggest rougher textures like skin or bark. Experiment with different techniques to achieve a range of effects in your animal sketches.
Animal Body Types
Understanding animal body types is crucial for creating realistic sketches, so let’s take a closer look at the different shapes and proportions found in various species.
Mammals: Structure and Form
When sketching mammals, it’s essential to understand their unique structure and form. Start by observing the way fur or hair lies on the body – note how it falls flat against the skin or forms a more textured surface. Mammals have a layer of fat (subcutaneous tissue) just beneath their skin, which can affect the shape and contours of their bodies.
Pay attention to muscle structure: mammals typically have four limbs, with forelimbs often being shorter than hindlimbs. The skeletal system is also worth noting – mammals tend to have a more flexible spine and a larger pelvis compared to other animal groups. Consider how these characteristics influence the overall shape and movement of a mammal’s body.
To accurately render fur or hair, study its texture and pattern. Observe how it falls in different directions on various parts of the body – for example, how facial hair may grow in distinct patterns around the eyes, mouth, and chin. Notice also how mammals often have more prominent skin folds or creases, particularly around joints like knees and elbows.
When drawing a mammal’s head, remember that their ears are typically mobile and can rotate to pinpoint sounds. Their nose is usually quite sensitive, and their eyes are large and expressive – these features all contribute to the unique character of a mammal’s face.
Birds: Feathers and Flight
Birds have several distinct features that set them apart from other animals. Their feathers are a crucial aspect of their anatomy, providing insulation, support, and lift during flight. When sketching birds, pay close attention to the shape and structure of their feathers, including the arrangement and texture. Note how the feathers curve around the body, forming a smooth, continuous surface.
The wing is another essential feature for flight, consisting of two main bones (humerus and ulna) that connect to the rest of the skeleton through specialized joints. The wings are made up of three parts: the humerus, which connects to the shoulder; the radius and ulna, which form the forearm; and the carpals, metacarpals, and phalanges, which make up the fingers.
When sketching a bird’s wing, focus on capturing its shape and movement. Observe how the feathers overlap and curve along the wing, creating a smooth surface. Consider the bird’s posture: is it perched, in flight, or landing? How does this affect the position of its wings?
Some common skeletal adaptations for flight include hollow bones, air-filled spaces within the skeleton (such as those found in birds), and powerful chest muscles that facilitate breathing during intense activity. By understanding these features, you can create more realistic and detailed sketches of birds in various positions and movements.
Skinning Techniques
When it comes to capturing a realistic animal sketch, mastering various skinning techniques is crucial for creating depth and texture. Let’s explore some essential methods to bring your animal drawings to life.
Basic Skinning Exercises
When practicing basic skinning techniques, it’s essential to start with simple exercises that focus on basic lines and shapes. Begin by sketching a simple animal form, such as a cat or dog, using only straight lines. Try to capture the overall shape and proportions of the animal without worrying too much about details.
Next, move on to more complex textures by practicing different skin patterns and folds. For example, try drawing the rough texture of an elephant’s hide or the smooth coat of a rabbit. Focus on capturing the subtle shifts in texture and tone that give each animal its unique appearance.
To take your basic skinning exercises to the next level, practice combining simple shapes and lines with more complex textures. For instance, draw a cat’s face using simple curved lines, then add intricate details like whiskers and nose folds. Remember, the key to mastering basic skinning techniques is to practice regularly and experiment with different styles and approaches.
When working on these exercises, pay close attention to the placement of folds, creases, and other skin features. Take note of how they relate to the underlying muscle structure and bone framework of the animal. This will help you develop a greater sense of anatomical accuracy in your drawings.
Advanced Skinning Methods
To create realistic skin textures, artists often employ layering and blending techniques. This involves building up layers of value and texture to achieve a convincing depiction of animal skin. One effective method is to start with a base layer that captures the overall tone and value of the skin, then gradually build up additional layers to add depth and dimension.
For example, when drawing a feline’s fur, you might begin by blocking in the general shape and value of the coat with a medium-toned pencil. Next, use a range of pencils or pens to add layer upon layer of texture and detail, starting from the base of the neck and working your way down to the tail.
To blend these layers seamlessly, it’s essential to work from light to dark, gradually building up the value and intensity of the shading. This will help prevent harsh lines or abrupt transitions between different textures. By mastering this process, you can achieve a remarkably realistic representation of animal skin that invites the viewer’s eye to linger.
Sketching Movement and Action
To capture the dynamic nature of animals, you’ll need to focus on conveying movement and action through confident lines and expressive gestures. This means letting go of static poses in favor of fluid motion.
Capturing Motion
Capturing motion is where many animal sketches falter. When an animal is depicted as stiff and static, it can make the entire piece feel lifeless. To avoid this, focus on conveying energy through line and gesture. One way to do this is by experimenting with different line weights. Thicker lines can create a sense of power and movement, while thinner lines can suggest speed and agility.
Try drawing a series of quick poses to get a feel for the animal’s movement. You don’t need to worry about making these drawings perfect – the goal is to capture the essence of the motion. Pay attention to where the animal’s weight is centered and how its limbs are extended or contracted. This can help you create a more dynamic composition.
When drawing from life, observe how the animal’s muscles ripple beneath its skin as it moves. You can also study videos of animals in motion to get a sense of their fluidity. Remember that capturing motion is not just about drawing what you see – it’s also about conveying a sense of energy and life.
Depicting Animal Behavior
When depicting animal behavior, consider the context of the scene. Is it a predator-prey interaction, or perhaps a social gathering? Understand the specific behaviors associated with each species and the situation. For example, a stalking lion will exhibit patience and stealth, while a group of playful otters may display energetic and chaotic movements.
To capture these nuances, observe animals in their natural habitats or study photographs and videos that showcase various behaviors. Note how body language contributes to the overall narrative – tense postures for aggression, relaxed stances for contentment, and fluid movements for hunting.
When illustrating a complex scene, prioritize key moments or interactions. Focus on conveying the emotional intensity of the situation rather than detailing every individual’s actions. This might involve emphasizing the dominant figure in a social hierarchy or highlighting the tension between predator and prey.
To achieve this level of detail, experiment with varying line weights and textures to convey different emotions and physical states. For instance, a tense scene might employ thicker lines for emphasis, while a calm moment could feature softer, more delicate strokes.
Advanced Techniques and Tips
As you become more confident in your animal sketching skills, it’s time to take your art to the next level by mastering advanced techniques such as texture and pattern rendering.
Mastering Texture and Pattern
To create realistic fur, feathers, and scales, focus on observing the texture’s underlying structure. Study the pattern of individual hairs, feathers, or scales within a larger group. For instance, observe how the guard hairs on an animal’s back are longer than the undercoat, creating a layered effect. When drawing these textures, use short, curved strokes to suggest the individual elements. Varying line weight and length can also convey texture.
When rendering fur, consider the direction of the hair growth. Draw the longest hairs first, using smooth curves for their length. Then add shorter, more delicate lines for the undercoat. This technique creates a sense of depth and dimensionality.
For feathers, focus on capturing the soft, wispy edges and subtle gradations in texture. Use gentle, sweeping strokes to suggest the shape and movement of individual feathers. When drawing scales, observe their arrangement on the body and how they reflect light. Use small, rounded shapes to depict individual scales, varying their size and spacing to create a sense of depth.
Remember, practice observing and rendering different textures will help you develop your skills in creating realistic fur, feathers, and scales.
Overcoming Common Challenges
When sketching animals, accurately capturing proportions can be a challenge. To overcome this, study reference images of the animal’s skeletal structure and observe how it relates to its overall body shape. For example, notice how a horse’s legs are proportionally longer than those of a cat or dog. Practice measuring and drawing different body parts in relation to each other, such as the distance between the eyes, nose, and ears.
Conveying emotion and personality can be just as tricky. To capture this, pay attention to posture, facial expressions, and the way the animal’s body interacts with its environment. For instance, a relaxed dog might be leaning against a tree, while an anxious cat is crouched low to the ground. To convey energy and movement, experiment with loose brushstrokes or gestural drawings that capture the animal in mid-action.
Another common challenge is capturing texture and pattern. Observe how different animals have unique skin textures – like the smooth fur of a rabbit or the scaly hide of a reptile. Practice rendering these textures using a range of line weights, hatching patterns, and shading techniques. By paying attention to these details, you can bring your animal sketches to life and make them feel more dynamic and engaging.
Frequently Asked Questions
How to apply the techniques learned in this guide to real-world sketches?
When sketching animals in a real-world setting, it’s essential to observe and study the subject’s anatomy. Start by breaking down the animal into its key body parts and then focus on capturing its proportions and textures accurately. Remember to practice regularly and experiment with different techniques to develop your skills.
Can I use digital tools to create realistic skin textures and patterns?
Yes. Digital drawing software can be a powerful tool for creating realistic skin textures and patterns, especially when paired with reference images of real animals. Experiment with layering and blending techniques to achieve the desired effect. However, keep in mind that mastering texture and pattern requires a deep understanding of anatomy and observation.
How do I convey emotion and personality in my animal sketches?
Conveying emotion and personality in animal sketches is all about capturing their unique characteristics and traits. Pay attention to their posture, facial expressions, and body language when observing real animals or reference images. Use your knowledge of animal behavior and social interactions to inform your drawings and make them more engaging.
What if I’m struggling to capture proportions and anatomy accurately?
If you’re struggling to capture proportions and anatomy accurately, try practicing basic drawing exercises that focus on measurement and scale. Study the work of other artists and observe real animals in their natural habitats or through reference images. Don’t be afraid to make mistakes – they can often lead to new discoveries and insights.
How do I balance technique with creativity when sketching animals?
Yes, balancing technique with creativity is essential when sketching animals. While mastering techniques like hatching and cross-hatching is crucial, don’t forget to let your imagination shine through in your drawings. Experiment with different styles and approaches to develop a unique voice and vision that sets you apart from others.

