
Creating the perfect sourdough garlic bread from scratch can be a daunting task, especially for beginners. The combination of a tangy, natural starter and the pungency of garlic is a match made in heaven, but it requires patience and practice to get right. You might have tried store-bought or bakery-sold versions that fall flat due to lackluster flavor and texture, but making it yourself can be incredibly rewarding. This ultimate guide will walk you through every step of the process, from creating your own sourdough starter to mixing, proofing, and baking techniques for a crispy crust and flavorful bread. By the end of this article, you’ll know how to craft perfect sourdough garlic bread that’s sure to become a staple in your kitchen, impressing friends and family with its rich aroma and delicious taste.
Understanding the Basics of Sourdough Starter
To create delicious sourdough garlic bread, you need a solid foundation: understanding how to care for and maintain your sourdough starter is key. Let’s start by learning about this essential ingredient.
What is a Sourdough Starter and How Does it Work?
A sourdough starter is a naturally occurring mixture of wild yeast and bacteria that’s used to leaven bread instead of commercial yeast. This microbial blend ferments sugars present in the dough, producing carbon dioxide gas bubbles that cause the bread to rise. You’ll create your own sourdough starter from scratch in the next section, but first, it’s essential to understand its role in bread-making.
In traditional sourdough baking, a healthy starter is maintained and fed regularly to ensure its potency and consistency. This process involves discarding half of the starter and feeding it fresh flour and water every 24 hours. Regular maintenance helps the starter develop a strong, balanced ecosystem that will reliably ferment your dough. Think of it like a pet – you’ll need to care for it, but with time and attention, it’ll become a trusted companion in your baking journey.
Maintaining a sourdough starter requires some planning, as it needs regular feeding to stay healthy. However, the rewards are well worth the effort: a naturally leavened loaf that’s rich in flavor and texture. With practice, you’ll develop a feel for when your starter is ready to use in bread-making.
Types of Sourdough Starters for Garlic Bread
When it comes to making sourdough garlic bread, you have three main types of sourdough starters to choose from: wild yeast starter, commercial starter, and a combination of both. A wild yeast starter is created naturally by allowing a mixture of flour and water to ferment over time. This method produces a more complex flavor profile but requires patience and regular maintenance.
Commercial starters, on the other hand, are available for purchase online or at local bakeries. They contain a controlled blend of microorganisms that can produce consistent results with minimal upkeep. However, some bakers find that commercial starters lack the unique character developed by wild yeast starters.
A hybrid approach combines the benefits of both methods: using a small amount of commercial starter to kickstart the fermentation process and then allowing the mixture to develop its own natural yeast. This method is ideal for those who want to achieve the best of both worlds without sacrificing too much control or time.
Creating Your Own Sourdough Starter from Scratch
Creating a sourdough starter from scratch is a crucial step in making authentic sourdough garlic bread, and it’s surprisingly easy to do at home with just flour and water. With this simple process, you’ll have your very own natural yeast starter in no time.
Step-by-Step Instructions for Creating a New Starter
To create a new sourdough starter from scratch, you’ll need flour and water. Start by mixing 1/2 cup of warm water (around 90°F to 100°F) with 1/2 cup of all-purpose flour in a clean glass or ceramic container. Use a wooden spoon or spatula to mix until the batter is smooth and free of lumps.
Next, cover the container with plastic wrap or a damp towel and let it rest at room temperature (around 70°F to 75°F) for 24 to 48 hours. This mixture will begin to ferment, producing bubbles and developing a tangy aroma. After 24 to 48 hours, discard half of the starter and add another 1/2 cup of flour and 1/2 cup of water. Mix well and let it rest for another 24 hours.
During this time, the starter should become more active, almost doubling in size. If you notice any mold or unpleasant odors, discard the starter and start again with fresh ingredients. It’s essential to maintain cleanliness throughout the process to prevent contamination. After two days of feeding, your sourdough starter is ready for use in making sourdough garlic bread.
Tips for Maintaining and Feeding Your Sourdough Starter
To keep your sourdough starter healthy and active for bread-making, you need to feed it regularly. The frequency of feeding depends on several factors, including temperature, humidity, and how often you plan to use the starter. A general rule of thumb is to feed it once a day at room temperature (around 70-75°F/21-24°C) and once a week in the refrigerator. During active periods when you’re baking frequently, you may need to feed it every 12 hours.
A common issue with maintaining a sourdough starter is over-proofing, which can lead to an unpleasant odor or a sluggish starter. To prevent this, feed your starter when it’s around one-quarter to one-third full and discard the excess. You should also be mindful of contaminants like yeast or mold, which can compromise the starter’s health.
Some signs that your sourdough starter is healthy include a slightly tangy aroma, a bubbly texture, and a moderate rise in volume during feeding. If you notice any unusual odors, colors, or textures, it’s best to err on the side of caution and discard the starter and start fresh.
Mixing and Proofing the Dough
Now that you’ve created your sourdough starter, it’s time to mix and combine the ingredients for a smooth, elastic dough. This step is crucial for developing the perfect texture in your garlic bread.
The Importance of Using Quality Ingredients in Sourdough Garlic Bread
Using quality ingredients is essential for creating a sourdough garlic bread that’s both flavorful and textured. The type of flour you choose can significantly impact the final product – look for unbleached, all-purpose flours with high protein content to produce a chewy crumb and robust flavor. Bread flour or a combination of all-purpose and whole wheat flour can add nutty undertones.
Water quality is also crucial; use filtered water or bottled spring water to prevent any off-flavors in the dough. A good balance between water and flour will help create a well-hydrated dough, which is essential for developing a sourdough’s characteristic tanginess.
Salt is another vital ingredient – use fine-grained sea salt or kosher salt to enhance flavor without adding bulk. If you choose to add yeast, ensure it’s active and suitable for bread making. Avoid using old or expired yeast, as this can lead to inconsistent fermentation. Lastly, consider the age of your sourdough starter; younger starters tend to produce a more neutral flavor profile.
Step-by-Step Instructions for Mixing and Kneading the Dough
To mix and knead the dough, start by combining 1 cup of warm water with 2 tablespoons of active sourdough starter in a large mixing bowl. Use a wooden spoon or a silicone spatula to gently fold the mixture until it’s fully incorporated. If using a stand mixer, attach the dough hook attachment and mix on low speed for about 5 minutes.
Next, add 3-4 cups of bread flour, 1 teaspoon of salt, and 2 tablespoons of olive oil. Mix the ingredients together until they form a shaggy dough. If using a stand mixer, increase the speed to medium-low and continue mixing for another 10 minutes. If mixing by hand, use a gentle folding motion to combine the ingredients.
To develop gluten in the dough, focus on kneading it rather than over-mixing. Use a gentle pushing-down motion with the heel of your hand or the stand mixer’s dough hook attachment. Knead for about 5-7 minutes, until the dough becomes smooth and elastic. Check the dough regularly to avoid over-working it, which can lead to a dense or tough crumb.
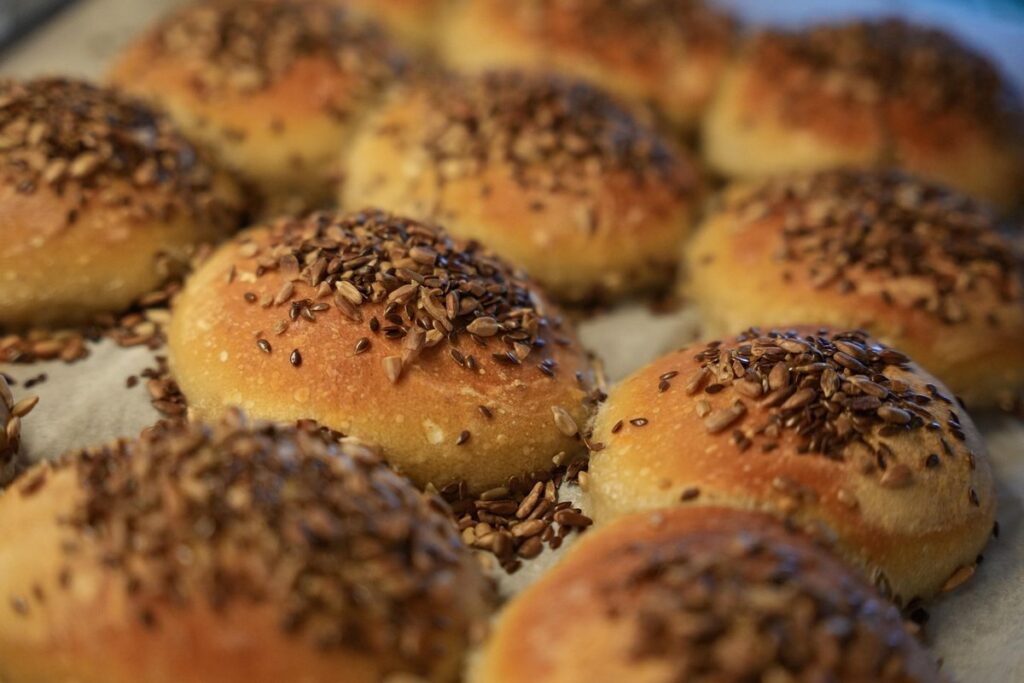
Shaping and Proofing the Garlic Bread
Now that our dough is ready, let’s shape it into beautiful garlic bread loaves and give them a chance to relax in a warm proofing environment. This step is crucial for developing flavor and texture.
Techniques for Achieving the Perfect Sourdough Crust
Achieving a perfectly crispy sourdough crust is largely dependent on how you shape and proof the dough. A key technique for even crust development is to handle the dough gently but firmly, avoiding over-working it. Over-manipulation can cause the gluten to become too tight, resulting in an uneven crust.
To promote a crispy texture, use a combination of steam and high oven temperature during baking. You can create steam by placing a pan of water at the bottom of the oven or using a steam injection system if you have one. A hot oven – typically between 450°F to 475°F (230°C to 245°C) – helps to crisp the crust quickly.
Another crucial factor is proofing time and temperature. A longer, slower rise at room temperature will produce a more evenly developed dough with better texture. Aim for a proofing time of around 2-3 hours, depending on your starter’s activity level and environmental conditions. Keep in mind that over-proofing can lead to a dense, flat crust.
Monitor the dough closely during proofing, as it should expand and maintain its shape without collapsing or becoming misshapen. If you notice any signs of over-proofing, reduce the temperature or shorten the rise time.
Preparing the Garlic Butter Topping and Assembly of the Bread
To prepare the garlic butter topping, combine 1/4 cup softened unsalted butter with 2 cloves minced fresh garlic and 1 tablespoon chopped fresh parsley. Mix until smooth, then adjust seasoning as needed. For a more intense flavor, use roasted garlic instead of raw.
When spreading the garlic butter over the dough, aim for an even layer without overworking the surface. A light touch is key to avoid developing the gluten in the dough, which can lead to a dense crumb. You can also create a decorative border by applying a thicker layer around the edges or using a spatula to create a pattern.
For the signature garlic bread design, use a sharp knife to make 2-3 diagonal cuts on top of each loaf. This will help the butter spread evenly and prevent it from pooling at the bottom. You can also add extra garlic butter in the slits for an extra burst of flavor. For a more rustic look, try using a pastry brush to apply the garlic butter in a zig-zag pattern along the length of the loaf.
Baking and Cooling the Perfect Sourdough Garlic Bread
Now that your dough is risen and ready, it’s time to shape it into perfect loaves for baking, a crucial step in creating truly exceptional sourdough garlic bread.
Temperature Control for Optimal Crust Coloration
To achieve a perfectly browned crust on your sourdough garlic bread, temperature control is crucial. You’ll want to preheat your oven to 425°F (220°C) with a baking stone or baking steel inside. If you don’t have one of these, you can use a regular baking sheet. To ensure even heat distribution and crispiness, make sure the stone or sheet is preheated for at least 30 minutes before baking.
For optimal crust coloration, it’s essential to control steam levels in your oven. You can achieve this by creating a steamy environment during the initial 10-15 minutes of baking. To do this, place a pan filled with water on the bottom rack of your oven. As the water heats up, it will release steam that will help create a crispy crust.
It’s also important to note that you should use a combination of hot air and dry heat for the best results. A convection setting can be beneficial in achieving an evenly baked crust. However, this may not be necessary if your oven doesn’t have a convection feature.
Cooling and Storing Your Freshly Baked Garlic Bread
To maintain the freshness and flavor of your sourdough garlic bread, it’s essential to cool it properly before storing. Remove the bread from the oven and let it cool on a wire rack for at least 10-15 minutes. This allows excess steam to escape, which helps prevent sogginess.
For longer-term storage, consider the following options: store in an airtight container at room temperature (typically up to 3 days), or wrap tightly in plastic wrap or aluminum foil and refrigerate (up to 5 days). If you prefer a crisper texture, freeze the bread for up to 2 months. When reheating, simply thaw at room temperature or bake in the oven for a few minutes.
When storing your sourdough garlic bread, keep it away from direct sunlight and moisture-prone areas. A pantry or cupboard is ideal. If you live in a humid climate, consider using a dehumidifier to maintain a stable environment.
To preserve the flavor, avoid wrapping the bread too tightly, which can cause condensation buildup. Instead, use a loose wrap or store it in an open container with good airflow. This will help retain the aroma and texture of your freshly baked sourdough garlic bread.
Frequently Asked Questions
Can I Use a Sourdough Starter That’s Been Sitting in the Fridge for Months?
Yes, if your starter is healthy and active after being stored in the fridge, you can use it immediately. However, if it has been dormant for too long, it may need to be revived by feeding it regularly before using it in bread-making.
What If My Sourdough Starter Doesn’t Seem to Be Rising as Expected?
There could be several reasons why your starter isn’t rising as expected. Check that you’re feeding it enough and at the right times, as an underfed or overfed starter can affect its performance. Also, ensure that the environment is not too cold or too hot for the starter.
How Long Does Sourdough Garlic Bread Typically Last When Stored Properly?
When stored in a cool, dry place, sourdough garlic bread can last for up to 3-5 days. However, the longer it’s kept, the more likely it is to become stale and lose its flavor. To maintain freshness, consider freezing the bread once it’s cooled completely.
What If I Don’t Have Time to Make My Own Sourdough Starter from Scratch?
If you don’t have time to create your own sourdough starter, you can use a commercial or store-bought starter instead. However, keep in mind that these starters may contain additives and preservatives that can affect the flavor and texture of your bread.
Can I Make Sourdough Garlic Bread Without Using Any Yeast at All?
Yes, you can make sourdough garlic bread using only your sourdough starter as a leavening agent. This method requires more time and patience, but it produces a naturally fermented bread with a unique flavor profile.

