
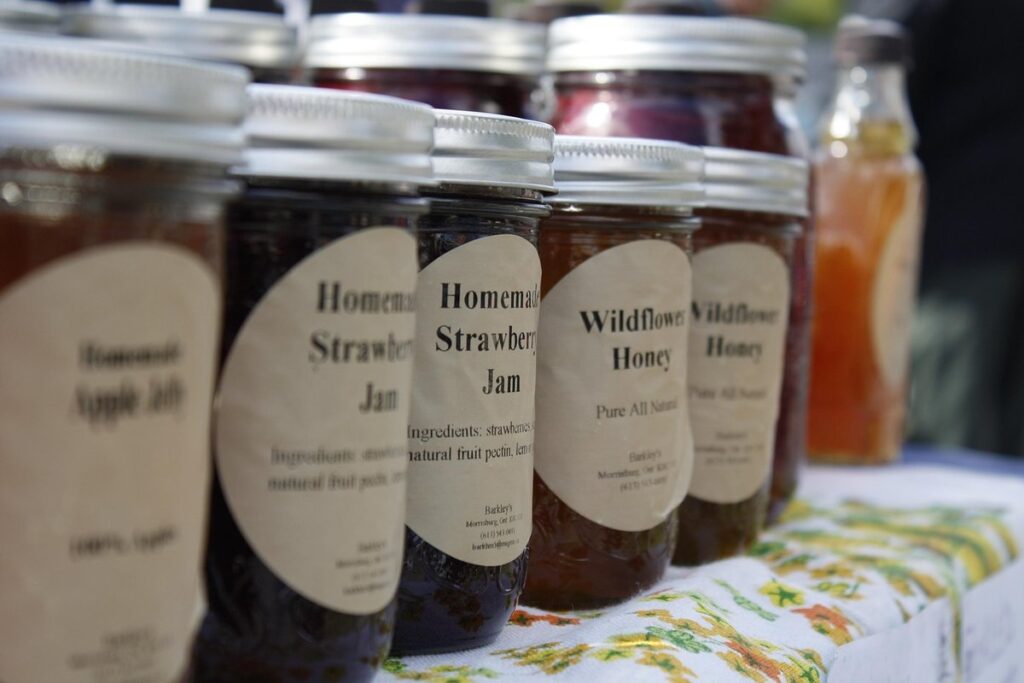
Canning your own strawberry jam is a great way to enjoy this sweet treat throughout the year, and with a little practice, you’ll be making jars full in no time. But before you start, it’s essential to choose high-quality ingredients, including fresh strawberries that are ripe but not overripe, as this will ensure the best flavor and texture in your jam.
Preparing the mixture is also crucial – using the right balance of sugar and pectin, or natural occurring substances like lemon juice, can make all the difference between a smooth, spreadable jam and one that’s too runny or too thick. You may encounter some common issues along the way, such as scorching or not enough sugar to balance out the flavors. This guide will walk you through each step of the process, from choosing your ingredients to troubleshooting any problems that arise, so you can learn how to can strawberry jam with confidence and create delicious homemade jars to give away as gifts or enjoy yourself.
Choosing the Right Ingredients
When it comes to making delicious homemade strawberry jam, selecting the right ingredients is crucial for flavor and safety. Let’s focus on choosing high-quality strawberries and the perfect sweetener combination.
Selecting Fresh Strawberries
When selecting fresh strawberries for canning, it’s essential to choose high-quality berries that are ripe and flavorful. A good strawberry will be firm but yield to pressure, with a vibrant red color and a sweet aroma. Avoid berries with white or green tips, as these may not have fully ripened.
To check for ripeness, gently touch the berry; it should feel slightly soft to the touch. If you’re purchasing strawberries from a store, look for bunches that are heavy for their size and have no signs of mold or bruising. When selecting individual berries, choose those with a glossy appearance and avoid any with visible blemishes.
It’s also crucial to note that strawberries will continue to ripen after they’ve been picked, but they won’t get sweeter or taste better. So, when canning, it’s best to use berries that are already fully ripe to ensure the best flavor in your jam. Typically, the sweetest and most flavorful strawberries are those grown locally during peak season.
Understanding Sugar Content
When it comes to making jam, sugar plays a crucial role in balancing flavors and creating a smooth texture. You’ll want to choose a sugar type that complements the sweetness of your strawberries. Granulated sugar is the most common choice for jam-making, as it dissolves easily and won’t leave any grainy textures. Brown sugar adds a rich, caramel-like flavor, but use sparingly due to its stronger taste.
Honey can be used as a natural sweetener alternative, but keep in mind that it’s sweeter than granulated sugar, so start with a small amount (about 1/4 cup per quart of jam) and adjust to taste. When selecting the right amount of sugar, consider the strawberry variety: sweet strawberries like Camarosa or Albion may require less sugar, while tart varieties like Seascape may need more.
A general rule of thumb is to use about 40-50% sugar by weight compared to your strawberries. For example, if you’re using one quart of strawberries (about 2 pounds), add 1-1.25 pounds of granulated sugar. Taste the mixture as you go and adjust sweetness levels according to your preference. Some recipes may also include additional sweeteners like fruit juice or spices to enhance flavor.
Other Essential Ingredients
When it comes to canning strawberry jam, certain ingredients play a crucial role beyond just strawberries and sugar. Pectin, for instance, is a naturally occurring substance found in fruit that acts as a gelling agent, helping the jam set properly. If you’re using low-pectin strawberries like Alpine or Camarosa varieties, you may need to add commercial pectin powder or liquid pectin to achieve the right consistency.
Another essential ingredient is lemon juice. A small amount of freshly squeezed lemon juice not only adds a hint of citrus flavor but also helps preserve the jam by creating an acidic environment that inhibits bacterial growth. Use about 1-2 tablespoons of lemon juice per batch, depending on your personal taste preferences.
Finally, adding a small amount of butter or oil can help stabilize the emulsion and prevent foam from forming during processing. This is especially important if you’re using a high ratio of sugar to strawberries. For example, you could add 1 tablespoon of unsalted butter or neutral-tasting oil like canola or grapeseed per batch.
When it comes to alternatives or substitutions, be aware that some pectin-free recipes rely on using only ripe fruit and cooking the mixture to a higher temperature to achieve gelation. However, this method requires careful monitoring to avoid overcooking the jam.
Preparing the Jam Mixture
Now that you’ve washed, hulled, and chopped your strawberries, it’s time to combine them with sugar and pectin in a perfect jam mixture. Let’s get started by preparing this essential component of our homemade jam.
Washing and Chopping Strawberries
Washing strawberries gently but thoroughly is crucial to remove any dirt, debris, or pesticide residues. To do this effectively, rinse the berries under cold running water, and then soak them in a large bowl of cold water for about 10 minutes. After soaking, lift out the strawberries with a slotted spoon, allowing excess water to drip off.
When it’s time to chop the strawberries, use a gentle touch to avoid bruising or crushing the fruit. This is especially important if you’re using a food processor or blender to puree the jam mixture later on. Instead of chopping the strawberries coarsely, try cutting them into small, even pieces that will cook down evenly during the jam-making process.
To preserve the texture and prevent over-cooking, chop only what you need for immediate use, leaving the rest whole until just before adding it to the pot with sugar and pectin. This way, you’ll maintain a nice balance of chunky texture and smooth consistency in your finished jam. If using frozen strawberries, thaw them first, then pat dry with paper towels to remove excess moisture before chopping or pureeing.
Creating a Smooth Puree
Creating a smooth puree is crucial for achieving a clear and even jam. If the fruit mixture is chunky or fibrous, it can lead to an inconsistent texture and appearance in the finished jam. There are several methods you can use to create a smooth puree.
Blending is one of the most common methods for creating a smooth puree. This involves using a traditional blender or food processor to break down the strawberries into a pulp. However, be careful not to over-blend, as this can create a mushy texture that’s difficult to work with. A good rule of thumb is to blend in short pulses until you reach your desired consistency.
Another option for creating a smooth puree is using a food mill. This tool is specifically designed to extract the juice and pulp from fruit while leaving behind any seeds or fibers. It’s particularly useful when working with delicate fruits like strawberries, as it helps preserve their natural flavor and texture.
You can also use an immersion blender to create a smooth puree. This is especially convenient if you’re making a large batch of jam, as it allows you to blend the mixture right in the pot without having to transfer it to a separate container.
Adding Sugar and Pectin
When adding sugar and pectin to the jam mixture, it’s essential to understand their roles. Sugar serves as a preservative, helping to prevent the growth of bacteria and other microorganisms, while also contributing to the jam’s flavor and texture. Pectin, a natural occurring substance found in fruit cell walls, acts as a gelling agent, thickening the jam mixture and giving it its characteristic jelly-like consistency.
To add sugar and pectin correctly, combine 3-4 cups of granulated sugar with the pectin powder (usually available in packets or jars). Mix well until the pectin is fully incorporated into the sugar. Then, gradually add this sugar-pectin mixture to the strawberry puree, stirring constantly to avoid lumps.
For optimal results, aim for a 40:60 ratio of sugar to fruit, but adjust this balance according to your personal taste preferences. Keep in mind that using less sugar may result in an under-set jam, while too much sugar can make it overly sweet and syrupy.
Some common issues arise when adding sugar and pectin. If the mixture fails to thicken properly, try re-adding a small amount of pectin or waiting longer for the jam to set before processing. Conversely, if the jam becomes too thick, you may need to add a little more water or adjust your cooking time.
Canning the Jam Mixture
Now that you’ve prepared your jam mixture, it’s time to transfer it into clean, sterilized jars, which will be sealed and processed in a hot water bath. This crucial step ensures the jam is safely preserved for years to come.
Sterilizing Jars and Lids
When sterilizing jars and lids for canning, it’s essential to create a clean environment to prevent contamination. Start by washing the jars, lids, and bands in hot soapy water, then rinse thoroughly to remove any residue.
To sanitize, place the cleaned items in a large pot or saucepan, cover them with water, and bring to a boil for 10-15 minutes. This ensures that all bacteria and other microorganisms are killed. Alternatively, you can use a dishwasher on a hot cycle to sanitize the jars and lids.
Once sanitized, remove the items from the pot or dishwasher and let them air dry on a clean towel. Never dry sanitized items with a towel that may have come into contact with dirt or bacteria. This final step is crucial in maintaining the cleanliness of your equipment.
It’s also important to note that you should always use new lids and bands for each canning session, as reused ones may harbor bacteria. When handling sanitized jars, be sure to touch only the rim to avoid transferring bacteria to the jar. This attention to detail will help ensure that your canned jam is safe to eat and has a longer shelf life.
Filling and Sealing Jars
When filling hot jam mixture into prepared jars, it’s essential to maintain a precise temperature and use clean equipment to prevent contamination. Begin by ladling the jam mixture from the pot into the waiting jar, leaving about 1/4 inch (6 mm) of headspace at the top. This allows for expansion during processing and ensures proper sealing.
As you fill each jar, be sure to wipe any spills or drips with a clean cloth to maintain a smooth surface. Leave a small amount of jam mixture in the pot to cover the bottom of the jar, as this will help prevent spoilage.
Next, place a new lid on top of the filled jar and screw on a band until it’s just finger-tight. Do not overtighten, as this can cause the seal to fail during processing. Process the jars immediately to ensure proper sealing. A well-sealed jar should be slightly concave in the center, indicating that the vacuum has been created.
To ensure successful sealing, check the lids for a slight pucker or concavity after 24 hours of cooling. If the lid does not seal properly, it’s best to reprocess the jar to prevent spoilage and foodborne illness.
Processing Canned Jams
When processing canned jams, you’ll need to consider two primary methods: water bath canning and pressure canning. Water bath canning is suitable for low-acid foods like jams, but it requires careful attention to acidity levels and processing times. For strawberry jam, which has a relatively high pH level, water bath canning is the preferred method.
To determine the correct processing time using a water bath, refer to a trusted canning resource or your pressure canner’s guidelines. Generally, 10 minutes of processing at altitudes below 1,000 feet is standard for pint-sized jars. However, if you live at higher elevations (1,001-2,000 feet), increase the processing time by one minute per 1,000 feet; above 2,000 feet, add two minutes per 1,000 feet.
For larger jars or when using a pressure canner, processing times may vary. Always consult your equipment’s guidelines and follow tested recipes to ensure safe canning practices. For example, the USDA recommends processing pints at 10 pounds of pressure for 10-15 minutes in a pressure canner.
Troubleshooting Common Issues
Don’t worry if your strawberry jam doesn’t set perfectly on the first try – we’ll walk you through some common issues and easy fixes to get it right. From cloudy jam to moldy lids, let’s troubleshoot together!
Runny or Too-Thin Jam
Runny or too-thin jam can be a frustrating issue, especially after investing time and effort into preparing the mixture. One possible cause is an insufficient amount of pectin, a natural occurring substance found in fruit that helps to thicken jam. If you’ve used a low-pectin strawberry variety or haven’t added enough sugar (which also contributes to gel formation), this could be the culprit.
To adjust for runny jam, try adding a small amount of commercial pectin powder or liquid. Start with a tiny amount – about 1/4 teaspoon per cup of jam mixture – and mix well before re-testing the consistency. Alternatively, you can increase the sugar content by an additional 10-20% to promote gelation.
Be aware that over-correcting can lead to an overly thick jam, so it’s essential to monitor the mixture closely as you adjust these factors. To ensure accurate results, it’s best to re-test after each adjustment rather than making multiple additions at once. Remember, practice makes perfect – and with a little patience and experimentation, you’ll achieve the ideal consistency for your homemade strawberry jam.
Moldy or Spoiled Jam
Mold and spoilage can occur in canned jam due to various factors. The most common cause is contamination during processing, which can be attributed to poor jar handling, inadequate sterilization, or failing to follow safe canning practices. Another reason for moldy or spoiled jam is the presence of wild yeast or bacteria on the strawberries or equipment.
To identify moldy or spoiled jam, inspect the jars regularly and check for visible signs such as mold growth, slime, or a sour smell. If you notice any of these indicators, it’s essential to discard the affected jar immediately. Do not attempt to salvage or reuse the contents, as this can spread contamination to other jars.
To prevent spoilage, ensure that your equipment is clean and sanitized before use. Sterilize lids and bands in boiling water for at least 10 minutes. When filling jars, leave about 1/4 inch headspace to allow for expansion during processing. Properly seal the jar and follow safe canning procedures to minimize the risk of contamination. Regularly inspect your canned jam for any signs of spoilage, and be prepared to discard affected jars if necessary.
Advanced Techniques and Variations
Now that you’ve mastered the basics of canning strawberry jam, it’s time to take your skills to the next level by experimenting with advanced techniques and creative flavor combinations.
Using Other Fruit Combinations
Combining strawberries with other fruits can result in unique and complex flavor profiles. Raspberries, for example, add a tartness and earthy undertone to strawberry jam, while blueberries contribute a sweetness and fruity depth. Citrus fruits like lemons or oranges introduce a bright acidity that balances the richness of the strawberries.
When combining strawberries with other fruits, you may need to adjust the sugar content depending on their natural sweetness. Raspberries, for instance, are relatively tart, so you can reduce the amount of added sugar by about 10-20%. Blueberries, on the other hand, are sweeter than strawberries and may require a slight increase in sugar.
To balance pectin levels, consider the pectin content of the combined fruits. Citrus fruits, like lemons or oranges, have high pectin levels that can help thicken the jam mixture. You can also use lemon juice as an alternative to commercial pectin.
Some popular combinations include:
- Strawberry-raspberry blend (reduce sugar by 10-20%)
- Strawberry-blueberry mix (increase sugar slightly)
- Strawberry-lemon or orange combination (use citrus fruits to balance sweetness and acidity)
Adding Spices or Zests
Adding spices or zests to strawberry jam can elevate its flavor profile and create unique variations. Consider pairing strawberries with citrusy notes from lemon or orange zest for a bright, summery taste. Alternatively, you can add warm spices like cinnamon, nutmeg, or ginger to give the jam a cozy feel.
When experimenting with spices or zests, remember that less is often more. Start by adding a small amount – about 1/4 teaspoon of ground spice per batch of jam – and adjust to taste. You can also combine different spices for added depth.
Some popular combinations include strawberry-lemon jam with a hint of lemon zest and strawberry-ginger jam with crystallized ginger. For those who prefer a subtle flavor, try adding a pinch of salt or a drizzle of balsamic glaze. These small additions can enhance the sweetness of the strawberries without overpowering them.
When working with citrus zests, be sure to grate them finely so they distribute evenly throughout the jam. You can also toast spices like cinnamon or nutmeg in a dry pan for 1-2 minutes to release their oils and intensify their flavor.
Safety Precautions and Considerations
When working with hot sugar and acidic fruit, it’s crucial to take extra precautions to avoid accidents and ensure your jam is safely canned. Be sure to follow these essential guidelines for a stress-free canning experience.
Understanding Food Safety Guidelines
When canning strawberry jam, it’s essential to follow established food safety guidelines. The acidity level of your jam is crucial, as it affects how long you can safely store the canned product. Strawberry jam typically has a pH level between 3.5 and 4.6, making it an acidic environment that inhibits bacterial growth. However, if your jam’s pH level drops below 3.2, it may be too acidic for safe consumption.
To ensure your jam is processed correctly, refer to the USDA’s recommended canning times and temperatures. For high-acid foods like strawberry jam, you’ll need to process jars at a minimum of 212°F (100°C) for 10 minutes, adjusting for altitude as necessary. It’s also vital to maintain proper storage conditions – keep canned jams in a cool, dark place, away from direct sunlight and heat sources.
Pay attention to jar sterilization and filling techniques, as these can compromise the seal or create an environment where bacteria thrive. Regularly inspect your jars for signs of spoilage or damage before storing them. By following established guidelines and maintaining a clean, organized workspace, you’ll be able to produce high-quality, shelf-stable canned strawberry jam that’s safe to consume.
Using Canning Equipment Properly
Properly using canning equipment is crucial to ensuring the quality and safety of your homemade jam. This includes not just the jars and lids themselves, but also the canners and other devices used for processing.
To maintain your equipment’s performance, regularly clean and sanitize all parts, paying particular attention to areas where food comes into contact with metal or glass. For example, wash and dry jar lids thoroughly before using them, and sterilize your canner by boiling it in water for at least 10 minutes between uses.
When filling jars, make sure the recommended headspace is maintained – typically about 1/4 inch (6 mm) of space between the jam’s surface and the lid. This allows for proper expansion during processing and prevents the risk of jar explosions or under-processed jam.
Avoid over-tightening lids, as this can damage the seal or cause the glass to crack. Instead, use a gentle touch to secure the lid in place, following the manufacturer’s recommended tightening procedure.
Frequently Asked Questions
Can I use frozen strawberries for canning?
Frozen strawberries work well in jam-making because they have already been picked at peak ripeness and then quickly frozen to preserve their flavor. When using frozen berries, follow the same sugar content guidelines as fresh strawberries, but keep an eye on the mixture’s consistency since frozen berries release more juice during cooking.
What if I accidentally overprocess my jam, making it too thick?
Overprocessing is a common issue when canning jam, especially for beginners. If you find your jam has become overly thick and difficult to spread, try adding a small amount of water (about 1 tablespoon at a time) while stirring constantly until the desired consistency is achieved.
How do I store my canned strawberry jam to maintain its quality?
Canned jam can be stored in a cool, dark place for up to one year. Keep jars away from direct sunlight and heat sources. For longer-term storage or if you live in an area prone to natural disasters, consider freezing the jam instead of canning it.
Can I use alternative sweeteners like honey or maple syrup when making strawberry jam?
While granulated sugar is the most traditional choice for jam-making, you can experiment with other sweeteners like honey or maple syrup. Keep in mind that these alternatives have stronger flavors and may affect the final product’s consistency and shelf life. Start by substituting a small amount (about 25%) to avoid compromising the jam’s texture.
What if I notice mold on my canned strawberry jam despite following all safety guidelines?
Mold on canned goods is usually a sign of contamination or improper storage conditions. If you notice mold, do not consume the jam and discard it immediately. Check your canning equipment and sterilization process to ensure they are working correctly, and consider re-sterilizing your jars and lids as a precautionary measure.

