
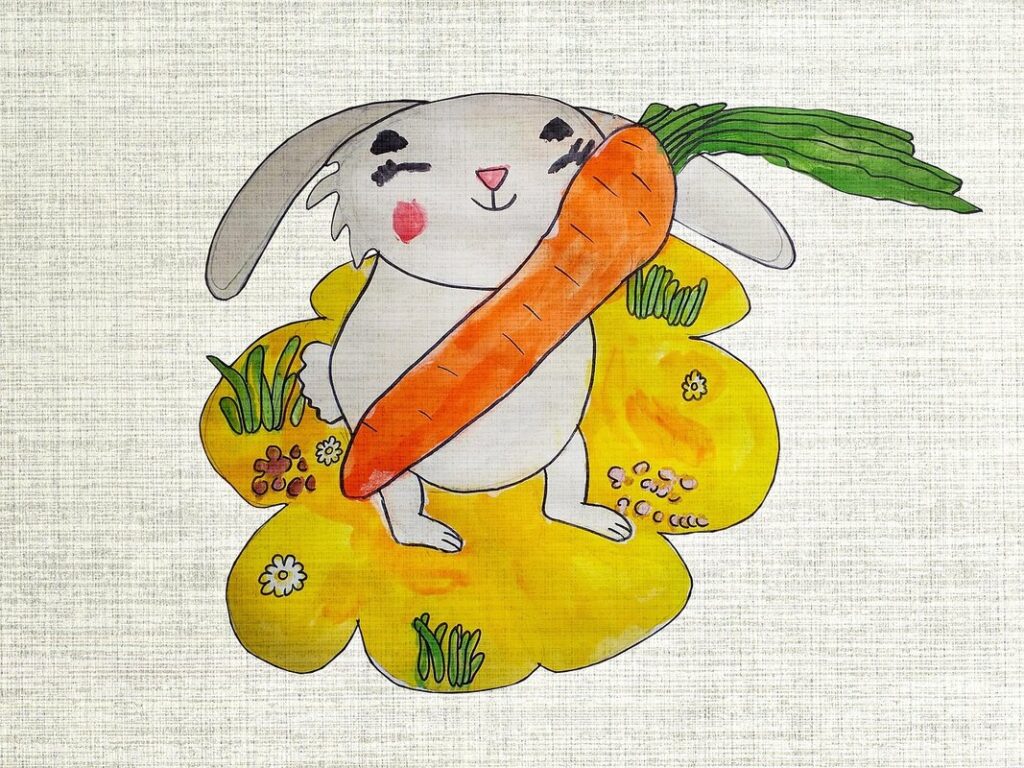
Drawing rabbits can be intimidating, especially for beginners. However, with some guidance and practice, you can create realistic and adorable drawings that bring joy to anyone who sees them. Rabbits are popular subjects in art because they have distinctive features such as large eyes, long ears, and soft fur. For a beginner, it’s essential to start with breeds that are easy to draw, like the Flemish Giant or the Netherland Dwarf. These rabbits have simpler facial structures and fewer details compared to other breeds, making them perfect for those new to drawing animals. This guide will walk you through step-by-step techniques to help you master drawing realistic-looking rabbits, covering common mistakes to avoid along the way. By the end of this article, you’ll be able to create charming rabbit drawings that showcase your artistic skills.
Choosing the Right Breed
When choosing a breed to draw, consider their unique characteristics and features that will make your artwork stand out and showcase your creativity. Think about what you enjoy drawing most about rabbits.
Simple Rabbit Body Structure
Rabbits have a distinctive body shape that can be simplified for drawing. Start by breaking down the head into three main parts: the forehead, cheeks, and chin. The forehead is slightly curved, while the cheeks are more angular. The chin is usually slight and rounded.
The ears are long and pointed, with a gentle curve at the tip. They’re often drawn as simple triangles or teardrops, but you can add some detail by including a subtle notch at the base of each ear. Pay attention to the position of the ears: in most breeds, they sit on top of the head, slightly angled forward.
The tail is typically long and thin, with a fluffy tuft at the end. It’s often drawn as a simple line or a series of curved shapes, but you can add some texture by including short, rounded brushstrokes along its length. When drawing the body, remember that rabbits are long and lean, with a slight sag to their hindquarters.
To simplify these features further, try drawing them from different angles or using simple shapes as reference points. For example, you can use an ellipse for the head or a series of connected ovals for the ears. By breaking down each feature into its basic components, you can create a more accurate and balanced rabbit body shape in your drawings.
Popular Rabbit Breeds for Beginners
When starting out as a beginner rabbit artist, it can be overwhelming to choose a breed that’s easy to draw. Fortunately, there are several popular breeds that are perfect for beginners. One such breed is the Holland Lop, known for its small size and compact body structure, making it simple to capture in a drawing.
Another great option is the Mini Lop, which boasts large ears and a short nose, giving it a distinctive look. However, what makes the Mini Lop so easy to draw is its symmetrical features, allowing beginners to focus on capturing the overall shape rather than intricate details.
For those who prefer a more majestic appearance, the Lionhead breed is an excellent choice. Characterized by its long mane and fluffy coat, the Lionhead can be drawn with bold brushstrokes, making it a great option for beginners looking to add some drama to their artwork. When drawing these breeds, remember that simplicity is key – focus on capturing their overall shape and features rather than getting bogged down in intricate details.
Basic Drawing Techniques
Mastering basic drawing techniques is essential to creating adorable rabbits, so let’s start by learning how to draw simple shapes and lines. These fundamentals will form the foundation of your rabbit artwork.
Understanding Proportions
When drawing a rabbit, proportions are crucial for creating a realistic and recognizable image. The body of a rabbit is roughly divided into two sections: the head and the torso. To ensure accurate proportions, start by measuring the height of the head from the tip of the ears to the chin. This will be about one-fifth to one-quarter of the total height of the rabbit.
Divide your paper accordingly to create these proportionate sections. A good rule of thumb is to use a grid system, where you draw light guidelines to help guide your pencil strokes. You can also use a measuring device or even just place a small ruler on your paper as a reference point.
To take it a step further, consider dividing the body into thirds both horizontally and vertically. This will give you nine equal sections to work with, making it easier to draw and maintain proportions throughout your rabbit’s body. Remember, practice makes perfect, so don’t be afraid to experiment and adjust these measurements as needed for your specific drawing style.
Line Art and Shading Basics
When creating a drawing of a rabbit, line art and shading basics are essential for bringing depth and dimension to your artwork. Start by understanding the difference between hatching, cross-hatching, and stippling. Hatching involves drawing parallel lines that follow the contours of your subject, while cross-hatching is created by layering hatching lines at different angles. This technique can produce a range of values, from light to dark.
Stippling, on the other hand, is achieved by creating small dots that together form an image. It’s often used for detailed work and can be time-consuming, but it produces a unique texture that’s well-suited to certain subjects. To master these techniques, practice drawing simple shapes with varying line weights and densities.
For beginners, it’s helpful to start with basic hatching patterns on flat areas of your rabbit’s body, such as the ears or face. Gradually move on to more complex cross-hatching and stippling techniques, using a range of pencil grades to achieve different levels of detail and texture. Remember, practice is key – experiment with different tools and techniques to find what works best for you and your drawing style.
Advanced Techniques for Realism
Now that you have a solid foundation, let’s take your rabbit drawings to the next level by exploring advanced techniques that bring realism and depth to your art. This includes subtle shading and texture effects.
Refining Facial Features
When refining facial features, it’s essential to capture the subtleties of rabbit expressions. Start by observing real-life rabbits and studying their unique facial characteristics. Note the shape and size of their eyes, nose, and mouth, as well as how these features interact with each other.
For instance, a relaxed bunny might have slightly droopy eyelids, while an alert one might have raised eyebrows. To convey this, draw the eye sockets at a slight angle to create a sense of relaxation or tension. The shape and size of the nose also vary between breeds, so make sure to research your chosen breed’s distinctive features.
When it comes to mouth details, remember that rabbits often lick their lips when feeling anxious or curious. You can convey this by adding subtle lip wrinkles or a tongue flicking out from between the teeth. To capture these expressions, practice drawing different facial muscles and how they interact with each other. Focus on creating soft, gentle lines rather than sharp angles to achieve a more realistic look.
Mastering Fur Texture and Patterns
When drawing realistic rabbits, mastering fur texture and patterns is crucial for creating a believable and engaging image. To start, let’s focus on individual hairs, which can be achieved by adding small lines or tufts to the rabbit’s body. These lines should be staggered and slightly curved to mimic the natural growth pattern of fur.
Whiskers are another important aspect of rabbit anatomy. They’re typically longer than individual hairs and have a more defined shape at the tip. You can draw whiskers as thin lines with a slight taper, making sure they’re evenly spaced around the face and snout.
Ear tufts, on the other hand, are made up of thicker, more prominent fur that grows from the rabbit’s ears. These can be drawn as larger clusters of lines or even as individual hairs that seem to sprout from the ear itself. For a more realistic look, consider adding some texture to these areas by drawing short, curved strokes.
To add an extra layer of realism, study photographs of real rabbits and observe how their fur interacts with light and shadow. You can use this information to create subtle gradations in value and texture that bring your drawing to life. By paying attention to individual hairs, whiskers, and ear tufts, you’ll be able to create a more detailed and convincing rabbit portrait.
Drawing Rabbits in Different Poses
Now that you’ve mastered drawing a basic rabbit, let’s move on to adding some personality with different poses. We’ll explore how to draw rabbits sitting, standing, and even hopping around.
Sitting Rabbits
When drawing sitting rabbits, capturing their weight and balance is crucial. Start by paying attention to the placement of their hind legs. These should be set back slightly from the front legs, creating a gentle slope in the body. This slight tilt helps maintain balance and stability.
Consider the positioning of the forepaws as well – they should be set firmly on the ground, with one paw angled forward slightly to counterbalance the weight of the rabbit’s head. You can also use this subtle angle to suggest the rabbit’s relaxed pose.
To emphasize the sense of weight, think about where you place your lines and shading. Avoid drawing the rabbit too symmetrically or evenly – instead, let the natural contours of their body define its shape. Focus on capturing the gentle rise of the shoulders, the curve of the back, and the soft dip of the belly. By doing so, you’ll create a more convincing and endearing sitting rabbit. Remember to keep your strokes loose and expressive to convey the sense of relaxed weight.
Jumping and Running Rabbits
When drawing a jumping or running rabbit, capturing movement and energy is key. To achieve this, focus on conveying the sense of motion through body language and pose. A jumping rabbit’s legs should be stretched out to their fullest extent, with one leg in mid-air while the other supports its weight. The tail can be held high, adding a dynamic flair to the overall pose.
For running rabbits, elongate the body slightly and emphasize the back legs’ movement. You can also suggest speed by drawing the front paws almost touching the ground, as if about to take off again. Consider using quick, loose strokes for the fur texture, especially on areas where the rabbit is in motion.
To convey energy, exaggerate the pose ever so slightly – a bit more stretched, a bit more dynamic. This will help create a sense of movement without making it look unnatural or cartoonish. Remember, practice makes perfect, and experimenting with different poses and movements can help you develop your own unique style when drawing rabbits in motion.
Tips and Tricks for Drawing Realistic Eyes
When drawing realistic eyes, it’s all about capturing those subtle details that make your rabbit’s gaze truly pop. A few simple tweaks can go a long way in creating an eye-catching expression.
Eye Shape and Size
When drawing a rabbit’s eyes, it’s essential to get the shape and size right. The type of breed you’re drawing can influence eye shape: lops tend to have rounder eyes, while English breeds often have more oval or almond-shaped eyes. You’ll also want to consider the overall face proportions: if your rabbit’s head is longer than its body, its eyes should be proportionally smaller.
To draw different types of eyes, start by sketching a circle for the iris and then add the pupil within it. For rounder eyes, use a slightly larger circle for the iris and a more rounded shape for the eye as a whole. For almond-shaped eyes, use an ellipse for the iris and extend the eye shape upwards, following the curve of the face.
In general, the size of your rabbit’s eyes should be in proportion to its head size. A good rule of thumb is to make the eyes about one-third to one-half the width of the head. This will help create a sense of balance and harmony in your drawing.
Iris and Pupil Details
When drawing realistic eyes for your rabbit, it’s essential to get the iris and pupil details just right. The iris is the colored part of the eye, and its shape can vary from round to almond-like. To capture this subtlety, focus on creating a smooth transition between the iris and the white of the eye. You can achieve this by using gentle gradations of tone and blending your shading.
The pupil, on the other hand, is the small black dot in the center of the iris. Its size will appear larger when looking directly at something and smaller when glancing away. To convey this effect, use a small brush or a fine-tip pen to draw the pupil as a distinct circle within the iris. Pay attention to its proportion – it should be about one-third the diameter of the iris.
To add depth and dimension to your rabbit’s eyes, consider the way light interacts with the iris and pupil. Shading can help create the illusion of light reflecting off these features. Experiment with different shading techniques, such as hatching or cross-hatching, to achieve a natural-looking effect. Remember that the key is subtlety – avoid over-shading, which can quickly make your rabbit’s eyes look unnatural.
Common Mistakes to Avoid
To draw rabbits easily, it’s crucial to steer clear of common mistakes that can confuse and frustrate beginners. Let’s take a look at some pitfalls to watch out for.
Over-Simplification
When drawing rabbits, it’s easy to fall into the trap of over-simplifying features. Beginners might think that making a rabbit look cute and cartoonish is enough, but this can actually make the drawing look amateurish. A good way to avoid this mistake is to observe real-life rabbits and study their anatomy. Notice how the shape of their eyes, ears, and nose contributes to their overall appearance.
Pay attention to proportions as well – a rabbit’s head should be roughly 1/4 the size of its body. Simplifying these details can make your drawing look cartoonish or even inaccurate. For instance, if you draw a rabbit with giant eyes and a tiny nose, it will look more like a caricature than a realistic representation.
To avoid over-simplification, try to capture the subtlety in a rabbit’s features. Study the way their fur lies flat against their skin, the shape of their ears when they’re folded back, or the way their eyes seem to sparkle with curiosity. Remember that it’s okay to take your time and focus on getting these details right – practice makes perfect, and even simple drawings can benefit from attention to detail.
Underestimating Details
When drawing rabbits, it’s easy to get carried away with the overall shape and proportions of the body. However, neglecting smaller details can make a significant difference in creating a realistic representation. Fur texture, for instance, is more than just a smooth coat – it has individual strands that can be depicted as short, fluffy tufts or longer, smoother locks.
Ear tufts are another aspect often overlooked, but they add character to the rabbit’s expression and can be used to convey emotions. Whiskers, too, play a crucial role in defining the rabbit’s features and should not be dismissed as mere embellishments. To capture these details effectively, observe how they interact with the surrounding fur and other facial features.
Incorporating these elements requires attention to texture and pattern. You can achieve this by using different line weights or hatching techniques to suggest varying lengths of fur. Paying close attention to these smaller features will help you create a more detailed and engaging drawing. Consider studying reference images of rabbits to get a better understanding of how their coats and facial hair interact with each other.
Final Touches: Tips for Completion
Now that you’ve mastered drawing the basic shapes and features, let’s add some finishing touches to make your rabbit drawings complete and polished. These final details will bring your artwork to life.
Adding Backgrounds and Context
When it comes to adding backgrounds and context to a rabbit drawing, keep it simple. A cluttered scene can overwhelm the subject, so focus on one or two key elements that enhance the mood and atmosphere of the artwork. Consider the time of day, weather, and setting that suits your rabbit’s breed and personality. For example, a playful bunny might be better suited to a sunny meadow, while a more reserved rabbit might prefer a quiet forest glade.
To create a cohesive scene, establish a clear horizon line and use gentle transitions between the background and foreground elements. Avoid placing the rabbit too close to the edge of the canvas or paper – leave some breathing room for the eye to move around the composition.
A few simple items can add depth and interest to your scene: a leafy branch, a few rocks, or a patch of soft grass. Just remember not to overdo it – too many details can make the artwork feel busy and distracting. By keeping the background simple and focused, you’ll create a harmonious balance between the subject and its environment.
Finalizing Your Masterpiece
When you’ve finally finished drawing your rabbit masterpiece, take a step back and admire it. This is the moment to add the finishing touches that bring everything together. Start by signing your name proudly on the artwork. Consider including the date or a personal message to make it even more special.
If you’re planning to display your artwork, think about adding a simple background or context to enhance its visual appeal. A subtle landscape or a few strategically placed props can help tell a story and draw the viewer’s eye into the scene. Keep in mind that less is often more – avoid cluttering the space with too many details.
Once you’re satisfied with your artwork, take a moment to review what you’ve learned throughout this guide. Remember that practice makes perfect, so don’t be afraid to experiment and try new techniques in future drawings. Finally, display your finished piece proudly, whether it’s on a wall at home or as a gift for a friend. This is the culmination of all your hard work, and it’s something to be truly proud of.
Frequently Asked Questions
How do I choose between drawing a sitting rabbit and a jumping one for my first project?
Choose between the two based on your comfort level with proportions and movement. If you’re new to drawing, start with a sitting rabbit as it requires less complex anatomy. Once you feel confident in your skills, move on to drawing rabbits in motion.
Can I use reference images from real-life rabbits when drawing my cartoon-style rabbits?
Yes. Reference images can help you capture the subtleties of fur texture and patterns. However, remember that cartoon-style art often exaggerates features for comedic effect, so balance realism with artistic license.
How long does it take to master drawing realistic rabbit eyes?
Mastering realistic rabbit eyes requires patience and practice. Start by studying the basics of eye shape and size, then move on to iris and pupil details. With consistent effort, you can develop the skills needed to draw convincing rabbit eyes in a short period, typically within a few weeks or months.
What if I want to draw a rabbit breed that’s not mentioned in the article?
If you’re interested in drawing a specific rabbit breed not covered in this guide, research its unique characteristics and adapt them into your drawing. Pay attention to breed-specific features like ear size, body length, or coat texture to ensure accuracy.
Can I use digital tools to draw rabbits, or is traditional media preferred?
Yes. Digital tools can be an excellent choice for drawing rabbits, especially if you prefer the freedom of erasing mistakes and experimenting with different styles. Traditional media, however, offers a tactile experience that many artists find beneficial. Choose the medium that suits your skill level and personal preference.

