
A well-planned vegetable garden raised bed can be a game-changer for home gardeners, providing a bounty of fresh produce and a sense of accomplishment that comes with growing your own food. However, many gardeners struggle with designing and building raised beds that actually work for their unique growing needs. A typical raised bed layout may look great at first, but it can quickly become a maintenance nightmare if it’s not carefully planned. To avoid common issues like overcrowding, poor drainage, and limited access, you need to consider the specific growing requirements of your chosen vegetables, as well as the space and materials you have available. This guide will walk you through the process of designing and building a thriving vegetable garden raised bed, from planning to maintenance, and provide you with the knowledge to overcome common issues for long-term success. By the end of this article, you’ll be able to create a raised bed layout that meets the needs of your plants and makes gardening a joy.
Choosing the Right Raised Bed Size and Material
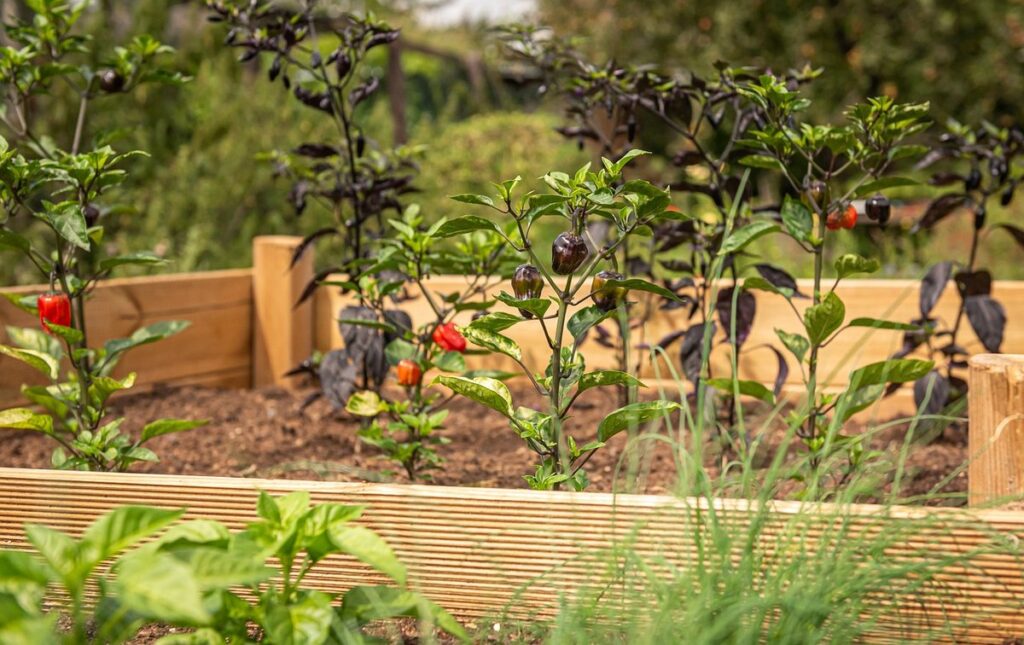
When it comes to building a vegetable garden raised bed, selecting the right size and material is crucial to create a functional and thriving space for your plants to grow.
Factors to Consider When Selecting a Raised Bed Size
When selecting a raised bed size, it’s essential to consider space, accessibility, and crop selection to ensure a productive and enjoyable gardening experience. First, think about the available space in your garden. A raised bed that’s too large can be overwhelming, while one that’s too small may limit crop selection and make maintenance more challenging.
Consider the accessibility of your raised bed. If you’re older or have mobility issues, a smaller bed with lower sides may be more suitable. On the other hand, if you have a large family or want to grow a variety of crops, a larger bed with adjustable height may be more practical.
Think about the types of crops you want to grow. Leafy greens and herbs can thrive in smaller spaces, while vining plants like peas and beans may require more room to climb. Consider a bed size that allows for a mix of crops with different growth habits to maximize space and productivity. For example, a 4×8 foot bed can accommodate a mix of leafy greens, herbs, and vining plants.
Types of Materials for Raised Beds
When choosing the material for your raised bed, you have several options, each with its own set of advantages and disadvantages. Wood is a popular choice, as it’s often affordable and can be stained to match your garden’s aesthetic. However, it may require more maintenance than other materials, as it can rot or warp over time. Cedar and cypress are two types of wood that are naturally resistant to rot and insects, but they can be more expensive than other options.
Composite materials, made from a combination of wood fibers and plastic, are durable and low-maintenance. They’re also resistant to rot and insects, making them a great choice for areas with high moisture levels. However, they can be more expensive than wood and may not be as eco-friendly.
Metal raised beds are another option, offering a modern and sleek look. They’re often made from recycled materials and can be durable, but they can also conduct heat, making them less suitable for hot climates.
Recycled plastic raised beds are made from 100% recycled plastic and are often used in areas with high moisture levels. They’re durable and require minimal maintenance, but they can be more expensive than other options and may not be as aesthetically pleasing.
Budgeting for Your Raised Bed Project
When setting a budget for your raised bed project, consider the costs of materials, tools, and any necessary permits. Start by estimating the cost of the materials, including wood, soil, compost, and any other necessary components. A 4×8 foot raised bed can cost anywhere from $100 to $500, depending on the materials used. In addition to materials, factor in the cost of tools, such as a saw, drill, and measuring tape.
You may also need to obtain permits from your local government before constructing a raised bed. Permit fees vary depending on your location, but expect to pay between $20 to $100. It’s also a good idea to budget for any necessary site preparation, such as clearing debris or grading the soil.
A good rule of thumb is to set aside 10% to 20% of the total budget for contingencies. This will help you cover any unexpected expenses that may arise during the project. For example, if you’re building a raised bed using cedar, you may need to replace a damaged board or two, which could add $50 to $100 to the total cost. By setting aside a contingency fund, you’ll be better equipped to handle any unexpected expenses that come up during the project.
Planning Your Raised Bed Layout
When planning your raised bed layout, the first step is to consider the overall size and shape of your bed, as well as the mature size of your plants. This will help you create a layout that maximizes space and minimizes crowding.
Understanding Your Garden’s Sunlight and Soil Conditions
When planning your raised bed layout, it’s essential to understand your garden’s sunlight and soil conditions. These factors will determine the best location for your raised bed and the type of crops you can grow. Start by observing the sunlight pattern in your garden. Take note of the direction the sun rises and sets, as well as the length of time your garden receives direct sunlight. Most vegetables require at least six hours of direct sunlight per day, so choose a location that receives sufficient sunlight.
To determine the best location, consider the time of day and the season. For example, if you have a south-facing garden, it will receive more direct sunlight during the summer months but may be shaded during the winter. Conversely, a north-facing garden will receive more indirect sunlight year-round. In terms of soil conditions, test the pH level and nutrient content of your soil. Most vegetables prefer a slightly acidic to neutral soil pH (around 6.0-7.0). If your soil is too alkaline or acidic, you may need to amend it with organic matter or fertilizers.
Selecting the Right Crops for Your Raised Bed
When selecting the right crops for your raised bed, consider the climate and seasonality of your area. Cool-season crops like broccoli, kale, and spinach thrive in temperatures between 40°F and 70°F, making them ideal for early spring or late summer planting. In contrast, warm-season crops such as tomatoes, peppers, and eggplants prefer temperatures above 60°F.
Companion planting is also crucial in raised beds. For example, planting marigolds with tomatoes can deter nematodes, while basil repels pests that target lettuce and other greens. Consider the mature size of each crop and leave enough space for proper growth. Overcrowding can lead to reduced yields and increased susceptibility to disease.
Some crops, like beans and peas, are excellent choices for raised beds due to their ability to climb and make use of vertical space. These “climbing” crops can be trained to grow up trellises or other supports, maximizing the bed’s yield without consuming excessive space. When choosing crops for your raised bed, research their specific needs and preferences to ensure optimal growth and success.
Creating a Crop Rotation Plan
A crop rotation plan helps you avoid depleting the soil of specific nutrients and reduces the risk of pests and diseases building up. To create a plan, start by dividing your raised bed into sections, each dedicated to a single crop or group of crops with similar requirements. Consider the mature size of each plant and leave enough space for air circulation and easy access. Most vegetables fall into one of three categories: root vegetables (carrots, beets), leafy greens (lettuce, spinach), and vining plants (cucumbers, squash). Allocate separate areas for each category to prevent diseases from spreading.
For example, if you’re growing tomatoes in one section, keep them away from eggplants, which are also susceptible to similar diseases. Also, avoid planting members of the Brassica family (broccoli, cauliflower) near where you’ve grown members of the Solanaceae family (tomatoes, peppers) in the past year. Typically, it’s a good idea to rotate crops every 3-5 years to ensure soil health and prevent pests and diseases from building up. Keep a record of your planting schedule to help you plan for future seasons.
Designing Your Raised Bed Layout
When designing your raised bed layout, consider the mature size of your plants to ensure they have enough space to grow without overcrowding the bed. This will also make harvesting and maintenance much easier.
Tips for Creating a Functional and Aesthetic Design
When designing your raised bed layout, consider the importance of pathways, irrigation, and storage. To create a functional design, plan for a minimum of 18-24 inches of space between raised beds for easy access and maintenance. This allows for comfortable walking and working without compacting the soil.
For aesthetic appeal, incorporate visual elements like color, texture, and height. Plant tall crops like sunflowers or corn at the north or west side of the bed to avoid shading smaller plants. Consider adding a trellis or obelisk to provide support for climbing plants like peas or beans.
Incorporate irrigation systems like drip irrigation or soaker hoses to conserve water and reduce evaporation. These systems deliver water directly to the roots, reducing runoff and minimizing waste. Consider installing a small storage container or shed nearby to keep tools and supplies within easy reach. This keeps the area tidy and makes maintenance easier.
Integrating Companion Plants and Support Systems
Companion plants are a crucial component of a thriving raised bed ecosystem. By incorporating beneficial plants alongside your vegetables, you can create a mutually supportive environment that enhances growth, reduces pests and diseases, and increases overall yields. For example, marigolds repel nematodes, which can harm tomatoes and other vegetables, while basil improves the flavor and aroma of nearby plants.
When selecting companion plants, consider their growth habits, maturity dates, and space requirements to ensure they don’t compete with your vegetables. Planting a mix of tall and short plants, as well as those with different bloom times, will create a diverse and resilient ecosystem. Some popular companion plants for raised beds include nasturtiums, which repel aphids and whiteflies, and comfrey, which acts as a fertilizer plant by adding nutrients to the soil.
Support systems, such as trellises, stakes, and cages, are also essential for maximizing space and promoting healthy growth. Use these systems to train climbing plants like peas, beans, and tomatoes, and to keep vining plants like cucumbers and squash from spreading. By integrating companion plants and support systems into your raised bed design, you’ll create a productive, low-maintenance garden that requires less watering, fertilizing, and pruning.
Maximizing Space with Vertical Gardening Techniques
When incorporating vertical gardening techniques into your raised bed design, consider using trellises, arbors, or obelisks to support climbing plants like peas, beans, and cucumbers. These plants can thrive on a trellis, maximizing the vertical space and allowing for a more compact layout. A well-designed trellis can also provide additional benefits, such as improved air circulation and reduced soil erosion.
You can also use vertical gardening techniques like the “Espalier” method, which involves training fruit trees or shrubs to grow against a wall or other support. This method can be particularly useful for small spaces, as it allows you to grow multiple plants in a compact area.
To further maximize space, consider using a “living wall” or a “green wall” system. These systems typically involve a modular design that allows for easy planting and maintenance. They can be a great option for raised beds, as they provide a high level of flexibility and can be tailored to fit your specific needs.
When using vertical gardening techniques, be sure to choose plants that are well-suited for climbing or support, and provide adequate support for the plants as they grow.
Building Your Raised Bed
Now that you’ve chosen the perfect location and design for your raised bed, it’s time to start building – let’s begin with the foundation.
Step-by-Step Instructions for Building a Raised Bed
Before you start building your raised bed, make sure the site is prepared. Clear the area of any debris, rocks, and weeds. Check for any underground utilities and mark their locations. If you’re using a wooden frame, lay down a layer of landscape fabric to prevent weeds from growing up through the wood. If you’re using a composite or recycled plastic material, follow the manufacturer’s instructions for preparing the site.
Next, construct the frame of your raised bed. Use pressure-treated wood or a durable composite material to ensure the bed will last for years to come. Assemble the frame according to the manufacturer’s instructions, using screws or nails to secure the pieces together. Make sure the corners are square and the frame is level.
Finally, install any necessary irrigation and drainage systems. If you’re using a drip irrigation system, follow the manufacturer’s instructions for installing the tubes and emitters. If you’re using a soaker hose, bury it in the bed and attach it to a timer or valve. For drainage, install a 2-inch drainage pipe along the bottom of the bed, sloping it slightly to direct water away from the plants.
Tips for Ensuring Stability and Durability
When building your raised bed, it’s essential to prioritize stability and durability to ensure your garden thrives. A sturdy foundation is critical, so consider using a level and compacted base material like gravel or sand. This will prevent the raised bed from settling unevenly over time. Additionally, anchor the bed to the ground using stakes or screws to prevent it from toppling in windy conditions.
Regular maintenance is also crucial. Check the bed’s drainage and irrigation systems regularly to ensure they’re functioning correctly. Keep the area around the raised bed clear of debris, which can cause water to accumulate and lead to rot or damage. Regularly inspect the bed’s structure for signs of wear and tear, and make repairs promptly to prevent further damage.
To further enhance stability, consider using a reinforced frame or using materials with a high load-bearing capacity. For example, cedar or recycled plastic raised beds are excellent choices due to their durability and resistance to rot and pests. By prioritizing stability and durability, you’ll be able to enjoy a bountiful harvest for years to come.
Upcycling and Repurposing Materials for Your Raised Bed
Upcycling and repurposing materials for your raised bed offers a multitude of benefits. Not only can you save money on materials, but you’re also giving new life to discarded items. For example, you can repurpose old pallets or wooden crates to create the frame and base of your raised bed. This approach reduces waste and minimizes the environmental impact of your gardening project.
In addition to cost savings and environmental benefits, upcycling and repurposing materials can also inspire creative possibilities. Think beyond traditional lumber and consider using materials like reclaimed brick, stone, or even recycled plastic. These unique materials can add visual interest and character to your raised bed design.
To get started, look for materials in your home or community that would otherwise be discarded. Consider visiting local salvage yards, Habitat for Humanity ReStores, or online marketplaces for reclaimed materials. When selecting materials, prioritize durability and stability to ensure your raised bed remains safe and functional. By incorporating upcycled and repurposed materials, you can create a one-of-a-kind raised bed that reflects your personal style and reduces waste.
Maintenance and Care of Your Raised Bed
To keep your raised bed thriving, regular maintenance is essential to prevent pests, diseases, and nutrient deficiencies from affecting your crop yields. This section covers the tasks to keep your raised bed in optimal condition.
Tips for Watering and Irrigation
Watering and irrigation are crucial components of raised bed maintenance. When it comes to frequency, a good rule of thumb is to water your raised bed when the top 1-2 inches of soil feel dry to the touch. This can vary depending on factors like climate, soil type, and plant species. For example, if you live in a hot and dry region, you may need to water your raised bed every 2-3 days, while in a cooler and more humid climate, you might only need to water every 4-5 days.
In terms of volume, aim to provide about 1-2 gallons of water per square foot of raised bed per week. This can be achieved through a combination of daily light watering and less frequent deep watering. It’s also essential to consider the timing of your watering schedule. Watering during the cooler morning or evening hours helps prevent evaporation and reduces the risk of fungal diseases.
To optimize your watering and irrigation strategy, consider installing a drip irrigation system or soaker hose, which can deliver water directly to the roots of the plants, reducing waste and runoff.
Managing Pests and Diseases in Your Raised Bed
Common pests and diseases that affect raised beds include aphids, whiteflies, spider mites, and powdery mildew. These pests and diseases can be prevented by maintaining good sanitation, using crop rotation, and introducing beneficial insects. For example, ladybugs are natural predators of aphids and can be introduced to your raised bed to control infestations. To treat infestations, use neem oil or insecticidal soap, which are gentle on plants but effective against pests.
Powdery mildew, a common fungal disease, can be treated with a mixture of water and baking soda. Regularly inspect your plants for signs of disease, such as yellowing leaves or black spots. Remove and dispose of any infected plants to prevent the disease from spreading. Consider using row covers or fine mesh to prevent pests from reaching your plants. It’s also essential to monitor soil pH and adjust it as needed, as extreme pH levels can make plants more susceptible to disease. By implementing these prevention strategies and treatment options, you can keep your raised bed healthy and thriving.
Seasonal Maintenance and Upgrades for Your Raised Bed
Regularly inspect your raised bed for signs of wear and tear, such as loose boards or cracks in the wood. In early spring, remove any debris that accumulated over winter and replenish the soil with a 2-inch layer of compost. This will help replenish nutrients and improve drainage.
Consider upgrading your irrigation system for the growing season. This could be as simple as installing a drip irrigation kit or upgrading to a more efficient watering can. Make sure to water your plants in the morning to prevent evaporation and fungal diseases that thrive in moist conditions.
In the fall, add a 2-inch layer of organic mulch to retain moisture and suppress weeds. You can also use this opportunity to prune and train your plants for better growth and structure. Don’t forget to clean and store your raised bed’s tools and accessories to keep them in good condition over the winter months.
Troubleshooting Common Raised Bed Issues
Don’t let raised bed woes ruin your harvest – this section tackles common problems like poor drainage, pests, and nutrient deficiencies, and shows you how to fix them. We’ll walk through the solutions to these garden headaches.
Identifying and Addressing Common Problems
Drainage problems can arise when water accumulates in the bed, causing roots to rot and plants to become waterlogged. This issue is often due to inadequate slope or poor drainage material selection. Check that your bed has a 1-2% slope to allow excess water to flow out. Ensure the bottom layer of your bed contains materials with good drainage properties, such as gravel or broken pottery. If you’ve already built your bed, try adding more organic matter like compost to improve soil structure and promote healthy drainage.
Pests like slugs, snails, and aphids can become a nuisance in raised beds, especially if they’re located near other plants that attract these pests. Regularly inspect your plants for signs of infestation, and consider using physical barriers or introducing beneficial insects to control these pests. Some plants, like marigolds and basil, repel pests and can be planted alongside your vegetables.
Plant disease can also occur when moisture and humidity are high. Make sure to provide adequate air circulation around your plants, and avoid watering in the middle of the day to prevent water droplets from remaining on leaves. Regularly inspect your plants for signs of disease, and remove any infected plants to prevent the spread of disease.
Solutions for Overcrowding, Underperforming, and Other Issues
When overcrowding occurs in a raised bed, it can lead to reduced air circulation, increased disease transmission, and decreased yields. To address this issue, consider these steps:
- Remove any weak or spindly plants to create space for healthier growth.
- Thin out overcrowded areas by transplanting some plants to other parts of the bed.
- Rotate crops to avoid depleting the soil of specific nutrients and to reduce pest and disease pressure.
Underperforming crops can be caused by inadequate sunlight, poor soil quality, or insufficient watering. Check the bed’s location and adjust the layout to ensure that all plants receive at least six hours of direct sunlight per day. Test the soil pH and nutrient levels, and amend the soil as necessary. Finally, inspect the irrigation system to ensure that it’s providing adequate moisture.
For example, if you notice that your tomatoes are struggling to produce fruit, consider repotting them in a well-draining mix with a balanced fertilizer. This will provide the necessary nutrients and conditions for optimal growth. Similarly, if your lettuce is bolting due to inadequate moisture, adjust the watering schedule to ensure that the soil remains consistently moist.
Best Practices for Long-Term Success
To maintain a healthy and productive raised bed over the long term, it’s essential to establish a regular maintenance routine. This includes regular watering and fertilization, but also addressing potential issues before they become major problems. For example, check the bed’s drainage regularly to prevent waterlogged soil, which can lead to root rot and other issues. Keep an eye out for pests and diseases, and take action promptly if you notice any signs of infestation or infection.
Another key best practice is to maintain a record of your raised bed’s performance over time. This will help you identify patterns and areas for improvement, allowing you to make adjustments to your layout and maintenance routine as needed. Consider keeping a garden journal to track weather patterns, soil conditions, and crop yields, as well as any challenges you’ve faced and how you’ve addressed them.
In terms of crop selection, focus on choosing varieties that are well-suited to your climate and soil conditions. This will help reduce the risk of disease and pest issues, as well as ensure that your crops are healthy and productive. By following these best practices and staying vigilant, you can enjoy a long and productive season from your raised bed. Regular monitoring and adjustments will help ensure that your raised bed remains a thriving and productive part of your garden.
Frequently Asked Questions
Can I use reclaimed wood for my raised bed frame if I’m planning to grow vegetables that require high acidity?
Yes, reclaimed wood can be a suitable option for raised bed frames, but make sure to properly clean and disinfect the wood to prevent any potential contamination from previous uses. Additionally, consider using a wood preservative or sealant to protect the wood from rot and insects.
How often should I rotate the crops in my raised bed to avoid depleting the soil of essential nutrients?
It’s recommended to rotate crops every 3-4 years to maintain soil fertility and prevent nutrient depletion. Consider implementing a crop rotation plan that includes a mix of annuals and perennials to promote soil health and biodiversity.
What if I have limited space in my backyard, and I want to maximize vertical space in my raised bed? Can I use multiple layers of crops?
Yes, you can use multiple layers of crops in your raised bed to maximize vertical space. Consider using a trellis or a vertical gardening system to support climbing plants, and make sure to provide adequate support and space for each layer to prevent overcrowding.
How can I ensure that my raised bed is stable and durable, especially if I live in an area with high winds or heavy rainfall?
To ensure stability and durability, make sure to build your raised bed on a level surface and anchor it securely to the ground. Consider using a foundation or a base plate to prevent the bed from shifting or toppling over. Additionally, use high-quality materials and follow proper construction techniques to ensure the bed’s structural integrity.
What if I encounter pests or diseases in my raised bed, and I’m not sure how to address them? Where can I find more information or advice?
If you encounter pests or diseases in your raised bed, consider consulting with a local gardening expert or visiting a reputable gardening website for advice. You can also check with your local extension office or gardening community for guidance on managing specific pests and diseases in your area.

