
Creating a healthy sourdough starter is the key to achieving improved flavor and texture in your homemade breads. You’ve probably tried making bread with store-bought yeast before, but have you ever wondered why artisanal bakers swear by their own sourdough starters? The reason lies in the unique characteristics of a naturally fermented starter: it imparts a depth of flavor that’s impossible to replicate with commercial yeast. But creating and maintaining a healthy sourdough starter can be intimidating if you’re new to bread-making. Don’t worry – with our comprehensive guide, you’ll learn everything you need to know to create and maintain your own thriving sourdough starter, from the initial creation process to tips for keeping it healthy and active over time.
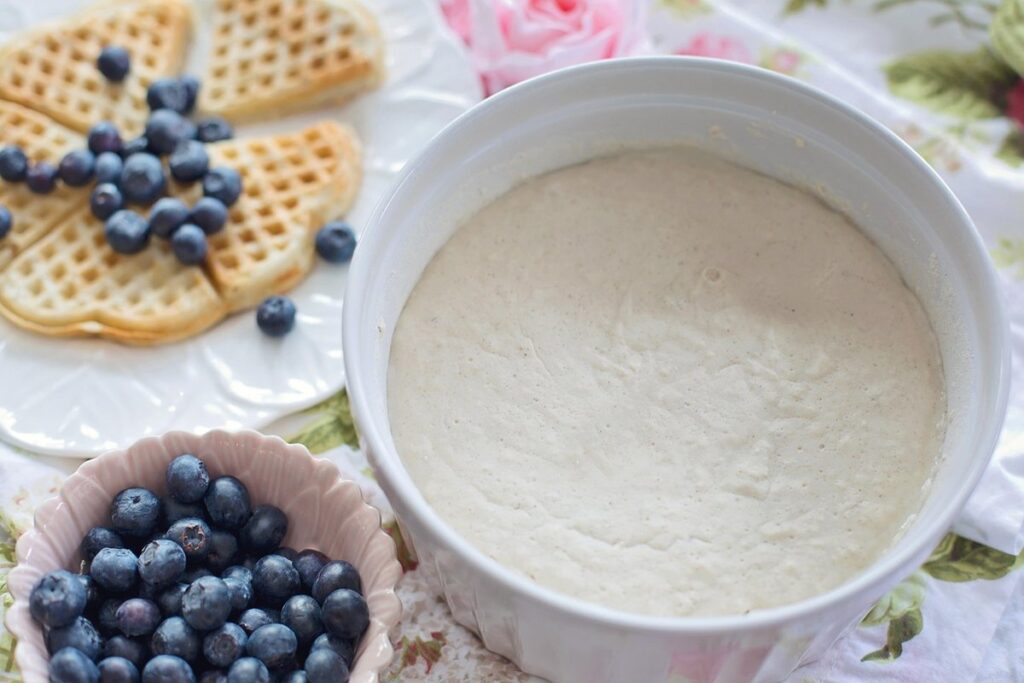
Understanding Sourdough Starters
To create a healthy and thriving sourdough starter, it’s crucial to understand its basic needs and behaviors, such as feeding schedules and potential issues.
What is a Sourdough Starter?
A sourdough starter is a naturally occurring mixture of wild yeast and bacteria that helps leaven bread. It’s a crucial component in traditional sourdough bread-making, as it replaces commercial yeast with a more complex and nuanced fermentation process. Unlike commercial yeast, which relies on a single strain to ferment sugars, a sourdough starter contains a diverse community of microorganisms that work together to break down starches.
This diversity is what gives sourdough its unique flavor profile and texture. A healthy sourdough starter will have a tangy, slightly sour taste and a thick, frothy consistency. When used in bread-making, it will produce a loaf with a crispy crust and a chewy interior. One of the benefits of using a sourdough starter is that it allows for greater control over the fermentation process, enabling bakers to create more complex and nuanced flavors.
Creating a sourdough starter from scratch can be challenging, but with patience and proper care, you can cultivate your own starter and enjoy the rewards of traditional bread-making. When selecting ingredients to feed your starter, choose whole grains or flour that is high in starch, as these will provide the necessary nutrients for the microorganisms to thrive.
Benefits of Using a Sourdough Starter
Using a natural sourdough starter offers several benefits over relying on commercial yeast. One of the most significant advantages is the depth and complexity of flavor it imparts to bread. Sourdough starters contain a diverse range of microorganisms, which contribute to a more nuanced taste experience. In contrast, commercial yeast produces a more uniform, predictable flavor.
The texture of sourdough bread also benefits from using a natural starter. The lactic acid produced by the microorganisms gives bread its characteristic chew and crust. This is particularly evident in artisanal breads, where the crumb is often denser and more satisfying than commercially baked loaves.
From a nutritional standpoint, sourdough bread made with a natural starter is easier to digest due to the breakdown of phytates and other anti-nutrients by the microorganisms. This can be especially beneficial for individuals with gluten intolerance or sensitivity. To maximize these benefits, it’s essential to feed and maintain your sourdough starter regularly, ensuring that it remains healthy and active.
Preparing Your Environment
Before you begin creating your sourdough starter, it’s essential to prepare a clean and suitable environment for its development. This includes setting up a dedicated space and gathering necessary equipment.
Creating an Ideal Environment for Your Starter
To create an ideal environment for your sourdough starter, consider the three key factors: temperature, humidity, and cleanliness. Temperature plays a crucial role in fermentation; most bakers agree that a temperature range of 75°F to 78°F (24°C to 25°C) is optimal for sourdough starter growth. This allows the natural yeast present on the flour to thrive without over-fermenting.
Humidity levels also impact your starter’s health. A humid environment, typically between 60% and 80% relative humidity, helps maintain moisture in the starter, preventing it from drying out or developing unwanted mold. You can achieve this by covering your container with plastic wrap or a damp towel.
Cleanliness is essential for a healthy sourdough starter; contamination can lead to off-flavors or even kill the natural yeast. Always use clean equipment and surfaces when handling your starter, and ensure your workspace is free from strong-smelling foods, cleaning products, and other potential contaminants that might affect the flavor of your bread.
Equipment Needed for a Sourdough Starter
To create an ideal environment for your sourdough starter’s growth, you’ll need a few basic pieces of equipment. First and foremost is a clean glass or ceramic container with a wide mouth, such as a Mason jar or a crock. This will serve as the starter’s home and make it easy to monitor its progress.
A digital scale is also essential for measuring ingredients accurately. Sourdough starters require precise ratios of flour to water, so invest in a reliable scale that can weigh ingredients in grams.
In addition to your container and scale, you’ll need some basic utensils like a wooden spoon or spatula for mixing the starter and a clean cloth for covering it during bulk fermentation. A pastry brush is also helpful for applying a thin layer of oil to the starter’s surface to prevent drying out.
When choosing equipment, prioritize cleanliness and non-reactive materials. Avoid using metal containers, as they can impart unwanted flavors to your starter. Instead, opt for glass or ceramic vessels that are easy to clean and won’t harbor bacteria.
Mixing and Maintaining the Starter
Now that you have a thriving sourdough starter, it’s time to focus on mixing and maintaining its delicate balance. This ensures your starter stays healthy and continues to produce great bread.
Initial Mix: Creating Your Starter from Scratch
Combine 30-40 grams of warm water with 30-40 grams of flour in a clean glass or ceramic container. Use filtered or bottled water if your tap water has high mineral content, as it can inhibit the starter’s activity. For this initial mix, choose a type of flour that is low in protein, such as all-purpose or cake flour, as it will produce fewer wild yeast and bacteria initially.
Stir the mixture with a wooden spoon until it forms a smooth, thick batter. Be careful not to overmix, as this can damage the developing microorganisms. The mixture should still be slightly lumpy and retain some of its original texture. Cover the container with a cloth or plastic wrap, creating a draft-free environment.
Allow the initial mix to rest in a warm place, around 75°F to 80°F (24°C to 27°C), for 24 to 48 hours. This period is crucial for the natural yeast and bacteria present on the flour to start colonizing and multiplying. During this time, you may observe slight bubbles or a faint sour smell – these are signs that your starter culture is coming to life.
Feeding and Caring for Your Starter
Feed your starter once a day by discarding half of it and adding equal parts flour and water to the remaining amount. For example, if you have 100 grams of starter, discard 50 grams and mix with 50 grams each of all-purpose flour and water. This process helps maintain the right balance of yeast and bacteria.
If you prefer a more convenient schedule, you can also feed your starter every other day or once a week, but this may lead to slower activity and reduced overall health. Starters that are fed less frequently often require longer times for dough to rise. Some bakers even choose to store their starters in the refrigerator, feeding them only once a week.
When checking on your starter’s health, look for signs of fermentation such as bubbles forming at the surface or expanding in size. If it’s too dry and crumbly, you may need to add more water. Conversely, if it’s too wet and liquidy, reduce the amount of water in the next feeding. Monitor your starter’s temperature, usually around 75°F to 78°F (24°C to 25.5°C), for optimal activity.
Common Issues with Sourdough Starters and Troubleshooting
Mold can develop on the surface of the starter if it’s not stored properly. Check for a white, green, or black fuzz on top and discard the affected area before continuing to use the starter. To prevent mold, keep the starter in an airtight container at room temperature, ideally around 75°F (24°C). If you notice mold, reduce the feeding frequency to every 12 hours and increase the amount of flour in each feeding.
Over-proofing can be identified by a very bubbly, almost bursting starter. This usually occurs when it’s fed too frequently or with too much water. To prevent over-proofing, reduce the feeding interval to every 24-48 hours and use a slightly firmer dough during the mixing process. On the other hand, under-proofing can be seen in a dense, flat starter. Check for this by gently pressing your finger into the surface; it should spring back slowly.
Under-proofed starters often require longer proofing times or additional feedings before they’re ready to use in recipes.
Tips for a Healthy Sourdough Starter
To keep your sourdough starter thriving, it’s essential to maintain a consistent feeding schedule and store it properly when not in use.
This includes monitoring temperature, humidity, and contaminants that can harm its delicate ecosystem.
Understanding the Life Cycle of Your Starter
Your starter’s life cycle is divided into several distinct stages. Initially, it will be in a dormant state after creation, often referred to as the “sleeping” phase. During this time, it may not appear active or show much visible activity.
Once you begin feeding and caring for your starter regularly, it will transition into the “expansive” stage. This is when the microorganisms start to multiply rapidly, causing your starter to expand in volume and emit a sour smell. It’s essential to monitor the starter’s temperature during this phase, as high temperatures can lead to over-fermentation.
As your starter becomes more mature, it will enter the “mature” or “established” stage. At this point, it should be able to double in size within 4-6 hours after feeding and display a consistent, tangy aroma. The microorganisms within the starter have now reached a balanced ecosystem, allowing for predictable fermentation patterns.
With proper care and regular maintenance, your sourdough starter will continue to mature over time, eventually reaching its peak performance. Understanding these stages is crucial in determining when your starter is ready for use in recipes.
Factors Affecting Sourdough Starter Health
A healthy sourdough starter is sensitive to its environment. Temperature plays a significant role; most starters thrive between 75°F and 78°F (24°C to 25.5°C), while temperatures above or below this range can be detrimental. A temperature fluctuation of just 10-15°F (5.5-8.3°C) can slow down the starter’s activity, making it sluggish or even causing it to collapse.
pH levels also impact the health of your sourdough starter. The ideal pH for a starter is between 4.5 and 5.5. If the pH level drops below this range, the starter may start to produce unwanted compounds, affecting its flavor and aroma. To maintain optimal pH levels, it’s essential to feed your starter regularly with fresh flour and water.
Additionally, other environmental factors such as humidity, light exposure, and air circulation can also affect your sourdough starter’s health. It’s best to keep the starter in a draft-free area, out of direct sunlight, and at a consistent temperature to promote healthy growth and activity.
Techniques for Reviving a Dormant or Dead Starter
When reviving an inactive sourdough starter, it’s essential to approach the process with patience and a clear understanding of what’s happening. A dormant starter may simply need a gentle rekindling, while a dead one might require more drastic measures.
First, discard any remaining starter from the container, as this will prevent over-acidification. Next, add 1/2 cup of flour and 1/2 cup of water to the container, mixing thoroughly to create a smooth batter-like consistency. If your starter is only slightly inactive, try feeding it once a day for three days in a row – if you notice bubbles forming within six hours, you’re back on track.
However, if this doesn’t work and your starter has gone from active to dormant, it’s possible that wild yeast populations have dwindled or been overwhelmed by unwanted bacteria. To combat this, use an acid like lemon juice (about 1 teaspoon per cup of water) when reviving the starter. This will help reset its pH balance and allow beneficial microorganisms to reclaim their dominance.
Keep in mind that over-feeding can lead to a vicious cycle: more food creates more waste, which fosters unwanted bacteria growth – this is why it’s crucial to maintain an optimal ratio between flour, water, and existing starter.
Advanced Topics in Sourdough Starter Maintenance
As you become more comfortable with maintaining your sourdough starter, it’s time to explore some advanced techniques for keeping your starter healthy and active. You’ll learn how to handle common issues like over-proofing and sluggish activity.
Maintaining Multiple Starters: The Pros and Cons
Maintaining multiple sourdough starters can be beneficial for bakers who frequently experiment with different types of bread or want to have a backup starter in case one becomes inactive. One advantage is that you can keep specific starters for particular recipes, such as a whole wheat starter for heartier breads and an all-purpose flour starter for lighter loaves.
However, maintaining multiple starters also presents challenges. Storage space is a concern, as each starter requires its own container and a consistent environment to thrive. Additionally, handling multiple starters can become confusing, especially if you’re not labeling them clearly.
To manage this, consider designating specific areas in your kitchen for starter storage and develop a system for labeling and tracking each one. You might also want to think about the space required for future starters and plan accordingly when selecting containers or a starter holder.
Creating a Sourdough Starter from Scratch Using Wild Yeast
Creating a sourdough starter from scratch using wild yeast involves capturing and cultivating the existing yeast present in flour or the environment. This method is ideal for those living in areas with high humidity and temperature fluctuations, as it allows the natural yeast to thrive. To create a wild yeast starter, begin by mixing 1/2 cup of warm water (around 90°F) with 1/2 cup of type ’00’ or all-purpose flour in a clean glass or ceramic container. Cover the mixture loosely and let it sit at room temperature for 24-48 hours, allowing the natural yeast to colonize.
During this time, you’ll start to notice bubbles forming on the surface and a slightly sour smell developing. This is a sign that the wild yeast has begun to ferment. After 24-48 hours, discard half of the mixture and add another 1/2 cup of flour and 1/2 cup of water. Repeat this process every 24 hours for the next 5-7 days, observing how the starter responds to its environment. Keep in mind that wild yeast starters can be more unpredictable than those created with commercial yeast, requiring patience and flexibility during the maintenance phase.
Advanced Bread Recipes with Your Sourdough Starter
Now that you have a thriving sourdough starter, it’s time to get creative and bake some truly exceptional breads using its natural yeast. From rustic country loaves to delicate baguettes.
Tips for Incorporating Your Starter into Bread Doughs
When incorporating your mature starter into bread doughs, there are a few key considerations to keep in mind. Start by mixing the starter into the dry ingredients, such as flour and salt, before adding the wet ingredients like water or oil. This helps distribute the starter evenly throughout the dough and prevents any clumps from forming.
The optimal proofing time will depend on the type of bread you’re making and the strength of your starter. As a general rule, let the dough rest for at least 1-2 hours after mixing in the starter before shaping it into its final form. For more complex breads like sourdough boules or ciabatta, you may need to allow the dough to proof for several hours or even overnight.
When it comes to incorporating the starter, a smaller amount is often better than a larger one. Start with about 10-20% of the total flour weight and adjust as needed based on the dough’s texture and development.
Creating Variations of Sourdough Breads Using Different Ingredients
One of the joys of working with a sourdough starter is experimenting with different ingredients to create unique flavor profiles and textures. For instance, substituting whole wheat flour for all-purpose flour can introduce a nuttier, slightly sweet taste to your bread. You might also try adding fresh or dried herbs like rosemary, thyme, or oregano to infuse the dough with subtle botanical notes.
Some examples of creative ingredient combinations include using rye flour to add a distinctive tanginess, or incorporating sesame seeds for added crunch and nutty flavor. Spices can also play a significant role in shaping the character of your bread – try adding a pinch of cumin to create an earthy, Middle Eastern-inspired loaf, or use coriander for a warm, slightly sweet taste.
When experimenting with new ingredients, keep in mind that even small changes can significantly impact the final product. Be mindful of the ratio of liquid to flour and adjust accordingly to achieve the right consistency. With patience and practice, you’ll develop a sense of how different ingredients interact with your sourdough starter to produce distinctive results.
Troubleshooting Common Issues in Sourdough Bread Making
Don’t worry, we’ve all been there: your sourdough starter isn’t rising, or it’s too sticky to handle. This section tackles common issues and offers practical solutions for a thriving starter.
Dealing with Over-Proofed or Under-Proofed Doughs
When dough over-proofs, it becomes too puffy and fragile, often collapsing during shaping. This can happen when the starter is too active or the proofing time is too long. To avoid over-proofed dough, regularly check its texture every 30-60 minutes after the bulk fermentation stage has begun. If you notice excessive puffiness, proceed with a gentle fold to redistribute the yeast and then return it to the cooler environment for an additional 15-30 minutes before shaping.
Under-proofed dough, on the other hand, is often dense and difficult to shape due to inadequate rise time or insufficient starter activity. A good rule of thumb is to look for visible expansion during proofing – if no change occurs after a few hours, it’s likely under-proofed. In such cases, extend the bulk fermentation time by another 30 minutes to an hour, allowing the yeast to produce more carbon dioxide and causing the dough to expand further.
In both scenarios, be prepared to adjust the recipe accordingly, as over- or under-proofing often stems from incorrect starter-to-flour ratios or insufficient temperature control.
Maintaining Consistency in Your Sourdough Breads
Consistency is key to achieving high-quality sourdough breads. To maintain consistency, it’s essential to establish a regular routine for feeding and handling your starter. This includes monitoring temperature and humidity levels, as these factors can significantly impact your starter’s performance. A consistent environment allows the microorganisms in your starter to thrive, resulting in more predictable and reliable dough behavior.
When using your sourdough starter in bread making, maintain consistency by sticking to a standard recipe and ingredient list. This ensures that the same types of sugars, proteins, and other compounds are present in each loaf. Consider creating a “base” recipe that you can modify as needed, and keep a record of your adjustments to refine your process.
Additionally, be mindful of your starter’s age and activity level when planning bread making sessions. A mature, active starter will produce more consistent results than a young or sluggish one. By paying attention to these factors and establishing a routine, you’ll be well on your way to achieving consistency in your sourdough breads. This allows for more predictable outcomes and helps to minimize the risk of errors.
Frequently Asked Questions
Can I use a sourdough starter to bake bread immediately after creating it?
Yes, you can use a sourdough starter as soon as it’s created, but keep in mind that the flavor and texture will be more pronounced if you let it mature for a few days. A younger starter may produce a slightly denser or less complex crumb.
How long does it take to notice improvements in bread quality after switching from commercial yeast to a sourdough starter?
The transition period can vary depending on factors like the type of flour used, maintenance habits, and personal preferences. However, many bakers report noticeable improvements in flavor, texture, and crust color within 5-10 loaves.
What if I notice mold or a bad smell coming from my sourdough starter? Should I discard it entirely?
No, you shouldn’t discard the entire starter. Instead, separate the healthy portion of the starter from the affected part, and discard the latter. If the issue persists, adjust your feeding schedule and environment to promote better health.
Can I store multiple sourdough starters in one container or do they require individual storage?
While it’s possible to store multiple starters together, it’s generally recommended to maintain each starter separately to prevent cross-contamination of yeast strains and potential issues with maintaining the desired characteristics of each starter.

