
Storing your sourdough starter like a pro can make all the difference in maintaining its health and potency. You’ve probably struggled with your starter at some point, wondering why it’s too active or too sluggish, and how to keep it thriving between bakes. The truth is, temperature control and humidity levels are crucial when storing sourdough starter – get them wrong and you’ll end up with a sickly, failing starter on your hands. In this article, we’ll cover the best storage containers, refrigeration methods, freezer options, and even advanced fermentation vessels to keep your starter in top shape. We’ll also touch on the importance of monitoring temperature and humidity levels to prevent over-proofing or under-proofing. By the end of this guide, you’ll be able to confidently store your sourdough starter and enjoy consistent results from your baking endeavors.
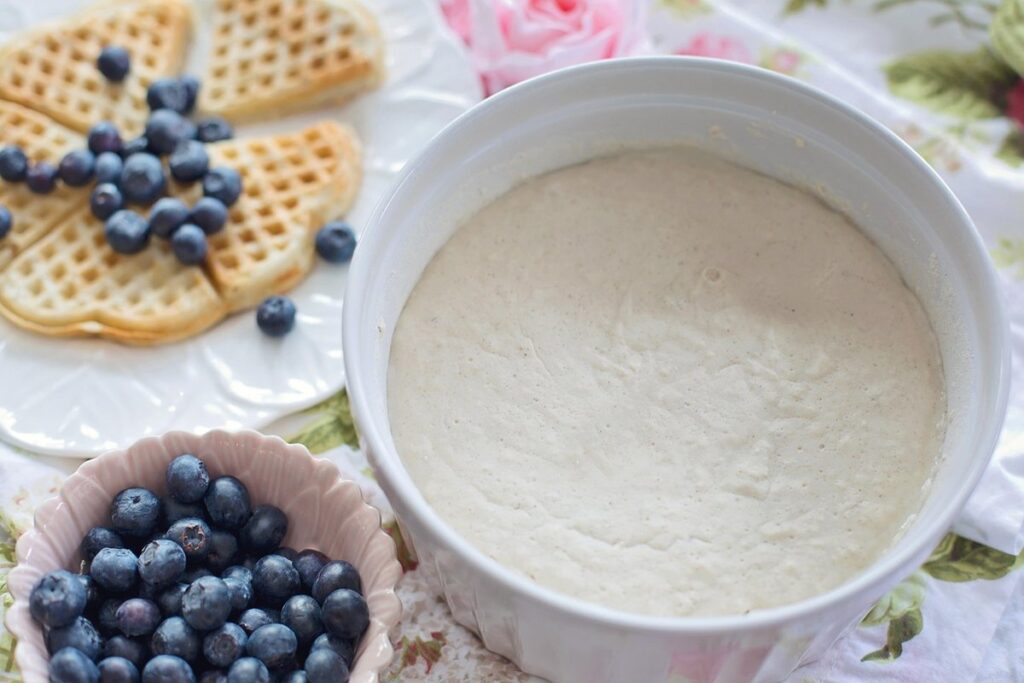
Understanding Your Starter’s Needs
When it comes to storing your sourdough starter, understanding its unique needs is crucial for maintaining a healthy and thriving ecosystem. This means considering factors like temperature and humidity control.
The Importance of Temperature Control
Maintaining a consistent temperature is essential for sourdough starter health and activity. A fluctuating environment can lead to unpredictable behavior, causing your starter to over-proof, under-proof, or even collapse. Temperature affects the rate of yeast fermentation and bacterial growth, with ideal temperatures ranging from 75°F to 80°F (24°C to 27°C) for most starters.
At lower temperatures, activity slows down, while higher temperatures can lead to over-fermentation, resulting in an unstable starter. This is particularly evident when storing your starter at room temperature without proper monitoring, as the temperature may vary significantly throughout the day. To maintain a consistent environment, consider keeping your starter in a dedicated area with minimal temperature fluctuations.
In some cases, you may need to adjust your storage location based on the time of year or local climate. For instance, during hot summer months, it’s best to store your starter in the refrigerator to prevent over-fermentation. Conversely, during colder winter months, you may need to keep it at room temperature to maintain activity.
Humidity Levels for Optimal Health
Maintaining optimal humidity levels is crucial for healthy sourdough starter growth. A dry environment can cause the starter to dehydrate and die, while excessive moisture can lead to mold and over-fermentation. The ideal humidity range for storing a sourdough starter is between 60% and 80%. To achieve this, you can place the container in a plastic bag or cover it with plastic wrap, allowing for a small gap to prevent buildup of condensation.
In cooler temperatures (around 64°F to 75°F), a higher humidity level may be necessary to maintain activity. In warmer environments, however, you might need to reduce the humidity by opening the container slightly more. Monitoring your starter’s activity and adjusting the environment accordingly will help you find the sweet spot for its specific needs.
A consistent temperature range of 64°F to 75°F also contributes to a stable environment. If you can’t maintain this ideal temperature zone, it’s best to avoid placing your starter near heating vents or drafty areas. By ensuring the right balance of humidity and temperature, you’ll create an optimal storage environment for your sourdough starter to thrive.
Choosing the Right Storage Container
When it comes to storing your sourdough starter, choosing the right container is crucial for its health and longevity. Let’s look at some key considerations for selecting a suitable vessel.
Ceramic vs. Glass: Material Matters
When it comes to storing sourdough starters, the container you choose is crucial for maintaining a healthy and thriving culture. Ceramic and glass containers are two popular options, each with their own set of advantages and disadvantages.
Ceramic containers offer excellent insulation properties, keeping the starter at a consistent temperature and reducing the risk of overheating. However, they can be more prone to contamination if not properly sanitized, as ceramic surfaces can harbor bacteria and other microorganisms. On the other hand, glass containers are non-porous and easier to clean, making them a better choice for hygiene-conscious bakers.
Glass containers also tend to be lighter in weight, which can make them easier to handle and store. However, they may not provide the same level of insulation as ceramic containers, potentially leading to temperature fluctuations that can affect the starter’s health. Ultimately, the choice between ceramic and glass containers depends on your specific needs and preferences. Consider factors such as ease of cleaning, durability, and the potential for contamination when making your decision.
Size Matters: Selecting the Perfect Vessel
When it comes to selecting a vessel for your sourdough starter, size matters. A container that’s too large can lead to over-proofing and messy spills, while one that’s too small can cause fermentation byproducts to build up, increasing the risk of contamination.
A general rule of thumb is to choose a container with a capacity of around 1-2 quarts (1-2 liters) for a standard-sized starter. However, this can vary depending on your specific starter’s needs and growth patterns. For example, if you’re planning to store a larger or more active starter, you may need a vessel with a slightly bigger capacity.
Consider the shape of the container as well – a wide-mouthed jar is often easier to clean and less prone to spills than a narrow-necked one. Some containers also come with built-in measuring markers or graduation lines, which can help ensure you’re not over- or under-filling your starter’s new home.
Refrigeration 101: Cooling Down Your Starter
To keep your sourdough starter at a consistent, cool temperature, it’s essential to understand refrigeration basics and how they apply to your starter. We’ll cover the fundamentals of storing your starter in the fridge.
Why Chill? The Science Behind Refrigerating Sourdough Starters
Refrigeration slows down the metabolic activity of microorganisms in the sourdough starter, including yeast and lactic acid bacteria. This slowdown is essential for maintaining a healthy balance within the starter ecosystem. When a starter is at room temperature, these microorganisms feed on available sugars and multiply rapidly, potentially leading to an over-fermented or acidic state.
In this environment, opportunistic pathogens can also thrive, further compromising the starter’s health. Refrigeration inhibits their growth, allowing the beneficial microorganisms to regain control and maintain a stable pH level. This balance is crucial for the starter’s overall well-being, as it dictates its ability to leaven bread consistently.
For most home bakers, refrigerating a sourdough starter at 39°F (4°C) or below is sufficient to slow down activity without causing harm. However, this temperature may vary depending on personal preference and specific environmental conditions. It’s essential to note that while refrigeration slows down microbial growth, it does not entirely halt it; the starter will still require regular feeding to maintain its health and viability.
Tips for Successful Refrigerator Storage
When preparing to store your sourdough starter in the refrigerator, it’s essential to take a few steps to ensure its survival. First, make sure the starter is at room temperature and has been fed within the past 24 hours. This will help prevent the starter from going dormant or developing unwanted flavors.
To handle temperature fluctuations, transfer the starter to an airtight container with a wide mouth, such as a glass mason jar or a ceramic crock. Avoid using metal containers, which can cause the starter to become too cold and sluggish.
For optimal recovery times, store the starter in the refrigerator at a consistent temperature between 39°F and 45°F (4°C and 7°C). This will slow down the starter’s activity but prevent it from going dormant. If you plan to be away for an extended period, feed the starter with a small amount of flour and water before refrigeration, and consider using a refrigerator-safe container to minimize the risk of contamination.
A general rule of thumb is to allow 24-48 hours for your starter to recover after removing it from the refrigerator. During this time, observe its behavior and adjust feeding schedules as needed to maintain optimal health.
Freezer Storage Options
If you don’t plan on baking every day, storing your sourdough starter in the freezer can be a great way to keep it alive and healthy. Here are some tips for successful freezer storage.
Flash Freezing vs. Long-Term Storage
When it comes to storing sourdough starter for extended periods, you have two primary options: flash freezing and long-term storage. Flash freezing involves quickly freezing the starter in small portions, typically using an ice cube tray or airtight containers. This method preserves the starter’s nutritional content and retains its natural yeast properties.
Long-term storage, on the other hand, requires transferring the starter to an airtight container, such as a glass jar with a tight-fitting lid, and storing it in the coldest part of the freezer at 0°F (-18°C) or below. This method is more energy-efficient than flash freezing but may lead to some loss of nutritional content over time.
For convenience, flash freezing can be beneficial, especially if you plan to use small portions of starter for bread-making or experimentation. However, long-term storage can help maintain the starter’s overall health and viability, making it a better option for extended periods.
Preparing Your Starter for Deep Freeze
When you’re ready to freeze your sourdough starter, it’s essential to prepare it properly for long-term storage. This means transferring the starter into an airtight container and allowing it to dry slightly on the surface. A clean glass jar or plastic container with a tight-fitting lid is ideal for this process.
Label the container with the date, starter type (e.g., whole wheat or all-purpose), and any relevant notes (such as the feeding schedule leading up to freezing). This information will help you identify the contents when you’re ready to thaw and use your starter again.
Once packaged, place the container in the freezer, ideally at 0°F (-18°C) or below. When it’s time to revive your starter, remove it from the freezer and let it thaw overnight in the refrigerator. In the morning, discard half of the starter and feed it with fresh flour and water according to your usual routine.
Reviving Your Frozen or Refrigerated Starter
If you’ve been storing your sourdough starter in the fridge or freezer, don’t worry if it’s lost its vitality – reviving it is a simple process that we’ll walk you through next.
A Step-by-Step Guide to Recovery
When reviving your frozen or refrigerated sourdough starter, you’ll often encounter one of three common issues: sluggish activity, mold growth, or contamination risks. Sluggish activity can be addressed by gradually increasing the starter’s feeding schedule after thawing. Start with once-a-day feedings for a few days, then revert to your regular maintenance routine.
To tackle mold growth, carefully inspect the starter and discard any affected areas. Then, re-feed it with fresh flour and water at an optimal ratio (typically 1:1:1) and allow it to rest for several hours. This will help balance the ecosystem and promote healthy microbial activity.
Contamination risks can be mitigated by implementing a “clean start” procedure after thawing. Begin by discarding half of the starter, then re-feed it with fresh flour and water while monitoring its behavior closely over the next 24-48 hours. Keep an eye out for off smells or textures, which may indicate ongoing contamination issues.
Troubleshooting Common Issues
When thawing and feeding your revived starter, you may encounter issues like an overly active or sluggish starter. If your starter is too frothy, it might be a sign of over-proofing due to inadequate feeding or inconsistent schedules. To rectify this, reduce the frequency of feedings or use less water in your feed mixture.
Conversely, if your starter seems lethargic after thawing, it may require more frequent feedings or an adjustment in temperature. A general rule is to increase feedings by 25% when reviving a dormant starter and return to regular intervals once it’s active again. Regularly monitoring your starter’s behavior will help you identify potential problems early on.
Keep a close eye out for signs of distress, such as mold, sliminess, or an unpleasant odor. If you notice any of these issues, discard the affected portion immediately and start fresh with a new starter culture. Maintaining a consistent feeding schedule and monitoring your starter’s health will help prevent these common problems from arising in the first place.
Advanced Storage Methods: Fermentation Vessels and More
Beyond simple containers, you’ll want to explore more advanced storage methods that keep your sourdough starter healthy and thriving. This includes using fermentation vessels, crocks, and other specialized equipment.
Fermentation Vessel Options for Sourdough Starters
Using a fermentation vessel specifically designed for sourdough starters offers several benefits, including reduced risk of contamination and improved control over fermentation conditions. These vessels are typically made from food-grade materials such as glass or ceramic and feature narrow necks that allow for precise measurements and minimal introduction of air.
A small minority of home bakers opt for a crock or clay vessel to store their starter, but these often lack the precision of true fermentation vessels. The benefits of using a dedicated sourdough storage vessel are twofold: reduced contamination risk from airborne pathogens and improved control over temperature and humidity fluctuations.
For optimal results, choose a vessel with an airlock that allows CO2 to escape while keeping oxygen out. Some popular options include the Anchor Hocking glass jars or the Sourdough International ceramic crocks. When selecting a vessel, consider factors such as size, material, and ease of cleaning. Proper maintenance and storage are crucial to maintaining a healthy sourdough starter.
Monitoring and Maintaining Your Starter’s Health
Regular monitoring and maintenance are crucial when using advanced storage methods for your sourdough starter. As you adjust to new containers or techniques, pay attention to changes in your starter’s behavior, such as slower rise times, unusual odors, or a more liquid consistency. These signs can indicate issues with temperature regulation, inadequate aeration, or contamination.
If you notice any of these symptoms, take corrective action immediately. For example, if your starter is too dry and cracking, try increasing the humidity in its storage environment or gently mixing it with a small amount of water. Conversely, if it’s become too liquid and has separated into distinct layers, reduce the temperature and check for any signs of mold.
In addition to these immediate responses, also inspect your container regularly for cleanliness and proper fit. Check that it’s not developing any cracks or crevices where bacteria can accumulate, and ensure it’s large enough to accommodate the starter’s growth without overflowing. By staying vigilant and making adjustments as needed, you can maintain a healthy and thriving sourdough starter even with more advanced storage methods.
Conclusion: Storing Your Sourdough Starter with Confidence
Storing your sourdough starter like a pro means being prepared for its maintenance, and storing it with confidence is a crucial part of that process. By following the steps outlined in this guide, you’ll be well on your way to creating a healthy and thriving starter that will last for months or even years. One thing to keep in mind is that consistency is key – regular feeding and monitoring are essential to keeping your starter happy and healthy. To store your sourdough starter with confidence, make sure it’s at the right temperature (around 75-80°F) and humidity level, and feed it regularly to prevent overgrowth or underactivity. With these simple habits in place, you can trust that your starter is being well cared for.
Frequently Asked Questions
Can I Store My Sourdough Starter in the Pantry?
Yes, but be aware that pantry conditions can vary greatly depending on factors like temperature and humidity. If you choose to store your starter in the pantry, ensure it’s away from direct sunlight and heat sources, and keep an eye on its activity.
How Do I Know When My Frozen Sourdough Starter Has Reached a Safe Temperature?
When you’re ready to thaw and use your frozen sourdough starter, remove it from the freezer and place it in the refrigerator overnight to allow it to come up to a safe temperature. Check for signs of life by gently stirring or folding it; if it shows no activity after 24 hours, discard it.
What Happens If I Accidentally Leave My Sourdough Starter at Room Temperature for Too Long?
If your sourdough starter is left at room temperature for an extended period, it may become over-activated and begin to produce too much carbon dioxide. To recover from this situation, reduce the frequency of feeding or try a starter revival method like adding flour and water to revive its activity.
Is It Possible to Store Sourdough Starters in Fermentation Vessels at Room Temperature?
Yes, but be cautious as fermentation vessels can create an ideal environment for over-fermentation. Regularly check your starter’s progress and adjust the vessel size or temperature accordingly to prevent potential issues like contamination or excessive CO2 production.
Can I Store Multiple Sourdough Starters in the Same Freezer Container?
No, it’s generally not recommended to store multiple sourdough starters together due to cross-contamination risks. Separate each starter with parchment paper or a divider to maintain cleanliness and prevent any potential spoilage of one starter affecting another.

