
Sketching a starfish can be a challenging but rewarding task, especially for those who appreciate the intricate details of marine life. You might find yourself stumped by its symmetrical yet irregular shape, or struggle to capture the delicate texture of its arms. But with practice and knowledge, you can master the art of drawing this fascinating creature. To start, it’s essential to understand the basic anatomy of a starfish, including its central body, radial symmetry, and five distinctive arms. This foundation will allow you to focus on more advanced techniques, such as conveying movement and capturing the unique features that set each species apart. By the end of this article, you’ll be equipped with the skills and confidence to sketch a starfish like a pro.
Understanding Starfish Anatomy
Let’s take a closer look at what makes a starfish tick, from its water vascular system to its delicate tube feet. We’ll explore these fascinating features in more detail.
Section Overview: Getting Familiar with Key Features
Getting familiar with a starfish’s key features is essential to accurately capturing its anatomy on paper. Start by examining the overall shape and structure of the body. Note how it’s divided into repeating segments, called radii, which are connected by flexible joints. This radial symmetry allows starfish to move efficiently and adapt to different environments.
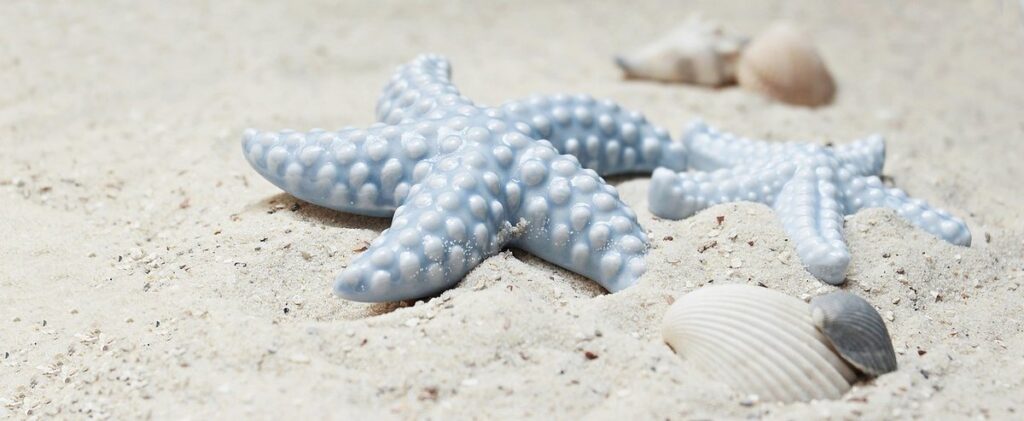
Look for the five distinctive arms or rays that extend from the central body, each one capable of independent movement. Some species may have more or fewer arms, but this basic arrangement is common across many starfish types. The underside of a starfish typically features tiny tube feet, which are used for crawling and grasping onto surfaces.
Pay attention to the unique features that set each starfish apart, such as distinctive patterns on their skin, spines, or bumps. Some species have eyespots at the end of each arm, while others may lack these entirely. By focusing on these key characteristics, you’ll be better equipped to accurately draw a starfish’s anatomy and capture its essential features on paper.
When studying starfish anatomy, consider referencing diagrams or illustrations that highlight their internal structures. This will help you understand how the body parts work together to enable movement and other vital functions.
Identifying Key Body Parts
When sketching a starfish, it’s essential to identify its key body parts. Start by looking at the arms – typically five in number, but sometimes more or fewer depending on the species. Each arm is usually of equal length and attaches to the central disc via a stalk-like structure called a peduncle. Observe how the arms are arranged: some starfish have short, stubby arms, while others have long, slender ones.
Next, examine the suckers that line the underside of each arm. These cupped structures help the starfish grip and crawl along surfaces. Some species have large, prominent suckers, while others have smaller, more discreet ones. Take note of their size and distribution to capture a sense of texture in your sketch.
Also, look for the eyespots – usually small, light-sensitive organs that detect light and dark. They’re typically located at the base of each arm or around the central disc. Some starfish have simple eyespots, while others have more complex structures with multiple lenses.
Lastly, locate the mouth – often positioned on the underside of the central disc, surrounded by a ring of tentacle-like appendages called papulae. The mouth is usually a small opening that leads to a digestive system. When sketching these body parts, focus on their proportions and relationships to one another for an accurate representation.
Basic Sketching Techniques
To capture the essence of a starfish on paper, it helps to master some fundamental sketching techniques that bring out its unique shape and texture. Let’s start with simple methods for rendering curves and lines.
Getting Started with Simple Shapes
When sketching a starfish, it’s essential to start with simple shapes. Begin by drawing circles for the starfish’s body and arms. Use a range of circle sizes to suggest depth and dimension. For example, you can use larger circles for the central body and smaller circles for the arms.
Next, focus on creating smooth curves to connect the circular shapes. This will help create the rounded edges and soft contours characteristic of a starfish. Practice drawing different types of curves: from gentle, flowing lines to more angular, pointed ones. This will allow you to capture the unique features of your starfish subject.
Lines are also crucial in capturing the starfish’s anatomy. Use short, gentle strokes for the fine details, such as the eyes and mouth, and longer, softer lines for the arms’ edges. Remember that these lines don’t need to be perfect – the roughness will help convey texture and life to your drawing.
Start with simple shapes, then gradually build up to more complex forms. This will allow you to capture the intricate details of a starfish while maintaining control over its overall proportions.
Building Forms with Gestural Drawing
When drawing a starfish, gestural drawing can be particularly useful for capturing the dynamic movement of its arms. This technique involves quickly sketching the overall shape and gesture of a subject with loose, expressive lines. To build forms with gestural drawing, start by lightly sketching the outline of the starfish’s body and five arms in rough proportion.
Focus on getting the basic shape and placement of each arm correct, rather than worrying about details like texture or pattern. Use a range of line weights to convey different levels of tension and movement within the arms. For example, you might use thicker lines for arms that appear more taut, while using thinner lines for those that seem more relaxed.
To add depth and dimension to your gestural drawing, consider adding subtle indications of how each arm is interacting with its neighbors. This could be as simple as a slight overlap or a gentle curve. By capturing the dynamic relationships between the starfish’s arms, you can create a sense of energy and movement in your sketch that feels more alive and engaging. Remember to keep your gestural drawing loose and expressive – it should feel like a quick impression rather than a precise rendering.
Advanced Sketching Methods
To take your starfish sketch to the next level, we’ll explore more complex techniques that add texture and dimensionality to your artwork. This includes layering, blending, and subtle shading.
Capturing Texture and Pattern
When rendering the texture and pattern on a starfish’s skin, consider employing various hatching techniques. Hatching involves creating different values with closely spaced parallel lines, while cross-hatching adds layers of perpendicular lines to create deeper shading. For example, you can use short, tightly spaced strokes for the tubercles’ ridges or longer, more scattered lines for the starfish’s underside.
To add more texture and visual interest, try stippling – small, closely packed dots that can build up detailed patterns. Experiment with varying dot sizes and densities to suggest different surfaces: finer stippling may capture the delicate texture of a starfish’s arms, while coarser stippling suits the rugged skin on its back.
Pay attention to the direction and density of lines or dots in relation to the subject’s surface features. For instance, on a starfish with prominent tubercles, you might align your hatching strokes with the ridges’ edges for added definition. Similarly, when using stippling to render the skin between tubercles, vary the dot size and spacing to suggest smooth transitions or slight ridging.
Remember that these techniques can create a rich, tactile quality on your starfish’s surface – so experiment freely to capture its unique characteristics!
Depicting Movement and Energy
When sketching a starfish, it’s essential to convey its movement and energy. Observe how the arms are positioned – are they curled inward, outward, or splayed apart? The direction of these arms can suggest the starfish is either retreating into its shell or actively foraging for food. Note the tension in each arm, too; some may be more relaxed while others appear taut.
To capture movement, use loose, expressive lines and varying line weights. Thicker lines can indicate areas of greater tension or muscle activity, while thinner lines suggest relaxation. Consider adding subtle gestures or suggestions of movement to the arms’ tips – a gentle wave or a flicking motion can imply energy and dynamism.
Incorporating visual cues like texture and pattern also helps convey the starfish’s vitality. For example, add more defined texture to areas where the arms are most active, such as near joints or at the base of each arm. This helps create a sense of kinetic energy and emphasizes the starfish’s mobile nature. By focusing on these details, you can capture the essence of movement in your sketch.
Sketching Starfish from Different Angles
When sketching a starfish, it’s essential to capture its unique shape and texture by observing it from various angles. Let’s explore how different perspectives can enhance your drawing.
Observing and Rendering Perspective
When sketching a starfish from different angles, observing and rendering perspective is crucial to capture its three-dimensional form. Start by studying the starfish’s structure: note how the arms radiate from a central disc, and observe how they are arranged in a symmetrical pattern.
From an overhead view, focus on capturing the starfish’s circular shape and the way its arms are evenly spaced around the center. Use gentle curves to suggest the rounded edges of each arm, and consider adding a subtle gradient or shading to convey depth. For side views, pay attention to the way the arms tilt and curve as they extend from the body.
To render perspective accurately, consider the vanishing point – where parallel lines appear to converge in the distance. In this case, it’s usually at eye level, near the center of the starfish. As you draw, use the horizon line as a guide to create a sense of depth: arms that are farther away from the viewer should be drawn smaller and more delicate than those closer to the front.
When rendering perspective in your sketch, remember that subtlety is key – too much emphasis on vanishing points can make the drawing look forced or artificial. Instead, focus on capturing the gentle curves and organic shapes of the starfish’s form.
Creating Depth and Dimension
To create depth and dimension in your starfish sketches, you need to think about how light interacts with the subject. Atmospheric perspective is a key technique to master here: as objects recede into the distance, they fade into soft focus and take on cooler colors. This can be achieved by blurring edges or using a range of gray values to suggest depth. Another effective method is overlap – where one body part overlaps another, creating a sense of layering.
In starfish anatomy, the arms are typically arranged in a radial pattern around the central disc. By carefully observing how these arms intersect and overlap each other, you can create a strong sense of three-dimensionality on paper. For example, if drawing from a profile view, you might draw one arm slightly over another to suggest its position behind it.
To take this technique further, pay attention to the way light catches the edges of each arm or body part. A slight softening of these edges can help dissolve the sharp lines that would otherwise make your sketch feel flat and two-dimensional. By combining atmospheric perspective with careful attention to overlap and edge treatment, you can create a richly textured and visually engaging sketch of your starfish subject.
Sketching Starfish for Different Purposes
Whether you’re illustrating a children’s book, designing a tattoo, or creating artwork for decorative purposes, your sketch will serve a specific goal. Let’s explore how to tailor our starfish drawings accordingly.
Illustration vs. Realism
When sketching a starfish, you’ll often encounter decisions about whether to prioritize accuracy or stylization. On one hand, illustration involves emphasizing visual appeal over strict anatomical correctness. This approach is suitable for artistic purposes, such as creating a stylized representation of a starfish in a children’s book or advertising material.
In contrast, realism requires a high degree of precision and attention to detail. For scientific illustrations, accurate depictions of the starfish’s anatomy are crucial. This includes getting the number of arms right, the arrangement of tubed feet, and even the subtle patterns on the skin.
A key challenge is finding the balance between accuracy and stylization. While it’s tempting to simplify complex forms for aesthetic purposes, doing so can compromise the scientific integrity of your illustration. Conversely, striving for realism without some degree of artistic license can result in a dull, unengaging piece. To achieve this balance, focus on capturing the essence of the starfish’s anatomy while allowing yourself creative freedom with texture and pattern.
Tips for Quick Sketches and Studies
When working under time pressure, it’s essential to distill the starfish’s essence into a quick sketch. To do so, focus on its overall form and simplify its features. Use basic shapes, such as spheres, ovals, or cylinders, to block out the starfish’s body. This approach helps capture its volume and mass without getting bogged down in intricate details.
Another technique is to emphasize the starfish’s radial symmetry by drawing a few key arms and suggesting the rest with a series of gentle curves. This method conveys the starfish’s movement and energy, even if you can’t render every detail.
For quick studies, try using a range of values (light and dark) to create depth and dimension. Sketch the starfish’s shadow or cast it against a contrasting background to emphasize its three-dimensional form. Additionally, limit your color palette to a few essential hues that capture the starfish’s overall tone and texture.
When working under time constraints, remember that accuracy is secondary to capturing the starfish’s gestalt – its overall appearance and feel. Focus on conveying its essence rather than rendering every detail with precision. By simplifying your approach and emphasizing key features, you can quickly sketch a compelling starfish study.
Troubleshooting Common Issues
Sketching a starfish can be a bit tricky, and you might encounter some common problems that can make your drawing look less than perfect. Don’t worry, we’ve got solutions to these pesky issues right here!
Overcoming Challenges with Proportion
When sketching a starfish, proportion is crucial to accurately convey its unique anatomy. One common challenge artists face is ensuring the body parts are in the correct relationship to one another. To overcome this issue, it’s essential to measure and double-check proportions regularly.
Start by dividing the starfish into sections – typically five arms radiating from the central disc. Measure the length of each arm relative to the others and ensure they are roughly equal in length. Compare this measurement to the size of the body at the center. A general rule is that the diameter of the body should be about half the combined length of two adjacent arms.
To further refine your proportions, sketch a simple grid or use a proportional divider tool. This will help you maintain consistency and accuracy throughout the drawing. Pay particular attention to the arm-to-body ratio – typically around 2:1 or slightly higher for most starfish species.
Dealing with Difficulty in Rendering Texture
When rendering texture on a starfish, it’s not uncommon to encounter difficulties, especially if you’re new to sketching these creatures. One key challenge is capturing the subtle variations in pattern and scale. To overcome this, try breaking down the texture into smaller components. For example, focus on the ridges and furrows that cover the starfish’s surface, rather than trying to render the entire texture at once.
Observe how the texture changes across different parts of the body. The arms often have a more uniform pattern, while the center disc may be smoother or feature more complex markings. Use reference images to study these variations and develop your own observational skills. When drawing, use gentle, expressive lines to suggest the texture, rather than trying to render it in precise detail.
A useful exercise is to sketch a starfish from different angles, paying close attention to how the texture appears in each perspective. This will help you understand how light and shadow affect the texture, allowing you to create more convincing renderings.
Frequently Asked Questions
What if I’m still struggling with getting the proportions right after reading about common challenges?
Yes. It’s normal to need practice and patience when learning new skills. Try breaking down the starfish into simpler shapes, like circles and lines, to help you achieve more accurate proportions.
Can I use digital tools or software to sketch a starfish instead of traditional media?
You can, but it’s worth noting that working with traditional media often helps artists develop muscle memory and a deeper understanding of texture and pattern. However, many digital tools are now available that can mimic the look and feel of traditional media.
How do I know when my sketch is “good enough” – especially if I’m trying to capture a starfish from life?
A good starting point is to focus on capturing the overall shape and movement of the starfish. Don’t worry too much about details like texture or pattern until you’ve got the basics right. Remember, it’s okay to make mistakes – they’re an essential part of the learning process.
What if I want to sketch a starfish from memory instead of observing one in person?
This can be more challenging, but it’s not impossible. Try to recall as many details as possible about the starfish’s anatomy and movement. Use reference images or sketches you’ve made before as prompts to help jog your memory.

