
Scratch art is often associated with childhood creativity, but its benefits extend far beyond the realm of kids’ arts and crafts. For adults, scratch art can be a powerful tool for reducing stress and anxiety, providing a calming escape from the demands of everyday life. By engaging in this tactile activity, you can improve your fine motor skills and hand-eye coordination, all while expressing yourself creatively. In this article, we’ll explore the world of scratch art for adults, examining its therapeutic benefits and providing guidance on how to get started. We’ll cover the basics of materials and techniques, as well as tips for incorporating scratch art into a busy schedule. By the end of this article, you’ll know how to create your own scratch art pieces and reap the calming benefits they provide, reducing stress and anxiety while improving your creative skills.
What is Scratch Art?
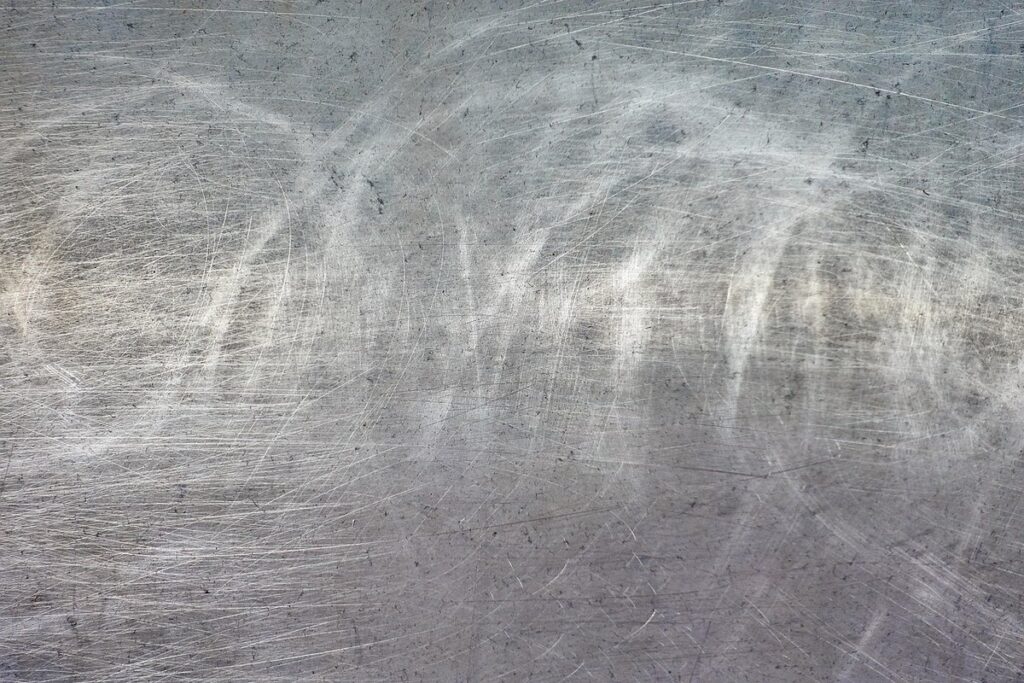
Scratch art is a unique and creative medium that allows artists to produce stunning works by scratching away layers of paint, ink, or wax. Let’s take a closer look at what makes scratch art so special.
History of Scratch Art
Scratch art has its roots in ancient civilizations, where people would use various materials to create designs on surfaces. The earliest known examples of scratch art date back to around 3000 BC in ancient Mesopotamia and Egypt, where artifacts show intricate designs scratched into clay tablets and stone walls. In these early forms, scratching was a primary method for creating visual effects and communicating messages.
The use of scratching as an artistic technique continued throughout history, with various cultures developing their unique styles and applications. During the Renaissance period in Europe, scratch art was used to create decorative designs on ceramics and metalwork. In the 19th century, artists like William Morris and Walter Crane experimented with scratching techniques in book illustrations.
In modern times, scratch art has evolved into a versatile medium that can be applied in various contexts, from visual arts to design and even therapy. Artists now use a range of materials, including paper, wood, and metal, to create intricate designs through scratching. The technique’s accessibility and adaptability have made it an attractive choice for artists of all skill levels, allowing them to experiment with different styles and techniques.
Types of Scratch Art
Scratch art encompasses a range of techniques, tools, and mediums used by artists. One popular method is nail scratching, where fingernails are used to scratch through layers of paint or ink on a surface, creating detailed images. Another technique involves using a scratchboard, a specially designed tool with a textured surface that allows for precise control over the scratching process.
Scratch glass art uses specialized tools and techniques to create intricate designs on tempered glass. This type of art often employs a combination of scratching and etching methods to achieve the desired effect. Some artists also experiment with mixed media, incorporating scratch art into larger pieces or using it as a base layer for other artistic techniques.
When exploring different types of scratch art, consider the unique characteristics and possibilities offered by each technique. For example, nail scratching is ideal for creating detailed, high-contrast images, while scratch glass art can produce stunning, translucent designs. By experimenting with various tools and mediums, artists can discover new ways to express themselves through scratch art.
Benefits of Practicing Scratch Art for Adults
Practicing scratch art can have a profound impact on both your mental and physical well-being, offering numerous benefits that extend far beyond the creative process itself. From stress relief to improved fine motor skills, the advantages are undeniable.
Stress Relief and Relaxation
Engaging with scratch art can be a calming and meditative experience, allowing you to quiet your mind and focus on the tactile sensation of scratching. The repetitive motion and gentle sound of the scratching tool create a soothing atmosphere that can help reduce stress and anxiety. This is particularly beneficial for adults who often face high levels of pressure and have limited time for relaxation.
One reason scratch art is effective in reducing stress is its ability to encourage mindfulness. As you focus on creating your piece, you’re forced to be present in the moment, letting go of worries about the past or future. The physical act of scratching also releases tension from your body, allowing you to unwind and relax.
To maximize the stress-relieving benefits of scratch art, try setting aside a dedicated space for your practice and establishing a regular routine. Experiment with different techniques, such as layering or mixing media, to keep your sessions engaging and dynamic. Even 15-20 minutes of focused scratching can be enough to calm your mind and recharge your energy.
Cognitive Development
Engaging in scratch art can have a profound impact on cognitive development, particularly in areas such as fine motor skills and hand-eye coordination. The repetitive motion of scratching and creating patterns requires sustained focus and attention, which can help to improve concentration and reduce mind-wandering. By practicing scratch art regularly, adults can experience improvements in their ability to multitask and switch between different tasks.
One key benefit of scratch art is its potential to enhance cognitive flexibility – the brain’s ability to adapt and adjust to new situations. As you experiment with different techniques and materials, your brain becomes more agile and better equipped to handle novel challenges. This increased flexibility can have a positive impact on other areas of life, such as work or personal projects.
Incorporating scratch art into your daily routine can also provide an outlet for creative expression, which is essential for maintaining a healthy mind. By allowing yourself to experiment with different colors and techniques, you can tap into your imagination and bring new ideas to the surface. As a result, you may find that your problem-solving skills improve, and you become more adept at approaching complex challenges from unique angles.
Materials and Tools Used in Scratch Art
To create beautiful scratch art, you’ll need a few specific materials and tools that are easy to find at most craft stores. We’ll guide you through the essentials here.
Essential Supplies for Beginners
To get started with scratch art, you’ll need some basic supplies. First and foremost, you’ll need a surface to work on – typically paper or cardstock is a good starting point. Look for high-quality paper that can withstand the scratching process, such as cold press watercolor paper or Bristol board.
Scratching tools are also essential. You can start with a few basic ones like scratch awls, scribes, or nail scrapers. These tools come in various shapes and sizes, so experiment to find what works best for you. Some popular options include the scratch awl’s pointed tip for fine details and the scribe’s flat edge for broad strokes.
You’ll also need a medium to create color and texture on your paper. Common mediums used in scratch art include graphite pencils, charcoal sticks, or even metallic powders like silver or gold. Start with basic colors and experiment with layering and blending techniques to achieve unique effects. Be mindful of the type of paper you’re using, as some may react differently to certain mediums.
Beginners often overlook the importance of a comfortable workspace, but it’s crucial for avoiding fatigue and maintaining control over your scratching tools. A stable work surface and good lighting will help you focus on your creative process.
Advanced Techniques and Specialized Tools
Experienced scratch artists often push the boundaries of traditional techniques by experimenting with custom-made scratching tools and unique surfaces. These specialized tools can be tailored to achieve specific textures, patterns, and effects that would be impossible or extremely difficult with standard materials.
Custom-made scratching tools might include wire brushes with varying bristle lengths or customized metal stamps with intricate designs. Some artists also use found objects like old forks, knives, or credit cards to create unique scratch patterns. These non-traditional tools require a high degree of control and precision, but can produce exceptional results when used effectively.
Unique surfaces are another area where experienced scratch artists excel. Instead of traditional paper or board, they might work with materials like vellum, Mylar, or even stone. Each surface has its own distinct characteristics, requiring the artist to adapt their techniques accordingly. For example, working on a smooth surface like Mylar demands a more delicate touch, while textured surfaces like wood or fabric can be scratched with greater force.
Some artists also experiment with layering multiple materials to achieve complex textures and effects. This might involve combining scratch art with other mediums like paint, ink, or even three-dimensional objects.
Creating Your First Scratch Art Piece
Now that you have a basic understanding of scratch art, it’s time to get hands-on and create your very first piece. We’ll walk through each step to help you achieve a beautiful scratch art creation.
Preparing the Surface
When preparing a surface for scratch art, it’s essential to choose the right medium. You can use either paper or board, but board provides more stability and durability. If you’re new to scratch art, start with paper as it’s easier to handle and less expensive.
Consider the type of design concept you want to create. Simple shapes and lines work well for beginners, while more complex designs require a solid plan. Think about the theme or subject matter: landscapes, portraits, abstract patterns, or something else entirely. Sketch out your idea on paper to get a sense of composition and balance.
Keep in mind that some mediums are better suited for specific techniques. For example, scratchboard is ideal for detailed work, while scratch foam is perfect for loose, expressive strokes. Experiment with different materials to find what works best for you and your art style.
When choosing a surface size, consider the space where your artwork will be displayed. A larger piece can make a statement, but may not fit in smaller spaces. Choose a size that balances creativity with practicality.
Basic Scratching Techniques
When it comes to creating a scratch art piece, mastering basic scratching techniques is essential. To begin, practice different strokes with various tools. Hold a scratch tool at a 45-degree angle and gently scrape the surface of the paper or board in smooth, even motions. This will help you develop control and create smooth lines.
For more defined edges and textures, experiment with using the edge of your tool instead of the flat side. Apply gentle pressure for finer details and increase the pressure for thicker lines. You can also try varying the direction of your strokes to achieve unique effects. For example, dragging a tool in one direction can create a smooth, even line, while moving it back and forth can produce a more textured look.
Another crucial aspect is understanding how different tools affect the scratching process. Fine-line brushes are ideal for creating delicate details, while thicker tools are better suited for broad strokes. Familiarize yourself with various tools to achieve the desired effect in your art piece. By mastering basic scratching techniques and experimenting with different tools, you’ll be well on your way to creating visually appealing scratch art pieces.
Advanced Scratch Art Techniques and Projects
Now that you’ve mastered the basics of scratch art, it’s time to take your skills to the next level with more complex techniques and ambitious projects. We’ll explore some advanced methods for creating intricate designs.
Layering and Texturing
To achieve layered and textured effects in scratch art, you can experiment with layering different mediums. Start by applying a base coat to your surface using a medium such as gel or paste. Allow this layer to dry completely before adding subsequent layers of color or texture.
One technique for creating texture is to use specialized tools like scratching sticks, sponges, or even household items like bottle caps or credit cards. These tools can be used to apply varying degrees of pressure and scratch depth, resulting in unique textures that add visual interest to your artwork.
You can also layer different types of scratch art mediums, such as powders or pastels, to achieve a range of effects. For example, applying a thin layer of powder over a previously scratched surface can create a subtle, layered look, while using multiple layers of pastel can build up vibrant colors and textures.
When working with layered mediums, it’s essential to let each layer dry completely before adding the next to prevent smudging or muddying. This patience will reward you with intricate, multi-dimensional artworks that showcase your creativity and skill.
Mixing Media with Scratch Art
Scratch art can be a versatile medium when combined with other artistic forms. Collage and mixed media techniques allow you to incorporate various textures and materials into your artwork, adding depth and visual interest. For instance, you could layer scratch art on top of printed paper or fabric, or combine it with digital art by scanning the piece and manipulating the image digitally.
When combining scratch art with other mediums, consider the contrast between smooth and textured surfaces. Scratch art’s tactile quality can be enhanced by pairing it with delicate watercolors or ink drawings. On the other hand, bold acrylic paint or collaged elements can create a striking visual impact when juxtaposed with scratch art.
Some artists even experiment with combining scratch art with digital tools to achieve unique effects. By scanning their work and manipulating the image using software, they can create intricate patterns and designs that would be difficult to achieve by hand alone. Experimenting with different combinations of media is key to unlocking new possibilities in scratch art.
Displaying Your Scratch Art Creations
Now that you’ve mastered the techniques, let’s talk about showcasing your beautiful scratch art creations to friends and family. Sharing your artwork is just as important as creating it.
Framing and Mounting Options
When it comes to displaying scratch art pieces, framing and mounting options are crucial considerations. The unique texture and material of scratch art require a thoughtful approach to ensure the artwork is showcased effectively.
For scratch art with deep, layered textures, consider using thick-set frames or wide-profile mats to create contrast between the frame and the piece. A simple white or black mat can also help emphasize the textured surface. On the other hand, for more delicate scratch art pieces, a slim-line frame or floating frame can create a sense of depth without overpowering the artwork.
In terms of mounting, consider using acid-free mats and boards to prevent damage from chemicals in adhesives. For heavier scratch art pieces, use sturdy backing boards or D-rings for added support. To account for the material’s fragility, avoid using adhesive-backed framing strips or other products that can cause scratches or damage.
When choosing a frame style, consider the overall aesthetic of your artwork and the surrounding environment. A minimalist frame can help the scratch art stand out, while a more ornate frame can add an artistic touch.
Conservation and Preservation Tips
To preserve and conserve your scratch art pieces, it’s essential to handle them with care. Start by storing your artwork in a dry, cool environment away from direct sunlight. Avoid exposing your pieces to extreme temperatures or humidity levels, as this can cause the surface to warp or fade.
When displaying your scratch art, consider using acid-free mats and UV-filtering glass or acrylic to protect against damage. Handle your artwork gently, avoiding touching the surface with dirty hands or wearing gloves that may leave residue. If you need to clean your piece, use a soft brush and gentle soap solution specifically designed for artworks on paper or board.
In the unlikely event of damage, consider consulting a professional conservator for advice on potential restoration methods. They can assess the extent of the damage and recommend the most suitable approach. In some cases, minor repairs may be possible using specialized techniques and materials. For more severe damage, it might be necessary to recreate the artwork or use digital tools to restore it. By taking proper care and precautions, you can enjoy your scratch art pieces for years to come.
Conclusion: Continuing Your Scratch Art Journey
As you’ve now mastered the basics of scratch art, it’s time to think about where your newfound skills will take you next. Here are some tips for continuing your creative journey.
Overcoming Challenges and Frustrations
As you continue on your scratch art journey, it’s inevitable to encounter challenges and frustrations. Perhaps your lines are inconsistent, your patterns are imperfect, or you’re struggling to achieve the desired texture. Remember that every artist faces these hurdles, including seasoned professionals. It’s not a reflection of your skill level or creativity; rather, it’s an opportunity for growth.
When faced with difficulties, try re-evaluating your approach. Ask yourself if your technique is suitable for the specific project at hand. For example, if you’re struggling to create smooth lines, consider switching to a finer tool or using a different scratching surface.
Additionally, take breaks and revisit your work with fresh eyes. This can help you identify areas where adjustments need to be made. Don’t be afraid to experiment and try new methods – sometimes it’s the mistakes that lead to unexpected breakthroughs.
Common mistakes often occur due to inexperience rather than lack of talent. By persisting through these challenges, you’ll develop problem-solving skills and confidence.
Expanding Your Skills and Style
As you become more comfortable with scratch art techniques and mediums, it’s essential to continue experimenting and expanding your skills. One way to do this is by introducing new themes into your work. Consider exploring abstract concepts like nature, emotions, or personal experiences to add depth and meaning to your art.
Experimenting with different mediums can also help you break through creative plateaus. For example, combining scratch art with other techniques like collage, stenciling, or printmaking can create visually striking pieces. You might try layering scratch art over a painted surface or incorporating found materials into your work.
When experimenting with new techniques and mediums, it’s crucial to remember that mistakes are an integral part of the creative process. Don’t be afraid to take risks and try something that doesn’t immediately come out as expected – it may lead to unexpected breakthroughs. To get started, set aside dedicated time for experimentation and keep a few projects on hand that you can revisit when inspiration strikes.
Frequently Asked Questions
Can I Create Scratch Art on Any Surface?
Yes, scratch art can be created on various surfaces, including wood, metal, and even fabric. However, it’s essential to choose a surface that is suitable for scratching and will produce the desired texture and effect.
How Do I Mix Media with Scratch Art if I’m a Beginner?
Start by experimenting with basic mixed media techniques, such as combining scratch art with paint or markers. You can also try using pre-made textures or patterns on your scratch art piece to add depth and interest. Don’t be afraid to test different combinations and see what works best for you.
Can Scratch Art Be Used Therapeutically in a Group Setting?
Yes, scratch art can be a great therapeutic activity for groups, promoting socialization, relaxation, and creative expression. You can adapt the techniques and materials to suit the needs of your group, making it an excellent way to bring people together while creating something beautiful.
What if I Make a Mistake While Scratching? Can It Be Fixed?
Mistakes are an inevitable part of the creative process, but with scratch art, they can often be easily fixed. If you notice a mistake while scratching, stop immediately and assess the situation. In many cases, you can simply start over or use a correction tool to fix minor errors.
How Can I Display My Scratch Art in a Way That Showcases Its Texture?
To showcase the unique texture of your scratch art piece, consider using a shadow box or deep frame with a UV-filtering glass to protect the artwork from fading. You can also experiment with different hanging techniques, such as using a sturdy rod or wire to create a sense of depth and visual interest.
