
Pebble art is more than just arranging smooth stones in a decorative pattern – it’s a way to create unique, visually striking pieces that can add personality to any space. If you’re looking for creative ways to incorporate natural elements into your home decor or outdoor design, pebble art ideas are definitely worth exploring. From intricate geometric patterns to vibrant mosaics, the possibilities with pebble art are endless, and it’s a great way to get creative without requiring extensive artistic experience. In this article, we’ll be covering various techniques for creating stunning pebble art pieces, including how to design and display them in both indoor and outdoor settings. Whether you’re a seasoned artist or just looking for a fun DIY project, you’ll learn how to create beautiful pebble art that reflects your personal style and enhances any space.
Getting Started with Pebble Art
Welcome to the world of pebble art, where creativity meets nature! To get started, let’s begin by exploring the essential tools and materials you’ll need to create your own stunning pebble designs.
Understanding the Basics of Pebble Art
To get started with pebble art, it’s essential to understand its fundamental concepts. Pebble art has a long history, dating back to ancient civilizations where stones and pebbles were used for decorative purposes. The modern revival of pebble art began as a form of stress relief and creative expression in the 1990s.
To create your own pebble art piece, you’ll need some basic materials. This includes a collection of suitable pebbles – smooth, rounded ones work best for most designs – a surface to work on (like a table or countertop), and any additional decorative items like shells, sand, or small plants.
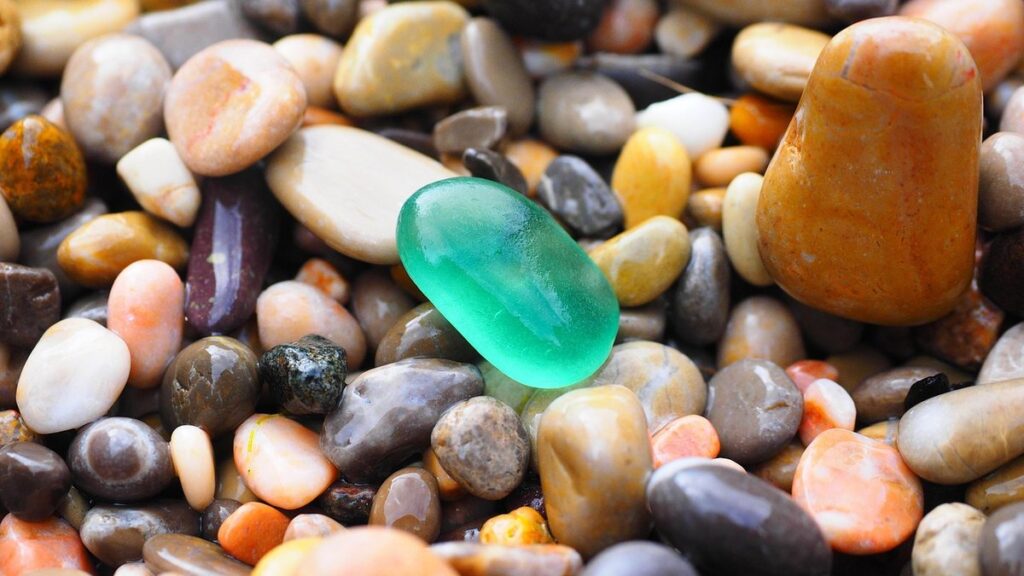
When selecting pebbles, remember that size, shape, color, and texture all play crucial roles in the final design. Larger stones can create bold accents, while smaller ones blend into intricate patterns. You should also consider the weight of your pebbles, as some may be too heavy for certain surfaces.
Before you start arranging your pebbles, make sure to clean them thoroughly. This involves washing with mild soap and water to remove any dirt or debris. Dry them completely before use to prevent slipping or uneven settling.
Choosing the Right Pebbles for Your Project
When selecting pebbles for your project, consider a color palette that resonates with you or complements the surrounding environment. A monochromatic scheme can create a cohesive look, while contrasting colors add visual interest. Think about the dominant hues and textures present in your space to ensure harmony.
Pebble shape and size play significant roles in achieving balance. Round pebbles tend to create soothing patterns, whereas angular or irregular shapes inject dynamism. Mixing sizes adds depth; small pebbles can fill gaps between larger ones. Consider the overall effect you want: a busy, textured look or a more subtle, refined design.
Texture is another crucial factor. Smooth pebbles blend seamlessly into patterns, while rough-hewn stones add an organic feel. Combine smooth and textured pebbles to create visual tension. Experiment with different combinations by arranging pebbles in small groups before finalizing your selection.
For example, pairing matte-finish pebbles with glossy ones can produce a striking contrast. When mixing shapes and sizes, remember that asymmetry often creates more visually appealing arrangements than perfect symmetry.
Designing with Pebbles: Techniques and Tips
When working with pebbles, it’s all about experimenting with different techniques to create visually appealing designs that bring your art pieces to life. From patterns to textures, we’ll explore essential tips and tricks for designers.
Creating Geometric Patterns with Pebbles
To create geometric patterns with pebbles, you can start by selecting a few key shapes to serve as the foundation of your design. Triangles and squares are popular choices for their clean lines and symmetrical appeal. You can arrange these shapes in a variety of ways to achieve different effects: for example, creating a repeating pattern of small triangles within larger squares.
When working with asymmetrical designs, you may want to incorporate pebbles of varying sizes or colors to create visual interest. One technique is to place smaller pebbles around the edges of your design and reserve the larger ones for central placement. This can help draw the viewer’s eye towards the center of the piece.
To add an extra layer of complexity, you can experiment with combining different shapes in a single design. For instance, pairing triangles with circles or squares with hexagons creates dynamic contrast that adds visual appeal. By carefully selecting and arranging your pebbles, you can bring geometric patterns to life in a unique and eye-catching way.
Free-Form Designs: Exploring Organic Shapes
When creating free-form designs with pebbles, you can capture the essence of nature by incorporating organic shapes found in landscapes and botanicals. Start by gathering inspiration from your surroundings – observe the curves of driftwood, the patterns on a leaf, or the shapes formed by sand dunes. Use these observations to guide your selection of pebbles, choosing ones that evoke the desired natural forms.
To develop free-form designs, begin by arranging pebbles in loose clusters or meandering lines. Experiment with different shapes and textures to achieve a sense of movement and flow. For example, you can use rounded pebbles to create smooth curves, while angular pebbles add definition and contrast. As you work, consider the negative space between the pebbles – this is where the organic shapes truly come alive.
Some artists interpret botanicals as intricate networks of veins or the delicate patterns on a flower petal. Others find inspiration in the sweeping curves of a coastline or the rugged forms of rocks. By embracing the freedom to create without strict guidelines, you can let your pebbles take on lives of their own, reflecting the beauty and complexity of nature.
Advanced Pebble Art Techniques
Take your pebble art skills to the next level by mastering intricate designs, texture techniques, and innovative compositions that showcase your creativity and patience.
These advanced methods will challenge and inspire you to push the boundaries of what’s possible with pebble art.
Incorporating Mosaics into Your Designs
When incorporating mosaics into your pebble art designs, you can create visually striking backgrounds by arranging small tiles or pieces of glass around a central focal point. This technique adds depth and visual interest to your piece. To blend different materials with pebbles, consider combining them with a contrasting medium like sand or small stones to create a textured effect.
For example, you could use small tiles as the primary background and arrange pebbles in a pattern on top of them. Alternatively, you can use pebbles as the focal points and fill in the gaps with small pieces of glass or tile. This approach allows you to play with color, texture, and shape to create unique and eye-catching designs.
To blend different materials effectively, consider the contrast between their textures and colors. For instance, smooth pebbles paired with rough sand can create a visually appealing combination. When working with mosaics, it’s essential to plan your design carefully to ensure that each element contributes to the overall aesthetic. Experimenting with different combinations of materials will help you develop your skills in creating mosaic backgrounds and incorporating pebbles as primary focal points.
Working with 3D Pebble Art: Techniques and Tips
Building depth and dimensionality is a crucial aspect of creating three-dimensional pebble art. To achieve this effect, you can use various techniques such as layering pebbles to create a sense of height or using different shapes and sizes to add visual interest.
One technique for building depth is to use a combination of small and large pebbles in the same design. This creates a sense of layers, with smaller pebbles forming the background and larger ones adding dimensionality to the foreground. You can also experiment with stacking pebbles on top of each other to create a three-dimensional effect.
Incorporating other materials can also add depth and dimensionality to your pebble art. For example, you can use sand or small rocks as a base layer before adding pebbles on top. Alternatively, you can incorporate other natural elements such as shells, driftwood, or moss to create a more textured and dimensional look.
When working with 3D pebble art, it’s essential to experiment and play around with different techniques until you achieve the desired effect. Remember that building depth is all about creating visual interest through layering and texture.
Using Pebbles in Different Settings
Pebbles can be used in a variety of settings, from indoor spaces like living rooms and offices to outdoor areas such as gardens and pathways. Let’s explore some creative ways to incorporate pebbles into different environments.
Home Decor: Incorporating Pebble Art into Your Space
When it comes to incorporating pebble art into your home decor, the right display is just as important as the artwork itself. To showcase your pebble creations, consider using a simple yet elegant frame or mounting option that allows the natural beauty of the pebbles to shine through. A minimalist frame with a clean white mat can help to highlight the intricate patterns and colors within the pebbles.
Alternatively, you can mount the pebbles directly onto a wall or shelf using a strong adhesive or a decorative anchor. This approach not only saves space but also creates a sense of visual flow. To add an extra layer of interest, use pebbles as a decorative accent for tables, shelves, and walls by arranging them in a pattern or creating a border.
Some popular frame styles to consider include:
• Wooden frames with a natural finish
• White or black metal frames with a minimalist design
• Reclaimed wood frames with a distressed look
When choosing a display method, keep the overall aesthetic of your space in mind and balance the pebble art with other decorative elements. By doing so, you’ll create a visually appealing and cohesive look that showcases your beautiful pebble art creations.
Outdoor Spaces: Ideas for Using Pebbles in Gardens and Landscapes
When used outdoors, pebbles can become an integral part of a garden’s or landscape’s design. One way to incorporate them is by creating pathways through a meandering pattern or a simple grid. This not only adds visual interest but also helps define different areas within the space.
Another idea is to use pebbles as stepping stones across ponds, fountains, or other water features. These can be placed at regular intervals or in creative arrangements that lead the eye to a focal point. Pebbles can also serve as a decorative element within gardens by creating a border around flower beds, bushes, or trees.
When working with pebbles outdoors, durability and weather resistance are crucial considerations. A good option is to use natural stone pebbles, which tend to be more resistant to erosion than other types of rocks. Regular cleaning is also essential to prevent dirt and debris from accumulating between the stones. By incorporating these practical tips into your design, you can ensure that your outdoor space remains beautiful for years to come.
To add an extra layer of visual interest, consider combining pebbles with other materials like wood or metal in creative ways. For example, a wooden bench surrounded by a pebble border creates a striking focal point within the garden.
Tips and Tricks for Preserving Your Pebble Art
Now that you’ve created your stunning pebble art, let’s talk about how to keep it looking its best: preserving your design requires a few simple tricks and techniques.
Cleaning and Protecting Your Finished Piece
When it comes to preserving your pebble art, cleaning and protecting the finished piece is crucial. Avoid using harsh chemicals or abrasive materials that can damage the pebbles’ surface or discolor them. Instead, gently sweep away any debris with a soft-bristled brush or use a dry cloth to wipe down the artwork.
For added protection against moisture and sunlight, consider applying a clear sealant specifically designed for outdoor art or decorative stone. Polyurethane, varnish, or epoxy resin are popular options that can help shield your pebbles from the elements. Apply multiple thin coats, following the manufacturer’s instructions, to achieve the desired level of protection.
It’s essential to choose a sealant suitable for indoor or outdoor use, depending on where your artwork will be displayed. Be cautious when selecting products containing UV protectants, as some may compromise the color vibrancy of the pebbles. Always read reviews and follow application guidelines carefully to ensure the best results.
Displaying and Storing Pebble Art: Ideas and Tips
When displaying multiple pebble art pieces, consider creating a cohesive display by grouping similar colors, textures, or themes together. This can be achieved by arranging the pieces in a circular pattern or forming a visually appealing triangle. You can also create a focal point by placing a larger piece at the center and surrounding it with smaller ones.
To add an extra layer of visual interest, consider using a mix of frame styles or shapes to create a unique display. For example, pairing rectangular frames with round ones can add depth and texture to your arrangement.
When not on display, store pebble art pieces in a cool, dry place to prevent moisture buildup. Use acid-free tissue paper or bubble wrap to separate individual pieces and prevent scratching during transport. Consider storing them in airtight containers or boxes to protect against dust and damage.
It’s also essential to handle pebble art with care when moving it from one location to another. Avoid exposing the pieces to direct sunlight, which can cause fading or discoloration over time. By following these simple tips, you can ensure your beautiful pebble art pieces remain vibrant and intact for years to come.
Inspiration and Conclusion
Now that you’ve explored a variety of pebble art ideas, it’s time to reflect on what inspires your creativity and how you can apply these techniques in new ways.
Where to Find More Inspiration for Your Pebble Art Projects
Explore online platforms like Pinterest, Instagram, and Tumblr to discover a vast array of pebble art creations. Follow hashtags such as #pebblearth #stoneart #miniatureart to stay updated on the latest trends and designs. You can also join online communities like Flickr’s Pebble Art group or Reddit’s r/PebbleArt to connect with fellow artists, share your work, and gain feedback.
In addition to social media, websites like The Spruce Crafts and Craftsy offer a wealth of tutorials, tips, and inspiration for pebble art projects. Browse through their galleries and blogs to find new techniques and ideas to incorporate into your own work.
Remember that experimentation is key to developing your skills and style in pebble art. Don’t be afraid to try new materials, colors, or designs – you might stumble upon a unique approach that sets your work apart. To further expand your creative horizons, attend local craft fairs, workshops, or classes where you can learn from experienced artists and gain hands-on experience with various techniques.
Final Thoughts: Tips for Continuing on Your Pebble Art Journey
As you’ve reached the end of this article on pebble art ideas and techniques, it’s likely that you’re inspired to continue exploring the world of pebble art. If you’re looking to turn your passion into a career or simply want to refine your skills, here are some final thoughts to keep in mind.
Firstly, don’t be discouraged if your early attempts at pebble art don’t yield the results you expect. It takes time and practice to develop the necessary techniques and eye for composition. Take note of what works and what doesn’t in each piece, and use that knowledge to inform your next project.
To continue growing as a pebble artist, consider experimenting with different shapes, colors, and textures. Try combining pebbles with other materials like glass or metal to create unique mosaics or collages. You can also join online communities or attend local workshops to connect with fellow artists and learn from their experiences.
Lastly, don’t forget to document your progress and showcase your work on social media or at local art fairs. This will not only help you track your improvement but also attract potential clients or commissions. With dedication and persistence, the world of pebble art is full of possibilities – keep creating!
Frequently Asked Questions
Can I use pebbles from my backyard in my art projects?
Yes, you can use pebbles from your backyard, but make sure they are clean and free of debris. This will ensure that your artwork looks its best and lasts longer.
How do I mix different types of pebbles to achieve a unique color palette?
To mix different types of pebbles, start by selecting a few dominant colors and then add smaller quantities of secondary colors to create depth and interest. Experiment with different combinations to find the perfect balance for your project.
What if my design doesn’t turn out as planned? Can I still salvage it?
Yes, even if your design doesn’t turn out as planned, you can still salvage it by adapting your original idea or trying a new technique altogether. Pebble art is all about experimentation and creativity, so don’t be discouraged if things don’t go exactly as expected.
How do I display my 3D pebble art pieces in a way that showcases their depth?
To showcase the depth of your 3D pebble art pieces, use a combination of lighting and framing. Consider placing them on a pedestal or shelf to create visual interest, and adjust the lighting to highlight the texture and dimensionality of the pebbles.
Can I use other materials alongside pebbles in my designs?
Yes, you can definitely experiment with combining pebbles with other materials like glass, stone, or even fabric. This will add an extra layer of depth and interest to your artwork, and allow you to explore new textures and colors.

