
As you find yourself drawn to the calming effects of nature, have you ever considered combining your love for art and the outdoors? Nature mandalas offer a unique way to do just that, allowing you to tap into the therapeutic benefits of being in nature while cultivating creative expression. By using natural materials like leaves, twigs, and rocks, and sustainable practices that work in harmony with the environment, you can create intricate patterns and designs that reflect the beauty of the great outdoors.
In this guide, we’ll take a closer look at the process of creating nature mandalas, exploring how they can be used as a tool for mindfulness and self-expression. You’ll learn about the principles of sacred geometry that underlie these natural creations, and discover practical tips for incorporating sustainable practices into your art-making. By the end of this article, you’ll have a clear understanding of what it takes to create your own nature mandalas, and be inspired to get outside and start crafting.
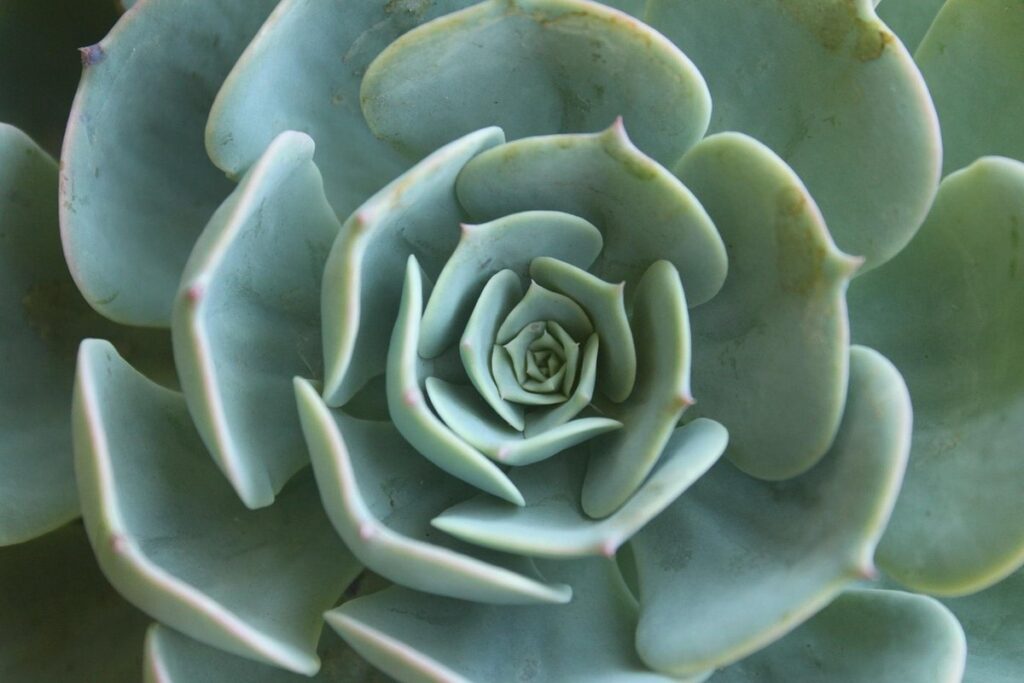
What Are Nature Mandalas?
Nature mandalas are intricate patterns created from natural elements, inviting us to slow down and connect with the world around us. They can be found in forests, beaches, or even your own backyard.
Definition and Origins
Nature mandalas are intricate designs created using natural elements such as leaves, twigs, rocks, and flowers to form a symbolic representation of unity and harmony with nature. These works of art have their roots in various cultures, including Buddhist and Hindu traditions, where they were used for meditation and spiritual growth.
In Tibetan Buddhism, mandalas were intricate sand paintings created on the ground to represent the interconnectedness of the universe. These temporary creations were believed to possess spiritual power and were often destroyed at the end of a ritual or ceremony. Similarly, in Hinduism, mandalas were used as a tool for meditation and were believed to hold sacred energy.
Today, nature mandalas have evolved into a modern interpretation of this ancient art form. They are created using natural materials found in our surroundings, often in response to the environment’s beauty and impermanence. By incorporating natural elements, we can tap into their symbolism and create a deeper connection with nature.
Benefits of Nature Mandalas
Creating nature mandalas can have a profound impact on both individuals and the environment. One of the most significant benefits is stress relief. As you gather materials from nature and arrange them into intricate patterns, you’re forced to slow down and focus on the present moment. This mindfulness practice has been shown to decrease cortisol levels and improve mood. By incorporating natural elements like leaves, rocks, or flowers into your mandala, you also deepen your connection with the environment.
As you create, you may find yourself drawn into a meditative state, lost in the beauty of the patterns emerging around you. This sense of flow can be incredibly therapeutic, allowing you to tap into a sense of calm and clarity. Moreover, nature mandalas offer a unique opportunity for community building. Gather with friends or family and work together on a collaborative piece, fostering communication and cooperation as you discuss design and placement.
The process of creating nature mandalas also encourages environmental awareness and appreciation. As you collect materials, take note of the interconnectedness of species and ecosystems, and consider the impact of your actions on the natural world.
Preparing for Your Nature Mandala Adventure
Before you set out to create your nature mandala, take a moment to prepare and plan ahead. This will ensure that you’re fully immersed in the experience and can tap into its transformative power freely.
Choosing the Right Location
When selecting a location for your nature mandala, consider three essential factors: accessibility, safety, and visual appeal. Begin by evaluating the terrain – is it level and stable enough to support you and your design? A slight incline or uneven surface can make it challenging to create your mandala, while also posing potential hazards if you’re working with fragile materials.
Choose a spot that allows for good visibility, both from a distance and up close. This will help you appreciate the final product and make any necessary adjustments during creation. Avoid areas with high foot traffic or where you may be disturbed by others – you’ll want to focus on your design without distractions.
Pay attention to the surrounding environment, too. Opt for a location that complements your mandala’s theme and aesthetic. For instance, if you’re working with autumnal materials, a spot surrounded by vibrant fall foliage will add depth and context to your design. By considering these factors, you’ll be able to create a nature mandala that not only looks stunning but also resonates with its surroundings.
Gathering Materials
When gathering materials for your nature mandala, it’s essential to consider both aesthetics and sustainability. Start by collecting an assortment of leaves, such as oak, maple, or birch, which can add depth and texture to your design. Look for flowers like wild roses, daisies, or black-eyed susans that have already bloomed to avoid harming the plant.
For structural elements, gather a variety of twigs and branches in different lengths and widths. Consider using sticks from trees like willow or hazel, which are flexible and can be easily shaped. You’ll also need some soil or sand to secure your design. When sourcing materials, aim for areas that are already disturbed by nature, such as woodland paths or near fallen logs.
When collecting leaves and flowers, try to avoid damaging the surrounding plants or removing large quantities from a single spot. Instead, look for individual specimens that have naturally dropped to the ground. This approach not only preserves the ecosystem but also adds an element of serendipity to your design process, allowing you to respond to the unique patterns and shapes nature has already provided.
Designing Your Nature Mandala
Now that you have a better understanding of nature mandalas, it’s time to start designing your own, using the natural world as inspiration and canvas. Let’s explore how to create a harmonious and balanced design in harmony with nature.
Understanding Sacred Geometry
Sacred geometry is an ancient practice that infuses nature mandalas with symbolic meaning and spiritual significance. At its core, sacred geometry involves arranging shapes and patterns to reflect the underlying structure of the universe. In nature mandala design, this translates to incorporating symmetries, such as radial or bilateral balance, to create visually appealing compositions.
Symmetry is key in nature mandalas, as it creates a sense of harmony and order. Radial symmetry, for example, can evoke a feeling of expansion and growth, while bilateral symmetry can represent duality and balance. By incorporating these patterns into your design, you can tap into the symbolic meanings associated with each shape.
To apply sacred geometry principles to your nature mandala, observe the patterns and shapes present in the natural world around you – the branching of trees, the petals of flowers, or the arrangement of rocks. Use these organic forms as inspiration for your design, allowing yourself to be guided by their inherent symmetries and patterns.
Freehand vs. Guided Designs
When it comes to designing a nature mandala, you have two primary approaches: freehand creation and using guides or templates. Freehand designs allow for complete freedom and spontaneity, encouraging creativity and connection with the natural environment. To create a freehand design, start by observing your surroundings, taking note of patterns and shapes in the natural world. Then, use a stick or small rock to draw inspiration from these observations onto the ground.
On the other hand, using guides or templates can provide structure and precision, helping to ensure that your mandala is symmetrical and balanced. These tools often come in the form of printed templates or online guides with concentric circle markings. A popular approach is to use a stick to draw a small spiral pattern on the ground, then transfer this design onto the center of your mandala using a guide line. This method allows for flexibility while maintaining some control over the final result.
Remember that there’s no right or wrong approach – both methods can produce beautiful and meaningful nature mandalas.
Creating Your Nature Mandala
Now that you’ve found a beautiful outdoor space, it’s time to bring your creative vision to life by designing and crafting your very own nature mandala. Let’s start by exploring the process of bringing order to this natural wonderland.
Gathering Materials in a Sustainable Way
When gathering materials for your nature mandala, it’s essential to do so in a way that respects and preserves the local ecosystem. This means taking only what you need, leaving some behind for other creatures, and minimizing waste. One simple yet effective approach is to “take a little, leave a lot.” For instance, if you’re collecting leaves or branches, choose those with the most interesting shapes or textures, but avoid stripping an area of all its foliage.
When working in areas with sensitive habitats, such as meadows or wetlands, be mindful of your impact. Avoid damaging plants or disturbing soil that’s home to microorganisms and insects. Consider using materials from areas that have been affected by natural events like storms or wildfires, where the ecosystem is already shifting.
To further reduce waste, bring a collection basket or bag with you to gather materials in one place rather than scattering them across the area. This also helps contain loose items like stones or shells, preventing them from getting lost or blown away. By being thoughtful and intentional about your material selection, you’ll not only create a stunning nature mandala but also contribute to preserving the natural beauty around you.
Building the Base and Adding Details
Begin by selecting a suitable location for your nature mandala, taking into account factors such as sunlight and accessibility. Create the base of your design using natural materials like leaves, sticks, or stones. For example, you can arrange rocks in a circular pattern to represent the center of the mandala.
Add details using various techniques and materials. One method is to use small twigs and branches to create intricate patterns within the design. You can also incorporate other natural elements such as pinecones, acorns, or feathers to add texture and visual interest. Consider using a combination of these methods to achieve a balanced composition.
When adding details, keep in mind that less is often more. Avoid overloading the mandala with too many elements, which can result in visual clutter. Instead, focus on creating a harmonious balance between positive and negative space. Experiment with different patterns and arrangements until you achieve a design that resonates with you.
Tips and Variations for Nature Mandalas
Now that you’ve mastered the basics of nature mandalas, let’s get creative! This next section shares inspired variations to take your art to new heights.
Seasonal Themes and Symbolism
Incorporating seasonal themes and symbolism into nature mandalas allows you to tap into the cyclical patterns of nature and connect with the world around you. For example, winter mandalas often feature symbols like snowflakes, icicles, or bare trees, which represent resilience and renewal. In contrast, spring mandalas might include blossoming flowers, budding leaves, or eggs, symbolizing fertility and new life.
In some cultures, specific seasons are associated with particular deities or spirits. For instance, the Japanese celebrate the cherry blossom season as a time of renewal and spiritual growth, while in many indigenous cultures, the changing of the seasons is seen as a time for purification and spiritual rebirth. You can draw inspiration from these traditions by incorporating symbols and motifs that resonate with your personal connection to nature.
When creating seasonal mandalas, consider the local flora and fauna that are unique to each time of year. For example, if you live in an area with vibrant wildflowers in the summer, you might use those blooms as a central element in your design. By working with the natural world, rather than imposing your own preconceptions, you can create nature mandalas that feel deeply rooted and authentic.
Collaborative Projects
Involving others in nature mandala creation can be a transformative experience for both yourself and those participating. Consider hosting group projects, where you gather like-minded individuals to work together on a large-scale design or multiple smaller mandalas within the same area. This can foster teamwork, creativity, and a deeper connection with nature.
Alternatively, you can offer workshops that teach others how to create their own nature mandalas. Choose a scenic location and provide all necessary materials, guiding participants through each step of the process from gathering materials to finalizing their design. Community events are another great way to share the experience, such as hosting a “Make Your Own Mandala” station at a local park festival or environmental fair.
When collaborating with others, keep in mind that varying levels of skill and experience will be present. Be prepared to offer guidance while also allowing participants to explore their own creativity and make mistakes – it’s all part of the learning process. By sharing this experience with others, you’ll not only create a beautiful nature mandala but also build connections within your community and foster a sense of shared purpose.
Capturing the Essence: Photography and Preservation
As you create your nature mandalas, capturing their ephemeral beauty can be just as important as creating them. To preserve these sacred spaces in all their glory, photography plays a vital role.
Tips for Capturing Your Mandala
To capture the essence of your nature mandala, consider the interplay between light and shadow. Soft, diffused light is ideal for highlighting delicate patterns and textures, while a more dramatic lighting setup can add depth and dimensionality to your design. Experiment with shooting during the golden hour – just before sunset or after sunrise – when the soft, warm light casts long shadows that emphasize the intricate details of your mandala.
When it comes to composition, look for ways to integrate your mandala into its surroundings. Consider including a few strategically placed natural elements, such as rocks or branches, to create a sense of balance and harmony. A low angle can also help draw attention to the intricate patterns within your design. As for camera settings, a macro lens will allow you to capture the smallest details with incredible clarity, while a wide-angle lens provides a more expansive view that showcases the mandala’s relationship to its environment.
Pay close attention to your camera’s ISO and aperture settings – a lower ISO (typically between 100-400) will help minimize noise and preserve image quality.
Preserving Your Creation
When you’ve finished creating your nature mandala, it’s essential to preserve its beauty and essence for years to come. This can be done by either documenting it digitally or preserving it in its original form.
For long-term preservation, consider using a natural sealant like beeswax or plant-based varnish to protect the leaves and flowers from decay and damage caused by the elements. You can also press your mandala between sheets of paper or cardboard to flatten it and prevent moisture buildup. This method is particularly suitable for delicate or sensitive materials that might be damaged by sealing.
Digital documentation is another excellent option, allowing you to capture high-quality images and share them with others. Use a smartphone camera or a dedicated DSLR camera to take clear, well-lit photos from multiple angles. Consider using a tripod to minimize camera shake and ensure sharp focus. You can also experiment with creative photography techniques like shallow depth of field or infrared photography to add an extra layer of visual interest to your images.
Conclusion
Now that you’ve completed your nature mandala, it’s time to reflect on what you’ve learned and how you can apply these skills in future outdoor adventures.
Reflecting on the Experience
As you complete a nature mandala, take a moment to reflect on the experience and what you’ve learned. This process can be just as transformative as creating the mandala itself. You may discover new depths of patience, as you carefully collect and arrange materials amidst changing weather conditions. Perhaps you develop a greater appreciation for the intricate patterns found in nature, from the branching of trees to the spiraling of seashells.
This newfound respect can translate into your daily life, influencing how you interact with the natural world. For instance, you may start observing the way light filters through leaves or notice the subtle colors that emerge at dawn and dusk. As you continue to create nature mandalas, you’ll find opportunities to apply these lessons in new ways. Take time to journal about your experiences, noting what worked well and areas for improvement. This will help you refine your skills and deepen your connection with nature. By embracing this reflective practice, you’ll unlock the full potential of nature mandala creation as a tool for personal growth and spiritual exploration.
Encouraging Others to Join In
As you’ve been inspired by creating nature mandalas and have fallen in love with their beauty, consider sharing your newfound passion with others. Many local parks and nature reserves host workshops, guided walks, or events that allow participants to connect with the natural world through creative expression.
You can also look into joining or starting a local nature mandala group. These groups often collaborate on large-scale installations, share techniques, and provide an opportunity for people to come together in appreciation of nature’s beauty. Research local environmental organizations or art collectives in your area that might be interested in hosting or participating in such events.
Some popular online resources for learning more about nature mandalas include workshops, tutorials, and YouTube channels dedicated to this practice. Websites like the Nature Mandala Association and the Sacred Geometry International website offer extensive guides, articles, and videos on creating nature mandalas, as well as information on local initiatives and events.
Frequently Asked Questions
How Do I Know If My Nature Mandala Is Suitable for Photography?
Yes, your nature mandala is suitable for photography if it’s created in an open area with good natural light and is not too fragile or ephemeral. Consider the composition, colors, and textures of your design to ensure they’ll translate well in photos.
Can I Use Man-Made Materials in My Nature Mandala?
No, using man-made materials would compromise the essence of a nature mandala, which relies on natural elements to connect with the environment. Sticking to sustainable and locally sourced materials is essential for this art form. However, you can get creative with recycled materials in a separate project.
What If I’m Short on Time or Lack Experience with Nature Mandalas? Can I Still Create One?
Yes, nature mandalas are accessible to anyone, regardless of experience or time constraints. Start small, focus on the process rather than perfection, and don’t be afraid to seek guidance from online resources or local workshops. Remember, it’s about connection with nature, not creating a masterpiece.
How Can I Involve Children in Nature Mandala Creation?
Involving children can be a great way to foster an appreciation for nature and art together. Use kid-friendly materials like leaves, sticks, and flowers, and encourage them to explore patterns and designs. Make it a fun, collaborative process that allows everyone to get creative.
How Do I Preserve My Nature Mandala When It’s Intentionally Ephemeral?
When creating a temporary mandala with natural materials, understand that preservation may not be the primary goal. Instead, focus on capturing its essence through photography or documentation before it deteriorates. You can also consider digitizing your design for long-term preservation and sharing with others.
Can I Create Nature Mandalas in Areas With Restricted Access?
Yes, but be respectful of local regulations and private property rights. If you’re unsure about access permissions, reach out to the relevant authorities or landowners to ensure that your creation is allowed. Always prioritize sustainability and community guidelines when creating nature mandalas in public spaces.
How Can I Scale Up My Nature Mandala Creation for Larger Groups?
To create a larger-scale nature mandala for groups, consider selecting a spacious area with minimal obstacles. Use larger materials or gather more natural elements to achieve the desired size. Encourage collaboration and encourage each participant to contribute their unique touch to the design.
What If I Notice Pests or Weeds Damaging My Nature Mandala?
Identify the issue quickly and take action to prevent further damage. Consider using natural pest control methods, carefully removing affected areas, or repurposing parts of your mandala to reduce waste. Learn from the experience and adapt future designs accordingly.
How Can I Adapt Nature Mandalas for Different Seasons or Weather Conditions?
Be flexible with seasonal themes and materials to create nature mandalas that reflect the changing environment. Use seasonal elements like fall leaves, winter branches, or spring flowers to keep your designs relevant and connected to the natural world.

