
Knitting enthusiasts often struggle with creating projects that showcase their skills, but it all starts with mastering the basics. You might be familiar with the knit one purl two (K1P2) pattern, which is a fundamental technique in knitting. However, many knitters find themselves stuck at this stage due to issues like inconsistent gauge measurement or poor yarn selection. Gauge can make or break a project’s overall look and feel, while choosing the right yarn can elevate your design from good to great. In this article, you’ll learn expert tips on how to troubleshoot common problems and create stunning K1P2 projects that turn heads. By the end of it, you’ll be able to confidently tackle even the most intricate designs with ease.
What is Knit One Purl Two?
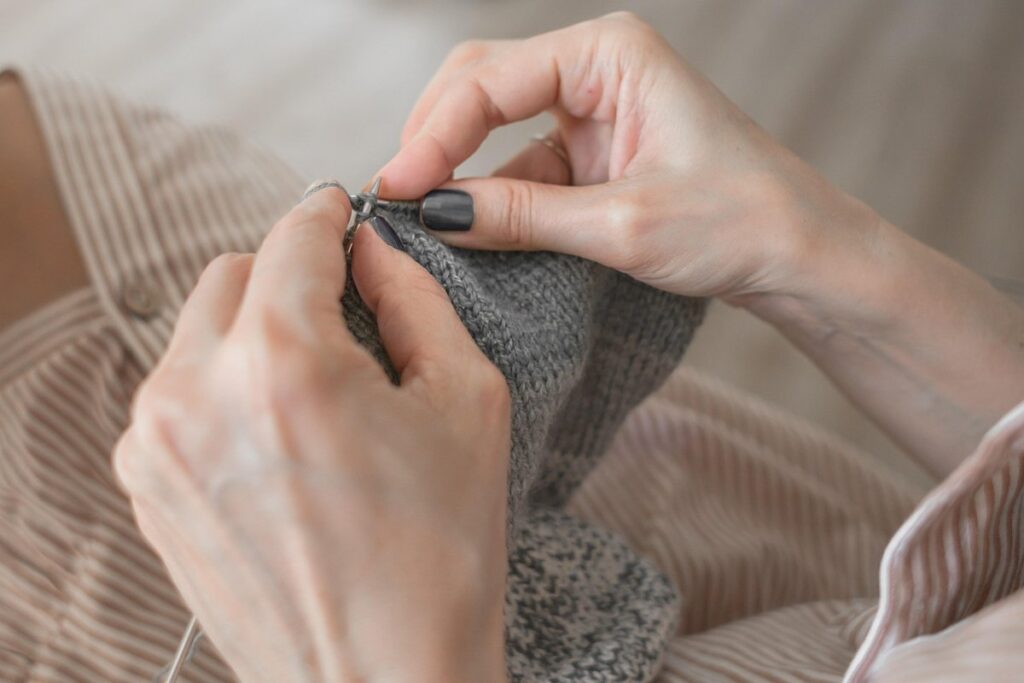
Knitting enthusiasts often wonder what sets knit one purl two apart from other patterns, so let’s break down its fundamental characteristics. This classic technique has been a staple in knitting for decades.
Origins of the Pattern
The knit one purl two pattern has its roots in traditional European folk knitting, where knitters would create simple yet functional garments for everyday use. In many European cultures, knitting was a passed-down skill from mother to daughter or between close family members. This tradition is reflected in the knit one purl two pattern’s straightforward and repetitive nature.
Historically, the knit one purl two pattern emerged as a way to create durable and practical items such as socks, gloves, and scarves. The simplicity of the pattern allowed knitters to focus on developing their skills without becoming overwhelmed by complex stitch patterns. This emphasis on functionality also influenced the choice of yarns used in traditional European knitting, with many knitters opting for natural fibers like wool and linen.
The knit one purl two pattern’s enduring popularity can be attributed, in part, to its versatility. While it originated as a simple, practical pattern, it has since been adapted into various forms, from intricate lace designs to bold, graphic motifs. This adaptability has allowed the pattern to remain relevant for centuries, making it an essential component of many knitting traditions.
Key Characteristics of the Pattern
The knit one purl two pattern is characterized by its consistent stitch count, with each row featuring a predetermined number of knit and purl stitches. This creates a predictable texture and visual appeal that’s central to the pattern’s charm. One of the defining features of knit one purl two is its reliance on repetition – specific sequences of knit and purl stitches are repeated throughout the fabric.
A key aspect of this repetition is the way it affects row length. In traditional knit one purl two, rows typically alternate between longer and shorter lengths, creating a subtle visual rhythm that’s both soothing and engaging to look at. This row repetition also has practical implications for knitters: by understanding how the pattern will affect their project’s width and length, they can plan accordingly and avoid costly mistakes.
Another crucial characteristic of knit one purl two is its use of even numbers in stitch count. For example, a common variation might feature four rows of knit stitches followed by four rows of purl stitches – this creates a balanced, symmetrical look that’s both visually appealing and mathematically precise.
Choosing the Right Yarn for Knit One Purl Two
When choosing the right yarn, consider factors like fiber blend, weight, and texture to ensure it complements your project’s intended look and feel. A good match will elevate your finished product.
Factors Affecting Yarn Selection
When selecting yarn for a knit one purl two project, weight is a crucial consideration. The right weight of yarn will affect not only the drape and texture of the finished fabric but also the complexity and speed of the knitting process. A heavier yarn can create a rich, luxurious texture that’s perfect for winter garments or home decor items, while a lighter yarn is better suited for spring and summer projects.
Fiber content is another key factor to consider. Different fibers have unique properties that will impact how your project looks, feels, and behaves over time. For example, wool yarns are great insulators, making them ideal for cold-weather garments. However, they can be prone to pilling or felting if not cared for properly.
Finally, color choice is an essential aspect of yarn selection for knit one purl two. A single-color yarn will create a cohesive look, while variegated or multi-colored yarns can add visual interest and depth to your project. Consider the overall aesthetic you want to achieve: do you prefer a subtle, monochromatic palette or a bold, statement-making design?
Popular Yarn Options for Knit One Purl Two
For the knit one purl two pattern, you’ll want to choose a yarn that complements its classic aesthetic. Here are some popular options:
- Merino wool: A favorite among knitters, merino wool offers excellent stitch definition and a subtle sheen that enhances the texture of your work.
- Cotton blends: These versatile yarns provide a soft drape and are suitable for projects that require a bit more structure. They’re also great for beginners who want to experiment with knit one purl two without committing to a more expensive or specialized yarn.
- Bulky weight yarns: For a quick and cozy project, try using a bulky weight yarn. These thick yarns work up fast and create a plush fabric that’s perfect for blankets, hats, or scarves.
When selecting a yarn, consider its fiber content, weight, and color palette. Merino wool yarns tend to be more expensive but offer superior stitch definition. Cotton blends are often more affordable and easy to care for. Bulky weight yarns can speed up your project but may require larger needles and more yarn overall. By understanding the characteristics of each option, you’ll make a more informed decision that suits your needs and preferences.
Understanding Knitting Gauge in Knit One Purl Two
To knit a sweater that fits perfectly, you need to understand how many stitches are in each inch of your work, which is where knitting gauge comes into play. Let’s break down what this means for your Knit One Purl Two projects.
Measuring Gauge: Tips and Tricks
To achieve accurate gauge measurements for your knit one purl two project, you need to understand what gauge is and how it affects the finished product. Gauge refers to the number of stitches per inch (or centimeter) in a knitted fabric. It’s essential to measure gauge accurately because it directly impacts the fit and drape of your garment.
To start measuring gauge, cast on a swatch using the same yarn and needles you plan to use for your project. Knit or purl a few rows, then bind off the swatch. Measure the number of stitches in a 4-inch (10 cm) square to determine your stitch count per inch. For knit one purl two projects, it’s common to aim for a gauge range between 3-5 stitches per inch.
Some common mistakes to avoid when measuring gauge include not swatching with the same yarn and needles as the project, or failing to measure accurately over a fixed length. To ensure accurate measurements, use a ruler or measuring tape to measure your swatch, rather than relying on an estimate. You can also try taking multiple measurements to account for any inconsistencies. By following these tips, you’ll be able to achieve accurate gauge measurements and create a knit one purl two project that fits perfectly.
Adjusting Pattern Rows Based on Gauge Variations
When gauge variations occur, it’s essential to adjust the pattern rows to ensure a seamless fit and finish for the finished garment. Gauge differences can arise from factors such as yarn weight, needle size, or individual knitting style.
To make adjustments, calculate the number of stitches per inch (spi) in your swatch. Compare this value to the gauge specified in the pattern. If you’re using a lighter yarn than called for, for instance, your stitch count will be higher, resulting in a looser fabric.
If you’ve determined that your gauge is smaller or larger than specified, make changes accordingly. To compensate for a tighter gauge:
- Increase the number of rows to maintain the intended size.
- Add extra stitches between increases to prevent crowding.
For a looser gauge, do the opposite: decrease the row count and remove excess stitches before increases.
A common mistake is to only adjust stitch counts without recalculating the pattern rows. This can lead to an imbalanced fabric with uneven tension. Take the time to reassess your swatch’s gauge and recalculate the required number of pattern rows for a precise fit.
Mastering the Knit One Purl Two Stitch Sequence
The knit one purl two pattern is a fundamental technique that requires precision and practice to master. In this next part, we’ll break down the sequence step-by-step, covering common mistakes and troubleshooting tips.
Common Mistakes to Avoid
When working with the knit one purl two stitch sequence, it’s essential to be aware of common mistakes that can lead to uneven rows and a finished project that doesn’t quite live up to expectations. One mistake beginners often make is not paying attention to tension while knitting, resulting in either loose or tight stitches. To correct this, focus on maintaining an even gauge by paying close attention to your stitch count and row length.
Another error occurs when the knit one purl two sequence isn’t properly aligned, causing rows to become mismatched. This can be avoided by regularly checking your work and adjusting as needed. For example, make sure the first row is a knit row and that subsequent rows follow the correct sequence.
In addition to these issues, forgetting to insert yarn overs or working them incorrectly can disrupt the rhythm of the knit one purl two pattern. To avoid this, always double-check your instructions before starting a project and practice inserting yarn overs until it becomes second nature. By being mindful of these common mistakes and taking steps to correct them, you’ll be well on your way to mastering the knit one purl two stitch sequence.
Practice Exercises for Improved Technique
To solidify your skills in working the knit one purl two pattern, it’s essential to practice regularly. One of the most effective ways to improve technique is through repetition and focused exercises. Begin by practicing the knit one purl two sequence without a project. Knit 10-15 rows, then purl 10-15 rows, repeating this process several times. This will help you develop muscle memory for the stitches.
Another exercise is to knit or purl a specific number of rows (e.g., 5-7) and then intentionally drop a stitch on purpose. Work the row to the end, counting the dropped stitch, and then carefully remove it. Replace the dropped stitch with the next stitch in line, making sure not to twist the work. Repeat this process several times.
You should also try practicing with different yarn weights or textures. Switching between smooth, medium-weight yarns and chunky, textured yarns will help you adapt to varying stitch definitions. When working with thicker yarns, focus on maintaining even tension to avoid puckering or sagging.
Knit One Purl Two Variations: Experimenting with Color and Texture
Now that you’ve mastered the basic knit one purl two stitch, let’s add some visual interest to your projects by experimenting with color and texture.
Introducing Yarn Dyed and Self-Striping Yarns
Yarn dyed yarns are created using specific dyeing techniques that result in unique color patterns within the skein. Unlike commercially dyed yarns, which have a uniform color throughout, yarn dyed yarns can feature subtle variations and nuances that add depth to your knit one purl two projects. These yarns often display marled or tweedy effects, where streaks of different colors are blended together.
Self-striping yarns take this concept a step further by featuring repeating patterns of stripes within the skein. These patterns can range from simple to complex and may include multiple colors or subtle variations in hue. Working with self-striping yarns requires careful planning and consideration of how the color pattern will emerge as you knit. To maximize the visual impact of these yarns, try pairing them with a solid-colored or subtly textured background to let the stripes take center stage.
When working with yarn dyed and self-striping yarns, keep in mind that their unique characteristics can sometimes affect your gauge. Be prepared to adjust your needle size or stitch count as needed to ensure a balanced fabric.
Tips for Working with Color Variations
When working with color variations in the knit one purl two pattern, it’s essential to create harmonious color combinations. Start by choosing a dominant color and then select secondary colors that complement it. Consider the color wheel: analogous colors (next to each other on the wheel) create a cohesive look, while triadic colors (equidistant from each other on the wheel) add visual interest.
For self-striping yarns, focus on managing striping patterns by adjusting your needle size or stitch count. Typically, a small decrease in needles or stitches will slow down the striping pattern. Conversely, increasing needles or stitches will speed it up. Be mindful of this when switching between different self-striping yarns.
To ensure color continuity, swatch with the yarn before starting your project. This allows you to assess how the colors will interact and make any necessary adjustments. Consider blocking your swatch to see how the colors change after washing.
Incorporating multiple colors can add visual appeal, but be cautious of too many changes. A general rule is to limit color shifts to every 4-6 inches (10-15 cm) to avoid overwhelming the pattern. This balance will create a visually appealing and harmonious design.
Troubleshooting Common Issues in Knit One Purl Two
Don’t worry if you’re struggling with a wonky row or a miscounted stitch – we’ll tackle common mistakes and provide solutions to get your project back on track. Common issues like dropped stitches, uneven tension, and pattern confusion can be frustrating, but they’re easily fixable.
Managing Drop Stitches and Ladder Formation
A dropped stitch can be frustrating to encounter, especially if it occurs early on in your project. To identify a drop stitch, look for an unevenness in your fabric’s texture or a loose thread visible from the wrong side of the work. Ladder formation is often a precursor to dropped stitches and appears as a series of small holes along a row.
Causes of these issues can be attributed to yarn overs, incorrect stitch counts, or working too tightly. To prevent drop stitches, ensure you’re maintaining even tension throughout your knitting. Try counting your stitches regularly, especially when changing colors or patterns. When working with self-striping yarns, pay attention to the subtle color changes and adjust your tension accordingly.
To fix a dropped stitch, carefully insert your needle into the stitch below it and work it back up through the fabric. Alternatively, if you notice ladder formation, gently pick up the ladders by inserting your needle into each hole and working it back up through the fabric. To prevent these issues from occurring in the first place, consider swatching with a scrap piece of yarn before beginning your project to ensure you’re comfortable with the tension required for your chosen yarn.
Fixing Mistakes: Tips for Salvaging Your Project
When mistakes occur in a knit one purl two project, it’s essential to act quickly and make repairs before they spread. One common issue is dropped stitches, which can be repaired by inserting an extra needle or using a crochet hook to pick up the stitch. To prevent ladder formation, gently pull the yarn tail through the loop created by the dropped stitch.
For mistakes in pattern repeats, you can try frogging (ripping out) the affected section and reknitting it from scratch. However, this approach can be time-consuming and may not always be feasible. A more efficient solution is to adjust the pattern repeat by adding or removing stitches as needed.
Maintaining fabric integrity is crucial when making repairs. To do this, try to match the original tension of the yarn as closely as possible. If necessary, use a stretchy stitch like garter stitch to blend in with the surrounding fabric. It’s also a good idea to weave in ends carefully to prevent further damage or snagging.
By following these tips and techniques, you can salvage your project and maintain its integrity even when mistakes occur.
Advanced Techniques for Knit One Purl Two: Creating Custom Patterns and Designs
Now that you’ve mastered the basic knit one purl two pattern, it’s time to take your skills to the next level by learning how to create custom patterns and designs. In this advanced section, we’ll explore new techniques for personalized knitting projects.
Using the Knit One Purl Two Pattern as a Foundation
When building upon the knit one purl two pattern as a foundation for custom designs, it’s essential to start by understanding its core structure. This classic technique is based on a repeating sequence of knit and purl stitches, creating a timeless fabric with a subtle texture. To begin experimenting with multi-colored yarns, try working with self-striping or variegated yarns that naturally create visual interest without needing additional dye work.
For incorporating different stitch patterns, consider adding accent rows using techniques like slip-stitch or intarsia knitting. These methods allow you to add contrasting textures and colors to your design without disrupting the underlying knit one purl two fabric. When combining multiple textiles, think about how their natural fibers and weights will interact with the yarn used in the knit one purl two pattern.
To integrate other materials into a project, consider using techniques like appliqué or embroidery to add visual interest. Experimenting with these methods can help you create truly unique and eye-catching designs that showcase your creativity.
Pushing the Boundaries: Exploring New Knit One Purl Two Designs
Exploring new knit one purl two designs requires a deep understanding of the pattern’s fundamental principles and a willingness to experiment. Start by modifying classic stitch combinations or introducing subtle color variations. Consider using yarn with unique textures, such as tweed or bouclé, to add visual interest to your design.
To push the boundaries of traditional knitting techniques, try combining knit one purl two with other patterns or stitches. For example, pairing it with a herringbone or chevron pattern creates a striking contrast between smooth and textured elements. Alternatively, use knit one purl two as a foundation for cables or Fair Isle knitting to add depth and complexity.
When experimenting with new designs, keep in mind the importance of maintaining even tension and consistent stitch count. This will ensure that your final product remains true to the knit one purl two pattern’s signature look and feel. Some popular techniques for creating innovative knit one purl two designs include:
• Swapping traditional knit one purl two rows with intarsia or stranded colorwork
• Incorporating subtle gradient or ombre effects through carefully selected yarn colors
• Experimenting with asymmetrical stitch patterns, such as diagonal or chevron arrangements
Frequently Asked Questions
Can I use any type of yarn with the knit one purl two pattern?
Yes, but it’s essential to consider factors like weight, fiber content, and color choice. A good starting point is to choose a yarn that matches the recommended gauge in your pattern.
How do I adjust my knitting speed when working with different types of yarn?
Adjusting your knitting speed allows you to maintain even tension. When working with thicker or thinner yarns, reduce or increase your row count accordingly to achieve the desired stitch density and fabric drape.
What if my knit one purl two project doesn’t turn out as expected due to gauge variations?
Start by re-measuring your gauge and adjust your pattern rows based on these measurements. It may be helpful to swatch with different yarns before starting a larger project, ensuring you’re comfortable working within the recommended gauge range.
How can I incorporate self-striping or variegated yarns into my knit one purl two design?
When using self-striping or variegated yarns, consider the color repeat and how it will interact with your stitch sequence. You may need to adjust your row count or stitch pattern to achieve a cohesive look.
Can I mix different knitting techniques within a single knit one purl two project?
Yes, you can experiment with combining multiple techniques. However, ensure that each section is worked in the correct gauge and tension, as mixing incompatible yarns or stitches may compromise the overall fabric integrity.

