
Starting to paint can be intimidating, especially if you’ve never held a brush before. You might wonder where to begin, from selecting the right type of paint to understanding how to mix colors and create depth in your artwork. With so many types of paints available, it’s easy to get overwhelmed by the options. But don’t let that stop you – painting is a great hobby for anyone looking to express themselves creatively and relax at the same time. In this article, we’ll take you through the basics of getting started with painting as a hobby, from choosing the right supplies to developing your own unique style and technique. By the end of it, you’ll be confident in starting your own painting journey and creating beautiful artwork that brings you joy.
Choosing the Right Paint and Supplies
When it comes to starting a painting project, selecting the right paint and supplies is crucial for achieving professional-looking results. We’ll guide you through the process of choosing the perfect materials for your artistic endeavors.
Understanding Your Options: Acrylic, Oil, and Watercolor
When it comes to choosing a paint medium for your hobby, you’ll likely come across three popular options: acrylic, oil, and watercolor. Each has its unique characteristics, advantages, and challenges.
Acrylic paint is known for its versatility and fast-drying properties. It’s ideal for beginners because it can be used on various surfaces, from canvas to paper, and can be mixed with a range of mediums to achieve different effects. However, acrylics can be brittle and prone to cracking if not applied thickly enough.
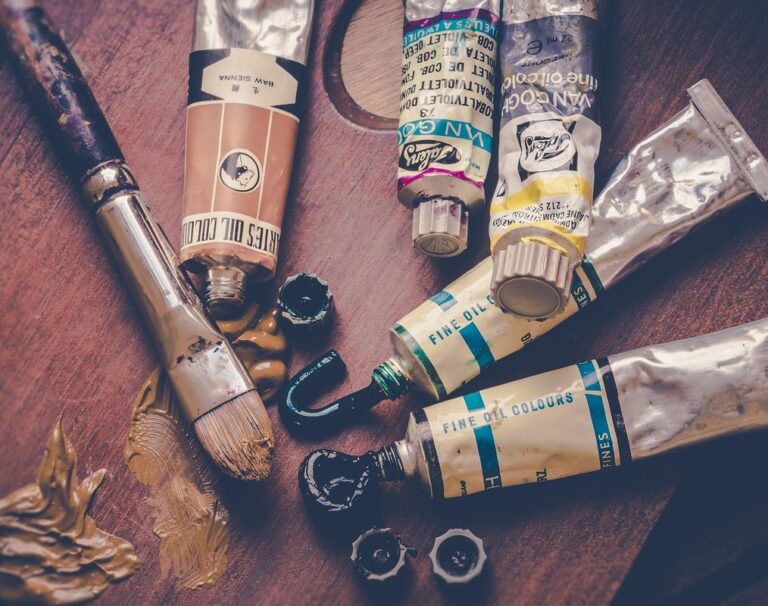
Oil paint, on the other hand, is prized for its rich colors and blending capabilities. It’s often preferred by artists who want to create subtle, nuanced works. Oils take much longer to dry than acrylics, which allows for smooth layering and blending. However, they require solvents like turpentine or mineral spirits for clean-up and can be hazardous if not handled properly.
Watercolor paint is a great choice for those who enjoy working with translucent washes and loose brushstrokes. It’s portable and easy to clean up, but it can be unforgiving if you make mistakes – corrections are often difficult once the paint is dry.
Essential Tools and Materials Every Painter Needs
You’ll need high-quality brushes to achieve smooth, even strokes. Look for synthetic or natural fiber brushes with flexible tips, as they will hold their shape and last longer than cheaper alternatives. A basic set should include flat brushes (1/2 inch and 1 inch wide) and round brushes (#4 and #8). These will cover most of your painting needs.
A palette is essential for mixing colors. Choose one that’s sturdy enough to withstand water and solvent spills, and has separate wells for each color. A disposable palette or a porcelain one are good options. You’ll also need a set of high-quality paints, including titanium white, yellow ochre, and ultramarine blue. These will form the basis of most colors.
A canvas or painting surface is where your art comes to life. Look for a sturdy cotton or linen canvas with a smooth finish. A 16×20 inch or 18×24 inch canvas is a good starting point. You’ll also need a set of easel clips or tape to secure the canvas in place, and a ruler or straightedge for drawing reference lines.
A painting medium like turpentine or linseed oil will help thin your paints and create glazes. A small container with a lid will keep it clean and organized.
Budget-Friendly Options: Where to Find Quality Paints on a Shoestring
You can find quality paints on a budget by shopping at big-box stores like Home Depot or Lowe’s. These retailers often carry a wide selection of paints from various brands at discounted prices. Online marketplaces like Amazon and Walmart also offer affordable options, with many customers leaving reviews to help you make informed purchasing decisions.
For even deeper discounts, consider visiting local hardware stores, second-hand shops, or thrift stores. You might stumble upon gently used paint sets or individual tubes that are still in great condition. Keep an eye out for paint sales or clearance sections, where you can snag quality paints at reduced prices.
When shopping for affordable paints, be sure to inspect the labels carefully. Look for brands that offer similar qualities and characteristics as more expensive options. Some reputable budget-friendly brands include DecoArt, Apple Barrel, and FolkArt. Additionally, consider purchasing student-grade or artist-grade paints in smaller quantities, which can often be just as effective as their larger counterparts at a lower cost.
Setting Up Your Space for Painting
To get started with painting, you’ll want a dedicated space that’s well-ventilated and organized to ensure your supplies are easily accessible. A clutter-free workspace can help you stay focused on your art.
Creating a Dedicated Workspace at Home
When transforming a room into a functional painting studio at home, consider the importance of proper lighting. Natural light is ideal, but if that’s not possible, invest in high-quality artificial lighting. Aim for a combination of overhead and task lighting to illuminate specific areas, such as your easel or palette. Avoid placing your workspace near windows with direct sunlight, which can create harsh shadows.
Storage solutions are also crucial for maintaining an organized painting space. Use wall-mounted shelves, cabinets, or storage units to keep supplies within easy reach. Label each container so you can quickly find what you need. Consider a cart or trolley to store paint, brushes, and other essentials, keeping your workspace clutter-free.
Ergonomics play a significant role in preventing fatigue and discomfort while painting. Position your easel at a comfortable height, allowing you to work without straining your back or shoulders. Invest in a good-quality chair with adjustable height and lumbar support. Consider adding a footrest or floor mat for added comfort. By prioritizing lighting, storage, and ergonomics, you can create a functional and efficient painting studio that inspires creativity and productivity.
Organizing Your Supplies: A System for Every Painter
To create an efficient supply system, start by categorizing your paints and materials into groups such as colors, mediums, brushes, and palettes. Store these categories separately to prevent clutter and make it easier to find what you need when working on a painting.
Use transparent containers or bins with lids to store small items like paint tubes, caps, and liners. Label each container clearly so you can easily identify the contents without having to open them. You can use a label maker for this purpose or write directly on the container with a permanent marker.
For larger supplies such as canvases, easels, and stretchers, consider investing in a storage cabinet or shelving unit specifically designed for art supplies. These units often have adjustable shelves and compartments to accommodate various sizes and shapes of materials.
When labeling your containers, use a consistent system that works for you. Some artists prefer alphabetical order by color name, while others organize by category or frequency of use. Experiment with different methods until you find one that suits your workflow.
Safety First: Preparing Your Space for Painting
Ensure proper ventilation by opening windows or using an exhaust fan to dissipate fumes from paint thinners and solvents. Avoid painting in areas with poor air circulation, as this can exacerbate respiratory issues. Choose a well-ventilated workspace, ideally near an exterior door.
Electrical safety is also crucial when setting up your painting space. Keep cords and wires organized and out of reach to prevent tripping hazards. Ensure that any electrical devices, such as lamps or heaters, are placed at least 3 feet away from flammable materials like paint and solvents.
Cover your work surface with a drop cloth or old sheets to protect it from spills and stains. Secure the cloth with tape to prevent it from slipping during use. Consider using a spill-proof palette or a tray with raised edges to contain any accidents.
For painting in small spaces, consider investing in a portable ventilation system or a fan that can be directed at your workspace. Some artists also recommend using odor-absorbing products like activated charcoal or baking soda to minimize fume buildup.
Learning the Basics of Color Theory and Composition
Mastering color theory and composition is essential for creating visually appealing paintings, so let’s start by understanding how colors interact and balance each other. This foundation will help you create harmonious pieces that draw the viewer in.
Understanding the Color Wheel and How to Use It
Understanding the color wheel is crucial for creating harmonious color schemes and achieving effective contrast. The color wheel is a circular diagram showing how colors are related to each other. It’s divided into primary colors (red, yellow, and blue), secondary colors (orange, green, and violet), and tertiary colors (colors created by mixing primary and secondary colors). To use the color wheel effectively, start by identifying your dominant color – the color that will take center stage in your painting.
Next, choose a secondary color to create harmony. You can either select a color directly across from your dominant color on the color wheel (complementary), or one next to it (analogous). For example, if your dominant color is blue, you could use orange as its complement and yellow-green as an analogous color. To add depth and interest, experiment with warm and cool colors. Warm colors like red and orange tend to advance, while cool colors like blue and green recede.
When working with the color wheel, remember that primary colors are not necessarily more saturated or vibrant than secondary colors. The key is to balance your colors thoughtfully, considering their hue, saturation, and value.
The Fundamentals of Composition: Balance, Proportion, and Emphasis
Creating balance and proportion in a composition is essential to draw the viewer’s eye through the painting. To achieve this, consider the placement of elements within the frame. For instance, in a landscape, placing a prominent mountain or tree at one corner can create visual interest and guide the viewer’s gaze. Conversely, placing all focal points near the center can lead to a cluttered appearance.
Proportion is equally important. A large object should be placed against a smaller background element to avoid overwhelming the composition. Think of it like building with blocks – larger pieces fit together with smaller ones in a harmonious way. Consider the relationship between the subject and negative space. Negative space, or empty areas around objects, helps create breathing room and directs attention.
To achieve emphasis, use visual flow. This can be achieved by leading the viewer’s eye through the painting using lines, shapes, or colors that converge at points of interest. For example, in a still-life, placing a vase near the edge and painting it with warm colors will draw the viewer’s gaze towards it.
Experimenting with Different Techniques: Wet-on-Wet and Drybrush
To master basic painting techniques, try experimenting with wet-on-wet and drybrush methods. Wet-on-wet involves adding layers of paint to a still-wet underlayer, allowing for smooth blending and subtle color transitions. Start by applying a thin layer of paint to your canvas or board, then immediately add additional layers without waiting for the previous coat to dry.
For example, you can use wet-on-wet to create soft, gradient-like effects in skies or water scenes. To achieve this, mix a small amount of transparent paint with a touch of glazing medium and apply it to your canvas. Then, while the layer is still wet, add additional colors or textures to blend and merge.
Drybrushing, on the other hand, involves dragging a almost-dry brush across your canvas in quick, sweeping strokes. This technique creates textured, rough effects that can be used to depict tree bark, stone walls, or other rugged surfaces. To try drybrushing, dip your brush into paint and remove most of it by wiping it against the rim of your paint jar. Then, drag the brush across your canvas in quick strokes, varying the pressure to control the texture.
When experimenting with wet-on-wet and drybrush techniques, remember to work quickly and have fun!
Developing Your Style and Technique
As you continue on your painting journey, it’s time to focus on developing your unique style and technique through experimentation and practice. This involves embracing mistakes and learning from them.
Overcoming Frustration and Self-Doubt in the Early Stages
It’s normal to feel frustrated and uncertain when you’re just starting out with painting. You may worry that your work isn’t good enough or that you’ll never be able to replicate a particular effect. But here’s the thing: every artist, regardless of skill level or experience, starts somewhere.
When you’re first learning to paint, it’s essential to set realistic expectations for yourself. Don’t compare your early attempts to finished artworks by professionals – instead, focus on the process and the progress you make from one piece to the next. Every brushstroke counts, and even small improvements can be a significant step forward.
To overcome self-doubt and frustration, try setting aside dedicated time for painting each week. This will help you stay focused and motivated, and give you a chance to experiment with new techniques without feeling overwhelmed. Remember that mistakes are an essential part of the learning process – it’s how we learn from them that matters. Don’t be afraid to take risks and try new things, even if they don’t turn out as expected.
Exploring Different Styles: From Realism to Abstract Expressionism
When starting out in painting, it’s natural to be drawn to styles you admire. Realism, for instance, focuses on accurately depicting subjects from everyday life, often with minute attention to detail. Think of a still-life setup: each fruit, vase, and tablecloth meticulously rendered. On the opposite end is Abstract Expressionism, characterized by spontaneous gestures and emotional expression, like Pollock’s splattered canvases.
Other styles worth exploring include Impressionism, which captures fleeting moments of light and color; Cubism, breaking objects into geometric shapes; and Pop Art, featuring bold graphics and bright hues. Each style offers a unique creative challenge and way to express yourself. To begin experimenting with these styles, try freestyle exercises: paint without a preconceived idea or reference image.
Observe the works of artists within each style and analyze what makes their paintings distinct. What techniques do they use? How do they balance composition and color? By studying and practicing different approaches, you’ll develop your own voice and visual language. Don’t feel pressured to replicate others; instead, let these styles serve as a starting point for discovery and growth in your artistic journey.
Experimenting with New Techniques and Mediums
When you feel like you’ve mastered a particular technique or style, it’s time to shake things up and try something new. Experimenting with different mediums and approaches can help prevent creative stagnation and keep your paintings fresh. Consider trying out encaustic painting, which involves melting wax to create textured, layered effects. You could also explore mixed media by combining paint with other materials like paper, fabric, or found objects.
Another option is to try painting with unconventional tools, such as household items like sponges, credit cards, or even your fingers. This can help you achieve unique textures and patterns. Don’t be afraid to experiment with different brushstrokes, too – try using a palette knife for bold, impasto effects or a small brush for delicate details.
Remember that experimentation is all about taking risks and having fun. Don’t worry if some of these new techniques don’t work out as planned – it’s all part of the learning process. Keep an open mind and be willing to adapt your approach as you go along. With practice, you’ll find what works best for you and develop a style that’s truly your own.
Joining a Community and Finding Inspiration
Connecting with fellow artists can be just as rewarding as creating art itself, so let’s explore how to find inspiration and join a community of like-minded painters.
Online Communities and Forums: Connecting with Fellow Painters
Joining online communities and forums is an excellent way to connect with fellow painters, get feedback on your work, and stay inspired. Platforms like Reddit’s r/LearnPainting, DeviantArt, and Facebook groups dedicated to painting can provide a supportive community for you to share your progress, ask questions, and learn from others.
To participate effectively in online forums, introduce yourself, share your work, and be open to feedback. Be respectful of other artists’ styles and opinions, even if they differ from yours. When sharing your own work, include details about the techniques or challenges you faced during the process. This encourages meaningful discussions and helps others understand your creative decisions.
Some online communities also offer critiques, where experienced artists provide constructive feedback on your pieces. While not all critiques will be positive, use them as an opportunity to learn and grow. Consider joining a few different forums to find the ones that best suit your needs and style. By engaging with these online communities, you’ll not only improve your skills but also develop a network of fellow painters who can motivate and support you throughout your artistic journey.
Local Art Classes and Workshops: Meeting Other Artists in Person
When searching for local art classes and workshops, consider visiting community centers, colleges, and art schools to see what’s available. You can also check online event calendars, social media groups, or local art organizations for listings. Look for classes that cater to beginners, as they’ll often provide a supportive environment for learning the basics.
Evaluating instructors is crucial when choosing a class. Check their credentials, read reviews from previous students, and observe a class before enrolling. Consider factors like teaching style, class size, and emphasis on technique versus creative expression. Some classes may focus on specific styles or mediums, so choose one that aligns with your interests.
Before signing up for a workshop or class, ask about the curriculum and what to expect from the experience. Will you be working on individual projects or contributing to a group piece? Are materials provided, or do you need to bring your own? What’s the instructor’s approach to feedback and constructive criticism? By asking these questions and considering these factors, you can find a class that suits your needs and helps you grow as an artist.
Museums, Galleries, and Artist Collectives: Finding Inspiration in the World Around You
Visiting museums and galleries can be an exhilarating experience for anyone looking to spark their creativity. These institutions showcase a wide range of artistic styles and movements, from classical masterpieces to contemporary exhibitions. By exposing yourself to the work of other artists, you may discover new techniques, color palettes, or compositional arrangements that inspire your own paintings.
When visiting museums and galleries, take note of how different artists use light, texture, and space to convey emotion and tell stories. For instance, observe how a painter might employ chiaroscuro to create depth and volume in a still life, or how an abstract artist uses gestural brushstrokes to express raw energy. Pay attention to the types of materials used – was it oil, acrylic, or watercolor? How did the artist achieve specific textures or effects?
Some museums and galleries also offer guided tours or audio descriptions that can provide valuable insights into the artwork on display. Don’t be afraid to ask questions or engage with docents; they often have in-depth knowledge of the pieces and can offer unique perspectives.
Lastly, don’t forget about smaller, local art collectives and exhibitions. These often feature emerging artists and showcase innovative works that may not be seen elsewhere. By exploring these lesser-known venues, you can gain a fresh perspective on contemporary art and perhaps even discover new favorite artists.
Frequently Asked Questions
How Long Does it Take to See Progress in My Painting Skills?
It’s normal to feel frustrated when starting out, but with consistent practice, you can see noticeable improvements within a few weeks. Set aside time each week to paint, and you’ll start to notice your skills developing as you get more comfortable with techniques and mediums.
What if I’m Not Good at Drawing? Can I Still Learn to Paint?
Absolutely! Painting is about creating art, not just drawing. Focus on color theory, composition, and experimentation, which don’t require advanced drawing skills. You can still develop a unique style and create beautiful pieces even if you’re not confident in your drawing abilities.
How Do I Know When to Move On from One Technique to Another?
It’s essential to practice techniques until you feel comfortable with them before moving on to new ones. Pay attention to when you start feeling repetitive or bored with a particular method; this is usually a sign that it’s time to try something new. Experiment and explore different techniques to find what works best for your style.
Can I Use Student-Grade Paints for Serious Artwork?
While student-grade paints are great for beginners, they might not be suitable for more advanced or serious artwork due to their limited pigment load and durability. If you’re planning to create large-scale pieces or want a more professional finish, consider investing in higher-quality paints that will hold up better over time.
What if I Get Paint Stains on My Furniture? How Do I Clean Them?
Yes, paint stains can be challenging to remove, but they’re not impossible to clean. For oil-based paints, use a solvent like turpentine or mineral spirits to dissolve the stain before wiping it clean with soap and water. For acrylics, try using a mixture of baking soda and vinegar to neutralize the stain before scrubbing it away.
