Sketching eyes can be intimidating, especially when you’re trying to capture their subtleties. You want to create realistic shading and expression, but you’re not sure where to start. The eye is an intricate organ, with a complex anatomy that’s easy to get wrong. To draw the eyes accurately, it’s essential to understand their proportions and how they relate to each other. This includes the shape of the iris, the pupil, and the surrounding structures like the eyelids and eyebrows. In this step-by-step guide, we’ll cover the basics of eye anatomy, techniques for realistic shading, and tips for capturing expression in your sketches. By the end of this article, you’ll be able to draw eyes with confidence and accuracy, adding a new level of depth and realism to your artwork.
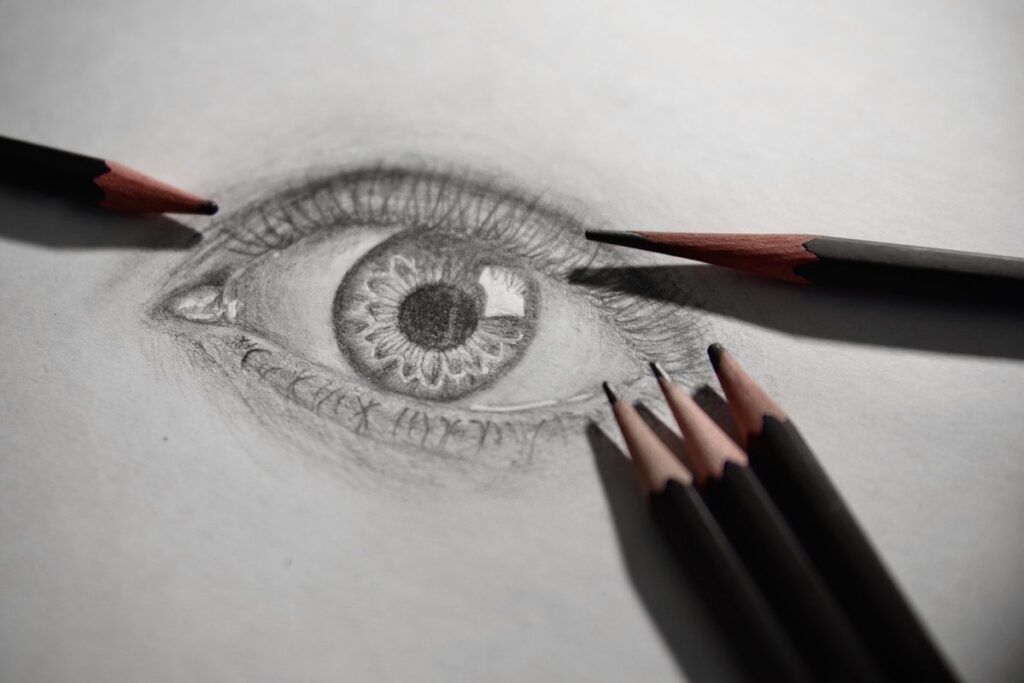
Understanding Eye Anatomy and Proportions
To sketch eyes convincingly, it’s essential to grasp the proportions of the eye and its various components, including the shape of the iris and eyelids. Let’s take a closer look at how these parts fit together.
The Basic Structure of an Eye
The human eye is a complex yet delicate organ, and its structure plays a crucial role in the overall appearance of the face. To accurately sketch eyes, it’s essential to understand their basic shape and size. The eye is roughly spherical in shape, with an average diameter of about 24 millimeters (1 inch) for adults. It’s situated within the orbit, which is essentially a bony socket that protects and houses the eyeball.
The placement of the eye on the face is also vital to consider when sketching. Typically, the center of the pupil aligns with the center of the eyebrow arch. This alignment is important because it helps create a sense of balance and proportion in your drawing. When placing the eyes, also keep in mind that they’re usually about one-quarter of the way down from the top of the head. Understanding these basic proportions will help you achieve more realistic eye sketches.
Measuring and Dividing the Face
When measuring and dividing the face for eye placement, it’s essential to consider the proportions of the entire head. Start by identifying the center of the face, usually where the nose meets the upper lip. From there, draw a vertical line down to the chin, creating a midline that divides the face into symmetrical halves.
Next, locate the outer edges of the eyes, which typically align with the corners of the nostrils. Mark these points lightly on your paper or canvas to ensure accurate placement. For a more precise measurement, use the width of the nose as a guide – usually about one-third of the total facial width falls between the eyes.
To divide the face into thirds horizontally, draw two lines: one at eye level and another at the bottom of the lower lip. These lines help establish the upper and lower bounds for the eyes, ensuring they’re neither too close to the nose nor overwhelmed by the chin. By measuring and dividing the face with these guidelines in mind, you’ll achieve a more natural and harmonious placement of the eyes in your sketch.
Basic Shapes and Lines for Eye Sketching
To sketch realistic eyes, you need a solid foundation of basic shapes and lines. We’ll cover the essential geometric forms that will help you create accurate eye proportions from the start.
Breaking Down the Eye into Simple Forms
When creating an eye for sketching, it’s helpful to break down the complex shape into simpler forms. Start with a sphere for the eyeball itself. This is typically the largest part of the eye and will serve as the base. Next, add cylinders for the iris and pupil. The iris can be thought of as a cylinder that encloses the smaller pupil cylinder. You can think of the iris as a donut shape, with the pupil hole in the center.
For more detail, consider adding cones to form the eyelids. These can be used to suggest the fold where the upper lid meets the eyeball. Pay attention to the proportions – the sphere should be roughly twice the size of the combined cylinders. Use gentle curves and smooth transitions when combining these forms to create a natural-looking eye. The key is to keep it simple, yet still capture the essence of the eye’s structure. Avoid over-complicating with too many details until you’re confident in your ability to balance form and proportion.
Key Lines and Features for Accurate Placement
The upper eyelid crease is a crucial line to capture accurately. It’s typically located about halfway between the lash line and the eyebrow arch, but its position can vary depending on individual facial features. A well-placed crease can help define the shape of the eye.
The lash line itself should be smooth and rounded at the outer corner, with a slight indentation at the inner corner. This helps to create a more natural look. The pupil outline is another essential feature – it should be slightly thicker than the iris and follow the natural curve of the iris.
When it comes to the iris texture, consider adding subtle shading and texture to suggest the shape and color of the iris. A small notch or indentation at the top of the iris can help indicate the presence of an eyebrow or eyelash. Pay close attention to these details as they significantly impact the overall appearance of the eye.
Sketching the Basic Eye Forms
Start by learning how to sketch basic eye shapes, including circles and ovals, which will serve as the foundation for more detailed facial features. Understanding these simple forms is crucial to accurately portraying eyes in your drawings.
Spheres for the Eyeball and Iris
When drawing the eyeball and iris, it’s essential to create smooth curves and blend them seamlessly. To achieve this, start by sketching a perfect sphere for the eyeball. You can do this using a compass or by freehanding it with a gentle touch of pressure on your pencil. To draw an accurate sphere, pay attention to the proportions: the eyeball is typically about 1/3 the size of the iris.
For the iris, focus on creating subtle curves and blending between different shades. Imagine the iris as a series of concentric circles, each with its own unique texture and pattern. Use gentle hatching strokes or soft blending stumps to create a natural-looking transition between colors. When blending, remember to work in thin layers, gradually building up texture and detail rather than applying too much pressure at once.
A small trick for creating smooth curves is to use a range of gentle, sweeping motions with your pencil. Practice this technique on a separate sheet before attempting it on your eye sketch. By mastering the basics of drawing spheres and blending colors, you’ll be able to capture the subtle nuances of the human eye in your sketches.
Adding Cylinders for the Iris Shape and Pupil Placement
To create a convincing iris shape, you’ll want to add cylinders around its circumference. Start by drawing two curved lines on either side of the iris, slightly overlapping them at the top and bottom. These lines should be about 1/3 to 1/2 the distance from the iris’s edge, depending on the desired level of detail.
The next step is to connect these curves with gentle, sweeping strokes, forming a smooth, rounded shape. Pay attention to the top and bottom edges, as they will greatly impact the overall appearance of the iris. Avoid making them too sharp or angular, as this can make the eye look unnatural.
Now that you have your iris cylinders in place, it’s time to accurately position the pupil within it. The pupil is typically located near the center of the iris and should be smaller than the iris itself. Use a small circle or oval shape to mark its location, making sure not to place it too close to the edges. By following these steps, you can achieve a more realistic and engaging eye shape in your sketches.
Refining Eye Details and Texture
Now that you’ve mastered the basic shape of the eye, it’s time to refine those delicate details and textures, adding depth and realism to your sketch. Focus on crafting subtle nuances in iris texture and eyelid folds.
Modeling the Eyelids and Orbital Bone
When modeling the eyelids and orbital bone, consider their unique textures. The upper eyelid is relatively smooth, while the lower eyelid has a more pronounced crease. To capture this difference, use gentle hatching strokes for the upper lid, progressing from light to dark as you move towards the lash line. For the lower lid, employ deeper, more deliberate cross-hatches to define the crease.
As you work on the orbital bone, think of it as a bony structure underlying the skin. Use shorter, more precise hatching strokes to suggest its contours and depth. Avoid applying too much pressure, which can result in an unnatural, puffy appearance. Instead, focus on creating subtle transitions between the bone and surrounding tissue.
To add dimension to these areas, vary your line weight and stroke direction. For example, use thicker lines for the orbital rim and thinner lines for the delicate folds of the eyelid skin. Experiment with different hatching patterns to capture the unique texture and curvature of each area. By paying attention to these details, you can create a more realistic and nuanced depiction of the eyes in your sketch.
Shading and Luminosity for Realism
When it comes to capturing realistic shading and luminosity in eye sketches, understanding light sources is crucial. Consider a subject with their eyes cast downward, as if gazing at something on the floor. In this scenario, the eyelids will naturally cast shadows under the eyes, creating an illusion of depth. The highlight on the cornea should be positioned near the center of the iris, but not directly in line with the light source.
To achieve a more nuanced look, analyze the direction and intensity of the light source. A gentle, indirect light will produce softer, more subtle shadows, while a harsher light will create deeper, more dramatic ones. You can also experiment with varying the angle of the light to simulate different times of day or environments. For instance, a side-lit subject may have shadows on one eyelid and highlights on the other. By studying how light interacts with the eye, you’ll be able to capture its subtle play of shadow and highlight, creating a more realistic and engaging sketch.
Common Eye Types and Variations
When it comes to sketching eyes, understanding the various eye types is crucial for creating realistic expressions. Let’s take a look at some common eye shapes and variations that will help you achieve more natural results in your drawings.
Sketching Different Eye Shapes and Sizes
To accurately capture an eye’s shape and size in a sketch, it’s essential to consider its overall type. For instance, almond eyes are characterized by their narrow outer corners and pointed tips. Round eyes, on the other hand, have curved and full lower eyelids. To draw these shapes, start by defining the outer corner of the eye with a gentle curve or a soft point.
Next, consider the size of the eyes in relation to each other and the surrounding facial features. Wide-set eyes are farther apart than close-set eyes, which are more crowded together. Pay attention to the space between the inner corners of the eyes; this distance should be roughly equal to one-third of the eye’s width for a natural look.
When sketching an eye with a prominent lid crease or folds in the eyelid skin, use short, gentle strokes to suggest these features. Remember that even small variations in eye shape and size can greatly impact the overall expression and character of your subject. Practice observing and drawing different types of eyes to become more confident in capturing their unique characteristics in your sketches.
Expressive Eyes: Capturing Emotion through Facial Expression
Expressive eyes are a crucial aspect of capturing emotion through facial expression. When sketching, consider how subtle hints of tiredness can be conveyed through droopy eyelids and furrowed brows. A slight sag to the mouth can also imply fatigue or disappointment.
For more dramatic expressions, examine the role of eyebrows in conveying passion or fear. Angled or arched eyebrows can give a sense of surprise or alarm, while furrowed or pinched brows may indicate concentration or anxiety.
Pay attention to how the eyes themselves are positioned on the face. A slight squinting or narrowing of the eyes can suggest annoyance or irritation, whereas wide-open eyes can convey innocence or alertness.
When capturing emotional intensity through facial expression, consider combining these subtle cues with more obvious indicators like open-mouthed shock or clenched fists. Practice observing and rendering different emotions in your sketches to develop a nuanced understanding of how they manifest in the face.
Practice and Tips for Mastery
Now that you’ve learned the basics of sketching eyes, it’s time to refine your skills with some practical tips and exercises to help you achieve a more realistic and masterful look. Practice these techniques regularly for even better results!
Exercises for Building Eye-Sketching Skills
To build eye-sketching skills, it’s essential to practice measuring proportions and understanding how eyes relate to the surrounding facial features. Start by sketching a face with a ruler to accurately measure the distance between the eyes (about 2-3 times the width of one eye), the nose-eye gap (typically 1/3 of the eye width), and the eyebrow arch (usually at an angle of about 30 degrees). This exercise helps you develop a keen sense of spatial awareness.
Next, practice sketching eyes from different angles. Draw eyes in profile (side view) to capture the curvature of the upper eyelid and the slope of the lower lid. Then, sketch the eyes straight-on, paying attention to the subtle differences between the two. Observe how the eyelashes, pupils, and irises interact with each other at various angles.
To add dynamic movement to your sketches, focus on capturing the subtleties of eye shape and expression. Practice drawing eyes in various emotional states – happy, sad, surprised, or tired. Pay attention to how the brow shape and eye spacing change with expression.
Common Mistakes and Troubleshooting
Proportion issues are a common mistake when sketching eyes. This can be due to incorrect placement of the iris, pupil, and surrounding features. For instance, placing the iris too close to the top or bottom edge of the eye socket can throw off the entire proportion of the face. To avoid this, pay attention to the guidelines you draw for each feature. Make sure they are in harmony with one another.
Inaccurate placement of the pupil is also a frequent error. The pupil should be centered within the iris and at the same level as the top edge of the eye socket. If it’s not, your entire drawing can look off-kilter. To identify this mistake, compare your sketch to reference images or study the proportions of eyes in real life.
Correcting proportion issues often requires revisiting earlier steps in your process. Don’t be afraid to erase and rework sections if necessary.
Conclusion and Inspiration
Now that you’ve mastered the basics of sketching eyes, let’s take a moment to recap what we’ve learned and explore how it can be applied to your own artistic journey.
Recap of Key Concepts
Recap of Key Concepts
To solidify understanding and retention, let’s review the essential steps outlined in this guide. You now know how to sketch eyes by breaking them down into individual components: the shape, proportions, and details. This includes identifying the overall eye shape as either round or almond-shaped, placing the pupil dead center within the iris, and creating subtle gradations for shading.
You’ve also learned about the importance of proportion in capturing a realistic representation of the eyes. This involves considering the width and height of each eye in relation to the face, as well as the distance between them. Additionally, you’ve seen how to add depth and dimension with basic shading techniques, including hatching and cross-hatching.
To take your skills further, remember that practice is key. Set aside time to sketch eyes from various reference images or even from life. Pay close attention to the subtleties in each eye, taking note of any unique characteristics you observe. With consistent practice and a focus on mastering these fundamental concepts, you’ll be well on your way to creating realistic and engaging portraits that draw the viewer’s attention.
Final Tips and Encouragement
Practicing eye sketching is a journey that yields significant rewards. Not only will you develop a keen understanding of facial anatomy, but you’ll also cultivate patience and persistence – essential qualities for any artist. Many artists who’ve mastered the skill attribute their success to consistent practice and dedication.
Take, for instance, the story of cartoonist Bill Watterson, creator of Calvin and Hobbes. He’s often cited as an example of an artist who achieved incredible success through his commitment to practicing and honing his craft. Watterson’s dedication to sketching eyes helped him create characters with distinctive, expressive features.
To get started on your own path to mastering eye sketching, schedule regular practice sessions into your routine. Set aside time each week to focus on the subtleties of eye anatomy, observing how different shapes and proportions can dramatically affect a character or subject’s appearance. Remember that every small improvement is a step closer to capturing those eyes just so – a skill that will serve you well in your artistic endeavors.
Frequently Asked Questions
How to choose the right size for my eye sketching exercises?
When choosing the right size for your eye sketching exercises, consider starting with smaller proportions on paper. This will help you develop accuracy and precision before moving on to larger sketches.
Can I use digital drawing tools instead of traditional media for eye sketching?
Yes. Digital drawing tools can be a great alternative or supplement to traditional media for eye sketching. Many artists find that using software like Adobe Draw or Procreate helps them achieve more precise lines and details, but may lack the expressive quality of traditional media.
How do I handle challenging facial expressions when trying to capture emotion through eyes?
When capturing emotional expression through eyes, remember that subtle hints can be just as effective as dramatic displays. Study the way facial muscles move and interact with each other to create a range of emotions in your sketches.
What’s the best approach for sketching eyes from different angles or perspectives?
Sketching eyes from different angles or perspectives requires practice and attention to proportion. Use reference images or real-life observation to help you accurately capture the eye shape, size, and placement on the face from various viewpoints.
Can I create realistic shading and luminosity effects with basic drawing skills?
Yes. Basic drawing skills can be developed into techniques for achieving realistic shading and luminosity in your sketches. Focus on understanding light sources and their impact on facial features, as well as experimenting with different hatching and cross-hatching methods to achieve depth and dimension.