
Baking perfect bread from scratch can be intimidating, but with the right guidance, you’ll be whipping up delicious loaves in no time. Making bread is not just about following a recipe; it’s an art that requires patience and understanding of the process. To create the perfect loaf, you need to master techniques such as mixing, kneading, proofing, and baking. This comprehensive guide will walk you through each step, covering even the smallest details, from selecting the right ingredients to achieving that perfectly golden crust.
As we explore the world of bread-making, you’ll learn how to combine flour, yeast, water, salt, and other essential ingredients in just the right way to produce a dough that’s both tender and robust. You’ll discover the secrets behind kneading and proofing, which are crucial for developing gluten and creating air pockets within your bread. By following our step-by-step instructions and mastering these techniques, you’ll be able to make perfect bread from scratch every time.
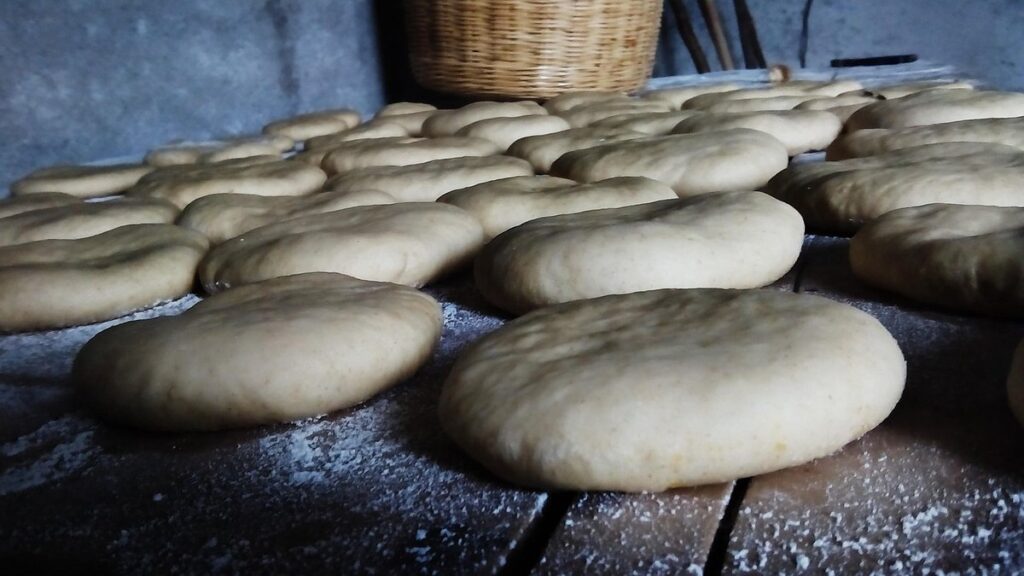
Understanding the Basics of Bread Making
Bread making basics are essential for creating a variety of delicious breads, so let’s start by understanding the fundamental ingredients and techniques required to get you baking.
Choosing the Right Ingredients
When it comes to making bread from scratch, selecting high-quality ingredients is crucial. The type of flour you choose can significantly impact the final product’s texture and flavor. All-purpose flour is a popular choice for beginners, but it lacks depth and complexity compared to other types. Bread flour, on the other hand, contains more protein, which results in a chewier crumb and better rise.
Yeast is another vital component that can affect the bread’s quality. Active dry yeast and instant yeast have different characteristics: active dry yeast requires rehydration before use, while instant yeast can be added directly to the dough. Salt enhances flavor and controls yeast growth, but excessive amounts can lead to a tough, dense crumb.
Water quality also plays a significant role in bread making. Tap water may contain impurities that inhibit yeast activity or affect dough development. Using filtered or bottled water ensures consistency and optimal results. Sugar is not essential for bread making but can promote fermentation and improve flavor. When choosing ingredients, consider the type of bread you want to create: artisanal breads often require specialty flours and precise ingredient ratios, while everyday breads may be more forgiving.
Understanding Yeast: Types and Activation Methods
When working with yeast, it’s essential to understand its two primary forms: active dry yeast and instant yeast. Active dry yeast needs to be rehydrated before using, whereas instant yeast can be mixed directly into the dough. The main difference between these two lies in their particle size – instant yeast is finer, making it more readily available for absorption by the flour.
To activate your yeast, you’ll typically need to proof it first. This involves mixing the yeast with warm water (around 100°F) and a small amount of sugar or honey. The mixture should start to foam and bubble within 5-10 minutes, indicating that the yeast is active and alive. For instant yeast, simply mix it into the dry ingredients in your recipe.
It’s worth noting that some recipes may call for rehydrating instant yeast instead, especially those using older or more sensitive yeast strains. In these cases, follow the same proofing process as with active dry yeast. If you’re unsure about which type of yeast to use or how to activate it, refer to your recipe instructions or consult a trusted bread-making resource.
Mixing and Kneading the Dough
Now it’s time to get hands-on and learn how to mix and knead your dough, a crucial step that will help develop your bread’s texture and structure. With practice, you’ll master this essential skill in no time!
The Art of Mixing
Mixing is a critical step in bread making, and it’s essential to get it right. When combining dry ingredients like flour, yeast, salt, and sugar with liquids such as water or milk, you want to aim for a smooth, consistent dough without developing the gluten too much. Overmixing can lead to a dense, tough crumb and an unpleasant texture.
To mix effectively, start by gently combining dry ingredients in a bowl. Use a wooden spoon or silicone spatula to incorporate liquids into the dry mixture, working from the center of the bowl outwards. Mix just until the dough comes together in a shaggy mass – don’t overdo it. Avoid using an electric mixer on high speed, as this can quickly develop the gluten.
For a small batch of bread, about 1-2 cups of flour, mix for around 30 seconds to 1 minute at most. You’ll know you’re done when the dough looks sticky and shaggy but still holds its shape. Be mindful that the mixing process will continue during the kneading stage, so don’t worry if it’s not perfectly smooth at this point.
Developing the Gluten Network
As you continue to mix and knead the dough, it’s essential to develop the gluten network. This complex structure of proteins is responsible for bread’s chewy texture and ability to hold its shape. Hand-kneading allows for greater control over this process. To develop the gluten network through hand-kneading, focus on applying gentle to moderate pressure with your palms, working from the center outwards. Use a pushing-down motion, then fold the dough back onto itself, repeating this sequence several times.
Alternatively, using a stand mixer with a dough hook attachment can be more efficient, especially for larger batches of dough. The machine’s gentle but persistent action helps to break down the gluten strands and redistribute them evenly throughout the dough. To achieve optimal results, keep an eye on the dough’s consistency, stopping the machine periodically to check its progress.
Aim for a smooth, elastic texture that resists tearing when pulled apart. This indicates the development of a robust gluten network, essential for creating bread with excellent structure and texture. With practice, you’ll develop a sense of when the gluten is fully developed, allowing you to fine-tune your kneading technique for consistent results.
Shaping and Proofing the Dough
Now that your dough is rested, it’s time to give it its final shape before a longer proofing period. You’ll learn how to handle and form the dough perfectly in this next step.
Creating the Perfect Loaf Shape
To create a beautiful loaf shape, you must develop tension within the dough. This is achieved by gently stretching and folding the dough during shaping, which helps redistribute yeast evenly and creates an even proofing pattern. To do this effectively, work with a relaxed, smooth motion, rather than forcing or tugging at the dough. Think of it as kneading, but in reverse: instead of pushing down, you’re pulling up and outwards.
As you shape the dough, focus on creating a symmetrical form. Hold the dough gently but firmly, using your thumbs to support its underside. With your fingers, stretch and fold the dough, working from the center outwards. This will help create even tension and prevent sagging or uneven proofing.
The result of this process should be a smooth, taut surface with no visible signs of stress or strain. To check for even proofing, gently press the dough with your fingertips; if it springs back quickly, you’re on the right track. Remember that developing tension takes time and patience – don’t rush the shaping process, as this can lead to uneven proofing and a poor final texture.
Understanding Yeast Fermentation
Yeast fermentation is a crucial process that occurs during bread making. When yeast consumes sugars present in the dough, it converts them into carbon dioxide gas and ethanol as a byproduct. This reaction produces CO2 bubbles within the dough, which eventually lead to its rise. The rate of fermentation can be influenced by factors such as temperature, sugar content, and yeast strain.
A typical scenario for yeast fermentation involves allowing the dough to rest in a warm environment, around 75-80°F (24-27°C), after the initial mixing process. This temperature range encourages the yeast to multiply and produce CO2 at an optimal rate. Some bakers also use proofing boxes or a proofing cabinet to create a consistent environment for fermentation.
Monitoring the dough’s progress is essential during this stage, as over-proofing can cause the bread to collapse. A well-fermented dough will typically double in size within 1-2 hours, depending on the yeast activity and environmental conditions. When checking for doneness, gently press your finger into the dough; if it springs back quickly, it’s likely ready to shape and bake.
Baking and Cooling the Bread
Now that our dough has risen, it’s time to shape and bake our bread to perfection. In this next crucial step, we’ll cover how to achieve a golden crust and a soft interior.
Achieving the Perfect Crust
To achieve a crispy crust on your homemade bread, consider incorporating steam injection into your baking process. This involves creating a humid environment within the oven to promote water evaporation from the dough’s surface. You can accomplish this by placing a pan of water on the bottom shelf or using a steamer basket.
High-temperature baking is another effective technique for achieving a crunchy crust. Preheat your oven to 450°F (230°C) or higher, and bake the bread for a shorter time than usual. This rapid heat transfer will help create a Maillard reaction, responsible for browning and crisping the crust.
Some bread enthusiasts swear by Dutch ovens or ceramic pots with lids for producing an exceptionally crispy crust. These containers trap steam inside, allowing for an even cooking process and resulting in a beautifully caramelized exterior. Experimenting with these methods can help you find the perfect combination for achieving your desired crust texture.
Cooling and Storing Freshly Baked Bread
Transfer bread to a wire rack immediately after removing it from the oven. This allows air to circulate around the loaf and promotes even cooling. A clean tea towel can also be used, but ensure it’s not too tight, as this may cause the crust to steam instead of cool.
Bread is most susceptible to staleness during the first few hours after baking, when excess moisture is still present within the crumb. To preserve its texture and flavor, store cooled bread in a dry, well-ventilated area away from direct sunlight. A paper bag or breathable container is ideal for short-term storage – consider using a linen cloth or parchment paper to wrap individual loaves before placing them inside.
For longer-term preservation, keep bread at room temperature (about 68°F/20°C) until the next day. Wrap it tightly in plastic or aluminum foil to prevent drying out. If you won’t be consuming your bread within three days, consider storing it in the refrigerator to slow down staling. However, note that this will affect the texture and flavor; if you plan to toast or reheat your bread, refrigeration is still a good option.
When freezing, make sure the bread has cooled completely first to prevent moisture accumulation and subsequent freezer burn. Wrap each loaf individually before placing them in an airtight container or freezer bag.
Advanced Techniques for Artisanal Bread Making
Now that you’ve mastered the basics, it’s time to take your bread making skills to the next level by learning advanced techniques that will give your loaves a professional touch. We’ll explore the nuances of artisanal bread making.
Laminating and Folding Dough
To achieve a delicate balance of flaky layers and tender crumb, laminated dough requires precise handling during proofing. After the initial rise, gently deflate the dough to redistribute yeast and prevent over-proofing. Fold the dough into thirds like a letter, using a gentle pressing motion with your palms to coax the butter into thin layers.
Rotate the dough 90 degrees after each fold, ensuring even distribution of tension throughout the dough. Repeat this process three to four times during proofing, allowing for approximately 30 minutes between folds. This sequence of folds and turns helps create the characteristic layers of a well-laminated bread.
As you work with laminated dough, be mindful of temperature and handling to avoid developing the gluten too aggressively. Over-working can lead to an over-proofed dough that collapses during baking. Conversely, under-folding may result in a dense or soggy crumb. Keep an eye on your dough’s progress, adjusting fold frequency as needed based on its sensitivity and rise rate. With practice, you’ll develop a sense of the optimal folding rhythm for your specific recipe and environment.
Creating Sourdough Starters from Scratch
Creating a sourdough starter from scratch requires patience and attention to detail. Begin by mixing 50 grams of warm water with 50 grams of flour in a clean glass or ceramic container. Cover the mixture and let it rest at room temperature, ideally between 70°F to 75°F (21°C to 24°C), for 24 to 48 hours.
During this initial phase, the natural yeast and bacteria present on the flour will start to ferment, creating a slightly effervescent and frothy texture. This is normal and indicates the starter is coming to life. Once you notice these changes, it’s time to feed your starter with more flour and water. A good rule of thumb is to maintain a 1:1:1 ratio of flour:water:starter by weight.
For example, if you have 100 grams of active starter, add another 50 grams each of flour and warm water. Mix well and discard half of the starter before feeding it again in 24 hours. This process will continue to strengthen your sourdough starter, which can take anywhere from a few days to a week or more to mature, depending on environmental conditions.
Frequently Asked Questions
What if my bread doesn’t rise even after using active dry yeast?
Yes, it’s possible that the yeast has gone bad or has been contaminated. Check the expiration date on your yeast packet and ensure you’re storing it properly in an airtight container.
How do I know when to stop kneading the dough to avoid overdeveloping the gluten network?
Stop kneading when the dough becomes smooth, elastic, and develops a slightly shiny surface. This should take around 10-15 minutes with a stand mixer or longer by hand. The key is to feel for the right consistency rather than relying on time.
What if I want to make whole wheat bread but don’t have access to a stone oven; can I still achieve a crispy crust?
Yes, you can still get a crispy crust without a stone oven. Try baking your loaf in a regular home oven with steam injection (by pouring water into the bottom of the oven or using a pan on the bottom rack) and maintaining a high temperature for the first 10-15 minutes.
Can I use sourdough starter in place of commercial yeast, even if it’s my first time making bread?
It’s possible but not recommended for beginners. Sourdough starters require more maintenance than commercial yeast, and their behavior can be unpredictable. Start with commercial yeast to develop your skills before experimenting with sourdough.
What’s the best way to store leftover homemade bread to keep it fresh for a longer period?
Wrap cooled bread tightly in plastic wrap or aluminum foil and store it at room temperature for up to 3 days. For longer storage, freeze the bread by wrapping it tightly in plastic wrap or aluminum foil and place it in a freezer-safe bag.

