
Bread making is an art that requires patience, practice, and a willingness to experiment with different techniques. Whether you’re a seasoned baker or just starting out, crafting perfect loaves can be a rewarding experience that brings joy to your family and friends. However, achieving artisanal-quality results at home can seem daunting, especially for those without extensive baking experience. This guide will take you through the comprehensive bread making process, covering essential ingredients, expert techniques, and insider tips to help you improve your skills and perfect your loaves every time. From mixing and kneading to shaping and baking, we’ll walk you through each step of the way, so by the end of this article, you’ll be confident in your ability to create delicious homemade bread that rivals even the most skilled artisanal bakers.
Understanding the Basics
Bread making can seem intimidating, but it all starts with a solid foundation of basic techniques and ingredients that you need to master before moving on to more complex recipes.
This section covers the essential principles that will set you up for success in your bread-making journey.
What is Bread Making?
Bread making is an ancient craft that has been passed down through generations. At its core, bread making involves mixing, kneading, and baking a dough to create a delicious and nutritious staple food. The process requires a combination of skill, patience, and attention to detail.
The history of bread making dates back to ancient civilizations, where it was often made by hand using simple tools and techniques. In modern times, the art of bread making has evolved significantly, with advancements in ingredients, equipment, and technology. However, the fundamental principles remain the same: creating a harmonious balance between yeast fermentation, dough development, and baking.
Understanding the basics of bread making is essential for any aspiring baker. By grasping the intricacies of flour types, water content, salt, and yeast interactions, you can produce a wide range of bread styles, from crusty baguettes to hearty sourdoughs. Knowing the importance of temperature control, proofing times, and baking techniques will also help you achieve consistent results.
Ingredients and Equipment Needed
To begin bread making, you’ll need a few essential ingredients. The most critical component is flour – a good quality, all-purpose flour is a great starting point. However, as you experiment with different types of bread, you may want to try specialty flours like bread flour, whole wheat, or rye. Yeast is another crucial ingredient; active dry yeast or instant yeast are commonly used in bread making.
Salt and water are also necessary ingredients, but use them sparingly – too much salt can be overpowering, while excess water can lead to a dense loaf. When it comes to mixing vessels, you’ll need a large mixing bowl for combining ingredients and a separate bowl for proofing the dough. A digital scale is helpful for accurately measuring ingredients, especially when working with yeast.
For kneading the dough, you can use a stand mixer with a dough hook attachment or do it by hand using a wooden spoon or a pastry blender. A clean, lightly floured surface is also essential for shaping and proofing the dough.
Understanding Yeast: The Key to Raising Dough
Yeast is a microorganism responsible for fermentation in bread making. Its primary role is to convert sugars present in the dough into carbon dioxide gas, causing the dough to rise. There are three main types of yeast commonly used: active dry, instant, and sourdough.
Active dry yeast requires rehydration before adding it to the dough, typically by mixing it with warm water or a portion of the flour. Instant yeast, on the other hand, can be added directly to the dry ingredients without rehydrating first. Sourdough starter, a natural yeast culture created from wild yeast and bacteria, is often preferred for its unique flavor profile but requires more maintenance.
To work effectively with yeast, it’s essential to maintain optimal temperature and proofing conditions. Yeast thrives in temperatures between 75°F and 80°F (24°C to 27°C). Overmixing can damage the yeast cells, reducing fermentation efficiency. Conversely, under-proofing may result in dense or flat bread. A good rule of thumb is to allow at least an hour for initial proofing, depending on the recipe’s specific requirements and environmental conditions.
Mixing and Kneading Techniques
To achieve perfectly kneaded dough, you’ll need to mix and combine ingredients just right, without overworking the gluten. Let’s break down the essential mixing and kneading techniques for success in bread making.
The Science Behind Kneading
Kneading is a crucial step in bread making that helps develop gluten and creates a smooth dough texture. When flour is mixed with water, the starches break down into sugars, but the gluten proteins remain intact. Kneading works to align these protein strands, forming a network of elastic bonds. This process strengthens the dough’s structure and gives it shape.
To understand why kneading is essential, consider what happens when you don’t knead: overmixing can lead to a tough, dense crumb or an unpleasantly chewy texture. Undermixing, on the other hand, results in a weak, fragile dough that collapses easily.
A good knead should last around 10-15 minutes, depending on the recipe and your mixing method. It’s not just about pounding away at the dough; aim for a smooth, pliable consistency by working the ingredients together in a rhythmic motion. A well-kneaded dough will hold its shape when gently stretched, while an underdeveloped dough will tear or break apart.
Keep in mind that different flours require varying kneading times due to their unique protein content and moisture levels. For example, bread made with high-protein flour may need a longer knead than one using all-purpose flour.
Hand Mixing vs. Machine Mixing: Pros and Cons
When it comes to mixing and kneading dough, bakers often have a preference for either hand mixing or machine mixing. Each method has its benefits and drawbacks, which can significantly impact the final product’s texture and flavor.
Hand mixing is a more labor-intensive process that allows for greater control over the development of gluten in the dough. This approach is particularly well-suited for traditional bread recipes that require a tender crumb and a delicate crust. By working the dough with your hands, you can feel the dough come together and develop a smooth, elastic texture.
Machine mixing, on the other hand, is faster and more efficient but can lead to over-working of the dough if not monitored carefully. This method is often preferred for larger batches or commercial bread production. However, some bakers argue that machine mixing can result in a denser crumb due to the increased mechanical stress on the dough.
Ultimately, the choice between hand mixing and machine mixing comes down to personal preference and the specific recipe being used. A combination of both methods is also possible, where initial mixing is done by hand followed by machine kneading for a shorter period.
Tips for Achieving the Perfect Dough Texture
Achieving a smooth, elastic dough is crucial for producing high-quality bread. To accomplish this, it’s essential to balance ingredient ratios and employ proper kneading techniques. A good starting point is to ensure you’re using the right type of flour. Bread flours, such as all-purpose or bread flour, typically have a higher protein content than all-purpose flour used for baking cakes and pastries. This increased protein helps strengthen gluten development during mixing.
When it comes to mixing, resist overworking the dough at first. Overmixing can lead to a tough, dense crumb. Instead, focus on creating a shaggy mass that still holds its shape. At this stage, you’re developing the initial network of gluten strands. Next, transfer the dough to a lightly floured surface and knead for 5-10 minutes, or until it becomes smooth and elastic.
Be mindful of over-kneading as well; this can cause the dough to become too tight and lead to an unpleasant texture. As you work the dough, pay attention to its development: look for signs like a shiny appearance, a firm but springy feel, and a slight sheen on the surface. These indicators signal that your dough has reached the perfect balance of strength and elasticity.
Shaping and Proofing the Loaf
Now that you’ve shaped your dough into a beautiful form, it’s time to let it rest and rise, which will help it develop the perfect texture and crust. Next up is the proofing process.
Common Bread Shapes: Boules, Batards, and More
Boules, batards, and other shapes are formed during the shaping process. Boules, typically round in shape, require a gentle touch to prevent tearing the dough’s surface. Batards, on the other hand, are longer and more elliptical. To form a batard, you’ll need to use your fingers or a bench scraper to create length while keeping the ends slightly rounded.
Other shapes include baguettes, ciabatta, and ficelle. Baguettes are long and thin, with a distinct crust. They’re formed by folding and stretching the dough to achieve their characteristic shape. Ciabatta, known for its airy holes, is shaped by gently pulling the dough apart rather than stretching it.
To create these shapes effectively, remember that each type of bread has unique requirements. For example, baguettes require a more aggressive shaping process to develop their distinctive crust. In contrast, ciabatta needs a lighter touch to preserve its airy texture. Familiarize yourself with the specific characteristics and needs of each shape to achieve professional-looking results.
Tips for Even Baking and Proper Loaf Expansion
Temperature control is crucial for even baking and proper loaf expansion. To achieve optimal results, ensure your oven’s temperature is accurate by investing in an oven thermometer. This simple tool can make a significant difference in the quality of your bread.
Humidity management is also vital, as it affects yeast activity and dough relaxation. Maintain a consistent humidity level between 50-70% during proofing to promote even expansion. You can achieve this using a steam injection feature or by placing a pan of water at the oven’s bottom. For example, if you’re baking in a home oven, try adding a cup of water to the pan for the first 20 minutes of baking.
When setting up your oven, consider using a baking stone or steel to enhance heat transfer and promote even browning. Preheat your stone or steel along with the oven to ensure it’s hot when you place the loaf inside. This will help create a crispy crust and well-baked interior. Avoid overcrowding the oven, as this can lead to uneven baking and reduced expansion.
Understanding the Proofing Process: What to Expect
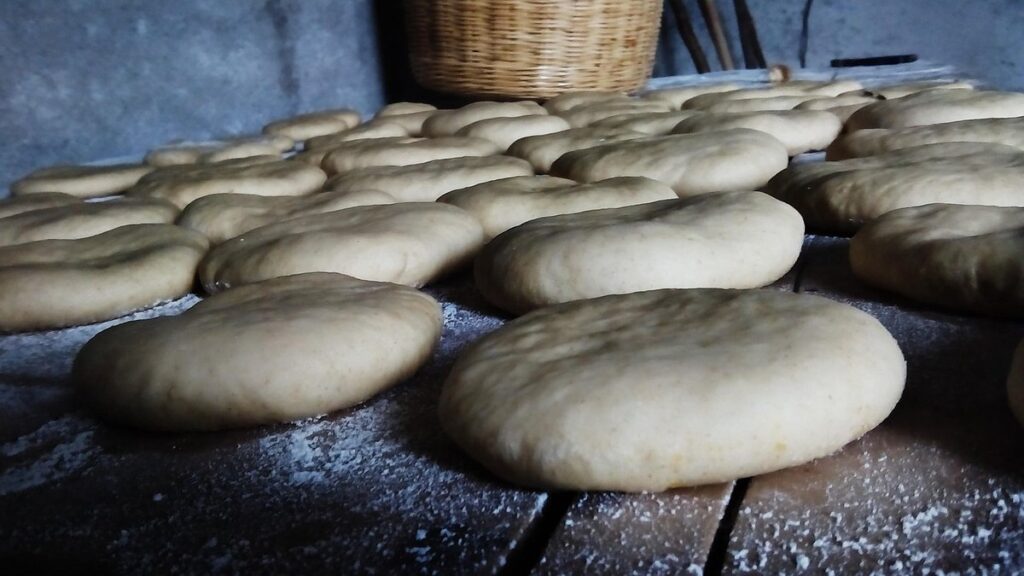
During proofing, yeast activity continues to break down sugars and produce carbon dioxide gas. This process causes the dough to expand, relax, and redistribute the starches. As a result, the dough becomes lighter, airier, and more pliable.
You can expect the dough’s texture to change significantly during this stage – it will feel less sticky and more tender. If you gently press your fingers into the dough, you should notice a slight indentation that springs back quickly.
The final rise is often the most impressive part of proofing. Depending on factors such as temperature, yeast strength, and dough development, the loaf can expand to nearly twice its original size. Some bakers prefer to let their loaves finish proofing in a cooler environment, around 65-70°F (18-21°C), which helps slow down the fermentation process.
Keep an eye on your dough’s progress during this stage – if it’s not rising as expected, there may be underlying issues with yeast activity or temperature control. Regularly checking the dough and making adjustments as needed will help you achieve a well-proofed loaf that’s ready for shaping.
Scoring and Baking Techniques
Mastering the perfect score and baking a crusty loaf is an art that requires patience, practice, and attention to detail. In this next part of our guide, we’ll share expert tips on achieving those elusive golden edges and crispy textures.
The Art of Scoring: Creating Crust Patterns
When scoring a loaf of bread, the art of creating patterns on the crust can elevate its appearance and texture. The key to achieving distinct patterns lies in the scoring technique itself, rather than the number or complexity of cuts. A simple lattice pattern, for instance, requires a straight-edged blade or razor held at a 45-degree angle to make parallel cuts just through the dough.
To create a more intricate design, use a combination of diagonal and perpendicular cuts. This will produce a network of intersecting lines that expand upon baking. Experiment with varying cut depths – scoring only lightly through the surface can result in a delicate, crispy crust, while deeper cuts yield a chewier texture. For a rustic look, apply gentle pressure with a blade to create rough, uneven scores.
Oven Temperatures and Times for Perfect Bread
A good bread depends heavily on precise oven temperatures and baking times. For artisan-style breads, a hot oven is essential for achieving a crispy crust and a well-baked interior. A temperature of around 500°F (260°C) with steam injection will produce a beautifully charred crust, but this method requires careful monitoring to avoid overcooking.
For more delicate breads like ciabatta or baguette, a moderate oven temperature of 425°F (220°C) is often preferred. This allows for even baking and helps prevent the bread from developing too much crust. As a general rule of thumb, you can bake these breads for 15-20 minutes per pound.
Keep in mind that different ovens have varying levels of heat retention and distribution. It’s essential to familiarize yourself with your oven’s quirks to ensure accurate baking times. For example, if you find that your oven runs hot, you may need to reduce the baking time by a few minutes. Similarly, if it runs cool, you’ll need to add more time.
To achieve perfectly baked bread, it’s crucial to monitor its progress closely during the final stages of baking. Check for golden-brown color and a crispy crust, and use a thermometer to ensure the interior has reached an internal temperature of at least 200°F (90°C).
Common Mistakes to Avoid When Scoring and Baking
Over-scoring can be particularly detrimental to a bread’s texture and appearance. Deep scores, especially those made with a sharp blade, can create pathways for air to escape during baking, leading to an uneven crust and potential collapse of the loaf. Conversely, under-scoring may not allow enough room for expansion, causing the dough to burst through the surface or crack open in irregular patterns.
Temperature control is equally crucial, as fluctuations between too hot and too cool can disrupt the delicate balance of yeast fermentation and starch gelatinization. A common mistake is to bake bread at a temperature that’s too high, resulting in an overcooked exterior and undercooked interior. This can be mitigated by using a thermometer to ensure accurate oven temperature and keeping an eye on the dough’s progress through the baking cycle.
Poor scoring techniques are often the result of inadequate practice or rushed execution. To avoid this, it’s essential to develop muscle memory when handling the blade or lame. Practice scoring different types of dough, paying attention to the pressure applied and the angle of the cut. Remember that a well-scored bread is not just visually appealing – it can also promote even baking and prevent over-cooking.
Advanced Techniques: Sourdough and Artisanal Methods
Take your bread making skills to the next level by mastering advanced techniques such as sourdough and artisanal methods, which require patience and practice to perfect. With these unique approaches, you’ll create truly exceptional loaves.
Creating Your Own Sourdough Starter
Creating a healthy sourdough starter from scratch requires patience and attention to detail. Start by mixing equal parts of warm water (around 90°F) and flour in a clean glass or ceramic container. Cover the mixture and let it rest in a warm, draft-free place for 24-48 hours. This initial mixture is called the “spontaneous starter” and will begin to bubble and emit a sour smell as wild yeast and bacteria start to colonize.
After 24-48 hours, discard half of the starter and add fresh flour and water to maintain a ratio of equal parts. Repeat this process every 24 hours for the next 5-7 days to strengthen the starter’s microbial activity. It’s essential to handle the starter gently and minimize exposure to air, as oxygen can inhibit the growth of desirable microorganisms.
During this time, monitor your starter’s progress by observing its texture, consistency, and activity level. A healthy sourdough starter should be bubbly, frothy, and nearly double in size within 4-6 hours after feeding. Once your starter is robust and active, you can use it to leaven bread, or share it with friends to start their own sourdough journey.
Understanding Artisanal Bread Making Techniques
Artisanal bread making techniques involve a range of advanced methods designed to coax complex flavors and textures from the dough. Autolyse, for instance, involves mixing flour and water before adding yeast, allowing the enzymes in the flour to break down the starches and create a more open crumb. This process can be repeated multiple times during the fermentation period, with each iteration contributing to a richer flavor profile.
Preferments, on the other hand, involve creating a separate mixture of flour, water, and sometimes yeast or wild yeast before adding it to the final dough. This introduces additional enzymes that further break down the flour’s starches and contribute to a more complex character. Long fermentation times are also characteristic of artisanal bread making, allowing for the development of an extensive network of gluten strands and a deeper flavor.
By incorporating these techniques into your baking routine, you can create breads with distinct, nuanced characteristics. To begin experimenting with autolyse, try mixing 10-20% more water than usual with your flour before adding yeast or other ingredients. Be prepared for longer proofing times, as the dough will require additional time to develop its signature flavor and texture.
Tips for Achieving the Perfect Crust and Crumb Texture
Achieving a perfectly baked crust and crumb texture is a matter of careful attention to ingredient ratios, proofing times, and baking temperatures. To start, ensure you’re using a strong enough flour blend that will provide structure without becoming too dense. A general rule of thumb is to use a higher-protein flour (12-14% protein) for artisan breads.
Pay close attention to the hydration level of your dough – typically, a 65-70% water-to-flour ratio will produce a crust with good chew and texture. Be cautious not to over-mix or over-proof the dough, as this can lead to an uneven crumb structure. Monitor your dough’s progress closely during proofing times, aiming for about 1-2 hours at room temperature (around 75°F/24°C) before shaping.
When it comes to baking temperatures, a preheated stone in the oven is essential – aim for a minimum of 450-500°F (232-260°C). The steam generated by a hot stone helps create that perfect golden-brown crust. To enhance the Maillard reaction and develop those characteristic browning patterns, try using a Dutch oven or a ceramic pot with a lid to trap moisture and heat.
Frequently Asked Questions
Can I Use Bread Flour for All Types of Bread?
Yes, bread flour can be used for various types of bread, but it’s essential to note that different breads require specific protein levels. For example, using bread flour for sourdough or artisanal breads may affect their texture and flavor.
How Do I Know If My Sourdough Starter is Healthy?
A healthy sourdough starter should have a tangy aroma, be bubbly and frothy, and double in size within 4-6 hours. If your starter is not showing these characteristics, it might be due to inadequate feeding or poor maintenance.
What’s the Best Way to Store My Bread After Baking?
To preserve freshness, store bread in an airtight container at room temperature for up to two days. For longer storage, consider freezing. Wrap the bread tightly in plastic wrap or aluminum foil and place it in a freezer-safe bag.
How Can I Adapt This Guide for Gluten-Free Bread Making?
When adapting this guide for gluten-free bread making, be aware that gluten-free flours behave differently due to their lower protein content and varying absorption rates. Experiment with different ratios of ingredients and adjust your mixing and proofing times accordingly.
What’s the Difference Between a Boule and a Batard?
A boule is a round, crusty loaf with a smooth surface, while a batard is an oblong-shaped loaf with a rougher texture and more pronounced ridges. The shaping techniques and scoring patterns differ between these two bread types to achieve their distinct characteristics.

