
Drawing realistic bushes and shrubs is one of the most challenging aspects of landscape drawing, but with practice and patience, you can master the techniques to create convincing foliage. The key to success lies in understanding how to break down complex forms into simple shapes and then build them back up again with subtle details. Lighting effects play a crucial role in creating depth and dimensionality, while atmospheric perspective helps to recede plants into the distance, creating a sense of space. In this step-by-step guide, we’ll take you from basic shapes to advanced techniques, covering everything from texture and volume to shading and atmosphere. By the end of this article, you’ll be able to draw bushes and shrubs with confidence, adding realistic foliage to your drawings and paintings.
Understanding Basic Shapes and Forms
To draw realistic bushes and shrubs, it’s essential to understand the basic shapes that make up their forms. Let’s start by breaking down these fundamental elements into spheres, cylinders, and cones.
Recognizing Plant Structures
When drawing bushes and shrubs, it’s essential to understand basic plant structures. Start by observing the overall shape of the plant, including its main stem and branches. The main stem is usually thicker than the branches and can be thought of as the “body” of the plant. Branches extend from the main stem and can be straight or curved, often with a slight taper towards the end.
Notice how the number and size of leaves change along the branch. Typically, more leaves are found closer to the base of the branch, while fewer are scattered further up. This is because branches often have a larger surface area near their base, where they attach to the main stem.
When drawing stems and branches, pay attention to proportions. A good rule of thumb is to make sure the main stem is at least 1-2 times thicker than any branch that extends from it. Measure your plant’s proportions by dividing its height into sections, with each section representing a different part of the plant’s structure.
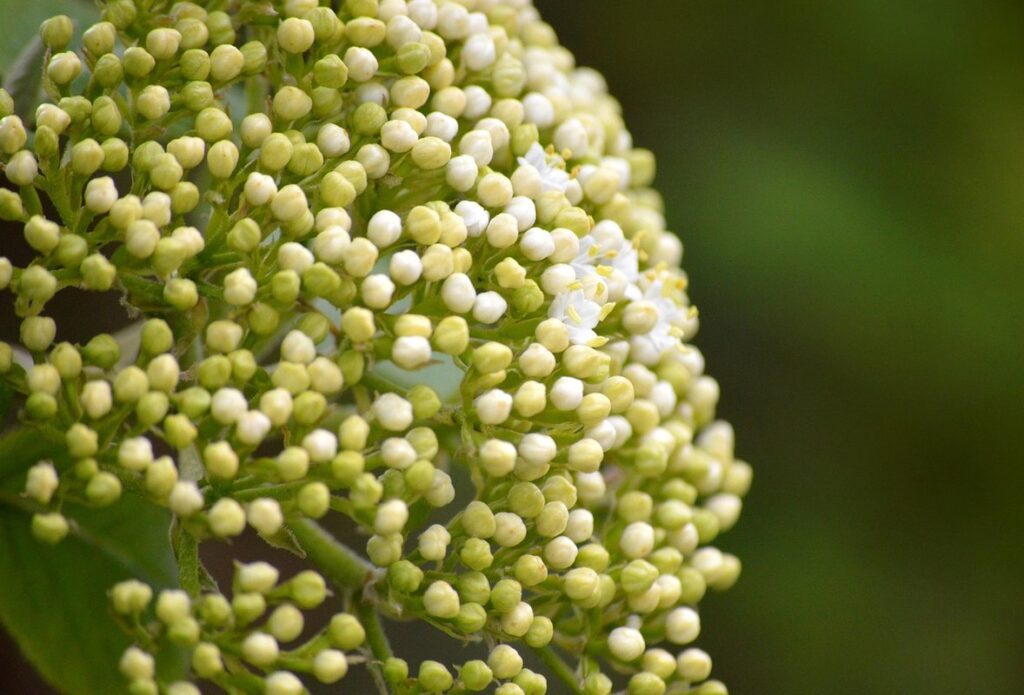
Creating Realistic Leaf Shapes
When drawing leaves, it’s essential to consider their shape, which can greatly impact the overall realism of your bush or shrub. Simple oval forms are a good starting point for many leaf types, but you’ll also find more complex shapes like lobed or divided leaves. To create these, break down the leaf into its individual components: the blade (the flat part), the petiole (the stem that attaches to the branch), and any distinctive features such as veins or edges.
Start by sketching a rough outline of your leaf’s shape, considering the overall proportions and symmetry. For oval leaves, pay attention to the curvature at the tips and the taper towards the base. To create lobed or divided leaves, use gentle curves to define the individual sections, allowing them to gradually merge back into the petiole.
Some common techniques for drawing realistic leaf shapes include using reference images, observing the shapes in real-life plants, or practicing different styles to develop your own unique approach. When working with complex shapes, consider breaking them down into simpler components and building up from there. This will help you achieve a more nuanced and lifelike representation of your leaves.
Basic Stem and Branch Drawing
When drawing bushes and shrubs, it’s essential to capture their natural, organic forms. To create realistic stems and branches, focus on smooth lines, curves, and gentle bends. Start by sketching the main stem as a gentle S-curve, allowing it to taper slightly towards the top. This will give your plant a sense of height and direction.
Next, add smaller branches that emerge from the main stem at regular intervals. Use short, curved strokes to suggest the growth pattern, making sure not to draw overly rigid or angular lines. The curves should be smooth and fluid, like the natural twists and turns of a branch.
As you refine your drawing, pay attention to the subtle variations in line weight and direction. Thicker lines can indicate thicker branches, while thinner lines suggest smaller twigs. Avoid drawing multiple lines that are too close together – instead, use gentle overlaps and subtle transitions between lines to create a sense of depth and dimensionality.
Mastering Texture and Detail
Now that you’ve got a good grasp on basic shapes and forms, let’s add some depth to your bushes by mastering texture and detail through loose brushstrokes and subtle shading.
Adding Bark and Twigs
When adding bark and twigs to your bush or shrub drawing, it’s essential to vary line weights and textures to create a realistic look. Start by using thicker lines for tree trunks and branches, gradually decreasing the weight as you move towards smaller twigs. This will give your drawing a sense of depth and dimension.
Experiment with different line directions and patterns to capture the unique texture of each branch. For example, smooth branches like those found on beech trees can be rendered with long, flowing lines, while rougher branches like those on oak trees may require shorter, more jagged strokes.
To add twigs, use a fine-tip pen or pencil to create thin, branching lines that emerge from the main stem. Vary the length and thickness of these lines to suggest different twig sizes. You can also use short, curved lines to indicate leaf buds or other growth points.
Remember, the key to creating realistic bark and twigs is subtlety. Avoid over-rendering or using too many details, as this can make your drawing look busy or unnatural. Instead, aim for a delicate balance between texture and simplicity.
Simulating Leaf Veins and Patterns
When drawing leaves on bushes and shrubs, simulating leaf veins and patterns can add depth and interest to your artwork. Leaf veins are the visible lines that run along the surface of a leaf, carrying essential nutrients from the stem to the rest of the plant.
To draw realistic leaf veins, start by looking at photographs of real leaves under magnification. Observe how the veins branch out from the center of the leaf and how they thicken towards the edges. You can also study the patterns of veins on different types of leaves. Some leaves have parallel veins, while others have reticulated or net-like patterns.
In your drawing, use a fine-tip pen to draw the main veins first, following their natural curve. Then, add smaller veins and branches using short, gentle strokes. For more detailed work, use a small brush and a light touch to suggest the texture of leaf cells. Keep in mind that leaf veins can be quite thin, so it’s essential to observe the subtlety of their pattern when drawing.
Consider the type of plant you’re drawing – some have prominent veins, while others are almost veinless. Pay attention to the overall shape and size of the leaves, as well as their arrangement on the stem. This will help you achieve a more realistic representation of leaf veins in your artwork.
Creating Realistic Petioles and Stems
To create realistic petioles and stems, pay attention to their thickness, tapering, and attachment points. Petioles should be thicker near the stem and gradually thin out as they approach the leaf blade. Observe how leaves are attached to stems – some have a clear joint or node, while others appear to grow directly from the stem.
When drawing petioles, use a gentle curve to convey flexibility and a natural growth pattern. Avoid making them too uniform or rigid, as this can make the plant look unnatural. Consider the size of the leaf in relation to its petiole – smaller leaves may have shorter, more delicate stems, while larger leaves require longer, thicker connections.
To add depth and realism to your stems, draw subtle ridges or striations along their length. These can be achieved with short, gentle lines that follow the natural curvature of the stem. For deciduous plants, show how petioles often persist after the leaf has fallen, forming a bare branch or twig. This attention to detail will help bring your bushes and shrubs to life and create a more immersive drawing experience.
Drawing Various Bush and Shrub Types
Let’s move on to drawing various bush types, including coniferous, evergreen, and deciduous bushes that add depth and texture to your artwork.
Coniferous Trees
When drawing coniferous trees, you’ll focus on their evergreen foliage and distinctive shapes. These plants are characterized by needle-like leaves, often in clusters or sprigs, which can be stiff and upright or soft and drooping. Pine, spruce, and fir are common examples of coniferous trees.
To draw the foliage, start by sketching the main branches with a gentle curve. Then, add smaller twigs and needles, varying their length and angle to create depth and texture. For pine trees, you can use short, stiff needles that grow in clusters, while spruce often have longer, more slender needles that branch off from the twig.
When drawing coniferous tree trunks and branches, consider their bark texture. Pine and fir tend to have thick, scaly bark, while spruce has smooth, reddish-brown bark. You can also add some visual interest by including seed cones or other foliage features unique to each species.
In terms of overall shape, coniferous trees often have a more symmetrical, columnar form than deciduous shrubs and small trees. This makes them easier to draw in a landscape setting, where they can provide a striking backdrop for other elements. By paying attention to these distinctive characteristics, you can create convincing drawings of coniferous trees that add depth and realism to your artwork.
Deciduous Shrubs and Small Trees
Deciduous shrubs and small trees offer a wide range of possibilities for drawing, from the sprawling willows to the stately oaks. To begin, consider the types of leaves these plants produce. Oaks, for example, have lobed or deeply toothed leaves, while maples have palmate leaves with pointed tips. Willows, on the other hand, tend to have long and slender leaves that often grow in clusters.
When drawing branch structures, look at how deciduous shrubs and small trees typically branch out from their trunks. Oaks and maples tend to have a more horizontal branching pattern, while willows often have a more vertical or weeping growth habit. Consider the way these branches intersect with one another, creating a complex network of stems.
In terms of growth patterns, deciduous shrubs and small trees can be either spreading or upright in nature. Oaks and maples are often more compact and rounded, while willows can grow quite large and sprawling. Pay attention to how these plants interact with their surroundings – for example, how they might lean over a body of water or wrap themselves around a nearby structure.
Consider sketching the shapes and textures of different deciduous shrubs and small trees in your practice drawings.
Succulent Plants
When drawing succulent plants, pay attention to their distinctive shapes, which often resemble clusters of plump, water-storing leaves. Notice how these leaves are typically arranged in a rosette pattern or stacked on top of one another, creating a compact and rounded silhouette. The stems of succulents tend to be short and stout, providing support for the dense cluster of leaves.
To capture the texture of succulent leaves, focus on their waxy coating and subtle ridges. Use short, curved strokes with a range of line weights to suggest the leaf’s surface. You can also experiment with hatching techniques to convey the impression of fine hairs or delicate filaments that help succulents conserve water.
In dry environments, succulents have adapted to store water in their leaves, stems, or roots. This adaptation often results in a thickened skin or waxy coating on the surface of leaves and stems. When drawing succulent plants, take note of these distinctive features and incorporate them into your rendering. Consider adding subtle shading to suggest the internal structure of the plant’s water-storing organs.
To draw succulent plants effectively, observe their characteristic shapes and textures closely. Practice rendering rosettes, clusters, and compact silhouettes in various sizes and orientations.
Advanced Techniques for Realism
To create truly realistic bushes and shrubs, you’ll need to learn some advanced techniques that will help you capture intricate details and textures. We’ll explore these techniques in this section.
Capturing Lighting Effects
When capturing lighting effects on bushes and shrubs, it’s essential to consider the unique challenges of these types of plants. Unlike larger trees, which can create deep shadows, bushes and shrubs tend to have more diffuse light penetration. This means that subtle variations in texture and form can greatly affect how light interacts with the plant.
Start by examining the overall shape and structure of the bush or shrub. Notice where the main stems and branches intersect with each other and with the leaves. These areas will often create deeper shadows, while the spaces between the foliage will be brighter. To capture this, use a range of shading values to suggest depth and dimension.
Pay attention to how light interacts with individual leaves as well. Highlighted edges can create a sense of freshness and vitality, while subtle gradations in shade can add depth and interest. Consider using gentle, sweeping strokes to suggest the softness of leaf surfaces, and avoid over-shading areas where light would naturally fall.
When working on reflections, remember that small plants often reflect their surroundings more intensely than larger ones. This means that a bush growing near a bright wall or window will likely display a strong reflected glow. Use this to your advantage by adding subtle highlights and warm tones to suggest the plant’s interaction with its environment.
Creating Depth and Dimension
When drawing bushes and shrubs, creating a sense of depth and dimension can be achieved through strategic placement and layering of branches, foliage, and other elements. Start by identifying areas where branches overlap or intersect with each other. These points of contact create visual interest and help guide the viewer’s eye through the composition.
Use overlapping leaves and foliage to block or obscure certain areas of your drawing, simulating the way real-world plants grow in three dimensions. You can also use contrasting values (light and dark) to create a sense of depth, with deeper shadows indicating areas that are farther back in the scene.
Consider placing larger branches or stems towards the front or middle of the composition, while smaller twigs and leaves recede into the background. This creates a natural hierarchy and helps direct the viewer’s attention through the drawing. By carefully balancing these elements, you can create a richly textured and engaging representation of your bush or shrub.
Adding Atmospheric Perspective
Atmospheric perspective is a crucial technique for creating depth and visual interest in your drawings of bushes and shrubs. By subtly fading objects into the background, you can create a more realistic and engaging scene. This effect is achieved by gradually reducing the contrast between objects as they recede into the distance.
To apply atmospheric perspective to your bush or shrub drawing, consider the following: first, use softer lines and gentle shapes for foliage in the background, allowing it to blend seamlessly with the surrounding environment. Second, reduce the level of detail on branches and leaves as they fade into the distance. For example, a small cluster of twigs in the foreground might be rendered with intricate detail, while the same type of twigs in the background could be simplified to mere wisps.
Third, take color into account: warm colors like orange and red tend to advance, while cool colors like blue and green recede. Apply this principle by using warmer tones for foliage in the foreground and cooler tones for plants in the background. By applying these simple yet effective techniques, you can create a more convincing and immersive drawing that invites the viewer’s eye to explore its depths.
Frequently Asked Questions
Can I use this guide to draw trees and larger plants?
Yes, the techniques described in this guide can be applied to drawing trees and larger plants. However, keep in mind that larger plants require more attention to proportion, scale, and texture. Be sure to adjust your drawings accordingly to achieve a realistic representation.
How do I know when to use smooth lines or varying line weights for stem and branch drawing?
Smooth lines are suitable for delicate branches and stems, while varying line weights can create a more textured look for thicker branches and trunks. Practice observing the natural world and experimenting with different techniques to find what works best for your drawings.
Can I combine different textures and details from various plant types in my drawings?
Yes, you can mix and match textures and details from different plants to create unique and realistic representations. For example, combining the bark texture of a deciduous tree with the leaf patterns of a succulent plant can add depth and interest to your drawing.
What if I’m struggling to capture realistic lighting effects on my bushes and shrubs?
Start by observing the natural light on real-world plants. Pay attention to how shadows fall and highlights reflect off different textures. Practice capturing these effects in your drawings using various techniques, such as layering or blending, to achieve a more realistic look.
How do I know when to add atmospheric perspective to my drawing of bushes and shrubs?
Atmospheric perspective is most effective when used subtly. Start by adding depth cues like overlapping branches or foliage, then gradually fade objects into the background using soft lines or gentle gradations of color. This will create a more engaging and realistic drawing.

