
Drawing a blue jay bird can be a fun and rewarding experience, but for many artists, getting started can feel overwhelming. One of the most striking aspects of this beautiful bird is its vibrant blue plumage, which can be tricky to capture accurately on paper. You might be an artist looking to hone your skills or simply someone who appreciates nature’s beauty and wants to learn more about drawing animals. In either case, learning how to draw a blue jay bird requires attention to detail and a good understanding of its anatomy. This comprehensive guide will walk you through the process, covering essential materials like pencils and paper, as well as the intricate details that make this bird so unique. By the end of this article, you’ll be able to accurately represent a blue jay bird in your artwork, from its bold crest to its striking feathers.
Understanding the Basics of Drawing a Blue Jay
To get started drawing a blue jay, it helps to understand the basic shape and proportions of this stunning bird. Let’s begin by breaking down its distinctive features into simple forms.
Introduction to Blue Jay Anatomy
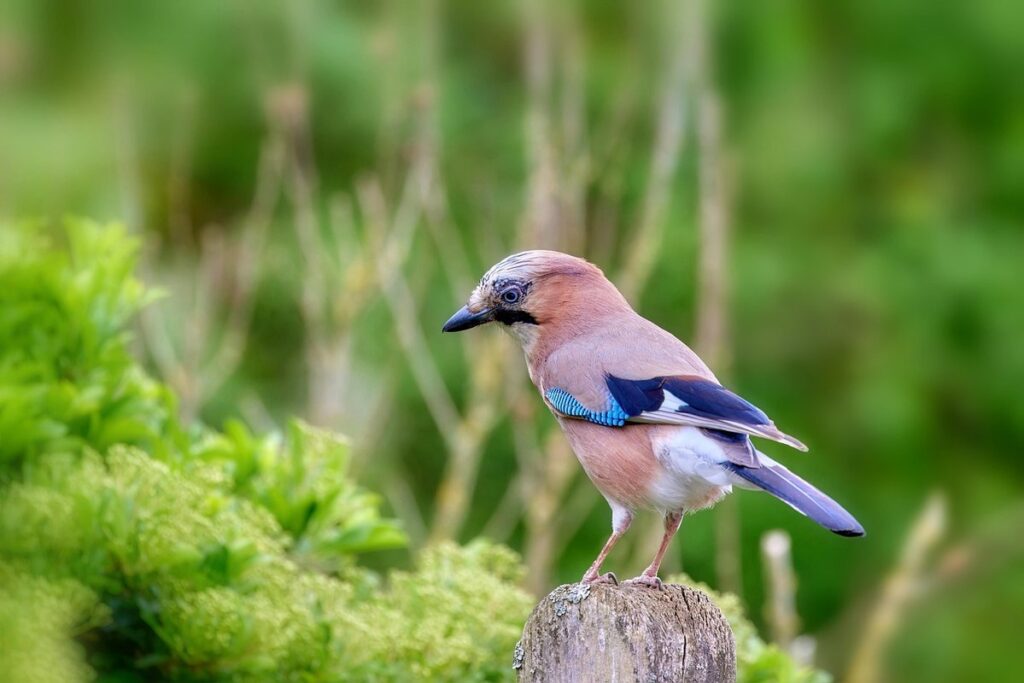
A blue jay’s anatomy is characterized by its vibrant plumage, distinctive crest, and bold facial markings. The bird’s body is roughly the shape of a stout oval, with a slightly flattened top and a rounded belly. One of the most recognizable features of a blue jay is its crest, which can be raised or lowered depending on the bird’s mood.
Understanding the basic anatomy of a blue jay is essential when drawing the bird, as it provides a solid foundation for accurately depicting its proportions and features. The position and shape of the head, neck, body, wings, and tail all contribute to the overall appearance of the bird. When studying a blue jay’s anatomy, pay attention to the way its feathers are arranged and how they interact with one another.
The blue jay’s distinctive facial markings, including its black necklace and white cheek patches, add visual interest to its head and face. The beak is strong and hooked, perfect for cracking open nuts and seeds. By understanding these basic anatomical features, you’ll be well-equipped to capture the essence of a blue jay in your drawing, from its bold plumage to its striking facial markings.
Essential Materials Needed for Drawing
To begin drawing a blue jay, you’ll need some essential materials. Start with a pencil sharpener and a set of graphite pencils (HB, 2B, and 4B) for creating detailed drawings. Choose paper that suits your preferred medium: watercolor, charcoal, or regular printer paper. A sketchbook is also a good investment if you plan to draw frequently.
In addition to these basics, consider investing in an eraser, kneaded or white vinegar-based, to correct any mistakes without damaging the paper. A sharpener for colored pencils can be helpful if you decide to add color to your drawing. A blending stump and tortillon can aid in softening edges and creating subtle transitions between shades.
You may also find it useful to have a ruler for measuring proportions or sketching straight lines, although many artists prefer freehanding these elements. Other tools like stencils or tracing paper are optional but can provide an extra layer of precision when drawing intricate details like feathers or branches.
Sketching the Basic Shape and Proportions
Start by sketching the basic shape of your blue jay, focusing on its overall proportions to ensure a balanced drawing. A rough outline will help you build upon in the next steps.
Understanding Bird Proportions
When drawing a blue jay, it’s essential to get its proportions right. This means accurately depicting the bird’s length, width, and ratio of body parts. Measuring from the tip of the beak to the end of the tail, a blue jay typically stands around 10-12 inches (25-30 cm) tall.
To gauge your drawing’s proportions, start by dividing the bird’s height into sections. A good rule of thumb is to allocate about one-third for the head and neck, one-quarter for each wing, and half for the body and tail combined. This will give you a solid foundation for your drawing.
Keep in mind that blue jays are relatively compact birds with a stout build. Their wings are short but broad, which helps them maneuver through dense foliage. When sketching the body, focus on maintaining this balance between length and width. Pay attention to how the tail extends slightly beyond the end of the body – this adds visual interest and creates movement in your drawing.
By following these guidelines, you’ll be able to capture the blue jay’s distinctive proportions and create a more realistic representation of the bird in your artwork.
Sketching the Basic Shape of the Body
When sketching the basic shape of a blue jay’s body, start by envisioning a compact, robust form. The blue jay is slightly larger than other backyard birds, with a length typically ranging from 10 to 12 inches (25-30 cm). To capture its overall proportions, divide the body into segments: the head and neck make up about one-fifth of the total length, followed by the torso, which accounts for roughly two-fifths.
Notice how the blue jay’s body is generally rounded, with a slight taper towards the tail. This distinctive shape sets it apart from other birds like robins or sparrows. To convey this in your drawing, focus on gentle curves rather than sharp angles. Pay attention to the subtle indentation just behind the wings, which helps balance out the body.
Consider the blue jay’s posture: when perched, its tail is often held high, while its head and neck remain relatively level. When sketching the basic shape of the body, keep these postural characteristics in mind to capture a dynamic, lifelike pose.
Drawing the Head and Facial Features
Now that you’ve got a solid body shape, let’s focus on bringing your blue jay to life by drawing its head and facial features. This is where personality really starts to shine through!
Sketching the Face and Beak
When sketching the face and beak of a blue jay, start by paying attention to the overall shape and proportions. The eyes are relatively large and close together, giving the bird a distinctive facial expression. To capture this unique look, use gentle, curved lines for the eyelids and pupils, taking care not to make them too large or rounded.
The beak is short, strong, and slightly upturned at the tip. Its shape should be roughly triangular with a flat base and a narrow, pointed end. Pay attention to the beak’s size in relation to the rest of the head – it should appear relatively small compared to the bird’s overall features.
When drawing the blue jay’s face, consider its emotions and attitude. A blue jay is often depicted as bold and assertive, so try to convey this confidence through your sketching. Study reference images or observe a real-life blue jay to get a sense of its facial expression and beak shape. To add more detail, you can also include the nostrils at the base of the beak.
A key aspect to keep in mind is that the blue jay’s facial features should appear slightly asymmetrical – this adds to their unique charm and personality.
Adding Details to the Head
When adding details to the head of your blue jay drawing, focus on the feathers around the face and beak. Start by sketching short, curved lines to indicate the softness of the bird’s feathers. These lines should follow the contours of the face, with more pronounced curves over the eyes and cheek area.
Add a few short strokes to suggest the nostrils, making sure they’re positioned correctly on either side of the beak. The blue jay’s nostrils are relatively small, so keep your strokes light and delicate. You can also add some subtle texture to the beak itself by sketching short, parallel lines that follow its curve.
For a more detailed look, consider adding some individual feathers around the face. Start with the longest feathers on either side of the head, working from the front of the face back towards the neck. Use short, curved strokes to indicate the feather’s shape and direction. Remember to keep your strokes soft and gentle, as blue jay feathers are delicate and expressive.
Depicting Plumage and Feathers
Now that we’ve covered the basics of drawing a blue jay’s body, let’s focus on capturing its stunning plumage, including those vibrant feathers that make this bird so striking. Pay attention to texture and pattern as you bring them to life on paper.
Understanding Blue Jay Plumage Patterns
When drawing a blue jay’s plumage, it’s essential to capture its vibrant colors and distinctive patterns. The bright blue back is one of the bird’s most striking features, but it’s not just a uniform shade. Instead, look for a subtle gradation from darker blues on the wings and tail to lighter blues on the belly.
Notice how the white belly provides a striking contrast to the blue back, creating a visually appealing split in the bird’s midsection. This dichotomy is key to accurately depicting the jay’s plumage. When drawing the underside of the body, use soft, gentle strokes to suggest the feathers’ texture and pattern.
The distinctive crest on top of the head is another crucial aspect of the blue jay’s appearance. It’s made up of long, pointed feathers that can be angled or curved in various ways depending on the bird’s mood and posture. To draw this crest accurately, pay attention to its shape and texture, and consider using a slightly darker shade for added depth.
When combining these elements – the bright blue back, white belly, and distinctive crest – you’ll begin to capture the essence of the blue jay’s plumage.
Sketching Individual Feathers and Details
When drawing individual feathers on your blue jay, remember that they vary in length and texture. The longest feathers are usually around the neck and back, while shorter ones cover the wings and tail. Start by sketching a few central feathers first, using gentle, flowing strokes to capture their shape. Pay attention to the way these central feathers meet at the base of the neck, forming a subtle V-shape.
Next, add smaller feathers around the edges, gradually decreasing in length towards the tips. Use short, curved strokes for these outer feathers, allowing them to blend smoothly into the central ones. Don’t forget to include texture – blue jays have a distinctive sheen on their feathers, especially on the throat and breast areas. You can suggest this with gentle hatching or cross-hatching.
To capture the subtle ruffles on the neck and back, try using short, broken lines that follow the curve of each feather. Use reference images to get a sense of how these textures interact with one another – it’s all about creating a sense of depth and dimensionality in your drawing.
Adding Wings and Tail
Now that we’ve got our blue jay body in place, it’s time to add some flair with its iconic wings and tail feathers. Let’s start with those distinctive wing shapes.
Understanding Blue Jay Wing Structure
A blue jay’s wings are remarkable for their unique structure and flight capabilities. The primary wing feathers, which cover the majority of the wing surface, are stiff and strong due to their dense quill filaments. This allows them to maintain a rigid shape during flight. In contrast, the secondary wing feathers, located towards the tip of the wing, are softer and more flexible. They play a crucial role in maneuverability and steering.
When drawing blue jay wings, it’s essential to capture this distinction between primary and secondary feathers. Typically, the primary feathers should be depicted as longer and more rigid than the secondaries. Observe how the primary feathers angle slightly upwards towards the body, while the secondaries are angled more sharply downwards.
To accurately depict a blue jay’s wings in flight, consider the positioning of the wingtips. In level flight, the tips will usually point slightly rearwards, but during dives or sharp turns, they can be positioned much further back.
Sketching the Tail and Wings
When drawing the blue jay’s tail and wings, it’s essential to capture their dynamic movement and natural shape. Start by sketching the tail as a rounded triangle with a slightly tapered end, making sure it’s roughly one-third of the body length. Pay attention to the tail’s position, as it should be set at an angle, usually pointing downwards.
The blue jay’s wings are shaped like a teardrop, with a curved upper edge and a straight lower edge. The primary flight feathers should be long and pointed, while the secondary feathers are shorter and more rounded. When drawing the wings, consider their natural position: when perched, the wings should be held close to the body, but slightly spread.
To capture movement in your drawing, you can suggest dynamic action by sketching the wings at different angles or adding subtle lines indicating the flow of air around them. This will help create a sense of energy and vitality in your blue jay illustration. Remember that the tail and wings should be proportional to each other – if the tail is too long, the wings may appear too short, disrupting the bird’s overall balance.
Final Touches and Shading
Now that you’ve got the basics down, let’s add some finishing touches to bring your blue jay to life with subtle shading and textures. This is where patience really pays off!
Adding Shading and Texture
When adding shading and texture to your blue jay drawing, start by studying the bird’s plumage patterns. Note how the feathers on its back are a deeper shade of blue compared to those on its belly. To capture this contrast, use a range of blues and grays to create depth. Begin with gentle, soft strokes to suggest the shape of each feather, gradually increasing pressure for more defined edges.
For the head and neck, pay attention to how the feathers lie flat against the skin, creating a subtle texture. Use short, hatching strokes to convey this effect, working from light to dark to build up layers of tone. Don’t forget to add some softness to the bird’s breast feathers – these are typically smooth and rounded.
When adding texture, focus on individual feathers rather than attempting to cover entire areas with a single stroke. This will help create a more nuanced, lifelike appearance. Experiment with varying line weights and textures to achieve different effects: for example, use fine lines for the bird’s face and coarser strokes for its back. By building up layers of shading and texture, you can bring your blue jay drawing to life.
Finalizing Your Drawing
When you’ve completed the main elements of your blue jay drawing, it’s time to finalize your work. Take a step back and evaluate your overall representation of the bird. Check for accuracy in proportion and shape, ensuring that your drawing still resembles its real-life counterpart.
Make any necessary adjustments to the shape or proportions of your drawing. This might involve tweaking the size and placement of individual features like the wings, tail, or beak. Consider referencing a photograph or real-life observation to ensure you’re capturing the bird’s characteristic traits.
Next, add any final details that bring your drawing to life. These could include subtle texture to the feathers, shading to suggest depth, or expressive lines to convey the bird’s movement or personality. Use reference images to study how light and shadow interact with the blue jay’s plumage, and replicate these effects in your drawing.
Finally, double-check that your drawing accurately represents the blue jay’s distinctive markings and colors. This might involve reviewing the patterns of blue and white feathers, or ensuring the beak is correctly colored and shaped. By paying attention to these final details, you’ll create a more nuanced and realistic representation of this beautiful bird.
Frequently Asked Questions
What if I get stuck on drawing the blue jay’s crest?
If you’re having trouble capturing the distinctive crest of a blue jay, try breaking it down into smaller components. Focus on sketching the individual feathers and their shapes before adding them together to form the crest. You can also reference images of real blue jays or practice drawing different types of bird crests to get a better understanding.
Can I use digital tools to draw a blue jay, or do I need traditional media?
Yes, you can definitely use digital tools like tablets or software to draw a blue jay. Digital art can be a great option if you’re new to drawing or prefer working on a computer. Just make sure to research and choose the right brushes and settings to mimic traditional media.
How do I add realistic texture to my blue jay’s feathers?
To add realistic texture, try using different pencil grades or even blending stumps to create subtle layering effects. You can also experiment with digital painting tools that allow you to add textures and patterns to your artwork. Remember to reference real-life photographs of blue jays for accurate reference.
What if I want to draw a blue jay in mid-flight, but I’m not sure how to depict its wings?
When drawing a blue jay in flight, focus on capturing the dynamic movement of its wings. Try using short, curved lines to suggest wing motion and feathers ruffling in the wind. You can also look at reference images of birds in flight or practice sketching different bird poses to get a better sense of wing anatomy.
Can I use colored pencils instead of paints for shading my blue jay?
Yes, you can definitely use colored pencils for shading your blue jay, especially if you’re looking for a more subtle and detailed approach. Choose high-quality colored pencils that allow for blending and layering effects to achieve realistic color transitions. Keep in mind that traditional painting media may provide more vibrant colors, but colored pencils can be a great option for those who prefer a more controlled environment.

