
As Christmas approaches, many of us find ourselves caught up in the chaos of commercialized holiday decor. But amidst the plastic and synthetic ornaments, there’s a way to create something truly special: handmade wooden Christmas decorations. Not only do these unique pieces bring a touch of warmth and personality to your home, but they also offer a chance to get creative and connect with nature. In this article, we’ll take you through the process of making your own handmade wooden decorations, from selecting the right materials to displaying them proudly. We’ll cover the essential techniques, such as carving and painting, and provide inspiration for incorporating natural elements into your designs. By the end of this guide, you’ll have the skills and confidence to create one-of-a-kind wooden Christmas decorations that will make your holiday season truly unforgettable.
Benefits of Handmade Wooden Christmas Decorations
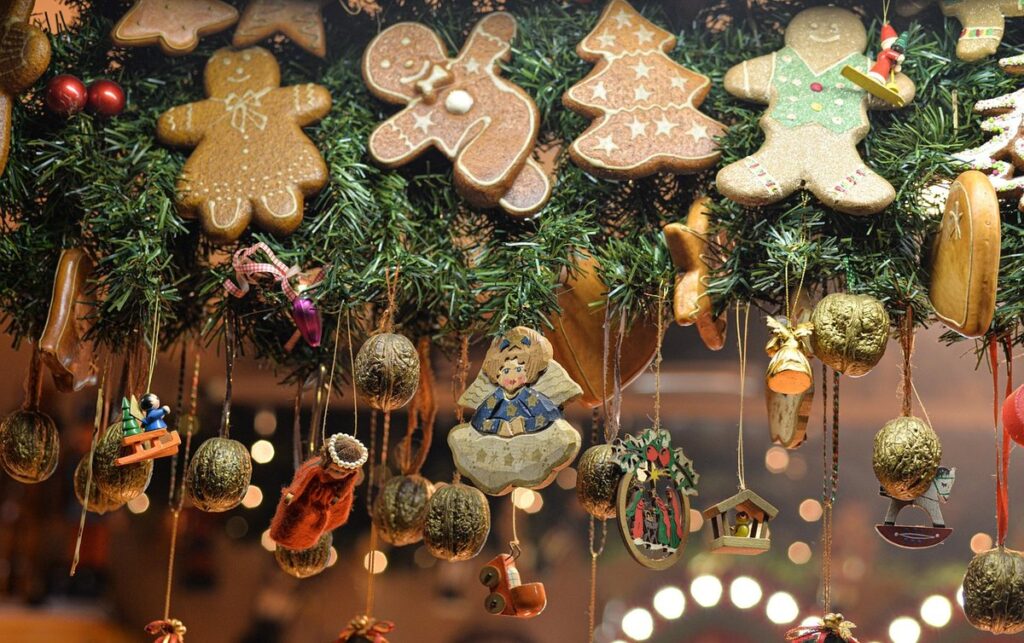
Handmade wooden decorations not only add a personal touch but also come with their own set of benefits, from being eco-friendly to making special gifts.
Why Choose Handmade Over Store-Bought
When you choose handmade wooden Christmas decorations over store-bought alternatives, you’re not just getting a unique piece of art – you’re also investing in quality and sustainability. Mass-produced decorations often sacrifice detail for efficiency, resulting in a generic look that lacks character. Handmade decorations, on the other hand, are crafted with precision and care, ensuring every aspect is meticulously considered.
One key advantage of handmade wooden decorations is their environmental impact. Most mass-produced items come wrapped in unnecessary packaging, contribute to carbon emissions during transportation, and may be made from unsustainable materials. In contrast, handmade decorations can often be made locally or from reclaimed wood, significantly reducing waste and the carbon footprint associated with their production.
Another significant benefit of handmade decorations lies in their customizability. You can choose your preferred type of wood, design style, and even add personalized details to make each piece truly one-of-a-kind. This level of control ensures that your decoration reflects your unique taste and aesthetic, making it a true conversation starter during the holiday season.
Customization Options for a Personal Touch
One of the greatest advantages of handmade wooden Christmas decorations is their ability to be tailored to fit individual tastes and styles. You can choose from a variety of wood types, each with its unique grain pattern and color, to match your home’s decor. For example, opt for richly textured cedar or rustic pine for a cozy cabin feel.
To further customize your decoration, consider the shape and size. A small wooden ornament can be made into a delicate snowflake or a sprig of holly, while a larger piece can become a stunning Christmas tree or a decorative wreath. You can also experiment with different joinery methods to create unique textures and patterns.
Incorporating personal elements is another way to make your handmade decoration truly special. Add a small family photo, a special message, or a meaningful object to give the piece emotional significance. Alternatively, choose a design that reflects your favorite holiday traditions or cultural heritage.
Materials and Tools Needed
To create beautiful handmade wooden Christmas decorations, you’ll need a few essential materials and tools that we’ll cover next to get started. Here’s what you’ll be working with.
Types of Wood Suitable for Christmas Decorations
When it comes to crafting handmade wooden Christmas decorations, choosing the right type of wood is crucial for achieving the desired look and durability. Some popular options include cedar, pine, and fir, which are all softwoods with a natural resistance to rot and insects. Cedar, in particular, has a distinctive aroma and a rich, reddish-brown color that adds warmth to any room.
Maple and cherry are also excellent choices for wooden Christmas decorations, as they have a smooth grain and can be stained or painted to create a variety of colors and effects. Walnut is another option, with its dark, rich tone adding depth and sophistication to any design. When selecting wood, consider the color, texture, and durability you want to achieve in your project.
For example, if you’re creating a wooden wreath or garland, a softwood like pine or fir might be a good choice due to their lightweight and flexibility. On the other hand, if you’re crafting a more substantial decoration like a wooden ornament or figurine, a hardwood like maple or cherry may be more suitable.
Essential Hand Tools for Woodworking Projects
When working on handmade wooden Christmas decorations, you’ll need a set of basic hand tools to get started. A woodworker’s kit typically includes chisels for removing small amounts of wood and shaping edges. These come in various sizes, so it’s essential to have a selection that covers the range from 1/4 inch to 2 inches wide.
Sandpaper is another crucial tool for smoothing out rough surfaces and preparing wood for staining or painting. Choose fine-grit sandpaper (220-240) for detailed work and coarser grits (80-120) for more aggressive sanding. Clamps are used to hold pieces together while gluing, ensuring tight joints and preventing warping.
You’ll also need a tape measure for accurate cutting and marking, a square for ensuring 90-degree angles, and a mallet for tapping pieces into place without damaging the wood. Don’t forget a set of hand saws – a backsaw for making precise crosscuts and a tenon saw for cutting mortises and tenons. These fundamental tools will help you create sturdy and visually appealing wooden decorations that reflect your personal style.
Basic Techniques for Working with Wood
To get started on creating your unique handmade wooden Christmas decorations, you’ll first need to learn some essential techniques for working with wood. Understanding basic cutting and shaping methods will help you bring your designs to life.
Measuring and Cutting Wooden Pieces Accurately
When measuring and cutting wooden pieces for your handmade Christmas decorations, accuracy is crucial. To ensure precise results, start by calibrating your measuring tools regularly to prevent drift or wear. A digital tape measure is a good investment, as it’s easy to read and reduces the chance of human error.
Use a combination square or try square to verify that your cuts are square and true. If you’re working with a large piece of wood, break it down into manageable sections using a miter saw or circular saw. Always cut in a well-lit area, and consider investing in a dust collection system to minimize mess and improve visibility.
For intricate designs or curved shapes, consider using a jigsaw or coping saw. When cutting small pieces or precise joints, use a handheld router or chisel. To prevent waste and optimize material usage, plan your cuts carefully and make the most of each piece. For example, you can cut multiple pieces at once from a single board to minimize excess scrap wood.
Keep your workspace organized and clutter-free to avoid mistakes caused by misplaced tools or misplaced measurements.
Assembling Decorations Using Various Joinery Methods
When assembling handmade wooden decorations, you’ll need a solid understanding of various joinery methods. One popular and sturdy option is the mortise and tenon joint. This involves cutting a recessed area (mortise) in one piece and a corresponding tongue (tenon) on another, which fits snugly into place.
Another effective method is the dovetail joint, often used for drawers or cabinets. However, it can also be applied to decorative boxes or ornaments. To create a dovetail joint, you’ll need to cut interlocking tails on one piece and matching pins on the other. This requires precision and patience but yields a beautiful, lasting bond.
Other essential joinery techniques include dado joints (for shelves or compartments) and doweled joints (for added strength). Keep in mind that the type of wood you’re working with may affect your choice of joint. For instance, hardwoods like maple or oak hold screws well, while softwoods like pine or fir might require more careful consideration.
When selecting a joinery method for your handmade wooden decorations, consider the specific design and intended use. Choose a joint that not only provides structural integrity but also complements the overall aesthetic.
Advanced Techniques for Unique Designs
As you refine your handmade wooden Christmas decoration skills, it’s time to push the boundaries of creativity with techniques that add a personal touch and unique flair to your designs.
Carving Intricate Details into Wooden Decorations
When carving intricate details into wooden decorations, precision and patience are key. Start by selecting a sharp gouge or V-tool, depending on the design’s complexity and the type of wood being used. For smooth finishes, work with the grain whenever possible to avoid tear-out and uneven surfaces.
To achieve fine details, use small, gentle strokes, gradually increasing pressure as needed. Hold your tool at a 20-30 degree angle, taking care not to apply too much pressure, which can cause the wood to split or become damaged.
For more intricate designs, consider using a combination of carving tools and hand-carving techniques, such as stippling or texture scraping. These methods allow for fine control over detail and add depth to the design. If you’re new to carving, start with simpler projects and gradually work your way up in complexity.
To maintain a smooth finish throughout your project, regularly clean your tools with a soft cloth and apply a small amount of oil or wax to prevent drying out the wood. This will help prevent scratches and uneven surfaces from developing over time.
Painting and Staining Wood for a Distressed Look
When working with wood to create handmade decorations, adding a distressed look can elevate the uniqueness of your design. To achieve this effect, you’ll need to experiment with painting and staining techniques. Start by choosing a high-quality primer specifically designed for wood surfaces. This will help create an even base for your finish.
For a more rustic appearance, use a mixture of paint and medium to achieve a textured look. Apply the mixture in a thin layer, allowing it to dry completely before adding additional coats. Alternatively, try using a stain with a built-in glaze effect. This will give your wood a beautifully worn appearance without requiring multiple layers.
Consider the type of finish you’re aiming for – whether it’s a weathered, aged look or a more subtle, distressed sheen. Experiment with different paint and stain combinations to achieve the desired effect. Remember that patience is key when working with finishes; don’t rush the process, as this can lead to uneven results.
To take your project to the next level, pay attention to how the light catches the wood’s imperfections. This will help you decide whether additional distressing is needed or if the finish should be left as is.
Safety Precautions and Tips
When working with power tools and wood, it’s essential to take certain precautions to ensure your safety while creating unique handmade wooden Christmas decorations. Let’s review some crucial safety tips to keep in mind.
Essential Safety Equipment for Woodworking Projects
Protective eyewear and dust masks are two crucial pieces of safety equipment you’ll need for woodworking projects. When working with power tools, debris can fly into your eyes at high speeds, causing serious injury or even blindness. A good pair of safety glasses should have lenses made from impact-resistant materials like polycarbonate or Trivex, which can withstand minor collisions without shattering.
Dust masks are essential for preventing respiratory issues caused by inhaling wood dust and other particles. Look for a mask with a high filtration efficiency rating (e.g., N95) to ensure it captures at least 95% of airborne contaminants. When choosing a dust mask, consider the type of woodworking you’ll be doing most often – if you work primarily with power tools, a mask with a respirator may be necessary.
Other essential safety equipment includes ear protection (earplugs or earmuffs), a first-aid kit, and a fire extinguisher in case of emergencies. It’s also vital to keep your workspace well-lit and clear of clutter to avoid tripping hazards. By investing in these basic safety tools, you can minimize risks associated with woodworking and create beautiful handmade wooden decorations for the holiday season without compromising your health or safety.
Best Practices for Avoiding Common Mistakes
When measuring and cutting wooden pieces for your handmade decorations, it’s essential to double-check your measurements and markings. A small error can result in a misaligned piece or an uneven cut. To avoid this, use a combination square to ensure accurate markings on the wood, and always measure twice before making a cut.
Use the right tools for the job, as using improper equipment can lead to accidents or damage to your workpiece. For example, a dull saw blade can cause kickback, while a loose drill bit can create uneven holes. Regularly inspect your tools and replace them when necessary. A sharp saw blade, on the other hand, will make clean cuts and reduce waste.
Another common mistake is applying too much pressure or using excessive force, which can lead to mistakes such as chipped wood or mangled pieces. Instead, work slowly and deliberately, taking small, gentle strokes with your tools. This approach will help you maintain control and achieve the desired results.
When working on a project, it’s also crucial to keep a clean workspace, free from distractions and clutter. A tidy area will help prevent accidents caused by tripping over tools or materials. Regularly organize your workspace, and store your tools in designated areas when not in use.
Displaying Your Handmade Wooden Decorations
Now that you’ve crafted your beautiful handmade wooden decorations, it’s time to show them off and add some extra sparkle to your holiday decor. We’ll share tips on how to beautifully display your creations.
Creative Ways to Showcase Your Handiwork
To add a personal touch to your handmade wooden Christmas decorations, consider showcasing them in creative ways around your home. For mantel decor, try arranging a mix of large and small pieces to create visual interest. You can also group similar items together, such as stacking wooden boxes or placing a collection of wooden snowflakes side by side.
For tree ornaments, get creative with hanging methods. Instead of traditional hooks, use twine or wire to suspend your handmade decorations from the branches. This adds a rustic touch and allows for easy removal at the end of the season. You can also experiment with different materials like ribbon or garland to add color and texture.
When it comes to showcasing tree ornaments, consider grouping them by theme, such as clustering all the wooden snowflakes together or creating a “forest” effect with tall, slender decorations. This creates a visually appealing display that highlights your handmade craftsmanship.
Tips for Preserving Your Handmade Creations Long-Term
To preserve your handmade wooden decorations for years to come, consider a few key strategies. First, avoid exposing them to direct sunlight, as UV rays can cause wood to fade and crack over time. If you plan to display your decorations near windows or glass doors, use window treatments like curtains or blinds to filter the light.
Next, keep your decorations away from moisture-prone areas of your home, such as bathrooms or kitchens. Wood is a natural material that absorbs humidity, which can lead to warping and damage if not managed properly. If you live in an area with high humidity, consider using a dehumidifier nearby to maintain a stable environment.
Finally, clean your wooden decorations regularly to prevent dust buildup and maintain their appearance. Use a soft, dry cloth to gently wipe down surfaces, or make a solution of equal parts water and white vinegar for tougher messes. Avoid harsh chemicals or abrasive cleaners that can damage the wood’s finish or strip away natural oils. By following these tips, you can enjoy your handmade wooden decorations for many holiday seasons to come.
Frequently Asked Questions
Can I use reclaimed or salvaged wood for handmade wooden Christmas decorations?
Yes, using reclaimed or salvaged wood can be a great way to reduce waste and add an extra layer of uniqueness to your decorations. However, it’s essential to ensure the wood is properly cleaned and treated before use to prevent any potential health hazards.
How do I preserve my handmade wooden decorations long-term when they’re exposed to moisture or extreme temperatures?
To preserve your handmade wooden decorations, apply a high-quality wood sealant or wax to protect them from moisture. You can also consider using a dehumidifier in areas with high humidity or storing the decorations in a cool, dry place during off-seasons.
What if I’m new to woodworking and want to make some simple wooden decorations for Christmas? Where do I start?
Start by familiarizing yourself with basic hand tools like chisels, sandpaper, and clamps. Practice measuring and cutting wooden pieces accurately using a miter saw or circular saw. Begin with simple projects like small wooden ornaments or coasters before moving on to more complex designs.
Can I use power tools instead of hand tools for making handmade wooden Christmas decorations?
Yes, power tools can be used for certain tasks in woodworking, but it’s essential to master basic hand tool skills first. Power tools can sometimes lead to inaccurate cuts or uneven surfaces if not handled properly. Start with hand tools and gradually incorporate power tools as you become more comfortable with the process.
How do I ensure my handmade wooden decorations are food-safe if they’ll be placed near edible items, like a Christmas cookie display?
To ensure your handmade wooden decorations are food-safe, use nontoxic wood finishes or sealants specifically designed for contact with food. Avoid using oils or waxes that can transfer to food or other surfaces. Always follow manufacturer instructions and take necessary precautions when working with any chemicals or materials near edible items.

