
The cluttered fridge is a common sight in many households. You know you’re not alone if you’ve ever stood in front of your fridge, staring at the jumbled mess of leftovers, expired food, and mystery containers. Not only does this visual chaos make meal planning a nightmare, but it also wastes valuable storage space. In fact, a cluttered fridge can reduce its capacity by up to 30%. But with a little expert guidance, you can transform your fridge into a streamlined oasis that makes cooking and meal prep a breeze. This article will cover the essentials of labeling, zoning, and advanced organization techniques to help you declutter and optimize your fridge’s storage capacity. By the end of this guide, you’ll know how to create a customized storage system that keeps your food fresh and accessible for weeks to come.
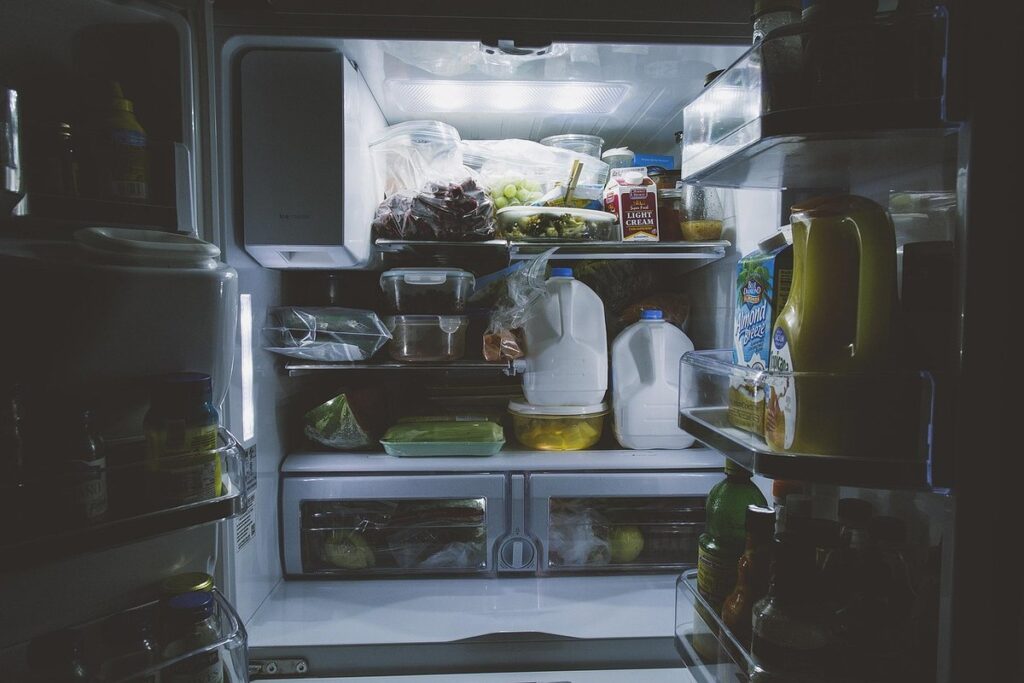
Understanding Your Fridge’s Storage Needs
When organizing your fridge, it’s essential to consider its unique storage needs, from shelf layout to door space utilization. Understanding these factors will help you maximize your fridge’s capacity and efficiency.
Assessing Your Fridge’s Size and Layout
Measuring your fridge’s dimensions is an essential step in planning efficient storage. Start by noting down its width, height, and depth to determine how much space you have to work with. Consider the location of shelves, drawers, and other features that may impact your storage strategy.
Take a moment to observe how you typically use the fridge. Do you often reach for items on the top shelf or tend to grab things from the middle section? Understanding your own habits will help you allocate space accordingly. For instance, if you frequently access a particular item, consider placing it at eye level or in an easily accessible location.
Don’t forget about dead spaces – areas that are hard to reach or don’t fit standard storage solutions. Think creatively about how you can utilize these zones, such as by installing custom shelves or baskets. By accurately assessing your fridge’s size and layout, you’ll be able to design a storage system that meets your needs and keeps clutter at bay.
Identifying Must-Have Items and Zones
Categorizing items into zones is essential to optimize storage capacity and maintain a clutter-free fridge. Start by identifying the must-have items, which are those you use frequently, such as beverages, dairy products, and leftovers. Be honest with yourself – if you haven’t used that jar of jam in six months, it’s probably safe to let it go.
Consider creating zones for specific types of food, like a “Beverage Station” for juices, sodas, and water, or a “Dairy Corner” for milk, yogurt, and cheese. This will make it easier to find what you need when you open the fridge door. You can also designate a zone for leftovers, where you can store them at eye level to ensure they’re used before they expire.
Think about your family’s eating habits and preferences when creating zones. For example, if you have young children, you may want to reserve a section for their snacks and drinks. By categorizing items into zones, you’ll save time searching for what you need and reduce clutter in the long run.
Decluttering and Downsizing Your Fridge Contents
Let’s face it, a cluttered fridge can be overwhelming. Getting rid of expired food and clearing out unnecessary items is often the first step to a more organized kitchen.
The One-Touch Rule: Tackling Clutter in the Fridge
Tackling clutter in one session can be intimidating, but it’s often the most efficient way to clear out expired or unwanted items from your fridge. When you put off decluttering, it’s easy for clutter to accumulate again, making the task seem even more daunting. By tackling it all at once, you’ll save time and energy in the long run.
Think about it: every time you open a door or reach behind a shelf, you’re creating a new opportunity for messes to spread. Putting off decluttering means dealing with the consequences of this spread – expired leftovers, mysterious stains, and lost containers. In one session, you can address these issues directly and prevent them from causing more problems.
To make the most of your one-touch rule session, set a timer or commit to working for a specific amount of time without distractions. This will help you stay focused and ensure that you cover every area of your fridge. As you work, sort items into clear categories – expired food, unopened items, and items that can be safely stored elsewhere in the kitchen. Be ruthless about getting rid of anything that’s past its prime or no longer serves a purpose.
Removing Expired or Spoiled Food
When dealing with expired or spoiled food, it’s essential to prioritize food safety. Check expiration dates on packaged items and be aware that “best by” dates are not always a hard deadline. If an item is past its date but still looks and smells fine, use your best judgment. For perishable items like meat, dairy, or eggs, trust your senses: if it’s slimy, moldy, or has a strong odor, discard it.
To identify spoiled food, look for visible signs of mold, slime, or an off smell. Check the color and texture of fruits and vegetables – if they’re wilted, mushy, or have brown spots, they’re likely gone bad. Be cautious with leftovers, as bacteria can multiply rapidly in perishable foods. If in doubt, err on the side of caution.
When disposing of expired or spoiled food, make sure to follow your local guidelines for household waste disposal. Typically, you’ll need to bag items separately and dispose of them in a designated trash area. Some communities also offer special collection programs for organic waste. Take advantage of these services to minimize your environmental impact. Remember to regularly check expiration dates and inspect your fridge contents to maintain a safe and organized kitchen environment.
Maximizing Vertical Space with Shelves and Bins
Maximizing vertical space is key to a clutter-free kitchen, which is why we’re turning our attention to shelves and bins as essential tools for fridge organization. Let’s explore creative ways to utilize these space-saving solutions.
Choosing the Right Shelving System
When selecting a shelving system for your fridge, you have several options to consider. Adjustable shelves are ideal for varying-sized containers and can be customized to fit specific storage needs. They allow you to easily switch between storing tall bottles or wide containers without having to change the shelf layout. Stationary shelves, on the other hand, provide stability and support for heavy items like large blocks of cheese or bulky jars.
Tiered shelving systems offer multiple levels of storage, making it possible to optimize vertical space within your fridge. This setup is particularly useful in smaller fridges where every inch counts. Another option is rotating baskets that can be mounted on shelves, offering easy access and visibility for frequently used items like condiments or spices.
Consider the types of containers you regularly store when choosing a shelving system. If you have large or heavy items, fixed shelves may provide better support. However, if you’re looking to maximize flexibility and adaptability, adjustable shelves are often the better choice.
Utilizing Baskets and Containers for Storage
Baskets and containers are versatile storage solutions that can be used to store items like fruits, vegetables, and leftovers. For example, a wicker basket with a lid can keep produce fresh by maintaining humidity and keeping it away from strong-smelling foods. You can also use small plastic containers or glass jars with lids to store leftovers in the fridge.
When choosing baskets and containers for storage, consider the size of the items you want to store and the space available in your fridge. For instance, a large container may be necessary for storing bulk produce like onions or potatoes, while smaller containers are better suited for snacks or condiments. Additionally, think about the material and durability of the containers – glass jars are easy to clean and can withstand extreme temperatures.
To maximize storage capacity, use baskets and containers with adjustable dividers or compartments that allow you to separate items within a single container. This helps maintain organization and prevents clutter from building up.
Organizing Fridge Contents with Labels and Signs
Turn your fridge into a tidy haven by adding labels and signs to organize its contents, making it easier to find what you need at a glance. With these simple signs, clutter becomes a thing of the past.
Creating a Labeling System
Labeling shelves and bins is crucial to maintaining organization over time. Without clear labels, it’s easy for clutter to accumulate as similar items get misplaced or stacked haphazardly. To avoid this, assign a specific label to each shelf or bin based on its contents. For example, designate one shelf for beverages, another for leftovers, and a third for dairy products.
When choosing labels, consider the size of your fridge and the visibility you need from across the room. Opt for clear, easy-to-read font sizes that can be seen even in low-light conditions. You can use stickers, chalkboard markers, or even paint to create custom labels that fit your kitchen’s aesthetic.
For bins with varying contents, use a key or legend to explain what each bin contains. This is especially helpful when you have family members who contribute to the fridge’s organization but may not remember the last time they used a particular bin. A simple diagram or illustration can go a long way in keeping everyone on the same page and maintaining your fridge’s overall tidiness.
Designating Zones with Signage
To differentiate between zones within your fridge, designate specific areas with clear signage. Label each zone with its intended use, such as “Beverages Only” or “Fruits and Vegetables.” This helps to maintain order and prevent cross-contamination of foods.
Use a consistent labeling system throughout the fridge to create visual cues for family members. You can use stickers, chalkboard labels, or even whiteboard markers on the shelves themselves. For example, you could assign a specific color scheme to each zone: blue for drinks, green for produce, and red for leftovers.
When choosing signs or labels, keep them simple and easy to read. Avoid cluttering the fridge with too many labels – focus on key zones and items that require differentiation. Consider using magnetic strips or adhesive-backed notes to hang signs directly on the fridge door or walls. This keeps your labeling system organized and prevents it from becoming overwhelming. By designating clear zones with signage, you’ll maintain a clean and functional fridge environment that makes meal prep and snack time more efficient.
Advanced Organization Techniques for Special Items
For those special items that require extra care, such as leftovers, take-out containers, and glassware, we’ll share advanced techniques to keep them organized and easily accessible. This includes strategies for maximizing storage space.
Storing Wine, Beer, or Liquor
To store wine, beer, or liquor effectively in your fridge, it’s crucial to consider temperature control and humidity. Most wines, for example, are typically stored between 45°F (7°C) and 65°F (18°C), while beers require a slightly warmer range of around 40°F (4°C) to 55°F (13°C). Liquors, like whiskey or rum, can be stored at standard refrigerator temperatures. However, it’s essential to note that extreme temperature fluctuations can damage these items.
Use separate storage containers for each type of beverage to maintain optimal conditions. Glass bottles and wine coolers are ideal for storing wine, while beer can be kept in a dedicated fridge compartment or a beer-specific cooler with built-in cooling elements. For liquor, consider using a locked cabinet or a secure storage container to prevent access by children or pets.
In addition to temperature control, it’s also vital to regulate humidity levels. Wine and beer are sensitive to dry environments, which can cause them to age prematurely or develop off-flavors. Keep the fridge at around 60-70% relative humidity to maintain optimal conditions for these items.
Managing Delicate or High-Maintenance Items
When it comes to storing items that require special care, such as raw meat, fish, or eggs, you’ll want to take extra precautions to prevent cross-contamination and spoilage. First, designate a specific area for these high-maintenance items, ideally towards the bottom of the fridge where temperatures are typically more stable.
Raw meat, in particular, should be stored on a lower shelf, away from ready-to-eat foods like fruits and vegetables. Use a covered container or zip-top bag to keep it sealed and prevent juices from dripping onto other items. Label the container with its contents and date for easy identification.
For fish and seafood, consider using an airtight container or vacuum-sealable bag to maintain humidity and prevent drying out. Store them on a middle or upper shelf, but not directly above ready-to-eat foods. Eggs should be stored in their original carton, placed on a stable surface, and kept away from strong-smelling foods that might transfer odors.
Remember to always handle these items safely by washing your hands before and after touching them, and keep them at or below 40°F (4°C) for optimal storage. By taking these simple precautions, you’ll be able to store delicate or high-maintenance items with confidence, keeping your fridge organized and safe.
Maintaining Fridge Organization Over Time
Now that you’ve set up your fridge with a system, it’s time to think about how to keep it organized over the long haul. We’ll walk through strategies for maintaining a clutter-free space.
Scheduling Regular Maintenance Sessions
Set aside time each week to clean and reorganize specific zones within your fridge. This might be as simple as wiping down shelves on Sunday evenings or dedicating 15 minutes on Wednesday mornings to tidying up a single shelf. You can also schedule deeper cleaning sessions every few months, such as scrubbing the fridge’s walls or replacing worn-out bins.
Consider implementing a ‘clean-as-you-go’ approach by immediately putting away food and drinks after use. This helps prevent clutter from building up in the first place, making regular maintenance easier. Another strategy is to involve family members in the cleaning process, assigning each person a specific area or task to take ownership of.
Some questions to ask yourself when scheduling maintenance sessions include: What areas of the fridge tend to get messy quickly? Are there any zones that need more frequent attention due to high-traffic usage or humidity levels? By being intentional about how you allocate time and resources, you can maintain your fridge’s organization over time with minimal effort.
Encouraging Family Members to Participate in Maintenance
Involving family members in maintaining the fridge’s organization is crucial to its long-term success. You can start by explaining to them why maintaining a clutter-free fridge is essential for food safety and household efficiency. Make it clear that everyone contributes to the mess, so everyone should participate in cleaning up.
Set aside dedicated time for maintenance sessions, ideally once a week or after big shopping trips. Assign tasks to each family member, such as wiping down shelves or checking expiration dates. Consider creating a schedule with specific responsibilities to avoid confusion.
To make it more engaging, turn maintenance into a game by setting a timer and challenging family members to complete their tasks within a certain timeframe. You can also offer rewards for outstanding performance, like extra dessert points or a small treat.
Remember to praise and thank family members for their efforts, no matter how small. Acknowledge that maintaining the fridge’s organization is a team effort and everyone’s participation is valued. By doing so, you’ll create a sense of ownership and responsibility among family members, making it easier to maintain the fridge’s organization over time.
Frequently Asked Questions
What If I Have a Small Fridge with Limited Space?
When dealing with limited space, prioritize essential items and consider storing less frequently used items outside of the fridge or in alternative containers. Utilize vertical space with stackable shelves or baskets to maximize storage capacity.
Can I Use Labeling on Both Shelves and Bins?
Yes. Labeling both shelves and bins helps maintain organization over time by making it easy for family members to identify where items belong. Ensure labels are clear, concise, and consistent in design to avoid confusion.
How Do I Store Raw Meat and Fish Properly in the Fridge?
Raw meat and fish require special care to prevent cross-contamination and spoilage. Wrap them tightly in airtight containers or plastic bags to maintain humidity control, then store them at the bottom of the fridge or in designated zones with minimal airflow.
What If I Have Multiple Types of Wine, Beer, or Liquor to Store?
Consider investing in a temperature-controlled storage unit specifically designed for wine, beer, or liquor. These units can maintain precise temperatures and humidity levels, ensuring optimal storage conditions for your beverages.

