
Sketching flowers can be intimidating for beginners, but with some simple techniques and observation skills, anyone can learn to draw beautiful blooms. Many people struggle to capture the delicate details of petals and leaves, leading to frustrating sketches that don’t do justice to their subject. The good news is that most flowers share common basic shapes, such as spheres, cylinders, and cones, which can be combined and modified to create a wide variety of species. By focusing on these fundamental forms and learning how to observe the subtle textures and patterns of petals, leaves, and stems, you’ll be able to create stunning flower drawings with ease. This guide will cover the basics of sketching flowers, from simple shapes and lines to more advanced details and techniques for capturing realistic results.
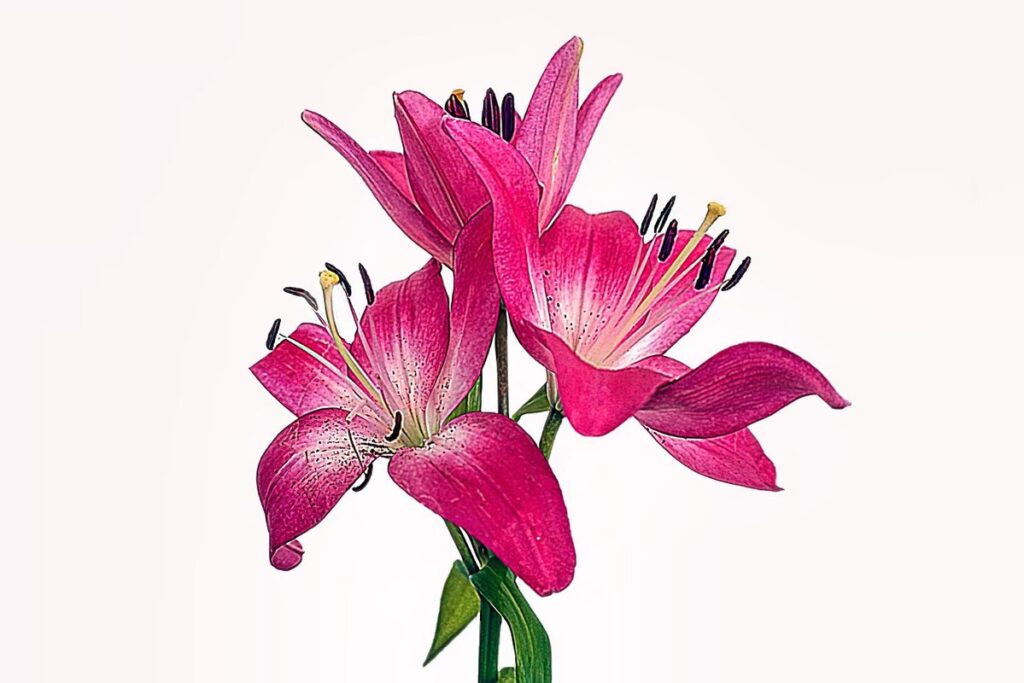
Understanding Flower Basics
To get started, let’s break down the basic elements of flowers that make them easy to sketch. Understanding these fundamentals will help you capture their essence on paper.
What Makes a Flower Easy to Sketch?
Flowers with symmetrical shapes are often easy to sketch because their components mirror each other on either side of a central axis. This balance creates a sense of order and predictability, making it simpler for beginners to replicate the flower’s structure. Consider the daisy or sunflower: both have petals that follow a radial pattern, creating symmetry around a central point.
Flowers with minimal details are also easier to draw because they require fewer lines and shapes. For example, the calla lily has a simple trumpet-shaped bloom with minimal texture or ornamentation. This simplicity makes it an excellent choice for beginners who want to focus on basic drawing skills without getting overwhelmed by intricate details.
When starting out, look for flowers that exhibit these characteristics. Use them as a starting point and gradually experiment with more complex forms. Keep in mind that even within symmetrical flowers, there can be variations in shape and size. Pay attention to these subtleties as you practice sketching different types of flowers. By focusing on the basic shapes and minimal details found in easy-to-sketch flowers, you’ll develop your drawing skills and build confidence in your ability to recreate a wide range of flower forms.
Basic Shapes and Lines in Flower Drawing
When breaking down a flower into its basic components for sketching, it’s essential to recognize and use simple shapes. Circles, ovals, and ellipses are common shapes found in various flowers, particularly in their petals and centers. For instance, the center of a sunflower or daisy is typically circular or oval-shaped. To draw these shapes accurately, focus on gentle, smooth curves rather than trying to replicate exact mathematical proportions.
Straight lines are also prevalent in flower drawing, often used for stems, leaves, and sepals. Identify and use simple straight lines instead of attempting to render the intricate details found on real-life flowers. Practice sketching basic curved and straight lines separately before combining them in a single flower drawing.
To apply this concept, try breaking down your favorite flower into its basic shapes and lines. Take a few minutes to study the individual components, such as petals, stamens, and sepals, and then attempt to recreate them using simple geometric forms. This exercise will help you develop your observation skills and build confidence in sketching more complex flowers.
Learning from Nature: Observational Sketching
Observational sketching is a powerful tool for artists, allowing us to slow down and truly see the intricate details of nature. By observing flowers through sketches, we can capture their essence and beauty in a simple yet expressive way.
Observing Real-Life Flowers for Inspiration
When observing real-life flowers for inspiration and reference, it’s essential to slow down and truly see the shapes, textures, and details up close. Start by choosing a single flower and approaching it from different angles, taking note of how the light catches its petals, sepals, and stamens. Notice how the texture of the petals changes as you examine them more closely – are they smooth, velvety, or perhaps slightly ridged?
Pay attention to the shapes and proportions of the individual parts: the size and placement of the center, the curvature of the petals, and the length and thickness of the stem. Compare your observations with reference images or photographs to ensure you’re accurately capturing the flower’s characteristics.
To take this exercise a step further, try observing flowers at different times of day or in various environmental conditions. For instance, how does the color intensity change as the sun moves across the sky? How do the petals respond to changes in temperature and humidity? By immersing yourself in the intricate details of real-life flowers, you’ll develop a keen eye for observation and a deeper understanding of what makes each bloom unique.
Simple Flower Drawing Exercises
To develop your drawing skills and build confidence when sketching flowers, it’s essential to practice basic stem and leaf structures. Start by practicing simple stems using gentle curves and subtle tapering. Begin with a straight line for the stem and then add gentle curvations at the top to create a natural, relaxed shape.
For leaves, focus on varying their size, shape, and orientation on the stem. Practice drawing leaves in different forms, such as teardrops, ovals, or irregular shapes. Experiment with overlapping leaves to capture the way they often grow together on stems.
To practice more complex flower structures, try drawing a simple daisy or sunflower. Focus on capturing the basic shape of the petals and the stem that supports them. You can also draw a single bloom on a short stem to practice individual flowers in isolation.
When practicing these exercises, remember to observe real-life flowers for inspiration and reference. Look at the way light interacts with different shapes and textures to inform your drawings. By mastering simple flower structures and leaves, you’ll be better equipped to tackle more complex blooms and develop your unique style.
Mastering Proportions and Measurement
Mastering proportions and measurement is essential for creating realistic flower sketches, so let’s talk about how to accurately gauge your petals and stems. By applying these techniques, you’ll be able to sketch flowers with greater ease and confidence.
Understanding Flower Symmetry and Asymmetry
Flowers come in a variety of symmetries, which can be broadly categorized into radial and bilateral. Radial symmetry is characterized by petals arranged around a central point, like a sunflower or daisy. This type of symmetry makes it easy to create balanced compositions, as the focus remains on the center. Bilateral symmetry, on the other hand, features petals mirrored on either side of a central axis, often seen in roses and carnations.
To achieve accurate proportions when working with these symmetries, measurement is crucial. Start by sketching the flower’s center, using simple shapes like circles or ovals to help guide your placement of petals. Measure the distance between each petal tip and use this information to determine their relative size and spacing. You can also use a grid system to ensure equal intervals between petals.
When creating compositions with asymmetrical flowers, focus on balancing visual weight rather than strict symmetry. Consider the overall shape of the flower and how it interacts with surrounding elements, such as leaves or stems. By understanding these principles and applying them through measurement and observation, you can create balanced and visually appealing flower sketches that require minimal effort to draw accurately.
Using Reference Images for Accurate Measurements
When drawing flowers, it’s essential to ensure accurate measurements and proportions. One effective way to achieve this is by using reference images. These can be photographs or real-life observations of flowers in various stages of growth. By studying the shapes, lines, and overall structure of a flower, you can develop a deeper understanding of its underlying anatomy.
To get the most out of reference images, try to find high-quality photos that show the flower from multiple angles. Look for images with clear labels or measurements to help guide your sketching process. You can also take your own photographs or observe flowers in person, paying attention to their texture, color, and overall appearance.
When using reference images, focus on capturing the essential features of a flower rather than getting bogged down in minor details. Identify the key shapes, such as petals, sepals, and stamens, and note their relative sizes and proportions. This will help you create a more accurate and balanced drawing. By incorporating reference images into your sketching process, you’ll be able to capture the essence of flowers with greater ease and confidence.
Advanced Techniques: Texture, Pattern, and Details
Now that you’re comfortable sketching basic flowers, let’s add some extra flair by exploring advanced techniques for capturing texture, pattern, and intriguing details. We’ll break down these skills step-by-step.
Adding Texture and Patterns to Your Flower Drawings
When adding texture and patterns to your flower drawings, remember that subtlety is key. Foliage and petals can have a significant impact on the overall appearance of your piece, but excessive details can quickly overwhelm the composition.
Start by observing real-life flowers for inspiration. Notice how delicate veins on leaves or soft ruffles on petal edges add depth without overwhelming the viewer’s attention. You don’t need to render every detail meticulously; instead, focus on capturing the essence of texture and pattern through gentle suggestions.
For foliage, consider using short strokes with a range of line weights to suggest leaf structure. Varying stroke direction can also help convey movement and energy in your drawing. When it comes to petals, experiment with soft blends or subtle gradations of color to capture their delicate texture. Avoid over-rendering; aim for a balance between realism and simplicity.
To achieve this balance, try applying the 80/20 rule: spend 80% of your time on the overall shape and proportions of your flower, reserving 20% for adding texture and patterns. By focusing on the essential details, you can create visually appealing pieces that feel realistic without getting bogged down in unnecessary details.
Advanced Stem and Leaf Structures
When adding more complex stem and leaf structures to your flower drawings, consider introducing branch arrangements and foliage distribution. This can be achieved by observing how real flowers grow in nature – for instance, notice how some stems have multiple branches that sprout from different points, while others feature long, slender stems with few or no lateral branches.
To replicate these variations on paper, try experimenting with different stem lengths and branching patterns. You might also want to pay attention to the way leaves are arranged along a stem – do they grow alternately, oppositely, or whorled? Incorporating such details can help create a more realistic and engaging flower drawing.
In terms of foliage distribution, think about how you can effectively convey the volume and texture of the leaves. This might involve using different line weights to suggest varying leaf sizes or layering multiple leaves to create depth. By paying attention to these structural elements, you can take your simple flower drawings to the next level and develop a more nuanced understanding of botanical form.
Common Mistakes to Avoid
As you practice sketching flowers, it’s easy to fall into common pitfalls that can make your drawings look stiff and unnatural. Let’s avoid these mistakes together from the start!
Overcomplicating Your Drawings
When drawing flowers, it’s easy to get carried away with details and end up overcomplicating your drawings. This can lead to frustration and a sense of disappointment when you don’t see the results you want. One common mistake is over-embellishing petals or stems, adding too many lines or curves that make the flower look cluttered.
To simplify your drawings while maintaining accuracy, try focusing on the basic shapes that make up each petal or leaf. For example, a rose has teardrop-shaped petals with a rounded tip and a small point at the base. Instead of drawing intricate lines around each petal, break it down into these simple shapes. This will help you capture the overall form of the flower without getting bogged down in details.
Here are some tips to keep in mind when simplifying your drawings:
- Use gentle curves instead of sharp angles
- Break down complex features into basic shapes
- Focus on capturing the overall proportions and placement of petals or leaves rather than every single detail
By following these tips, you can create simple yet accurate flower drawings that capture the essence of the flower without getting caught up in unnecessary details.
Ignoring Basic Principles of Proportion and Measurement
Ignoring basic principles of proportion and measurement can lead to inaccuracies in your flower drawings. When you don’t pay attention to these fundamental skills, it’s easy to end up with flowers that are either too small or too large for their surroundings. This not only affects the overall aesthetic of your artwork but also makes it difficult to achieve a sense of balance.
Regular practice is essential in mastering proportion and measurement. Start by observing real-life flowers and taking note of their proportions. For instance, most flowers have five petals, which can be broken down into smaller shapes like circles or ovals. Practice drawing these shapes accurately and consistently to develop your skills.
As you work on different flower types, pay attention to their unique characteristics. Some flowers, like roses, have more rounded petals, while others, like daisies, have more pointed ones. By studying the proportions of various flowers, you’ll be able to create more realistic drawings that capture their essence. Don’t be discouraged if it takes time – with consistent practice, you’ll see improvement in your skills and be able to apply them to your flower drawings.
Putting It All Together: Tips for Success
Now that you’ve learned how to sketch easy flowers, it’s time to put your new skills into practice and create a beautiful piece of art. Here are some expert tips to help you achieve success.
Setting Realistic Goals and Expectations
When learning to draw flowers, it’s easy to get caught up in trying to create perfect, detailed representations. But setting unrealistic expectations can lead to frustration and burnout. Instead, focus on making progress one step at a time. Celebrate small victories along the way – whether it’s mastering the basic shapes of a simple flower or adding texture to your petals.
Don’t compare yourself to others; their journey is unique, and you’re working at your own pace. You’ll find that breaking down larger goals into manageable tasks makes them feel less daunting. For example, instead of aiming to draw a perfect orchid on your first try, focus on mastering the shape of its petals or the arrangement of its stem.
Set specific, achievable goals for each practice session. This could be as simple as dedicating 10 minutes a day to sketching basic flower shapes or trying a new technique each week. Remember that progress is not always linear – you’ll have days where you feel like you’re making great strides and others where it feels like two steps back. Stay committed, stay patient, and trust the process: with time and practice, your skills will improve, and your drawings will become more confident and expressive.
Staying Motivated through Regular Practice
To stay motivated through regular practice, find inspiration in nature by observing flowers at different stages of growth. Visit a local park or garden to sketch and study various species. Experiment with different mediums like pencils, charcoal, or pastels to discover what works best for you. Try combining traditional techniques with digital tools to add depth and interest.
Set aside a dedicated space for drawing, free from distractions, to establish a consistent routine. Allocate specific times for practice, even if it’s just 15-20 minutes a day. Gradually increase the duration as your skills improve. Experiment with different exercises, such as sketching a single petal or focusing on texture and pattern.
Keep an inspiration board or sketchbook filled with reference images and observations to revisit when motivation wavers. Record your progress by taking photos of your work or sharing it with fellow artists online. This will help you track improvements and stay accountable. By combining experimentation, observation, and consistent practice, you’ll find that motivation and enthusiasm become second nature in the world of flower drawing.
Frequently Asked Questions
Can I use this guide to learn how to paint flowers instead of sketching them?
Yes. While the guide focuses on sketching, many of the techniques and principles discussed can be applied to painting flowers as well. By understanding the basic shapes, proportions, and details of flowers, you’ll have a solid foundation for creating beautiful flower paintings.
How do I know when my flower drawing is “good enough” or finished?
There’s no one-size-fits-all answer to this question, but a good rule of thumb is to step back from your work after completing the main elements and ask yourself if it accurately represents the reference image you used. If it does, then it’s likely complete.
What if I have trouble seeing symmetry in real-life flowers? Are there any exercises that can help improve this skill?
Yes. One exercise to practice recognizing symmetry is to draw a flower from multiple angles, paying close attention to how the petals and other features align with each other. You can also try sketching simple shapes like circles or ovals and experimenting with adding symmetrical patterns.
Can I use digital tools or software to help me with my flower drawing practice?
Yes. Digital tools can be a great way to streamline your workflow, but keep in mind that the principles of proportion, measurement, and symmetry still apply even when using technology to aid you. Consider using reference images or guides within your digital tool to help ensure accuracy.
How do I balance realistic details with artistic license when drawing flowers?
It’s all about finding a balance between accuracy and creativity. Study real-life flowers for inspiration and reference, then use your imagination to add unique twists and features that reflect your personal style. Remember, the goal is to create a visually appealing piece, not a scientifically accurate one.

