
Drawing is an essential skill for artists, designers, and anyone looking to express themselves creatively. Unfortunately, many beginners struggle with even the most basic techniques, while experienced artists often feel like they’ve plateaued in their growth. A clear understanding of drawing fundamentals is crucial for improving skills, whether you’re just starting out or refining your craft. When it comes to mastering these basics, having access to comprehensive guidance can be a game-changer. This guide aims to provide that much-needed resource, covering the essential tools and techniques required to excel in drawing. From basic exercises to expert advice on developing your style, we’ll explore every aspect of drawing fundamentals. By the end of this article, you’ll have a solid grasp of drawing principles and be able to tackle any subject with confidence.
Choosing the Right Tools and Materials
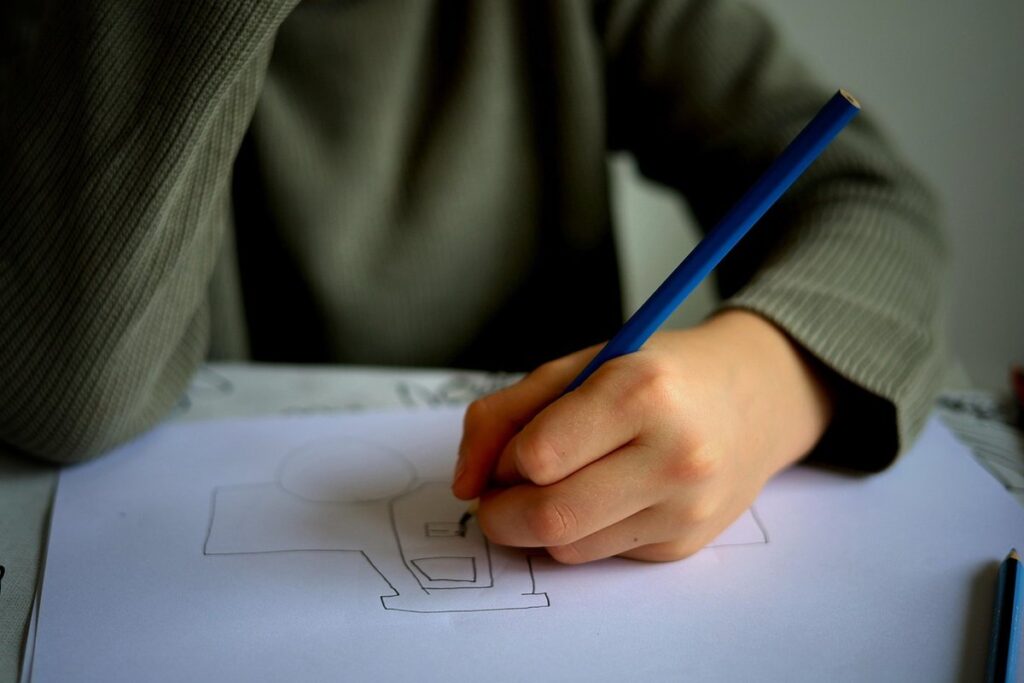
When it comes to creating stunning artworks, having the right tools and materials can make all the difference. In this crucial step of your artistic journey, we’ll explore essential considerations for selecting the best tools and materials that suit your needs.
Essential Drawing Supplies for Beginners
You’ll need a set of basic drawing tools to get started. Pencils are the most essential tool for drawing. Look for a range of graphite grades, including HB (medium), 2B (soft), and 6B (very soft). A sharpener is also necessary; mechanical sharpeners work best, but manual sharpeners can be more convenient. Erasers help correct mistakes and remove pencil marks – choose either a kneaded eraser or a white vinegar eraser for effective removal.
Good-quality drawing paper is also crucial. Choose between three main types: hot press (smooth), cold press (textured), and rough. Hot press is ideal for detailed work, while cold press suits expressive sketches. Consider the weight of the paper as well – lighter weights are better for practice drawings, while heavier weights are suitable for finished pieces.
Invest in a few sketchbooks or a bulk pack of loose sheets to keep costs down. Some artists prefer mixed media paper, which can handle various mediums like ink and paint.
Advanced Drawing Tools for Professional Results
Digital drawing tablets offer a high level of precision and control, ideal for creating intricate details. These tools are particularly useful for artists who prefer to work digitally, allowing them to easily undo mistakes and make adjustments as needed.
Markers and ink sets are also popular among professional artists, providing a range of line weights and colors. Faber-Castell’s Pitt Artist Pen is a favorite among illustrators, offering waterproof ink and fine tips. Copic markers are another popular choice, known for their vibrant colors and blendable edges.
When choosing digital drawing tablets, consider the resolution, size, and connectivity options. Wacom’s Intuos series is a great entry-point for beginners, while the Cintiq line offers more advanced features and higher resolutions. For markers and ink sets, think about the types of projects you’ll be working on and choose tools that fit your style.
It’s worth noting that many professional artists use a combination of traditional and digital media to achieve their desired results. Experimenting with different tools can help you find what works best for your unique workflow and artistic goals.
Understanding Basic Drawing Techniques
Mastering basic drawing techniques is a fundamental step in creating visually appealing artwork, regardless of your skill level or style. This section breaks down essential skills for beginners and experienced artists alike.
Mastering Line Art and Shading
Mastering line art and shading is crucial to creating depth and visual interest in drawings. This can be achieved through various fundamental techniques such as hatching, cross-hatching, stippling, and gesture drawing.
Hatching involves creating closely spaced parallel lines that follow the contours of a subject, often using different directions or densities to convey texture and value. For example, hatching can be used to depict fur or wood grain by varying line density and direction. To practice hatching, start with simple subjects like spheres or cylinders before moving on to more complex forms.
Cross-hatching is an extension of hatching that involves layering lines at different angles to create a more detailed and textured appearance. This technique can be used to suggest volume, texture, and even emotions in drawings. Stippling, which consists of small dots arranged closely together to form an image, can also be used for shading and creating depth.
Gesture drawing is another important aspect of line art that involves capturing the overall pose and movement of a subject through quick sketches. This technique helps artists focus on gesture and energy rather than detail and realism, often resulting in more expressive and dynamic drawings.
Value and Contrast: Adding Dimension to Your Drawings
Value and contrast are fundamental elements in drawing that can make or break the overall impact of a piece. By mastering these techniques, you can create a sense of volume, texture, and mood in your artwork. Value refers to the lightness or darkness of a color, while contrast is the way different values interact with each other.
To achieve volume, use contrasting values to suggest depth and dimensionality. For example, place a dark shadow on one side of an object and a lighter highlight on the other, creating a sense of three-dimensionality. In a still-life drawing, use contrasting values to separate objects from the background, making them appear more substantial.
When working with texture, consider how value can enhance or disrupt it. A rough, textured surface might be rendered in soft, muted values to create a tactile feel, while a smooth surface could be depicted with sharp, cool tones to suggest sleekness. Finally, contrast is also key in establishing mood. Warm, golden light can evoke feelings of comfort and coziness, whereas cool blues and grays can convey a sense of melancholy or detachment.
Learning Basic Shapes and Forms
Learning basic shapes and forms is a fundamental step in mastering drawing, as it lays the groundwork for more complex subjects to come. Let’s start by exploring these essential elements together!
Recognizing Geometric Shapes in Nature
To recognize geometric shapes in nature, start by looking at the overall form of an object rather than its intricate details. A sphere, for instance, can be seen in a ball, an egg, or even a rounded rock. Notice how these objects are roughly circular and symmetrical about their center.
Similarly, cylinders can be identified by their tall, tubular shape with two identical ends that are usually round. Think of a bottle, a vase, or a tree trunk – all exhibit this characteristic. Cylinders can also be found in everyday objects like pipes or brooms.
Rectangles and boxes are more straightforward to recognize as they have four sides with right angles (90 degrees). A book, a computer monitor, or even a picture frame often display these characteristics. Boxes can also be seen in shipping containers or storage units. By breaking down complex subjects into their basic geometric shapes, you’ll become better at observing and drawing the world around you. This technique is especially useful when creating 3D drawings from photographs or life observations.
Constructing Complex Forms from Simple Shapes
When constructing complex forms from simple shapes, it’s essential to understand how basic geometric forms can be combined to create more intricate subjects. For instance, a sphere can become an animal by adding legs, arms, and other features. Start with the simplest shape that captures the essence of the subject you’re trying to draw.
For landscapes, begin with basic rectangles or ovals for mountains, hills, and valleys. Add trees as cylinders or cones, and water bodies as fluid curves. Remember, these simple forms will help you establish proportions and placement in your drawing.
As you practice combining shapes, pay attention to their relationships and how they interact with each other. For example, a sphere’s curvature can create the illusion of volume when paired with flat surfaces. By observing how basic forms work together, you’ll develop an intuitive understanding of form and structure, making it easier to draw complex subjects.
The key is to be deliberate in your shape selection and placement, ensuring that they accurately convey the subject’s underlying anatomy. With practice, you’ll become more comfortable creating complex forms from simple shapes, allowing you to tackle a wide range of subjects with confidence.
Developing Observation Skills
Developing strong observation skills is crucial for creating accurate and detailed drawings, which involves paying attention to shapes, proportions, and subtle nuances of form. By cultivating these habits, you’ll become a more skilled artist.
Improving Your Drawing Skills with Still Life Studies
When observing a still life composition, it’s essential to pay attention to the interplay of shapes, lines, and forms. Notice how objects overlap, recede into the background, and cast shadows on one another. For instance, a vase might be placed atop a tablecloth, which in turn is supported by a chair leg. This hierarchical structure is crucial for creating a sense of depth.
To render these details accurately, start by sketching the overall composition with loose gestures. Focus on capturing the placement and relationships between objects rather than their exact shapes or proportions. Once you’ve established the basic layout, refine your drawings by paying attention to subtle nuances like texture, pattern, and reflected light. A small crack in a vase or the intricate folds of a tablecloth can add tremendous visual interest.
When working from observation, it’s also important to practice measuring and transferring proportions accurately. This involves using a range finder or dividing your paper into precise grids. By doing so, you’ll be able to replicate the still life composition with greater fidelity, resulting in more convincing drawings that convincingly capture the subtleties of light and shadow.
Practicing Gesture Drawing and Quick Sketches
To improve observation skills through gesture drawing and quick sketching exercises, focus on capturing a subject’s movement and essence rather than precise details. Set a timer for 10-15 minutes and draw the entire figure without lifting your pen from the paper. This rapid exercise helps you notice the overall shape, proportion, and flow of lines in the subject.
When practicing gesture drawing, try to simplify complex forms by breaking them down into basic shapes and lines. For example, if drawing a person, identify the basic outline of their body, such as the curve of their shoulders or the angle of their head. By capturing these key elements quickly, you’ll begin to recognize patterns in movement and shape.
Quick sketches can also be used to observe color and texture. Try setting a timer for 5 minutes and drawing an object from a new angle each time, focusing on the way light affects its surface. These short exercises help develop your ability to notice subtle variations in form and value.
Mastering Proportions and Measurement
Mastering proportions and measurement is essential for creating accurate and believable drawings, which we’ll explore through practical tips and techniques. Let’s start by discussing how to accurately measure subjects and scale them on paper.
Understanding Basic Proportion Techniques
When measuring proportions, it’s essential to divide subjects into manageable parts. One effective technique is to use the rule of thirds. Imagine your paper divided into nine equal parts by two horizontal lines and two vertical lines. Place important features along these lines or at their intersections. This method helps create balance and visual interest in your composition.
Grid paper can also aid proportion measurement. Draw a grid on your paper with evenly spaced lines, ensuring each square is the same size as your subject’s feature. Then, draw the feature on the corresponding grid square. This technique is particularly useful for drawing complex forms or shapes. Another tool you can employ is a measuring device, such as a caliper or a flexible curve.
To apply these techniques effectively, practice using them in simple exercises before applying them to more intricate subjects. Start with basic objects like fruit or household items and gradually move on to more complex compositions. By dividing your subject into smaller parts, you’ll be able to accurately measure proportions and create more realistic drawings.
Applying Proportional Accuracy in Your Artwork
Applying proportional accuracy is crucial in various drawing styles and mediums. In realistic drawings, it’s essential to maintain proportions when depicting subjects from different angles or distances. For instance, when drawing a human figure, ensure the ratio of head size to body length remains consistent, even when viewed from multiple perspectives.
In portrait drawing, measuring the facial structure is key. Measure the distance between the eyes, nose, and mouth, and use these measurements as references for proportion. The width of the face should be about 1.5 times the height of the eye socket.
When working with different mediums, such as charcoal or pastels, pay attention to the softness and density of the marks. Charcoal is often more forgiving than pencils when it comes to subtle corrections, while pastels can create smooth transitions between values. Experiment with different strokes and techniques to achieve accuracy in your drawings.
In digital drawing, utilize tools that help you maintain proportions, such as grid systems or measurement guides. Familiarize yourself with the software’s features to streamline your workflow. By applying proportional accuracy consistently, you’ll be able to capture the essence of your subject, regardless of the medium used.
Bringing Your Drawings to Life with Color
Learning to add color effectively is a crucial step in bringing your drawings to life, and it’s something we’ll explore in more detail soon. You’ll learn techniques for selecting the right colors and creating depth with shading.
Introduction to Basic Color Theory
Color theory is the foundation upon which a vibrant, engaging drawing is built. At its core, color theory revolves around understanding how colors interact with one another to create visually appealing effects. The color wheel, a circular representation of hues, serves as a fundamental tool for grasping these interactions.
Primary colors – red, yellow, and blue – are the building blocks of color theory. These hues cannot be created through mixing other colors together. Secondary colors, on the other hand, are derived from primary colors: orange (red + yellow), green (blue + yellow), and violet (blue + red). Understanding the relationships between primary and secondary colors is crucial for developing a strong foundation in color theory.
Warm colors, such as red, orange, and yellow, evoke feelings of warmth and energy. Cool colors, like blue, green, and violet, tend to convey a sense of calmness and serenity. When combining warm and cool colors, you create visually striking contrast that can add depth and interest to your drawings. Familiarize yourself with the color wheel and practice experimenting with different color combinations to better grasp these concepts in action.
Choosing Colors for Moods and Effects
When selecting colors to convey a specific mood or effect in artwork, consider the emotional resonance you want to evoke. Blues and greens often create a calming atmosphere, while oranges and yellows tend to stimulate energy. Use these associations as a starting point, but remember that color meaning can vary across cultures.
For example, white is typically associated with purity in Western art, but it represents mourning in many Asian cultures. Similarly, red can signify passion or love in some contexts, yet signal warning or danger in others.
To choose colors effectively, identify the primary mood you want to convey and balance it with complementary hues. A warm palette might include burnt oranges and golden yellows, while a cool palette could combine soft blues and pale greens. Experiment with different combinations to find what works best for your piece. Pay attention to how colors interact on the page, as adjacent hues can create subtle nuances or overpower each other. By considering color associations and interactions, you can intentionally craft moods and effects in your artwork.
Frequently Asked Questions
What if I’m struggling to apply basic proportion techniques in my artwork?
Yes, it’s normal for artists to take time to develop their skills with proportions. One strategy is to practice measuring and dividing subjects into thirds using grid paper or measurement tools. Start with simple exercises like drawing basic shapes and gradually move on to more complex subjects.
How can I choose the right colors for a specific mood or effect in my artwork?
When selecting colors, consider the emotional impact of each hue. Warm colors like oranges and reds often evoke energy and passion, while cool colors like blues and greens can create a calming atmosphere. Experiment with different color combinations to achieve the desired mood.
Can I use digital drawing tools for gesture drawing exercises?
Yes, you can definitely use digital drawing tablets or software for gesture drawing exercises. In fact, this method allows for quick sketches and rapid iterations, which are ideal for capturing movement and energy in your drawings. However, keep in mind that using a traditional medium like paper and pencil can help develop your fine motor skills.
How do I balance learning new techniques with practicing my existing skills?
Yes, it’s essential to strike a balance between mastering new techniques and honing your existing skills. Allocate specific time for practicing each area of drawing, such as basic shapes, proportions, or color theory. Consistency is key when developing your artistic abilities.
What if I’m unsure about the best way to break down complex subjects into simpler forms?
One effective method is to use reference images or observe real-life subjects in nature. Start by identifying basic shapes like spheres, cylinders, and rectangles, then gradually add more detail. Practice breaking down different types of subjects to develop your skills in this area.

