
You might be surprised to learn that you can turn your kitchen scraps and other household waste into rich, nutrient-dense soil for your indoor plants. Composting indoors is not only an environmentally friendly way to manage your waste, but it’s also a great way to create a sustainable gardening practice. By composting your indoor waste, you’ll be reducing the amount of trash sent to landfills and creating a valuable resource for your plants at the same time. But where do you start? This beginner’s guide will cover the benefits of composting indoors, from improving air quality to creating nutrient-rich soil. We’ll walk through setting up an indoor composting system, including choosing the right bin and managing moisture levels. With our troubleshooting tips, you’ll be able to overcome any challenges that arise and successfully turn your waste into rich soil for your indoor garden by the end of this article.
Understanding Indoor Composting
Composting indoors can be a game-changer for small spaces, but it requires a solid understanding of what works and what doesn’t. Let’s break down the basics to get you started on your indoor composting journey.
Benefits of Indoor Composting for Small Spaces
For individuals living in small apartments, condos, or houses with limited outdoor space, indoor composting is a game-changer. Traditional composting methods often rely on large bins and open spaces to aerate and turn waste into nutrient-rich soil. However, these constraints don’t apply when you bring the composting process indoors.
By using a compact indoor composter, such as a worm bin or a bokashi bin, you can recycle food scraps and other organic waste in the comfort of your own home. These units are designed to be space-efficient and odor-controlled, making them perfect for small living spaces.
In addition to saving space, indoor composting also reduces odors and pests that often come with traditional outdoor methods. You’ll have more control over the process and can even enjoy watching worms break down food waste into rich fertilizer in as little as 2-3 weeks.
When choosing an indoor composter, consider factors like size, ease of use, and maintenance requirements to ensure it fits your lifestyle and space constraints.
Choosing the Right Location for Your Compost Bin
When selecting a location for your compost bin indoors, one of the most critical factors to consider is ventilation. Proper airflow is essential for efficient decomposition and minimizing odors. Ideally, place your compost bin near a window or outside door to allow fresh air to circulate around it.
Avoid placing your compost bin in enclosed spaces like closets or basements, as these areas tend to be stale and can exacerbate odor issues. Instead, choose an area with good natural ventilation or consider using a fan to improve airflow. A spot near the kitchen or laundry room can work well, as these areas often have existing ventilation systems.
Keep in mind that you’ll want to position your compost bin at least 6-8 inches away from any walls to allow for easy access and prevent moisture buildup. By choosing a well-ventilated area for your compost bin, you’ll be able to maintain optimal decomposition rates and minimize unpleasant odors within your home.
Setting Up Your Composting System
To get started, you’ll need to choose a location for your composting system and decide on the type of bin that suits your needs best.
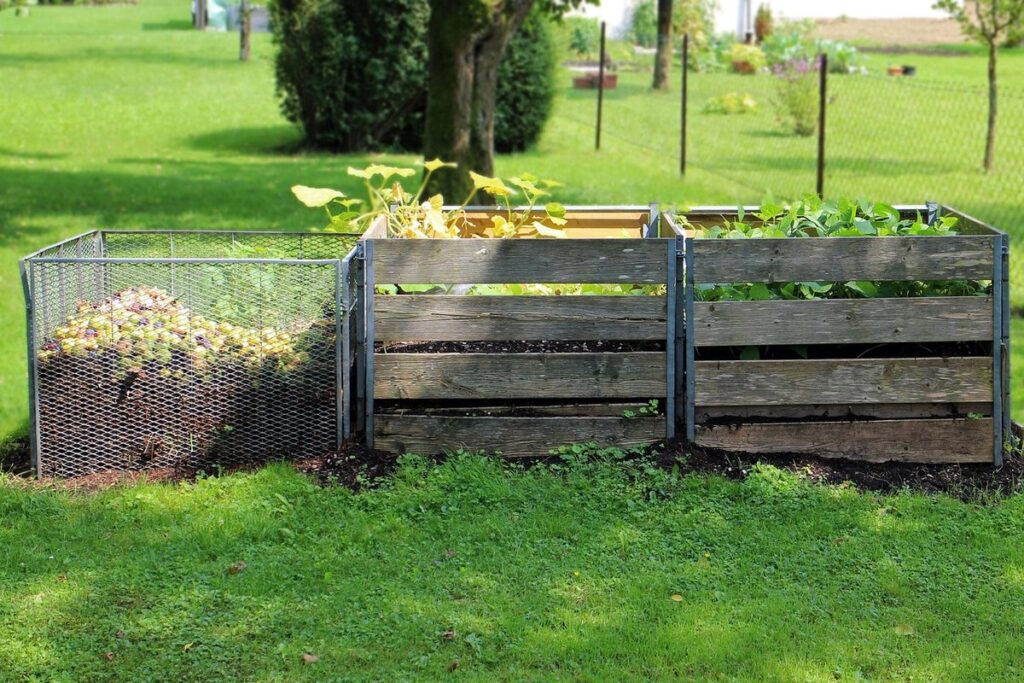
Selecting the Right Compost Bin Type
Tumblers are a popular choice for indoor composting due to their compact size and ease of use. They’re typically made of plastic or metal and have a rotating drum that allows you to mix the contents without having to manually dig through them. This can be a significant advantage, especially if you’re new to composting, as it eliminates the need for manual turning.
However, tumblers also have some disadvantages. For one, they can be quite expensive, especially high-end models with advanced features like automatic aerators. Additionally, they may not be suitable for large families or households that generate a lot of waste, as their capacity is often limited. Bokashi bins, on the other hand, are designed to handle larger quantities and work by anaerobic fermentation rather than aerobic decomposition.
Worm composters, also known as vermicomposting systems, offer a unique approach that’s both space-efficient and low-maintenance. By using worms to break down food scraps, these systems produce a nutrient-rich compost without the need for regular turning or maintenance. However, they do require an initial investment in worms and can be sensitive to temperature fluctuations.
Preparing Your Materials for Composting
Food waste, paper products, and yard trimmings are all suitable for composting indoors. Start by collecting these materials in a designated area, such as a bin or container with a lid. This will help keep pests and odors under control.
When preparing food waste for the compost bin, focus on removing contaminants like plastic packaging, metal staples, and bones. Shredded paper products can also be added directly to the bin, but tear them into smaller pieces first to increase their surface area.
Yard trimmings can be more challenging to work with indoors due to their bulk and potential for mess. Consider using a chipper or shredder to reduce large branches and leaves into manageable fragments. This will not only save space in your compost bin but also speed up the decomposition process.
Aim to add equal parts “green” materials like food waste and yard trimmings to “brown” materials like shredded paper products, as this balance will help maintain optimal moisture levels and prevent odors from developing.
The Composting Process: What Happens Inside Your Bin
As your compost bin starts to break down, microorganisms get to work on transforming kitchen scraps and yard waste into a nutrient-rich soil amendment. This process is both fascinating and essential for creating healthy indoor compost.
Understanding Microbial Activity in Compost
Microorganisms are the unsung heroes of composting. They’re responsible for breaking down organic matter into a nutrient-rich soil amendment. These tiny organisms feed on carbon-rich materials like leaves and straw, releasing enzymes that dissolve complex molecules into simpler forms.
As microorganisms work their magic, they convert nitrogen from waste materials into ammonia gas, which is released into the air. This process also releases carbon dioxide as a byproduct. However, if there’s an imbalance of “green” (nitrogen-rich) to “brown” (carbon-rich) materials in your compost pile, this can lead to unpleasant odors and potentially create anaerobic conditions.
To promote healthy microbial activity, ensure your compost has the right mix of green and brown materials. Aim for a 2:1 or 3:1 ratio of brown to green. Add water judiciously to maintain moisture levels between 40-60%. Regular turning also helps aerate the pile, allowing microorganisms to thrive.
Maintaining an optimal temperature range (typically between 130°F and 140°F) is crucial for microbial activity. If your compost pile gets too hot or cold, this can inhibit microorganism growth. Monitor your pile’s progress by checking its temperature with a food thermometer.
Managing Odors and Moisture Levels in Your Compost Bin
Proper moisture levels are crucial for efficient decomposition. If your compost bin is too dry, decomposition will slow down significantly, while excessive moisture can lead to anaerobic conditions and strong odors. Aim to maintain a consistency similar to that of a damp sponge.
To achieve this balance, ensure you add a mix of “green” materials (high in nitrogen) like food scraps and grass clippings along with “brown” materials (high in carbon) such as dried leaves or shredded newspaper. Brown materials help absorb excess moisture and odors.
Regularly check the compost pile’s temperature by inserting a thermometer. A healthy compost pile should reach temperatures between 130°F to 140°F (54°C to 60°C). If it gets too hot, add more brown materials. For odor control, bury new additions under a layer of existing compost or turn the pile regularly.
Maintaining optimal moisture levels and minimizing odors will not only make your indoor composting process more efficient but also prevent pests from being attracted to your bin.
Troubleshooting Common Indoor Composting Issues
We’ve all been there: your indoor composting bin starts to smell, or you notice mold growing on top. Let’s tackle these common issues and get your indoor composting back on track!
Identifying and Fixing Pests or Rodents in Your Compost Bin
Fruit flies and rodents can be a significant problem when composting indoors. Fruit flies are attracted to sweet-smelling materials like fruit and vegetable scraps, which should ideally be balanced with carbon-rich ingredients like dried leaves or shredded newspaper. To prevent fruit fly infestations, make sure to bury scraps deep within the compost pile and cover them with a layer of dry material.
Rodents, on the other hand, are often drawn to easily accessible food sources and moisture. Secure your compost bin by sealing any gaps or holes with metal wire mesh, and keep it at least three feet away from any exterior walls. Regularly check for signs of rodents, such as gnaw marks or shredded materials.
To eliminate pests once they’ve infested the compost bin, try adding a layer of diatomaceous earth, a non-toxic powder that dehydrates insects. You can also transfer the infested material to a separate pile and allow it to complete its decomposition cycle before returning it to your regular composting routine.
Overcoming Composting Challenges like Mold or Mildew
Mold and mildew growth is a common issue when composting indoors. To recognize it, look for white, greenish, or black patches on the surface of your compost pile. These can be accompanied by an unpleasant odor. Proper ventilation is essential to prevent moisture buildup and subsequent mold growth. Ensure that your bin has adequate airflow by leaving about 10-15% of its capacity empty.
Regular maintenance also plays a crucial role in preventing mold and mildew. Aim to turn your compost pile at least once a week, using a pitchfork or shovel to aerate it thoroughly. This helps to speed up decomposition, reducing the likelihood of mold growth. For added protection, you can sprinkle a thin layer of bulking agents like shredded newspaper or coconut coir on top of your compost pile. These materials absorb excess moisture and prevent the formation of anaerobic zones where mold thrives.
If you do notice mold or mildew, don’t panic – simply remove the affected area with gloves and a spoon, then add more carbon-rich materials to balance out your compost pile’s ratio.
Advanced Indoor Composting Techniques and Applications
Now that you’ve mastered the basics of indoor composting, it’s time to take your skills to the next level with advanced techniques for optimizing space and efficiency. We’ll explore innovative methods for maximizing nutrient-rich soil output.
Vermicomposting: Using Worms for Efficient Composting
Vermicomposting is a method of composting that utilizes worms to break down organic matter. This technique, also known as worm composting, offers several advantages over traditional composting methods. For one, vermicomposting accelerates the decomposition process, allowing for faster production of nutrient-rich soil. This is because earthworms are voracious consumers, able to process a significant amount of waste in a short period.
The resulting compost from vermicomposting contains higher levels of essential nutrients compared to traditional composting methods. Earthworms contribute to the increase in nutrient content through their excrement and burrowing activities, which enhance soil structure and fertility. To set up a worm composting system, you’ll need a shallow container with good drainage, a mix of bedding materials like coconut coir or shredded newspaper, and a sufficient number of red wiggler worms.
When done correctly, vermicomposting can be a space-efficient and odor-free method for indoor composting. Regular maintenance involves feeding the worms a consistent supply of organic matter and ensuring proper moisture levels. By adopting this efficient approach to composting, you can produce high-quality soil for your plants while minimizing waste disposal issues in your home.
Compost Tea: Brewing Liquid Fertilizer from Your Compost
Compost tea is a liquid solution made by steeping mature compost in water. This brewing process extracts the beneficial microorganisms and nutrients from the compost, creating a rich source of plant nutrition. To make compost tea, you’ll need a bucket or container with a lid, some mature compost, and clean water.
Submerge about 1-2 cups of mature compost in 5 gallons of water, making sure the compost is fully saturated. Allow the mixture to steep for 24 hours, then strain it through a cheesecloth or fine mesh into another bucket. The resulting liquid solution is your compost tea, ready to use as a natural fertilizer.
Compost tea can be applied directly to soil or plants, promoting healthy microbial growth and improving nutrient uptake. It’s an excellent option for seed starting, cuttings, or propagation of sensitive plants. When using compost tea, start with small doses (about 10% of the recommended fertilizer amount) and observe your plants’ responses before increasing the application rate.
Frequently Asked Questions
What if I have pets and want to compost indoors?
Yes, it’s possible to compost with pets in the household. However, you’ll need to take extra precautions to ensure that any pet waste or bedding doesn’t contaminate your compost bin. Consider using a separate composting area for pet waste or using a worm composter specifically designed for indoor use.
Can I compost meat and dairy products indoors?
No, it’s not recommended to compost meat and dairy products indoors due to the potential for attracting pests and creating unpleasant odors. These types of materials are best added to outdoor compost piles where they can break down more easily and efficiently.
How do I know when my indoor compost is ready for use in my plants?
A good rule of thumb is to wait until your compost has reached a dark, crumbly texture similar to soil. You can also perform a “squeeze test” by squeezing a handful of compost – if it holds its shape and doesn’t crumble easily, it’s still not ready. When you can easily break apart the compost with your hands, it’s ready for use.
Can I use indoor compost as a fertilizer in my hydroponic garden?
Yes, but be sure to pasteurize or heat-treat your indoor compost first to kill any potential pathogens that might harm your plants. This step is especially important if you’re using compost from an indoor worm composter or bokashi bin.
What if I notice mold or mildew growing in my indoor compost?
Mold and mildew can be a sign of too much moisture in your compost bin. To address this, ensure that your bin has proper ventilation and consider adding more brown materials like dried leaves or shredded newspaper to help balance out the carbon-to-nitrogen ratio.

