
Feeding your sourdough starter is not just about keeping it alive, but also about fostering its health and vitality. A well-fed starter is essential for producing bread with depth of flavor and texture, while a neglected one can lead to disappointment in the oven. The key to reaping these rewards lies in mastering the art of feeding your starter, which involves striking the right balance between frequency, quantity, and nutrient supply. This article will guide you through the basics of feeding your sourdough starter for maximum health and flavor, including expert tips on how often to feed it and what type of ingredients to use. Whether you’re a seasoned baker or just starting out, this guide will help you develop a thriving, robust starter that produces consistently delicious bread.
Understanding Your Sourdough Starter
Your sourdough starter is a living, breathing entity that requires regular care and attention to thrive. In this section, we’ll explore the characteristics of a healthy starter and what to look for when it’s time to feed it.
What is a Sourdough Starter?
A sourdough starter is a natural yeast culture used to leaven bread instead of commercial yeast. This microbial ecosystem is created by allowing wild yeast and bacteria present on flour and surfaces to ferment, resulting in a unique mixture of microorganisms. The starter’s importance lies in its ability to produce a complex flavor profile and a chewy texture that many bakers associate with artisanal bread.
Unlike commercial yeast, which relies on a single strain of yeast, sourdough starters contain a diverse range of microorganisms that work together to ferment sugars in the dough. This diversity is what sets sourdough apart from commercial yeast: it’s more unpredictable and requires a more nuanced approach to feeding and maintenance. However, this unpredictability also allows for greater flexibility and adaptability – bakers can experiment with different flours and environments to create unique starter cultures.
A healthy sourdough starter is not just a mixture of microorganisms but an active participant in the bread-making process. It’s essential to understand the characteristics of your starter, including its appearance, texture, and behavior, to provide it with the right conditions for optimal performance. In the next section, we’ll explore the different types of sourdough starters and how they affect feeding habits.
Types of Sourdough Starters
A sourdough starter can be either wild or cultivated. Wild starters are developed naturally through a process of spontaneous fermentation, often using wild yeast and bacteria present in the environment. This type of starter is typically more unpredictable, with varying levels of activity and flavor profiles depending on the local microorganisms. Cultivated starters, on the other hand, are created by intentionally mixing flour and water to encourage the growth of specific yeast strains.
Wild starters require a more flexible feeding schedule, as their fermentation rates can fluctuate significantly. In contrast, cultivated starters tend to be more consistent in their behavior, allowing for a more routine feeding approach. When choosing between these two types, consider your personal preference for predictability and control versus the excitement of working with an unpredictable but potentially unique wild starter.
In general, wild starters may require less frequent feeding due to their increased activity levels, while cultivated starters benefit from regular, consistent nourishment. By understanding the characteristics of each type, you can better tailor your feeding approach to meet the needs of your sourdough starter.
Choosing the Right Food for Your Starter
When it comes to feeding your sourdough starter, choosing the right food is crucial for maintaining its health and encouraging activity. You’ll want to select a nutrient-rich option that’s easy to digest.
Nutrient-Rich Flours for a Healthy Starter
When choosing flours for your sourdough starter, consider whole wheat flour as a nutrient-rich option. Whole wheat flour contains more fiber and nutrients than refined all-purpose flour, which can lead to healthier starter development. Use it in moderation, however, as too much of any single type of flour can create an imbalance.
All-purpose flour is another popular choice for feeding sourdough starters due to its neutral flavor and ability to promote consistent growth. It’s also a good option when you want your starter to produce more delicate flavors in breads.
Rye flour adds depth and complexity to the starter, but use it sparingly as it can be quite potent. A small amount of rye (about 10-20% of the total flour) can add a rich flavor profile without overpowering other ingredients.
Incorporating different types of flours into your feeding routine allows you to create a balanced and diverse starter ecosystem. Experiment with various ratios and combinations, but keep in mind that too many changes at once can disrupt the starter’s health.
The Importance of Water Quality
Using filtered or bottled water is essential when your tap water has high mineral content, as it can affect the pH balance of your sourdough starter. If you live in an area with hard water, for instance, the minerals present may alter the environment within the starter, potentially leading to an overactive or sluggish starter.
To gauge whether your tap water is suitable for your sourdough starter, perform a simple test: mix 1 tablespoon of flour with 1 tablespoon of water in a clean container and observe its consistency after 24 hours. If it’s too thick or separates into layers, consider switching to filtered or bottled water.
Bottled spring water can also be an option if you’re concerned about mineral content. However, remember that the absence of minerals in distilled water may necessitate supplementing with a small amount of sugar or honey to maintain the starter’s health.
For some bakers, using tap water works just fine; it ultimately depends on your local water quality and your specific sourdough starter’s needs. Monitor your starter’s behavior and adjust accordingly – if you notice any adverse effects after feeding, reassess your water source as a potential contributing factor.
Feeding Your Sourdough Starter for Optimal Health
When it comes to nourishing your sourdough starter, the right feeding schedule and ingredients can make all the difference in maintaining its health and vigor. A well-fed starter is key to producing delicious bread every time.
Frequency and Quantity: Finding the Right Balance
As your sourdough starter ages and becomes more active, it will require less frequent feeding. However, this doesn’t mean you can neglect it entirely. A general rule of thumb is to feed your starter once a day for the first week or two after its initial creation, then gradually decrease frequency as it matures.
Climate plays a significant role in determining how often you should feed your starter. In warmer temperatures (above 70°F/21°C), starters can go from ravenous to lazy quickly, so it’s essential to monitor their activity closely and adjust feeding schedules accordingly. Conversely, in cooler environments, your starter may require more frequent nourishment.
The age of your starter is also a crucial factor. Younger starters, typically under six months old, need regular attention and will benefit from daily feedings. As they mature, you can gradually reduce the frequency to once every two or three days. Keep an eye on your starter’s behavior and adjust feeding schedules based on its response.
In general, aim for a balance between too much and too little food. If your starter is too hungry, it will be overly active and may even start to break down its own tissues. Conversely, if it’s underfed, it will slow down or even die. Monitor your starter’s activity, appearance, and texture to determine the ideal feeding schedule for your specific environment and starter age.
Tips for Maintaining a Consistent Rhythm
To maintain a consistent rhythm with your sourdough starter, it’s essential to establish a routine that works for you. This means scheduling regular feeding sessions and creating a reminder system to ensure you don’t forget to feed your starter.
You can start by setting aside the same time each day or week for feeding, such as first thing in the morning or right before bed. Consistency is key when it comes to maintaining a healthy starter. Try using a planner, calendar, or app to remind yourself when it’s time to feed your starter.
Consider implementing a routine that involves multiple small feedings throughout the day rather than one large feeding session. This can help maintain the delicate balance of microorganisms in your starter and prevent over-feeding. For example, you could start with a small feeding in the morning and then another later in the day.
A simple habit to cultivate is to always perform two tasks simultaneously when feeding your starter: discarding half of the starter and adding fresh flour and water. This helps maintain consistency and prevents neglecting one aspect of feeding while focusing on the other.
Advanced Feeding Techniques for Experienced Bakers
As you’ve worked with your sourdough starter, it’s time to refine your feeding techniques and take your bread-making skills to the next level. We’ll explore advanced methods to stimulate starter growth and optimize its performance.
Experimenting with Different Flour Blends
When experimenting with different flour blends, it’s essential to maintain a balance between novelty and starter health. Start by introducing new flours gradually, replacing 10-20% of the starter’s regular diet with a new ingredient each time. This gradual transition allows the microorganisms to adjust without shocking the starter.
For example, you might replace a portion of all-purpose flour with whole wheat or bread flour. Alternatively, try incorporating ancient grains like spelt, kamut, or rye into your blend. These additions can enhance the starter’s nutritional profile and flavor complexity.
When selecting new flours, consider their protein content and fiber levels. For instance, whole grain flours tend to have a higher fiber content than refined flours. This can affect the starter’s activity and texture, so be prepared to adjust feeding schedules or quantities accordingly.
To ensure the health of your starter, maintain a consistent pH level by balancing acidic ingredients like whole wheat with alkaline ones like bread flour. Be mindful of over-processing, as it can damage the flour’s nutrient-rich bran and germ layers.
Boosting Your Starter’s Resilience
Strengthening your sourdough starter requires more than just regular feeding. To boost its resilience, you can try techniques like stretch and fold, which helps maintain even distribution of yeast and bacteria. This method involves gently stretching the starter’s surface with a spatula or spoon to break down gluten strands, promoting healthy growth.
Another approach is using a proofing box to regulate temperature and humidity levels. By creating an optimal environment, you can encourage your starter to develop robustness and adaptability. This is particularly useful during extreme weather conditions or when experimenting with new ingredients.
You can also experiment with different flour blends to introduce unique characteristics to your starter. For instance, using a combination of all-purpose and whole wheat flours may enhance its ability to withstand fluctuations in temperature and humidity. Keep in mind that over-reliance on single types of flour can lead to an imbalanced ecosystem.
To get the most out of these techniques, focus on gradual implementation and observation. Monitor your starter’s response to new methods or ingredients, adjusting as needed to prevent overwhelming its delicate balance. By combining these advanced techniques with regular feeding and care, you’ll be well on your way to cultivating a resilient sourdough starter that can thrive in various environments.
Troubleshooting Common Feeding Issues
Feeding issues can be frustrating, so let’s tackle some common problems you might encounter when caring for your sourdough starter. We’ll cover solutions to get your starter thriving again.
What to Do When Your Starter is Too Active
When your sourdough starter is too active, it can be overwhelming to manage. A starter that’s too lively may produce too much carbon dioxide, causing bread to overproof or collapse. To bring your starter back into balance, try reducing the frequency of feedings. Instead of feeding your starter daily, try feeding it every 12-24 hours for a few days to give it time to relax.
Another option is to adjust the environment in which you store your starter. Make sure it’s not too warm or drafty, as this can contribute to overactivity. Keep your starter at room temperature (around 70-75°F/21-24°C), and away from direct sunlight. You can also try placing it in a cooler location or even the refrigerator for short periods to slow down its activity.
If you’re still struggling with an overly active starter, consider adjusting the ratio of flour to water in your feedings. Using a higher proportion of water can help to dilute the starter’s yeast and bacteria, giving it time to calm down. For example, if you normally use 1:1:1 (starter:flour:water), try reducing the amount of starter or increasing the amount of water for a few feedings to see if this helps.
Signs of a Starving Sourdough Starter
A starving sourdough starter often exhibits sluggish behavior, such as failing to rise quickly after feeding or taking longer than usual to recover from a long period of inactivity. This can be due to a lack of nutrients or an imbalance in the starter’s ecosystem. Another warning sign is mold growth on the surface of the starter. When this occurs, it’s essential to discard the affected area and reassess your feeding schedule.
To address these issues, start by re-examining your feeding frequency and quantity. Check if you’ve been neglecting to feed your starter regularly or providing inadequate food for its needs. Consider increasing the amount of flour or water in each feeding session to provide a nutritional boost.
If you suspect that your starter is starving due to an imbalance in its ecosystem, try incorporating a more diverse range of flours into your feedings. This can help introduce beneficial microorganisms and improve the overall health of your starter. Be cautious not to over-correct, as this can disrupt the delicate balance within the starter’s ecosystem.
Regularly monitoring your starter’s behavior and making adjustments as needed will help prevent starvation and maintain a healthy, thriving sourdough culture.
Maintaining Your Sourdough Starter’s Health Over Time
As you continue to nurture your sourdough starter, it’s essential to monitor its activity and adjust feeding schedules accordingly to maintain optimal health and performance. Regular monitoring will help prevent over- or under-proofing issues.
Monitoring Progress and Adjusting Feeding Habits
Regularly monitoring your sourdough starter’s health is crucial for maintaining its well-being over time. To do this, observe how it responds to feeding and changes in its environment. A healthy starter should be active yet calm, with a slightly puffed or domed appearance after feeding. Look for signs of distress, such as an excessive rise or fall, unusual odors, or mold growth.
Monitor the starter’s behavior over several feedings to identify patterns. For example, if it consistently rises too much during warmer months but struggles during cooler periods, adjust your feeding schedule accordingly. Similarly, if you notice that adding a specific type of flour causes issues, consider switching to a different one.
Adjusting feeding habits may involve tweaking the frequency or quantity of feedings. If you observe that your starter is too hungry and devouring its food in hours, try reducing the amount fed or increasing the interval between feedings. Conversely, if it seems sluggish, you can increase the frequency or add more food. Keep in mind that every starter is unique, so be prepared to make adjustments based on your observation of its specific needs.
Integrating Your Starter into Your Baking Routine
As you become more comfortable with maintaining your sourdough starter’s health, it’s time to integrate it into your regular baking routine. This means planning ahead and incorporating your starter’s needs into your recipe preparation. One way to do this is by scheduling a specific day each week for feeding and maintenance tasks. This could be as simple as setting aside an hour on Sundays to tend to your starter.
To prepare recipes, consider the time it takes for your starter to rise and incorporate that into your planning. For example, if you’re making a sourdough bread recipe that requires a 24-hour rise, plan to start the process early in the morning or the night before. You can also use this time to plan out meals and snacks for the week, incorporating recipes that utilize your starter.
To make integration easier, keep a few staples on hand, such as flour, water, and salt. This will allow you to quickly whip up a batch of starter food when needed. Additionally, consider investing in a large container or jar with a wide mouth to store your starter during periods of inactivity.
Frequently Asked Questions
What happens to my sourdough starter when I go on vacation or will be away from home for an extended period?
You can feed your sourdough starter once a week while you’re away, but it’s better to prepare it for dormancy by reducing feeding frequency to once every 10-14 days. This will help it survive the long break without requiring too much attention. Before leaving, also make sure to store it in an airtight container in the refrigerator at around 39°F (4°C) to slow down its activity.
How do I know when my sourdough starter is ready for its first loaf of bread?
Your sourdough starter is usually ready to be used in bread making after 7-10 days of regular feeding. However, this can vary depending on the environment and the type of flour you’re using. To check if it’s ready, perform a “float test”: gently place the starter into a glass of water; if it floats, it’s active enough to be used in bread making.
Can I use my sourdough starter for other types of baked goods besides bread?
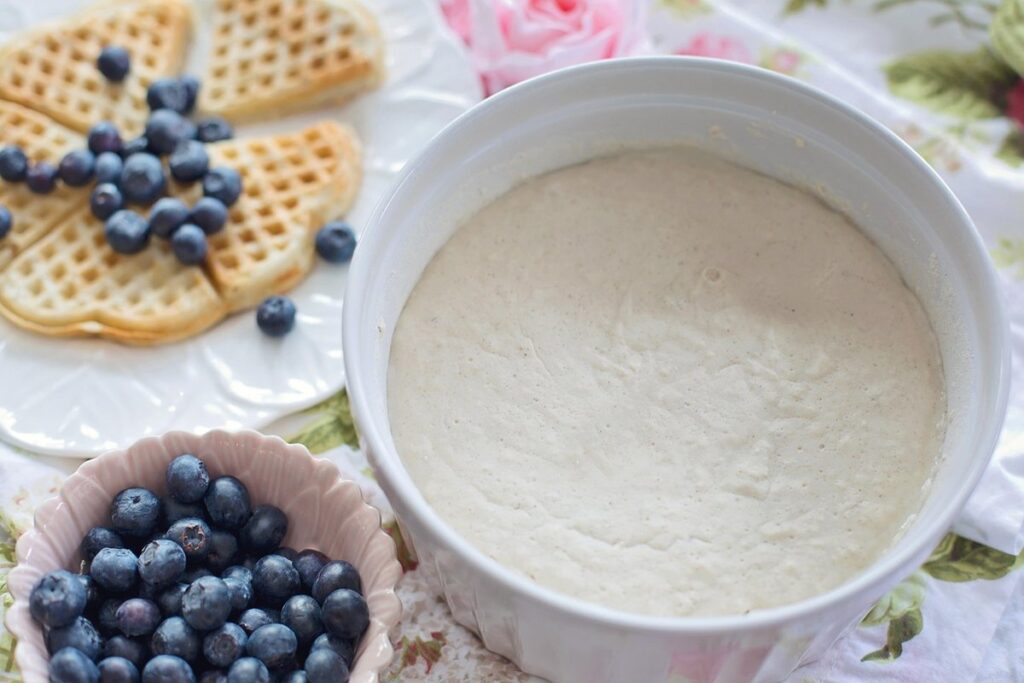
Yes, you can experiment with using your sourdough starter in various recipes like pancakes, waffles, and even pizza dough. However, keep in mind that the ratio of starter to flour may need to be adjusted depending on the specific recipe and desired texture.
What if I accidentally overfeed my sourdough starter? Will it still survive?
Yes, your sourdough starter can recover from being overfed. Simply reduce feeding frequency for a few days to allow it to adjust back to its normal pace. Also, consider adjusting the environment by keeping it in a cooler place or reducing the amount of food provided at each feeding.
Can I store my sourdough starter in the freezer instead of letting it go dormant?
Yes, you can store your sourdough starter in the freezer for up to 3 months by placing it in an airtight container or freezer bag. Before freezing, make sure it’s as active as possible and has been fed once in the last 24 hours. When you’re ready to revive it, simply thaw it at room temperature and feed it regularly until it becomes active again.

