
Making your own self-rising flour at home is a simple yet game-changing skill that can save you money and give you complete control over the ingredients. Store-bought self-rising flour often contains additives and preservatives, which can be detrimental to certain diets or preferences. By making it yourself, you can choose the type of leavening agents, salt content, and even add a touch of extra flavor. The process is surprisingly easy and requires just three basic pantry staples: all-purpose flour, baking powder, and salt. In this article, we’ll show you how to mix these ingredients together to create a custom blend that suits your needs. By the end of this guide, you’ll be able to whip up self-rising flour in no time, perfect for baking cakes, biscuits, or any recipe that calls for it.
Understanding Self Rising Flour
Self-rising flour is a convenient pantry staple, but making it from scratch can be a game-changer for bakers. We’ll break down its essential components and how they work together to create this versatile ingredient.
What is Self Rising Flour?
Self rising flour is a type of pre-mixed flour that contains baking powder and salt. This combination makes it easy to bake various recipes without needing additional leavening agents. The addition of baking powder, specifically, is crucial as it releases gas more slowly over time, allowing dough to rise evenly and consistently.
When you purchase self rising flour from a store, the proportion of baking powder and salt is typically pre-determined by the manufacturer. This balance is key to achieving the right texture and flavor in your baked goods. However, when making self rising flour from scratch, it’s essential to get this ratio correct to avoid over- or under-leavening.
In general, store-bought self rising flour contains around 1.5% baking powder and 0.5% salt by weight. If you’re creating a homemade version, aim for a similar balance – though feel free to experiment with different ratios to suit your preferences. Keep in mind that using too little or too much leavening agent can significantly impact the final product’s texture and flavor.
Why Make Your Own Self Rising Flour?
Making your own self rising flour can be a game-changer for those on a tight budget. Store-bought self rising flour can be expensive, especially when purchased in small quantities. By making it yourself, you can buy the individual ingredients in bulk and save money in the long run. For example, if you regularly bake biscuits or scones, buying a 5-pound bag of all-purpose flour, baking powder, and salt can be significantly cheaper than purchasing pre-mixed self rising flour.
Customization is another significant benefit of making your own self rising flour. If you have dietary restrictions or preferences, such as gluten-free or low-sodium requirements, you can easily adjust the ingredients to suit your needs. This level of control allows you to create a self rising flour blend that perfectly suits your baking style and dietary needs.
Consider this: if you’re making a batch of biscuits for a special occasion, you might want to use a high-quality, artisanal salt instead of regular table salt. By using individual ingredients, you can incorporate these kinds of nuances into your self rising flour blend, elevating the flavor and texture of your baked goods.
Ingredients and Equipment Needed
Before we get started, make sure you have all the necessary ingredients and equipment on hand to avoid any last-minute trips to the store. You’ll need a few common pantry staples and some basic kitchen tools.
Essential Ingredients
To make self rising flour from scratch, you’ll need three essential ingredients: all-purpose flour, baking powder, and salt. These components work together to give your homemade flour a light, tender texture and a subtle flavor.
All-purpose flour provides the structure and elasticity necessary for yeast doughs to rise. It’s the foundation of self rising flour, comprising about 98-99% of the mix. Using a high-quality all-purpose flour will ensure that your finished product has a pleasant texture and taste.
Baking powder is the leavening agent responsible for making your baked goods rise. It contains both baking soda (sodium bicarbonate) and an acid (usually cream of tartar), which react to produce carbon dioxide gas when exposed to liquid ingredients. This reaction causes dough to expand, creating a light, airy texture.
Salt serves as a flavor enhancer and also helps control yeast growth in your dough. It’s present in small amounts but plays a crucial role in balancing the sweetness of baked goods and promoting even fermentation. Make sure to use plain salt (not iodized or sea salt) for best results.
Optional Ingredients and Additives
When making self rising flour from scratch, you have the flexibility to incorporate various optional ingredients and additives to create different types of flours. One popular variation is adding whole wheat flour, which can enhance the nutritional profile of your homemade self rising flour. To make a whole wheat version, simply substitute 25-50% of the all-purpose flour with whole wheat flour.
Another option is incorporating oat flour, which can add a nutty flavor and slightly denser texture to your self rising flour. Keep in mind that using oat flour may affect the overall rise and structure of your baked goods, so you may need to adjust the liquid content or yeast amount accordingly.
Some other ingredients you can experiment with include:
- Oat bran for added fiber and nutrition
- Flaxseed meal for extra omega-3 fatty acids and texture
- Sunflower seeds for a nutty flavor and crunchy texture
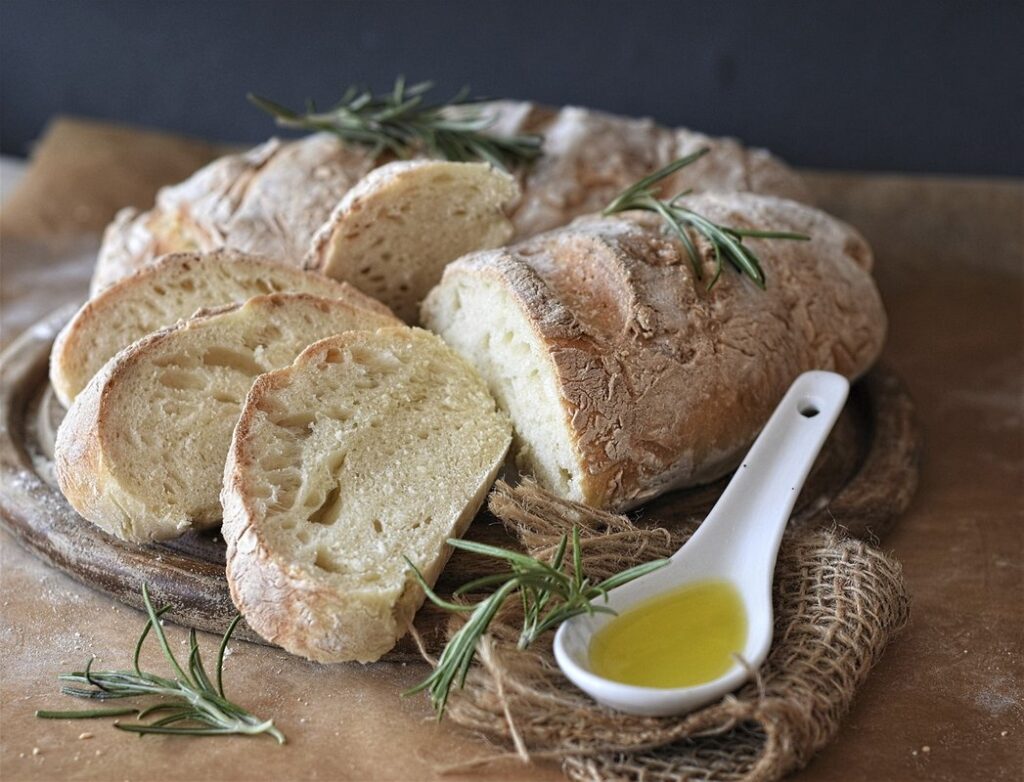
- Herbs like rosemary or thyme for unique flavor profiles
When adding optional ingredients, remember to adjust the ratio of dry ingredients according to the specific ingredient’s absorption rate. For example, using oat flour may require more liquid due to its high starch content. Experiment with small batches to find the perfect balance for your desired type of self rising flour.
Measuring and Mixing the Dry Ingredients
To make self rising flour from scratch, you’ll need to carefully measure out your dry ingredients, including baking powder, salt, and a crucial ratio of all-purpose flour. Let’s start by getting these proportions just right.
Accurate Measurement Techniques
To ensure accurate measurement of dry ingredients, it’s essential to level off cups and spoons when measuring. This is particularly crucial for self rising flour recipes, as small variations in ingredient quantities can significantly impact the final product’s texture and rise.
When using a dry measuring cup, fill it up to the desired amount, then use a straight edge or knife to level off the ingredients. Do not pack down the ingredients, as this can lead to incorrect measurements.
For measuring with spoons, especially when working with small quantities, use a digital kitchen scale for precision. However, if you don’t have access to a scale, use a spoon that’s specifically designed for dry ingredients and gently scoop up the desired amount. Level off the top of the spoon by running it across the rim of the container or bowl.
It’s also important to note that different types of containers can affect measurements. For instance, if you’re using a measuring cup with markings on the side, ensure these markings are level and not tapered. This will prevent over- or under-measuring ingredients. By following these simple tips, you’ll be able to achieve accurate measurements for your self rising flour recipe.
Combining Dry Ingredients
When combining dry ingredients for self rising flour, start by adding 1 1/2 teaspoons of baking powder and 1 teaspoon of salt to a large bowl. If using optional additives such as sugar or extra salt, add them at this stage. Whisk the dry ingredients together until they are evenly distributed, taking care not to create a cloud of powdery dust.
For best results, use a dedicated dry measuring cup to scoop out the flour and then pour it into the bowl with the leavening agents and salt. This helps prevent over- or under-mixing the ingredients. Begin by pouring in about 2 cups of all-purpose flour, then gradually add more as needed, whisking continuously to avoid clumps.
To incorporate optional additives like sugar, use a light hand – typically no more than an additional 1 tablespoon per 2 cups of flour. Be cautious not to overdo it, as excessive additions can disrupt the delicate balance of leavening agents in self rising flour.
Mixing and Sifting
Now that we’ve created our dry ingredients blend, it’s time to combine them with other essential elements to create our self rising flour. This step is crucial in achieving the perfect balance of texture and rise.
The Importance of Sifting
Sifting is a crucial step when making your own self rising flour. It’s essential for removing lumps and ensuring even distribution of ingredients, which can affect the final product’s texture and rise. When you don’t sift, the dry ingredients can clump together, leading to inconsistent results in baked goods.
To sift effectively, use a fine-mesh sieve or a sifter with large holes. Hold it over a bowl or another container to catch the sifted ingredients. Start by pouring the dry ingredients into the sifter or sieve in small increments, about 1/4 cup at a time. Gently shake the sifter back and forth, allowing the ingredients to fall through the mesh. Repeat this process until all the ingredients have been sifted.
Sifting not only breaks up clumps but also incorporates air into the dry ingredients. This helps to create a lighter texture in your final product. Be sure to sift your self rising flour mix over a surface that’s easy to clean, as sifting can be messy.
Incorporating Air for Better Rise
Introducing air into the mixture is a crucial step in making homemade self rising flour. Air incorporation helps to improve the texture and rise of baked goods by creating a more even distribution of ingredients and allowing for better leavening action.
When you mix dry ingredients like flour, baking powder, and salt, they tend to clump together, forming dense pockets that can affect the final product’s texture. By incorporating air, you break down these clumps and distribute the ingredients more evenly. This helps the baking powder to react with liquid ingredients more efficiently, resulting in a lighter, flakier crumb.
To incorporate air effectively, sift your dry ingredients into the mixing bowl after measuring them. Alternatively, use a fork or whisk to gently mix the ingredients until they’re well combined and aerated. Avoid over-mixing, as this can compact the mixture and defeat the purpose of introducing air. A gentle touch is essential here – aim for a smooth, even consistency that’s free from lumps and clumps. With practice, you’ll get a sense of how much air to introduce without over- or under-doing it.
Storage and Shelf Life Considerations
When making self rising flour from scratch, it’s essential to consider how you’ll store your homemade blend to maintain its potency and shelf life. Proper storage will keep your flour fresh for longer.
Proper Storage Techniques
Store homemade self rising flour in airtight containers to maintain its quality and shelf life. Transfer the freshly made flour into a clean, dry container with a tight-fitting lid. This prevents moisture from seeping in and causing clumping or spoilage.
For long-term storage, consider using glass jars or plastic containers specifically designed for storing dry goods. These containers typically have airtight seals that prevent air, light, and pests from affecting the flour’s quality. If you’re using a glass jar, make sure to clean it thoroughly before filling it with self rising flour.
Keep the stored flour in a cool, dark place such as a pantry or cupboard. Avoid storing it near heat sources like ovens or radiators. Exposure to high temperatures can cause the flour to become stale or rancid. A small amount of flour will typically keep for several weeks at room temperature if stored properly. However, for optimal results and longer shelf life, store self rising flour in a freezer-safe container at 0°F (-18°C) or below.
Tips for Long-Term Storage
Freezing is an excellent way to extend the shelf life of homemade self rising flour. Transfer the cooled flour mixture into airtight containers or freezer bags, pressing out as much air as possible before sealing. Label and date the containers so you can easily keep track of how long they’ve been stored. Frozen self rising flour will typically retain its quality for 3 to 6 months.
Another option is refrigeration, which works well for smaller batches. Store the cooled flour mixture in a covered container or plastic bag at a consistent refrigerator temperature below 40°F (4°C). You can expect a shelf life of up to 2 weeks in the refrigerator.
Before using frozen or refrigerated self rising flour, always inspect it for any signs of spoilage, such as an off smell or mold. If you notice anything unusual, err on the side of caution and discard the flour. When you’re ready to use your stored flour, simply scoop out what you need and let it come to room temperature before using in your recipe. This ensures that the flour has regained its optimal texture and performance.
Recipe Applications and Variations
Now that you’ve mastered making self-rising flour from scratch, let’s get creative with it! We’ll explore various recipe ideas and substitutions to take your baking skills to the next level.
Basic Biscuit Recipe Using Self Rising Flour
To showcase the versatility of homemade self rising flour, let’s start with a simple biscuit recipe. This classic Southern staple is a great way to test the performance of your freshly made self rising flour.
You’ll need 2 cups of the homemade self rising flour, 1/4 cup cold unsalted butter, 3/4 cup buttermilk, and 1/2 teaspoon salt. Preheat your oven to 425°F (220°C). In a large bowl, whisk together the flour, salt, and cold butter until the mixture resembles coarse crumbs.
Next, pour in the buttermilk and stir until the dough comes together in a shaggy mass. Turn the dough out onto a floured surface and knead it gently until it becomes cohesive. Roll the dough out to about 1 inch (2.5 cm) thickness and use a biscuit cutter or the rim of a glass to cut out rounds.
Place the biscuits on a baking sheet lined with parchment paper, leaving about 1 inch (2.5 cm) of space between each one. Brush the tops with a little extra melted butter and bake for 12-15 minutes, or until golden brown.
Customizing Self Rising Flour for Different Recipes
To customize self rising flour for different recipes, you can adjust the proportions of ingredients or add unique flavorings to suit various baking needs. For instance, if a recipe calls for a gluten-free variation, you can substitute up to 25% of the all-purpose flour with a gluten-free alternative like almond or coconut flour.
When adapting self rising flour for savory applications, such as breads or pizza crusts, reduce the amount of salt and consider adding herbs or spices to enhance flavor. Conversely, for sweet baked goods like cakes or cookies, increase the sugar content and omit any salt altogether.
Some recipes may require a higher or lower ratio of leavening agents. For example, if you’re making a yeast-based bread, you can reduce the baking powder content by up to 50% since yeast provides its own leavening properties. Alternatively, for delicate pastries, add an extra pinch of baking powder to ensure they rise evenly.
You can also experiment with different flavor profiles by incorporating additional ingredients like dried fruits, nuts, or cocoa powder into your self rising flour blend.
Frequently Asked Questions
Can I Use Old Baking Powder for Making Self Rising Flour?
Yes, old baking powder can still be used for making self rising flour, but it may affect the rise and flavor of your baked goods. If you’re using expired or old baking powder, it’s best to discard it and use fresh baking powder for optimal results.
How Long Does Homemade Self Rising Flour Last Before Spoiling?
Homemade self rising flour can last for several months when stored properly in airtight containers. However, if you notice any changes in texture or smell, it’s best to err on the side of caution and discard the flour. Generally, homemade self rising flour lasts longer than store-bought versions due to its absence of additives.
Can I Add Other Leavening Agents Like Yeast to Self Rising Flour?
Yes, you can add yeast to your self rising flour mixture for a different type of leavening. However, keep in mind that yeast requires warmer temperatures and longer proofing times, which may change the characteristics of your final product. Be sure to adjust your recipe accordingly.
How Do I Know If My Self Rising Flour is Working Properly?
To determine if your self rising flour is working properly, check for a consistent rise in your baked goods, such as biscuits or cakes. You can also test the texture by making a small batch of biscuits and checking their tenderness and flakiness.
Can I Mix Different Types of Flours Together to Create Custom Self Rising Flour?
Yes, you can mix different types of flours together to create custom self rising flour blends. This allows for greater flexibility in your recipes and can accommodate various dietary needs or preferences. Simply adjust the ratio of ingredients according to your desired blend and proceed with making your self rising flour as usual.

