
As the weather warms up and flowers start to bloom, kids are bursting with energy and creativity. It’s the perfect time to get them involved in some fun and educational spring arts and crafts projects. Not only do these activities foster their imagination and fine motor skills, but they also provide an opportunity for learning about the seasons and our environment. In this article, you’ll discover a variety of engaging projects that are easy to set up and require minimal supervision, including colorful collages made from recycled materials, vibrant finger paintings inspired by spring’s palette, and DIY decorations that add a personal touch to your home or classroom. By following these creative ideas, you’ll be able to help your little ones express themselves while developing essential skills that will last a lifetime.
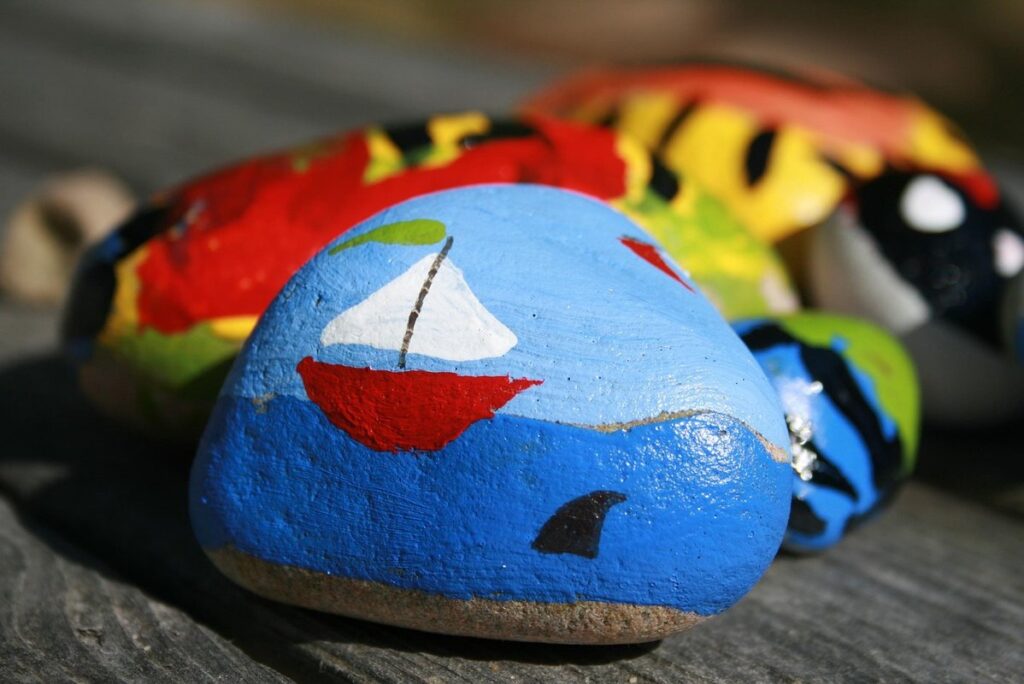
Getting Started with Spring-Themed Art
To begin creating beautiful spring-themed art, start by gathering essential materials and supplies that will help bring your child’s imagination to life.
This includes various paints, brushes, markers, scissors, glue, and colorful papers to get started.
Understanding the Basics of Spring Crafts
When it comes to spring-themed crafts, you’ll need a range of materials, including construction paper, glue, scissors, and various textures like leaves, flowers, and twigs. Spring crafts often involve water-based techniques like painting and drawing, but may also incorporate more delicate methods, such as stamping or stenciling. When working with younger children, it’s essential to consider their age and skill level when selecting materials and techniques.
For example, toddlers can start with simple projects like making handprint flowers using paint or markers, while older kids can move on to more complex tasks like collage-making with layered paper and natural elements. Be mindful of any potential allergens or safety hazards, such as glitter or small parts, when planning your project. Additionally, think about the environment: many spring crafts involve collecting materials from nature, so be sure to take necessary precautions to preserve these items for future use.
Some popular techniques in spring-themed crafts include using watercolor paints to capture soft pastel colors and incorporating natural textures like fabric or paper to add depth to a piece.
Preparing Your Child for Spring Crafts
Before starting spring crafts with your child, it’s essential to prepare a conducive workspace. Designate a specific area for arts and crafts, free from clutter and distractions. Cover your work surface with newspaper or a plastic tablecloth to make cleanup easier. Gather necessary supplies, such as paper, glue, scissors, and paint, in a convenient location.
Encourage creativity by offering a variety of materials and letting your child choose what they want to use. Consider setting up a “craft station” where kids can access different supplies and explore new techniques. For younger children, provide pre-cut shapes or templates for easier handling.
To foster imagination, ask open-ended questions like “What do you think this flower would look like?” or “Can you show me how the sun shines on the clouds?” Avoid giving explicit instructions or expecting a specific outcome. Instead, focus on the process and let your child’s creativity shine through. By setting up a supportive environment, you’ll be well-prepared to enjoy the spring crafting experience with your child. Provide necessary guidance without stifling their imagination.
Spring-Inspired Collage Art Projects
Get creative with paper flowers, butterflies, and more as we explore fun ways to bring spring-inspired themes into your child’s collage art projects. From nature-inspired designs to colorful patterns, the possibilities are endless!
Creating Nature-Inspired Collages
When creating nature-inspired collages, encourage your child to explore the outdoors and collect various natural materials like leaves, flowers, twigs, and rocks. These elements can be used as is or manipulated through techniques like tearing, crumpling, or flattening to create unique textures.
To incorporate these natural materials into art pieces, start by gathering a variety of items on a walk or in your own backyard. Discuss with your child how each element can be used – for example, leaves might represent spring growth, while twigs could symbolize new beginnings.
Begin the collage-making process by applying a background layer, such as construction paper or fabric. Then, have your child arrange the natural materials on top, experimenting with different compositions and textures. Encourage them to consider color, shape, and size when placing each element.
To add an extra dimension, try using adhesives like glue or decoupage medium, which can be applied in thin layers to avoid overwhelming the collage. You might also explore using natural materials like seed pods, feathers, or flowers as a focal point or central image.
Recycled Materials Collage Ideas
When working with recycled materials, you can create a wide range of textures and colors by incorporating different types of paper, cardboard, and fabric scraps into your collages. For instance, newspaper pages can be torn into strips to add a rustic feel or cut into shapes for a more precise look.
Cardboard tubes from toilet paper rolls or paper towel rolls make great bases for collages, while cereal boxes provide sturdy backing material. You can also use old maps, music sheets, or book pages for added depth and interest.
To incorporate fabric scraps, try cutting them into strips or small pieces to create a patchwork effect or gluing larger sections onto the cardboard base. Consider using cotton fabrics like t-shirts or pillowcases for a soft, textured look. Be sure to pre-wash any fabric scraps before using them in your collage to remove any sizing or finish that might affect the adhesive.
To get started, sort through household items and gather materials that appeal to you or your child. Set aside any materials with too much texture or weight, as they may be difficult to work with.
Finger Painting Techniques for Spring
Get creative with finger painting as we share our favorite techniques for spring, from blooming flowers to sunny skies. Try out these fun and easy methods with your little ones.
Exploring Color Theory with Finger Paints
When introducing color theory concepts to kids, finger paints are an excellent medium for exploration. Start by explaining that primary colors – red, yellow, and blue – can’t be made from mixing other colors together. Use a simple example: if you mix two primary colors, you’ll create secondary colors like green (blue + yellow), orange (red + yellow), or purple (blue + red). Demonstrate this process on paper to illustrate the concept.
To reinforce understanding, have your child mix different combinations of primary colors and record their observations. For instance, what happens when blue and red are mixed? You might get a shade of brown or purple depending on the proportions used. This hands-on approach helps kids grasp color theory fundamentals in an engaging way.
Remember to encourage experimentation and exploration, but also be prepared for unexpected results! Some secondary colors may appear more vibrant than others due to factors like paint quality or mixing techniques. Keep the discussion focused on the process rather than the outcome, allowing your child’s creativity to shine through as they discover color combinations.
Creating Texture with Finger Paints
When working with finger paints, you can achieve a variety of textures by experimenting with different techniques. To create patterns, try dipping your fingers in paint and making prints on the paper. You can also use your fingers to draw lines or shapes, then add more layers of paint to build up the texture.
For swirls, hold your painting hand above the paper while still holding the brush or a clean finger in the paint. Gently tilt your hand to create a marbled effect. This technique works particularly well with bright colors like blue and yellow.
To create 3D effects, try dripping small amounts of paint onto the paper from a height. You can also use a toothpick or a small tool to draw lines or patterns on the wet paint. As it dries, the texture will become raised and three-dimensional.
DIY Spring Crafts for Kids’ Rooms
Give your child’s bedroom a fresh new look with these fun and easy DIY spring crafts that are perfect for kids to make and customize. From flowers to butterflies, we’ve got you covered!
Decorating with Nature-Inspired Art
When it comes to decorating a child’s room with nature-inspired art, the possibilities are endless. You can start by gathering real or artificial elements like flowers, branches, and rocks. Consider using a vase or container filled with fresh flowers or silk blooms as a centerpiece on their dresser or nightstand. Alternatively, you can create a mobile using artificial flowers in different shapes, sizes, and colors.
For a more rustic look, try arranging a few branches in a decorative vase or frame to add visual interest to the wall. You could also use a combination of real and artificial elements, like pairing fresh flowers with dried branches and rocks. When choosing items, encourage your child to think about the colors and textures that evoke springtime for them.
To make it even more engaging, you can involve your child in the process by letting them help gather materials or arrange the pieces in a vase or frame. This hands-on approach not only helps develop their creativity but also fosters a deeper connection with nature’s beauty.
Handprint and Footprint Art Projects
Handprint flowers are a classic spring craft that kids love. Paint a child’s hand with bright pink and yellow finger paints to create a flower shape. Add some green for the stem, and you’ve got a simple yet adorable decoration for a room or card. To add more detail, paint on some seeds or leaves around the flower.
Footprints can be just as creative when it comes to spring themes. Try painting footprints on large pieces of paper shaped like leaves or clouds. Add some green paint for the leaf veins or fluffy white clouds for a whimsical touch. For an added 3D effect, use textured paint or glue on paper with a leaf shape.
You can also try making handprint and footprint art using natural materials like twigs, rocks, and flowers. Collect items from outside, such as leaves, petals, and small sticks, to create a collage with your child’s handprints and footprints. This project encourages kids to explore nature while creating something beautiful for their room or to give as a gift.
Spring-Themed Card Making and Gift Ideas
Get creative and craft some lovely spring-themed cards and gifts for your little ones to give to family members, friends, or even teachers. From colorful flowers to happy bunnies, these ideas are sure to delight!
Designing Spring-Themed Cards
When designing spring-themed cards, consider using bright colors like pastel pink, baby blue, and sunshine yellow. These hues evoke feelings of new beginnings and renewal, perfect for celebrating special occasions like Easter or Mother’s Day. To add a personal touch, incorporate spring-themed embellishments such as small flower-shaped stickers or die-cuts in the shape of leaves.
You can also use spring-inspired stamps to create unique designs on your cards. Look for stamps featuring illustrations of blooming flowers, butterflies, or birds. These images will transport the recipient to a sunny meadow and add a playful touch to your handmade card.
For added texture and interest, incorporate die-cuts in various shapes and sizes. You can use a spring-themed die-cut cutter to create intricate designs like interlocking leaves or branches. Remember to balance bold designs with plenty of white space to prevent the card from feeling overwhelming.
Some popular spring-themed die-cuts include:
• Bunny ears
• Flowers
• Leaves
• Butterflies
Making DIY Spring Crafts for Gifts
Consider making hand-painted planters with your child. Gather a few terracotta pots, some acrylic paint, and a brush. You can let your child’s creativity shine by choosing bright spring colors or delicate pastel shades. To make the planter even more special, have them add a small design or pattern on the side.
Another idea is to create flower crowns using real or artificial flowers, floral tape, and some greenery like eucalyptus or ferns. This project can help your child develop their fine motor skills while learning about different types of flowers and foliage. You can also use this opportunity to teach them about the importance of bees and pollinators.
Personalized notebooks are a thoughtful gift idea for friends and family. Use paint, markers, or colored pencils to let your child decorate the cover with spring-inspired designs like flowers, birds, or butterflies. They can also write a personal message or inside joke on the first page. Consider adding a packet of seeds or a small potted plant as a surprise inside the notebook.
When choosing materials for these projects, select items that are safe and suitable for your child’s age and skill level.
Advanced Spring Arts and Crafts Projects
Take your spring arts and crafts skills to the next level by learning advanced techniques, from intricate paper mache to delicate glass painting. Get creative with these expert-level projects!
Mosaic Art with Spring Themes
Mosaic art is a fantastic way to engage kids with spring themes. Using tiles, glass pieces, and other materials, you can create beautiful artworks that reflect the season’s colors and motifs. To introduce mosaic art techniques to kids, start by using pre-made spring-themed templates or stencils. These can be found in craft stores or online.
You’ll need a variety of materials, including tiles, glass pieces, glue, and a surface to work on. For younger children, consider using a 3D mosaic kit that includes pre-cut shapes and a frame. This makes it easier for them to follow the design and achieve a cohesive look.
To make the project more engaging, incorporate spring elements such as flowers, butterflies, or birds into the design. Encourage kids to experiment with different materials and colors to create unique textures and patterns. You can also use natural materials like seashells or pebbles to add an extra layer of interest.
When working on a mosaic art piece, remember that it’s okay if it doesn’t turn out perfectly – the process is just as important as the final product!
Papier-Mâché Decorations for Spring
To create papier-mâché decorations for spring, you’ll need balloons, newspaper, scissors, and a mixture of flour and water. Inflate the balloon to the desired shape for your decoration, such as a vase or bowl. Then, cut strips of newspaper and apply them to the balloon with the papier-mâché paste, overlapping each strip slightly.
Once the first layer is dry, you can add more layers, gradually building up the design and texture. For a spring-themed decoration, consider incorporating elements like flowers, leaves, and branches into your design. You can use real or artificial flowers to create a 3D effect on your papier-mâché surface. Use a toothpick to attach small twigs or branches to the balloon, creating a delicate branch-like pattern.
For added realism, you can also use green paint to add color and depth to your leaves and stems. Once the final layer is dry, pop the balloon inside and carefully remove it from the papier-mâché shell. Allow your decoration to dry completely before displaying or varnishing with a clear coat. This project allows kids to experiment with texture and design while creating a unique spring-inspired piece of art.
Frequently Asked Questions
Can I use recycled materials for spring-themed collage art projects with very young children?
Yes, using recycled materials is an excellent way to introduce your little ones to the concept of reducing waste and repurposing everyday items. However, be sure to supervise them closely when handling materials like scissors or hot glue guns. You can find many creative ideas for using recycled materials in collages on websites dedicated to eco-friendly crafts.
How do I store my child’s spring arts and crafts projects so they remain preserved for a long time?
To keep your child’s artwork intact, consider storing them in acid-free folders or frames specifically designed for art preservation. You can also use plastic sleeves to protect the pieces from dust and moisture. Label each piece with the date, project name, and materials used to create it.
Can I make spring-themed crafts without a dedicated workspace at home?
Yes, you can definitely get creative even without a designated space. Start by clearing a small area on your kitchen table or countertop, cover it with newspaper or a plastic tablecloth, and let the creativity flow! You can also try working in short intervals to keep things manageable.
What if my child is particularly attached to their finished spring art project? How do I encourage them to take care of it?
Encourage your child to understand that their artwork is precious and should be treated with care. Explain the importance of handling fragile items gently, avoiding direct sunlight exposure, and keeping it clean by dusting it occasionally. You can also create a special “art gallery” in your home where they can display their favorite pieces.
How long will it take for my child to see improvement in their spring arts and crafts skills?
Improvement is usually noticeable within 2-3 sessions of regular practice, but every child learns at their own pace. Be patient and supportive as they explore different materials and techniques. Encourage them to experiment and try new things – this will help build confidence and fine-tune their creative skills over time.

