
If you’ve ever noticed a musty smell or felt sluggish after spending time indoors, you might be dealing with poor indoor air quality. The truth is, your home can harbor hidden pollutants and allergens that can affect your health and well-being. Air quality testing kits are readily available for DIY use, but many people don’t know how to properly test their homes or interpret the results. Professional services also offer a more comprehensive analysis of your indoor environment. However, not all tests are created equal, and it’s essential to choose the right method for your home. In this article, we’ll walk you through the process of testing your home’s air quality using both DIY kits and professional services, so by the end, you’ll be able to identify potential issues and take steps towards improving your indoor environment.
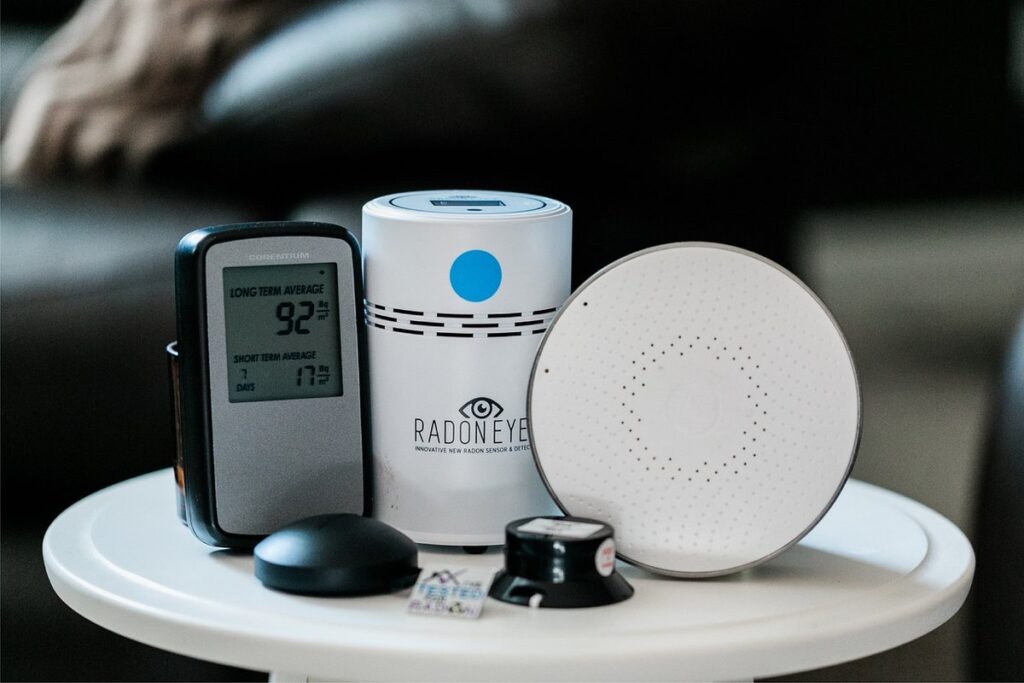
Understanding Indoor Air Quality and Its Importance
Before we dive into testing for air quality, it’s essential to understand what you’re looking for: clean air that makes your home a healthier space to live in.
What is Indoor Air Quality (IAQ)?
Indoor air quality (IAQ) refers to the measure of pollutants and contaminants present within a building’s indoor environment. Poor IAQ can have significant health implications, ranging from mild respiratory issues to more severe conditions like asthma attacks or even neurological damage. When you breathe in polluted air, particles and gases enter your lungs, causing inflammation and irritation.
Some common sources of poor IAQ include mold growth, radon buildup, and volatile organic compounds (VOCs) emitted by household products and building materials. These pollutants can be particularly problematic in areas with inadequate ventilation or high humidity levels. In addition to health concerns, poor IAQ can also lead to increased absenteeism from work or school, reduced productivity, and decreased property value.
To put this into perspective, consider the fact that Americans spend around 90% of their time indoors, where air quality is often more compromised than outdoors. This highlights the importance of monitoring and maintaining good IAQ in your home. Testing for air quality is a crucial step in identifying potential issues and taking corrective action to create a healthier indoor environment.
Factors Affecting Indoor Air Quality
Indoor air quality can be influenced by a wide range of factors. Pollutants from construction materials, such as volatile organic compounds (VOCs) emitted by new carpets and paint, can linger for months after installation. Household products like cleaning supplies, personal care items, and furniture treatments also contribute to IAQ problems.
Outdoor sources can also impact indoor air quality. For instance, nearby traffic or industrial activities can bring pollutants into the home through open windows or on clothing. Other factors include poor ventilation systems, high humidity levels, and pest infestations that release allergens and other contaminants into the air.
Some of the most common pollutants affecting IAQ in homes include particulate matter (PM), nitrogen dioxide (NO2), carbon monoxide (CO), and radon gas. These pollutants can come from a variety of sources, including combustion appliances, smoking, and nearby industrial activities. Identifying and addressing these sources is crucial for maintaining good indoor air quality.
Typically, the most significant IAQ issues are related to residential construction, renovation, or occupancy. For example:
• New homes often suffer from VOC emissions from building materials.
• Renovations can stir up dust and debris that exacerbate respiratory problems.
• High-occupancy homes with multiple people and pets may experience increased humidity levels, leading to mold growth.
It’s essential to consider these factors when testing for air quality in your home.
Choosing the Right Air Quality Testing Method
When it comes to testing your home’s air quality, choosing the right method can be overwhelming due to various factors and options available.
You’ll want to consider the type of pollutants you’re concerned about, as well as the size and layout of your space.
Types of Air Quality Tests Available
When selecting an air quality testing method, you have several options to choose from. One approach is to use DIY kits, which are available for purchase online or at home improvement stores. These kits usually involve collecting a sample of indoor air using a device like a pump or a filter, and then sending the sample to a laboratory for analysis.
Another option is professional air sampling, where a qualified consultant collects multiple samples from various locations within your home over a set period, typically 24-48 hours. This approach provides a more comprehensive understanding of your home’s indoor air quality by accounting for variables like temperature, humidity, and time of day.
Monitoring devices, such as sensors or detectors, can also be used to track indoor air quality in real-time. These devices are usually battery-powered and plug into a wall outlet, providing continuous readings of pollutants like particulate matter (PM), carbon monoxide (CO), and volatile organic compounds (VOCs). Some popular types of monitoring devices include smart sensors and air purifier-integrated monitors.
When choosing between these options, consider factors such as the specific pollutants you’re concerned about, your budget, and the level of detail you need in your test results.
Selecting the Appropriate Test for Your Needs
When identifying sources of odors or determining if a home has been contaminated with mold or asbestos, you need to choose tests specifically designed for these purposes. For example, if you suspect mold growth due to water damage, look for tests that detect mycotoxins and fungal spores. These tests are usually part of a comprehensive indoor air quality assessment.
Some air quality tests focus on volatile organic compounds (VOCs), which can contribute to unpleasant odors. These tests measure the levels of specific VOCs, such as formaldehyde or benzene. For asbestos detection, you’ll need a test that identifies friable asbestos-containing materials in your home.
In some cases, you may be concerned about radon gas levels or lead contamination. In these situations, specialized tests are available to detect and quantify radon and lead. These tests often require professional equipment and expertise to perform accurately.
Before selecting any air quality test, consider the specific contaminants of concern in your home. This will help you choose the most relevant test(s) for your situation.
DIY Air Quality Testing Kits: Pros and Cons
If you’re considering purchasing a DIY air quality testing kit, it’s essential to weigh its pros and cons before making a decision. These kits can be an affordable option for monitoring indoor air quality at home.
Benefits and Drawbacks of DIY Kits
DIY air quality testing kits can be an attractive option due to their cost-effectiveness and ease of use. Many kits are available on the market, offering a range of features such as temperature and humidity sensors, particulate matter (PM) monitors, and VOC detectors. These kits often come with user-friendly instructions and sometimes even mobile apps for data tracking.
However, there are also several drawbacks to consider. One major concern is the potential for inaccurate results. Without proper calibration and maintenance, DIY kits may provide misleading or inconsistent readings, which can be detrimental in identifying and addressing IAQ issues. Additionally, these kits usually have limited scope, often only detecting specific pollutants rather than providing a comprehensive analysis of indoor air quality.
When selecting a DIY kit, it’s essential to look for one that is specifically designed for residential use and meets the necessary standards for accuracy. Be sure to follow the manufacturer’s guidelines carefully and consider factors like battery life, data storage capacity, and replacement costs. Keep in mind that while DIY kits can be a useful starting point, they may not provide the same level of detail or expertise as professional testing methods.
Popular DIY Test Kits and Their Features
Several popular DIY air quality testing kits are available on the market. One such kit is the IQAir Indoor Air Quality Test Kit, which measures VOCs, particulate matter, and other pollutants. This kit includes a sensor that plugs into a smartphone or tablet via Bluetooth and provides real-time readings. Pricing for this kit starts at around $100.
Another option is the Awair Glow, a compact device that tracks air quality and temperature. It also monitors humidity and light levels, providing a comprehensive view of indoor conditions. The Awair Glow retails for approximately $150.
The Alen BreatheSmart Classic is a more advanced DIY kit, featuring four sensors to detect pollutants like VOCs, particulate matter, and allergens. This device also includes a built-in air purifier and Wi-Fi connectivity for remote monitoring. Pricing for the Alen BreatheSmart starts at around $250.
When choosing a DIY test kit, consider factors such as sensor accuracy, data storage capacity, and user reviews. Some kits may require subscription fees or offer limited free trials, so be sure to check these details before making a purchase.
Professional Air Quality Testing: When to Hire a Specialist
If you suspect your home has poor air quality, there are specific situations where it’s best to hire a professional for accurate testing and results. This often involves unknown contaminants or sensitive conditions like mold exposure.
Situations Requiring Professional Testing
You may need professional testing if you’re dealing with an indoor air quality incident, such as a mold infestation or a chemical spill. In these situations, a professional can identify health hazards and determine the best course of action to mitigate them. For instance, after a flood, it’s essential to test for mold growth in walls, ceilings, and floors to ensure safe occupancy.
A professional air quality consultant is also necessary when assessing the effectiveness of remediation efforts. If you’ve taken steps to improve indoor air quality but still experience issues, a specialist can determine if your efforts are sufficient or if additional measures are required. This might involve testing for pollutants such as radon, lead, or asbestos, which require specialized equipment and expertise.
When selecting a professional, look for one with experience in handling similar situations and possessing relevant certifications, like those offered by the Indoor Air Quality Association (IAQA) or the American Industrial Hygiene Association (AIHA). Ensure they use state-of-the-art testing equipment and follow established protocols to ensure accurate results.
How to Find and Choose a Qualified Air Quality Consultant
When searching for a qualified air quality consultant, it’s essential to ask the right questions during the hiring process. You should start by verifying their certifications and credentials from reputable organizations such as the American Industrial Hygiene Association (AIHA) or the Indoor Air Quality Association (IAQA). Ask about their experience with projects similar to yours, including any relevant case studies.
You should also inquire about their testing equipment and methods, ensuring they use industry-standard tools and techniques. Consider asking for references from past clients and check online reviews to gauge their reputation. Additionally, ask about their report format, data analysis capabilities, and availability for follow-up consultations. It’s crucial to understand how they will present your test results, as this will help you identify the sources of air quality issues in your home.
When evaluating a consultant’s credentials, consider factors such as their level of experience, industry certifications, and educational background. Be wary of consultants who only provide basic testing services without offering recommendations for remediation or long-term solutions. A qualified consultant should not only test your air quality but also offer guidance on how to improve it.
Interpreting Air Quality Test Results
Now that you’ve collected your air quality test results, it’s essential to understand what they mean and how to take corrective action to improve indoor air quality. We’ll break down each type of pollutant and provide guidance on interpreting the data.
Understanding Test Reports and Data
When examining test reports and data, it’s essential to understand measurement units. Typically, air quality tests report particulate matter (PM) levels in micrograms per cubic meter (μg/m³). Gases like carbon monoxide (CO), nitrogen dioxide (NO2), and volatile organic compounds (VOCs) are usually expressed as parts per billion (ppb) or parts per million (ppm).
To accurately interpret results, identify potential sources of errors. Check if the testing device was properly calibrated, and ensure it was used in a location representative of the area being tested. Factors like temperature, humidity, and air circulation can significantly impact measurements.
Recognize areas for improvement by examining test data against established safety standards or guidelines from organizations such as the US Environmental Protection Agency (EPA). A well-maintained home with good ventilation tends to have lower pollutant levels than one with noticeable signs of moisture damage or high usage of strong chemicals.
Common Issues with Air Quality Test Results and How to Address Them
Inconsistent readings are often a major concern when interpreting air quality test results. This can be due to various factors such as equipment calibration issues, human error during testing, or even the type of sampler used. For instance, a particulate matter (PM) sampler may not accurately capture particles in areas with high humidity.
To address inconsistent readings, it’s essential to understand that different air quality tests measure distinct pollutants. A low reading on one test might indicate high levels of another pollutant. Therefore, consider using multiple testing methods, especially if you’re concerned about specific pollutants like radon or mold.
When unclear recommendations for remediation arise, revisit the test report and identify key findings. Look for red flags such as extremely high readings or unusual patterns in the data. You may also need to consult with a professional air quality consultant who can provide personalized guidance on mitigation strategies.
If you’re unsure about how to address inconsistent readings or unclear recommendations, consider taking the following steps:
- Review your testing protocols and ensure proper calibration
- Consult multiple test reports for comprehensive results
- Identify potential sources of pollution based on test findings
- Seek expert advice from a certified air quality consultant
Remediation Strategies for Improving Indoor Air Quality
Now that you’ve identified potential air quality issues, it’s time to explore effective remediation strategies to improve indoor air quality and create a healthier home environment. We’ll walk you through these essential methods.
Identifying and Mitigating Sources of Pollution
Identifying and mitigating sources of pollution is a crucial step in improving indoor air quality. When interpreting test results, you may find high levels of pollutants such as particulate matter (PM), volatile organic compounds (VOCs), or radon gas. To address these issues, start by assessing ventilation rates. Check if your home has adequate airflow and consider upgrading to more efficient systems. This can be achieved through the installation of HEPA filters, whole-house fans, or energy recovery ventilators.
Next, identify and remove sources of pollution whenever possible. Common culprits include old carpets, upholstered furniture, and certain building materials like plywood or oriented strand board (OSB). Replace these with cleaner alternatives like hardwood floors, tile, or low-VOC paints. Be sure to follow manufacturer instructions for new materials and allow them to off-gas before occupancy.
When source removal isn’t feasible, focus on reducing pollutant emissions. For example, replace incandescent bulbs with LED options, which emit fewer VOCs during production and use. Additionally, consider using a dehumidifier to control moisture levels, as high humidity can exacerbate indoor air pollution issues. By tackling these sources of pollution, you’ll be well on your way to maintaining good IAQ and creating a healthier indoor environment.
Long-Term Solutions for Maintaining Good IAQ
To maintain good indoor air quality in the long term, it’s essential to implement regular testing and monitoring. This involves not only initial assessments but also ongoing evaluations to identify emerging issues before they become severe problems. For instance, if you’ve recently replaced a heating system or renovated a section of your home, it’s crucial to test for pollutants that might have been introduced during the process.
Proper maintenance of heating, ventilation, and air conditioning (HVAC) systems is also critical. This includes changing filters regularly, inspecting ducts for leaks, and ensuring proper airflow throughout your home. Typically, you should change disposable filters every 1-3 months, depending on usage and manufacturer recommendations. You should also consider upgrading to HEPA-rated filters, which can capture 99.97% of particles as small as 0.3 microns.
It’s also important to keep in mind the following best practices:
- Schedule annual professional HVAC maintenance
- Inspect and clean your ducts every 5-7 years
- Regularly check for signs of moisture damage or leaks in your home’s envelope
Frequently Asked Questions
Can I use DIY air quality testing kits in areas with high levels of radon or asbestos?
Yes, but it’s crucial to follow the manufacturer’s instructions for handling and disposal of samples. While DIY kits can detect these hazardous substances, they may not provide accurate concentrations, which is essential for remediation planning.
How often should I test my home’s air quality, especially after making changes to the HVAC system or introducing new materials?
It depends on your specific situation, but as a general rule, re-test every 6-12 months. This will help you monitor the effectiveness of any improvements and detect potential issues before they become significant health concerns.
Can I use a single air quality testing method for an entire multi-story home, or do I need separate tests for each floor?
It’s generally recommended to test each floor separately, especially if there are distinct sources of pollution on different levels. However, some DIY kits come with specialized sampling methods that can help you collect representative samples from multiple areas.
What if the results indicate a specific pollutant is present, but I’m not sure what source it’s coming from?
Start by inspecting your home’s interior and exterior for potential sources of pollution, such as water damage, mold growth, or nearby industrial activities. You may also need to consult with a professional air quality consultant to help identify the source and recommend corrective actions.
Can I use air quality testing results from one property to determine the IAQ in similar properties, such as identical floor plans?
No, each home has its unique characteristics and sources of pollution. Air quality testing should be conducted separately for each property, even if they share similarities with other homes in the area.

