
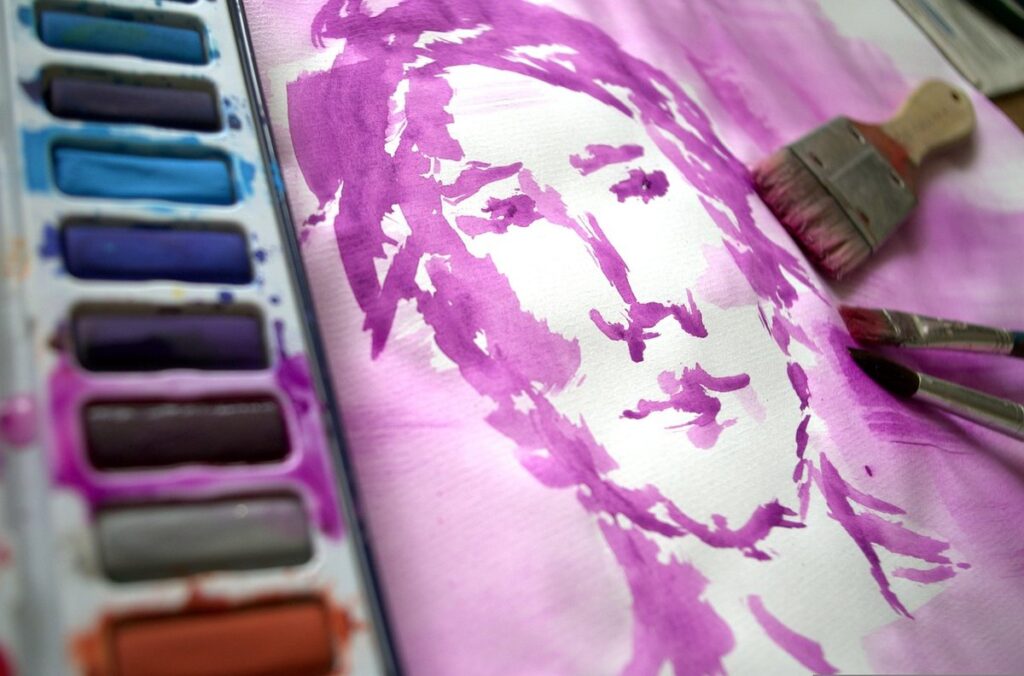
Drawing a face can be intimidating, especially when trying to capture its unique characteristics. However, mastering facial proportions is key to creating realistic portraits. The human face is composed of subtle features that make each person distinct, and by paying attention to these details, you can convey emotion and personality in your sketches. To get started, it’s essential to understand the underlying structure of the face, including the relationships between different facial features. In this article, we’ll break down the fundamentals of sketching faces into manageable steps, covering basic techniques such as gesture drawing and facial proportions, as well as more advanced methods for capturing subtle expressions and textures. By the time you finish reading this guide, you’ll be able to confidently draw a variety of faces with accuracy and nuance.
Understanding Face Proportions
To create a realistic face sketch, you need to understand the underlying proportions that make up a person’s facial structure. The proportions of the face are determined by specific measurements and ratios.
Mastering Facial Measurements
When sketching faces, it’s essential to understand the fundamental measurements and proportions that govern facial structures. One key principle is the 1/3 division, where the face is divided into thirds both horizontally and vertically. This creates three equal sections: the upper third (forehead), middle third (eye area), and lower third (chin). By using this guideline, you can ensure your eyes are positioned correctly in relation to the nose and mouth.
The golden ratio, approximately 1.618, is another crucial principle in face proportions. It’s often applied to the measurements of the facial features, such as the distance between the eyes, the width of the nose, or the length of the jawline. However, when sketching faces, it’s more practical to use rough estimates rather than precise calculations. For example, you can use a rough estimate of 1:2:3 for the proportions of the head, with one unit being roughly equal to the width of the eyes.
To apply these principles effectively, focus on using them as guidelines rather than strict measurements. Observe how they work in relation to real faces and adjust your sketches accordingly.
Recognizing Facial Features
When sketching a face, it’s essential to recognize and accurately depict its various features. Start by identifying the eyes, which are typically placed about one-third of the way down from the top of the head. Note their shape, size, and spacing – do they slant upwards or downwards? Are they close together or wide apart?
Next, focus on the nose, often considered a key defining feature of a person’s face. Is it straight, slightly upturned, or hooked? Pay attention to its size in relation to the eyes and mouth.
The mouth is another crucial aspect to capture accurately. Its shape can vary from a gentle curve to a more pronounced smile or frown. Consider the relationship between the nose and mouth – do they meet at a distinct angle or overlap slightly?
Finally, examine the jawline and its connection to the face as a whole. Is it strong and angular or soft and rounded? The way these features interact with one another will help you create a more believable and engaging portrait. By taking the time to study each feature carefully, you’ll be better equipped to sketch a face that accurately represents your subject’s unique characteristics.
Understanding Face Types
When sketching faces, it’s essential to understand face types to capture their unique characteristics accurately. There are three primary face shapes: oval, round, and square. An oval-shaped face is longer than it is wide, with curved lines that soften the overall appearance. A round face is roughly circular in shape, with similar width and length measurements.
To categorize a face, start by measuring its width across the cheekbones and its length from the hairline to the chin. For oval faces, the jawline is usually more defined than for round faces. Square faces have strong angular features and equal width and length measurements.
Observe the proportions of each feature in relation to the others. Pay attention to the shape of the eyes, nose, mouth, and jawline. Oval faces often have larger eyes compared to their other facial features. Round faces tend to have a more rounded nose and fuller lips. Square faces typically have bold, defined features.
By understanding these face types and proportions, you’ll be able to capture the subtleties of each individual’s unique appearance in your sketches. This will help you create more accurate, natural-looking portraits that do justice to their subjects.
Basic Gesture Drawing Techniques
To get started, let’s focus on mastering some essential gesture drawing techniques that will help you capture the essence of facial expressions and proportions. These simple exercises will form a solid foundation for your sketching skills.
Establishing a Facial Outline
To establish a facial outline, start by sketching the overall shape of the face using gentle, expressive strokes. This is where contour drawing comes into play. Contour lines are the outer edges of an object or feature, and when applied to the face, they help create a sense of volume and dimension.
Begin by lightly sketching the curve of the jawline with a soft pencil, taking care not to press too hard on the paper. Then, move upwards to capture the outline of the cheekbones and the forehead. Pay attention to the subtle S-curve that forms from the nose to the chin – this will help create a sense of harmony and balance.
Next, use gesture lines to quickly convey the overall structure of the face. These are short, expressive strokes that suggest the placement and proportion of features without getting bogged down in details. Use your pencil to lightly draw in the eyes, nose, and mouth as rough approximations – remember, you’re not trying to render them accurately at this stage.
Capturing Facial Expressions
When capturing facial expressions, focus on the underlying structure of the face rather than minute features. Simplify the drawing by reducing the number of lines and focusing on the essential shapes. A curved line can suggest a smile or frown, while a slight angle to the eyes and mouth can convey emotion.
The nose, eyes, and lips are often the most expressive parts of the face. However, in gesture drawing, it’s more important to capture their relationships with each other rather than every detail. For example, if you want to depict a smile, focus on the gentle curve of the mouth and how it relates to the surrounding facial structure.
In a quick sketch, it’s not necessary to draw each eyelid or individual nostril. Instead, use simple shapes to suggest the overall shape of the eye or nose. This approach helps you capture the underlying emotions without getting bogged down in minute details. By simplifying your drawing and focusing on essential forms, you can effectively convey facial expressions with minimal effort.
Refining Your Outline
When refining your initial outline, start by identifying and exaggerating essential facial features. These might include the shape of the eyes, nose, mouth, jawline, and cheekbones. In a rough sketch, these elements should be simplified to their most basic forms, freeing you from excessive detail.
Consider the placement of features in proportion to each other. For example, the space between your subject’s eyebrows is typically equal to one-third of the distance between their nose tip and chin. This helps create a balanced structure for further refinement. Notice the overall shape of the head and face – do they form an oval or more angular silhouette?
Begin incorporating these elements into your outline by using simple shapes, like circles, ovals, and triangles. This will help you accurately place facial features without getting caught up in fine details that might not be apparent at this stage. Use a range of pencil marks to explore different line weights and textures – soft for curved areas or darker lines for more defined edges.
Building Upon Basic Skills: Drawing Features and Details
Now that you’ve mastered basic facial proportions, it’s time to add some personality to your sketches by learning how to draw distinct features and details that bring faces to life. This is where things get really fun!
Eyes: The Window to the Soul
When drawing eyes, it’s essential to pay attention to their size, shape, and color. The iris is typically a slightly smaller circle within the larger eye circle, but its size can vary depending on the individual’s features. A standard guideline for beginners is to imagine an “S” shape connecting the tops of the iris to the eyebrows, helping you gauge its position.
The shape of the iris also plays a crucial role in conveying emotions. For example, rounded irises often suggest friendliness or approachability, while more angular ones can imply intensity or sharpness. The color of the iris is just as important; while some people have a solid brown or blue, others may have flecks of gold, green, or even gray.
To accurately depict eye expression, focus on the shape and direction of the eyelids. A relaxed gaze might feature slightly raised lids, while an angry or concerned one would have more pronounced creases. Consider adding subtle lines to indicate where the eyes are looking – this can be achieved by drawing a faint curve connecting the inner corner of each eye.
Noses and Mouths
When drawing a nose, remember that its shape and proportions change with the angle of the face. In profile views, the nose appears longer and more pointed, while in three-quarter views, it becomes shorter and wider. To achieve this, focus on the nostrils’ placement: higher up on the face for profiles, and lower down for three-quarters.
Pay attention to the bridge’s curvature as well – a subtle S-curve can make a big difference in capturing a realistic nose. In expressions of anger or determination, the nose becomes more defined, with the nostrils flaring outward. To convey this, draw the nose slightly longer and more angular.
Mouths are equally expressive, with subtle variations in shape and placement revealing emotions. A smiling mouth is characterized by curved corners and a gentle curve to the Cupid’s bow (the curve of the upper lip). For an open-mouthed expression, focus on the lower lip jutting forward and the edges of the mouth curving downward. Experimenting with different mouth shapes can help you capture a range of emotions in your sketches.
Hair, Skin Tones, and Other Details
When drawing facial features, it’s essential to pay attention to hair styles and skin tones. Hair can add a lot of character to a face, from a sleek, straight look to a messy, curly one. Consider the age and personality of your subject when deciding on a hairstyle – for example, a young person might have longer, more unruly hair than an older adult. You can achieve different textures by using varying line weights or layering lines.
Skin tones are also crucial in capturing a realistic face. Observe the subtle nuances of skin tone in people you know or see in photographs – some people have cool, pink undertones while others have warm, yellow ones. To convey this in your drawing, use a range of greys or browns to block out areas of the face. Varying the density and softness of these marks can help create the illusion of different skin tones.
When combining hair and skin tones, remember that they interact with each other. For instance, dark hair can make certain skin tones appear paler than lighter hair. By paying attention to these relationships, you can create a more convincing and engaging sketch face.
Advanced Techniques for More Realistic Portraits
Now that you’ve mastered basic facial proportions, it’s time to elevate your portraits by learning advanced techniques to capture subtle expressions and nuanced details. This includes mastering soft features like eyes and lips.
Working with Soft Pencils and Blending
When working with soft pencils and blending mediums, it’s essential to understand their unique characteristics. Soft pencils, typically B, 2B, or 4B, are designed for creating subtle gradations of value. Use them for smooth transitions between light and dark areas, as well as for capturing the delicate nuances in skin texture.
To achieve realistic shading with soft pencils, focus on gentle, controlled strokes. Apply moderate pressure to build up layers of graphite, gradually increasing or decreasing the darkness as needed. This technique is particularly effective for creating soft, feathery textures on subjects’ faces.
Blending mediums, such as tortillons or blending stumps, are used to merge and smooth out pencil marks. Hold these tools at a 45-degree angle and gently rub them over the graphite area in small circular motions. This helps distribute the pigment evenly, eliminating harsh lines and edges. For example, use a blending stump to soften the shadows under eyes, creating a natural, three-dimensional appearance.
Capturing Facial Musculature
When depicting facial musculature, start by considering the underlying structure of the face. The muscles are arranged in three main layers: the superficial muscles, which control facial expressions; the intermediate muscles, which provide stability and support to the face; and the deep muscles, which help move the jaw and tongue.
To capture these subtleties, pay attention to the relationships between individual muscle groups. For instance, the zygomaticus major muscle, responsible for smiling, is often visible in the area around the mouth corners and can be indicated by a gentle upward curve of the lip.
Subtle details like facial wrinkles can add significant depth to your portrait. Notice how fine lines often radiate from the eyes, nose, and mouth, and consider using short hatching strokes or delicate cross-hatching patterns to suggest these textures. Don’t forget to capture the subtle play of light on skin – a gentle crease under the eye or a soft fold in the forehead can greatly enhance your subject’s likeness. By incorporating these details, you’ll be able to convey a more nuanced and realistic portrayal of your subject.
Advanced Portrait Techniques
When rendering texture in a portrait sketch, consider the subtle irregularities of human skin. Focus on capturing the soft folds of facial muscles and the fine lines around the eyes, nose, and mouth. To achieve this, use hatching techniques that vary in pressure and direction to convey texture and depth. For example, apply gentle strokes with a sharp pencil to suggest the smoothness of a person’s forehead or the coarser skin on their hands.
To capture subtle color variations, pay attention to the way light interacts with an individual’s features. Notice how it can enhance or mute certain tones, creating a nuanced palette that adds depth and dimensionality to your portrait. Use colored pencils or markers to build up layers of color, gradually deepening the shading to create a sense of volume.
When creating backgrounds for portraits, remember that they should complement, not overpower, the subject’s face. Avoid overly dramatic or distracting elements, opting instead for simple, muted colors and subtle textures that evoke a sense of atmosphere or mood. Consider using soft brushstrokes or loose scribbles to suggest foliage, architecture, or other environmental features that enhance the overall narrative of your sketch.
Tips and Tricks for Sketching Faces on the Go
When sketching faces on the go, it’s essential to have a few reliable techniques up your sleeve. Master these portable-friendly tips and you’ll be able to capture likenesses anywhere.
Essential Tools for Travel Sketching
When traveling or working in a limited space, it’s essential to have portable tools that can withstand the demands of sketching faces. A compact set of graphite pencils is a must-have for travel sketching. Look for sets with varying hardness levels, such as HB, 2B, and 6B, which will allow you to create a range of line weights.
A good eraser is also crucial for correcting mistakes or removing unwanted lines. A small, portable kneaded eraser can be shaped to fit into tight spaces and won’t leave behind any residue on your sketchbook pages.
For travel sketching, consider investing in a compact sketchbook with high-quality paper that can handle multiple layers of graphite without buckling. Look for books with 80-100 gsm weight paper, which will provide a smooth surface for drawing. A smaller book size, such as A6 or 5×7 inches, is also more convenient for carrying on the go.
When packing your travel sketching kit, be mindful of airline regulations and pack your tools in a secure, protective case to prevent damage during transit.
Quick Fix Methods for Common Mistakes
When you notice uneven proportions while sketching a face, quickly check if your subject’s features are too large or too small compared to each other. If the nose is disproportionately big, try reducing its size and adjusting the surrounding features accordingly. For instance, shrink the nose by about one-third to rebalance the face.
Another common mistake is misplaced facial features. To fix this, carefully assess whether the eyes, mouth, or jawline are incorrectly positioned. Try rotating your paper 90 degrees to get a fresh perspective on your sketch and identify areas that don’t seem quite right. Use gentle, soft strokes to reposition these features without over-erasing existing lines.
Remember, it’s not about erasing everything and starting from scratch – you can subtly adjust the proportions or placement of individual elements while keeping the rest intact. If needed, use a blending stump or a kneaded eraser to softly correct your mistakes, avoiding any harsh scrubbing that might damage the paper.
Time-Saving Strategies
When sketching faces on the go, it’s essential to employ time-saving strategies that don’t compromise the likeness and character of the subject. Using basic shapes is a great place to start. Begin by drawing an oval for the face, with guidelines to help you place the features. This simplifies the process and ensures proportions are correct.
Prioritize details, but not at the expense of capturing the essence of the face. Focus on the overall structure and expression rather than trying to render every feature in minute detail. This might mean sacrificing some level of realism, but it allows you to quickly capture the subject’s likeness.
Loose, expressive lines can also be a time-saving asset when sketching faces on the go. Instead of drawing precise, defined features, try using softer, more fluid strokes to convey the subject’s expression and character. This approach not only saves time but also adds a sense of energy and spontaneity to your sketches. By employing these strategies, you can quickly capture a face’s essence without sacrificing accuracy or personality.
Final Tips and Resources
As you continue on your face sketching journey, here are some final tips to help refine your skills and additional resources to explore for further practice.
Practice Makes Perfect: A Call to Action
As you conclude this guide on sketching faces, it’s essential to emphasize that practice is indeed key to mastering this skill. You’ve learned the fundamentals, but consistent practice will refine your skills and allow you to capture the subtleties of facial expressions. Set aside time each week to sketch from life – observe people in public places or ask friends if they’d be willing to sit for you.
When practicing, focus on a single aspect at a time. For instance, spend several sessions perfecting the proportions of the face, then move on to capturing the nuances of facial expressions. As you work through these exercises, pay attention to your process and identify areas where you need improvement. This self-awareness will help you tailor your practice to address specific challenges.
In addition to practicing regularly, consider exploring various mediums to expand your skills. Try sketching with different pencils or charcoal grades to see how the results change. You might also find it helpful to experiment with digital drawing tools – many software programs offer tutorials and exercises specifically designed for face sketching.
Lastly, don’t underestimate the value of learning from others. Seek out online resources that provide detailed critiques and constructive feedback on facial sketches. Join a community of fellow artists or instructors who can offer guidance and support as you continue to grow in your skills. By combining consistent practice with exploration and outside guidance, you’ll be well on your way to becoming proficient in sketching faces.
Frequently Asked Questions
Can I start sketching faces without having a good understanding of facial proportions?
Yes, it’s possible to begin sketching faces even if you’re not familiar with facial proportions. However, mastering the basics of face measurements and proportions will ultimately lead to more accurate and realistic sketches.
How do I know when I’m adding too much detail to my portrait, making it look cluttered?
When sketching a face, pay attention to the overall balance of details versus empty space. Consider the 60-30-10 rule: allocate 60% of your focus on basic facial features, 30% on secondary details like hair and clothes, and only 10% on minute details that can easily overwhelm the composition.
Can I use digital drawing tools instead of traditional media for sketching faces?
Yes. Digital drawing tools offer flexibility and versatility when working with face sketches. Consider using a graphics tablet or stylus to replicate traditional drawing techniques in software like Procreate, Adobe Photoshop, or Sketchbook.
What if I’m stuck on capturing a particular facial expression – how can I practice it effectively?
To capture challenging expressions, study reference images of people displaying the desired emotion. Practice sketching from life or from photos of faces with varying expressions, paying close attention to subtle details that convey emotions through facial musculature and features.
Are there any quick methods for fixing common mistakes in face sketches, like misaligned eyes?
Yes. If you’ve made a mistake while sketching a face, try to work with the error rather than erasing it completely. For example, if your subject’s eyes are misplaced, adjust their alignment by creating a new shape or modifying an existing one, taking care not to disrupt surrounding facial features’ proportions and relationships.

