
When you’re planning a fall-themed dinner or looking to add some nutritious squash to your meals, selecting and preparing a fresh pumpkin can be a daunting task. You might find yourself wondering how to tell if a pumpkin is ripe for cooking, or how to clean and slice it without wasting any of the edible flesh. With so many ways to cook with pumpkins – from roasting and baking to boiling and pureeing – it’s easy to feel overwhelmed by all the options. But don’t worry, with this step-by-step guide you’ll learn the best methods for preparing your pumpkin for cooking, including tips on selecting the right variety, cleaning and storing fresh pumpkin, as well as preserving cooked pumpkin for future meals. By the end of this article, you’ll be able to select, clean, cook with pumpkins confidently and know how to store them both fresh and cooked.
Choosing the Perfect Pumpkin
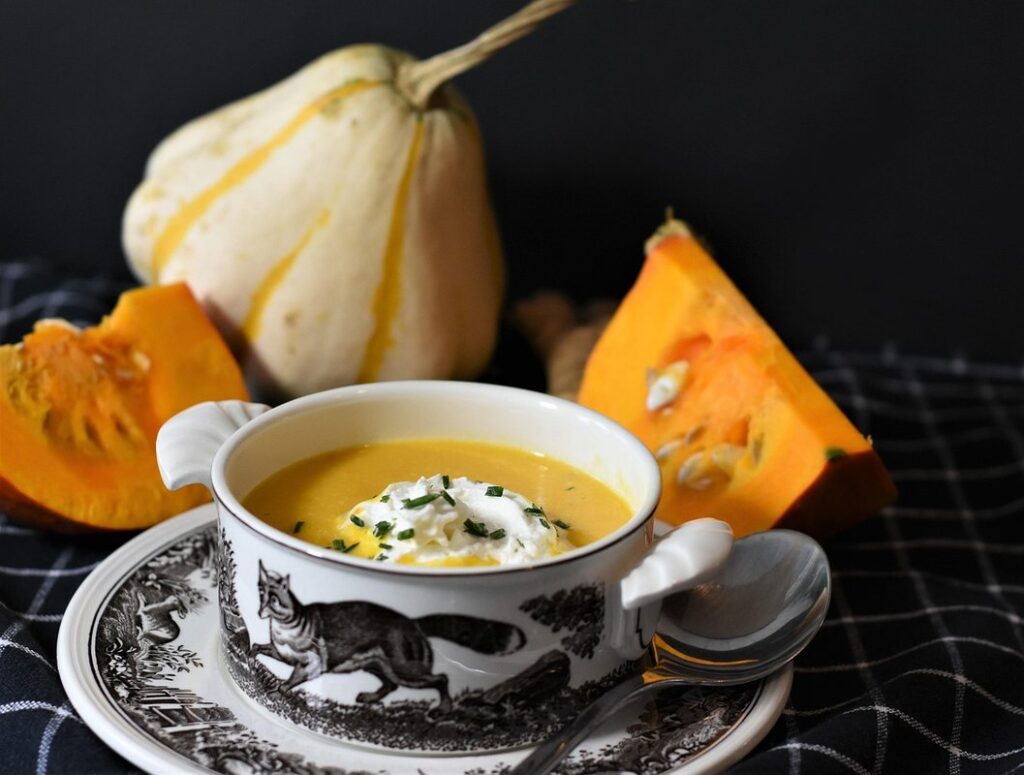
When selecting a pumpkin for cooking, consider its size and shape to determine which type is best suited for your recipe. A smaller, symmetrical pumpkin often yields better results.
Selecting the Right Variety
When it comes to cooking with pumpkins, not all varieties are created equal. The right type of pumpkin can make a huge difference in the flavor and texture of your final dish. Sugar pie pumpkins, also known as sweet pumpkins, are ideal for baking and roasting. They’re smaller in size, typically weighing between 2-5 pounds, and have a sweeter, nuttier flavor.
Carving pumpkins, on the other hand, are larger and more symmetrical, but their stringy flesh makes them better suited for decoration rather than cooking. Decorative pumpkins come in a variety of shapes and sizes, often with unique markings or patterns, and are not typically suitable for eating.
If you’re planning to cook your pumpkin, look for one that is firm and free of soft spots. The skin should be smooth and easy to cut through. When in doubt, ask the seller or choose a different variety. Some popular cooking varieties include ‘Baby Boo’, ‘Jarrahdale’, and ‘Kabocha’. These types of pumpkins have been specifically bred for their culinary uses and will yield better results than carving or decorative pumpkins.
Inspecting the Pumpkins
When selecting a pumpkin for cooking, it’s essential to inspect it carefully for any signs of spoilage. Look for soft spots, bruises, and cuts on the surface. Soft spots can be a sign that the pumpkin is rotting from the inside out, while bruises or cuts may allow bacteria to enter and cause decay. Check both the top and bottom of the pumpkin, as well as any ridges or crevices.
Hold the pumpkin in your hands and gently rotate it to check for any soft areas. A healthy pumpkin should feel firm and heavy for its size. If you notice a soft spot, avoid squeezing it too hard, as this can cause further damage. Instead, inspect the area more closely for signs of mold or rot. Check the stem end for any cracks or splits that could compromise the pumpkin’s integrity.
When selecting a pumpkin at the store, ask the vendor if they know how long it has been stored. A fresh pumpkin should have a harder, smoother skin than one that has been sitting around for too long. If you’re purchasing from a farmer’s market or picking your own pumpkin, inspect it carefully before taking it home to ensure you’ve got a healthy, high-quality gourd.
Cleaning and Preparing the Pumpkin
Before you start carving, roasting, or pureeing your pumpkin, it’s essential to clean and prepare it thoroughly. This process removes dirt, debris, and any soft spots that could affect the final texture and flavor.
Removing Dirt and Debris
To remove dirt and debris from the exterior of the pumpkin, start by gently scrubbing the surface with a soft-bristled brush or a clean cloth. Avoid using abrasive materials like steel wool, as they can scratch the skin of the pumpkin. For tougher stains, mix 1 tablespoon of white vinegar with 2 tablespoons of water on your brush or cloth and gently scrub the affected area.
Pay particular attention to any areas that have come into contact with soil, as these can be particularly prone to staining. You may also want to wipe down the stem end of the pumpkin, where dirt and debris tend to accumulate. Rinse the entire surface of the pumpkin with a clean, damp cloth to remove any remaining dirt or vinegar solution.
Once you’ve scrubbed away the majority of the dirt and debris, use a dry section of cloth to wipe down the entire surface of the pumpkin. This will help remove any excess moisture and prevent bacterial growth. Now that the exterior is clean, we can move on to preparing the pumpkin for cooking by cutting out the top and scooping out the seeds.
Cutting Off the Stem
Cut off as much of the stem as possible, leaving about 1 inch attached to the pumpkin. This will create a flat surface for handling and cooking. Make sure to cut the stem at an angle, rather than straight across, to prevent moisture from collecting on the cut end.
If you’re using a serrated knife, such as a kitchen/utility knife or a chef’s knife, this is usually easy to do. If not, consider using a dedicated pumpkin-cutting tool or even a sharp pair of pruning shears.
The goal is to create an even surface for cooking and reducing the risk of uneven browning. For roasting whole pumpkins, you want as much skin intact as possible to promote caramelization.
Roasting, Baking, or Boiling: Choosing the Right Method
Now that we’ve cleaned and sliced our pumpkin, it’s time to decide how to cook it – will you be roasting, baking, or boiling your gourd? Each method requires a slightly different approach.
Preparing Pumpkins for Roasting
When preparing pumpkins for roasting, it’s essential to remove excess pulp and seeds first. Start by cutting off both ends of the pumpkin using a serrated knife. This helps create stability and prevents the pumpkin from rolling around while scooping out its insides. Next, use a spoon or specialized pumpkin scoop to remove as much of the stringy pulp and seeds as possible. Be cautious not to puncture the flesh of the pumpkin, as this can make it more prone to breaking down during cooking.
If you’re using a sugar pumpkin, which is typically smaller than larger carving pumpkins, you may need to use a bit more force to remove the pulp. However, if you’re working with a larger pumpkin, be gentle and take your time to avoid applying too much pressure. Scooping out the seeds and pulp can make quite a mess, so consider wearing an apron or old clothes to protect yourself from stains.
After scooping out as much of the pulp as possible, pat the inside of the pumpkin dry with paper towels to remove any remaining moisture. This helps create a better texture and promotes even roasting.
Preparing Pumpkins for Baking
When baking a pumpkin, you’ll want to prepare it by pureeing or mashing its flesh. Start by cutting a small hole in the top of the pumpkin and scooping out the seeds and pulp. You can use a spoon or an specialized tool for this step.
To puree the pumpkin, place the flesh into a blender or food processor with a small amount of liquid – such as water or broth. Blend until smooth, adding more liquid as needed to achieve your desired consistency. Some recipes may call for a completely smooth puree, while others may leave some texture intact.
For mashing, you can use a fork or potato masher to break down the flesh into a chunky texture. This method is often preferred when making pumpkin pies or other desserts where a bit of texture is desirable. Be sure to cook your pumpkin before preparing it for baking – this will help bring out its natural sweetness and make it easier to mash or puree. Simply roast or boil the pumpkin until tender, then follow these steps to prepare it for use in your recipe.
Cooking with Pumpkin Puree vs. Chunks
Now that you’ve prepared your pumpkin, it’s time to decide how you want to use it in your recipes: pureed or chunked? This section will explore the differences between these two approaches.
Using Pumpkin Puree
Using pumpkin puree in recipes is a convenient and versatile option. Once cooked down to a smooth consistency, it’s easy to incorporate into a variety of dishes, such as soups, breads, and desserts. Unlike working with chunks, puree eliminates the need for chopping or pureeing ingredients separately.
When substituting canned or fresh puree in a recipe, keep in mind that its moisture content can affect the final product’s texture. For instance, adding too much puree to a baked good may result in an overly wet crumb. Conversely, using it sparingly allows you to retain some of the natural fiber and flavor.
In addition to its ease of use, pumpkin puree also offers flexibility when it comes to flavor profiles. You can easily add spices or sweeteners to create different taste combinations. This adaptability makes it a great choice for experimenting with new recipes or substituting ingredients in existing ones.
Working with Pumpkin Chunks
When cooked whole, pumpkin chunks retain their natural texture and flavor, making them a superior choice for many recipes. Unlike pureed pumpkin, which can become mushy and lose its distinct characteristics, chunked pumpkin maintains its firmness and vibrant color. This is especially important when you want to showcase the beauty of pumpkin in dishes like roasted vegetable medleys or stuffed peppers.
To take advantage of whole chunks’ texture and flavor retention, choose firm, heavy pumpkins with smooth skin for cooking. Avoid older, softer pumpkins that may fall apart during preparation. Cut the pumpkin into manageable pieces, then roast or sauté them as desired. For example, toss chunks with olive oil, salt, and your preferred spices before roasting in the oven at 400°F (200°C) for about 30-40 minutes, or until tender.
By cooking whole pumpkin chunks, you’ll be rewarded with a more rustic, homespun presentation and a deeper, richer flavor profile. This approach is particularly well-suited to seasonal recipes that highlight autumnal ingredients like sage, nutmeg, and cinnamon.
Tips for Storing and Preserving Pumpkins
Now that you’ve prepared your pumpkin, it’s time to think about how to store it so it lasts as long as possible. Proper storage can make all the difference in maintaining its freshness.
Short-Term Storage
When storing fresh pumpkins at home, temperature control is crucial to maintain their freshness. Keep them away from direct sunlight and heat sources, as high temperatures can cause decay and mold growth. Store them in a cool, dry place with good air circulation, ideally between 50°F to 60°F (10°C to 15°C). A basement or a pantry with consistent temperatures is an ideal location.
Handle pumpkins gently to prevent bruising, which can lead to spoilage. Wash them before storing to remove any dirt and debris that may be hiding in crevices. Dry the pumpkins thoroughly with a clean cloth to prevent moisture buildup. If you’re planning to store your pumpkin for an extended period, consider wrapping it in a breathable material like paper or a mesh bag to protect it from dust.
Monitor your stored pumpkins regularly for signs of spoilage, such as soft spots or mold growth. Remove any affected areas promptly to prevent the decay from spreading. Proper storage and handling techniques will help keep your pumpkin fresh for several weeks, ensuring you have a high-quality ingredient for cooking.
Long-Term Preservation Methods
Freezing is an effective method for preserving raw pumpkin. Cut the pumpkin into cubes or puree it and place it in airtight containers or freezer bags. Frozen pumpkin can be stored for up to 8 months. When you’re ready to use it, simply thaw the frozen pumpkin overnight in the refrigerator or at room temperature.
Dehydrating is another option for preserving cooked or raw pumpkin. Slice the pumpkin thinly and dry it using a food dehydrator or your oven on its lowest temperature setting with the door slightly ajar. Dehydrated pumpkin can be stored for up to 6 months, making it a convenient addition to soups, stews, and baked goods.
Pickling is a great way to add flavor and preserve raw pumpkin. Slice or dice the pumpkin and soak it in a brine made from vinegar, sugar, salt, and spices. Let the pickled pumpkin sit at room temperature for 24 hours before transferring it to the refrigerator, where it can be stored for up to 6 months. Pickled pumpkin adds a tangy flavor to salads and sandwiches.
Frequently Asked Questions
What to Do If My Pumpkin Has Been Left at Room Temperature for Too Long?
No, it’s not safe to use a pumpkin that has been left at room temperature for too long. Pumpkins can spoil quickly if not stored properly, and using spoiled pumpkin can lead to foodborne illness. Discard the pumpkin and choose a fresh one instead.
Can I Use Frozen Pumpkin Puree in Place of Freshly Made Puree?
Yes, you can use frozen pumpkin puree as a substitute for freshly made puree. However, keep in mind that frozen puree may have a slightly different texture and flavor than freshly cooked puree. To ensure the best results, thaw frozen puree slowly in the refrigerator or at room temperature before using it.
How Do I Prevent Pumpkin Seeds from Spitting When Roasting?
To prevent pumpkin seeds from spitting when roasting, make sure to remove as much of the stringy pulp as possible and dry the seeds thoroughly with a paper towel. This will help reduce the moisture content and minimize splattering during cooking.
Can I Cook Whole Pumpkin Chunks in a Slow Cooker or Instant Pot?
Yes, you can cook whole pumpkin chunks in a slow cooker or Instant Pot using liquid such as broth or water to help soften the flesh. Cooking time may vary depending on the size of the chunks and your desired level of tenderness.

