
You’ve probably had your fair share of store-bought pickled green beans, but there’s something special about making them from scratch. Not only do homemade pickles taste better, but they’re also free from preservatives and additives that can be found in commercial products. The key to success lies in selecting the right variety of green beans – look for ones with a tender crunch and minimal seeds. Once you have your beans, it’s time to prepare them for pickling by trimming any ends and giving them a good rinse. After that, it’s all about creating a custom pickling solution that suits your taste buds. In this comprehensive guide, we’ll walk you through the process of selecting the perfect green beans, preparing them for pickling, and making a delicious homemade pickle brine. By the end of this article, you’ll be able to create mouthwatering homemade pickled green beans that will elevate any meal or snack.
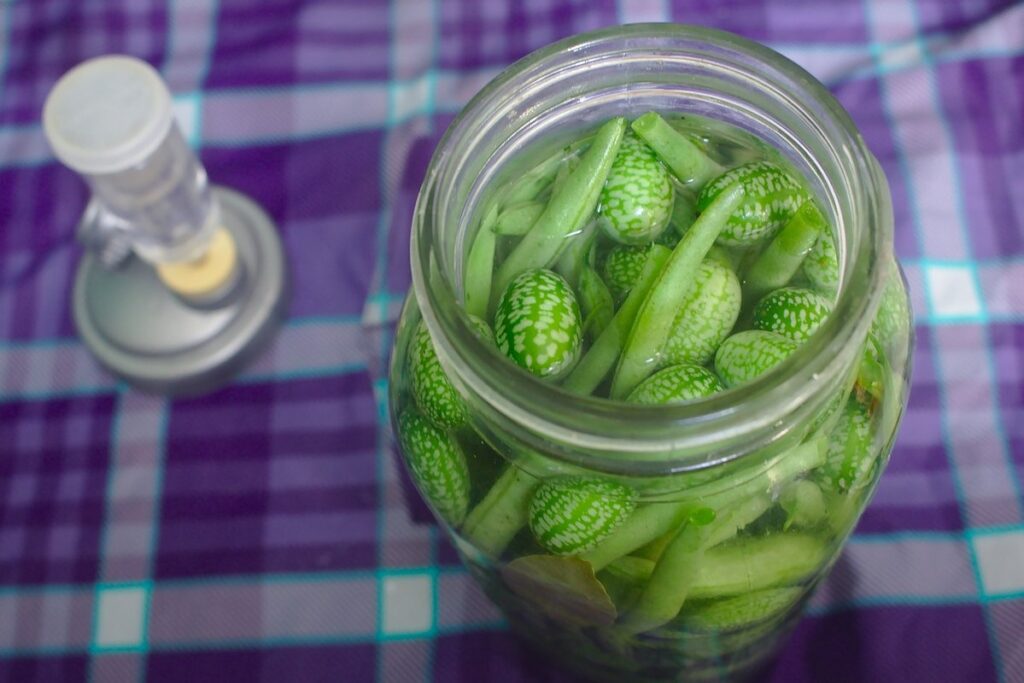
Choosing the Right Green Beans
When it comes to pickling green beans, selecting the right variety is crucial for achieving that perfect balance of crunch and flavor. Let’s start by exploring the differences between popular green bean types.
Selecting the Perfect Variety
When it comes to pickling green beans, the right variety can make all the difference. Some popular choices for pickling include ‘Kentucky Wonder’, ‘Blue Lake’, and ‘Romano’ – each with its own unique characteristics. For example, ‘Kentucky Wonder’ has a tender, stringless texture that holds up well in pickling liquid, while ‘Blue Lake’ offers a slightly firmer bite.
Consider the flavor profile you’re aiming for when selecting a variety. Some green beans have naturally sweet or earthy undertones, which can add depth to your pickles. Others may be more bitter or have a stronger bean flavor. Think about what type of pickle you want to create: do you prefer a bright, snappy texture or a heartier, more robust one?
Texture and color are also important factors to consider. If you’re looking for green beans with a delicate crunch, opt for slender varieties like ‘French Finger’. On the other hand, if you prefer a meatier pickle, choose a thicker variety like ‘Hearts of Gold’.
Understanding Green Bean Freshness
Fresh green beans are essential for pickling, as they contain higher levels of enzymes and other compounds that contribute to their flavor and texture. However, freshness can be subjective, and it’s not always easy to determine whether the beans you’ve chosen are optimal for pickling.
When selecting fresh green beans at the market or in your garden, look for those with bright, even coloration and firm, glossy pods. Avoid beans that appear wilted, yellowing, or have brown spots, as these may be past their prime. The ideal time to harvest green beans is when they’re young and tender, typically within 50-60 days of planting.
To gauge freshness, gently pinch the bean between your thumb and index finger. If it snaps easily, it’s likely fresh. Avoid beans that are too old or dry, as these may be more prone to spoilage during the pickling process. You can also check for freshness by cutting into a few beans; if they’re tender and crisp, they should still have some crunch.
For gardeners, consider harvesting green beans in the morning, when the dew is still present on the plants. This helps to preserve their natural moisture and flavor. By selecting the freshest green beans possible, you’ll be able to achieve better results in your pickling endeavors.
Preparing Green Beans for Pickling
To get started, you’ll need to prepare your green beans by blanching them to remove excess moisture and preserve their crunch. This simple step sets the stage for perfect pickling results.
Cleaning and Sanitizing
Cleaning green beans properly is crucial to preventing spoilage and ensuring a healthy pickling environment. Start by rinsing the beans under cold running water to remove loose dirt and debris. Next, scrub them gently with a soft-bristled brush or vegetable brush to dislodge any stubborn particles.
For tougher messes, soak the green beans in a solution of 1 tablespoon of white vinegar per quart of water for about 30 minutes. This helps loosen dirt without affecting the beans’ texture or flavor. After soaking, rinse the beans thoroughly under cold running water to remove any remaining vinegar residue.
To sanitize your green beans, immerse them in a solution of 1 tablespoon of unscented chlorine bleach per gallon of water for 10-15 minutes. This will kill off any bacteria that may be present on the surface of the beans. Be sure to rinse the beans thoroughly after sanitizing and before packing them into jars.
When handling green beans, it’s essential to maintain clean equipment and work surfaces as well. Wash your hands frequently with soap and warm water to prevent transferring bacteria to the beans or pickling liquid.
Blanching Green Beans
Blanching green beans before pickling serves two primary purposes: preserving color and texture. When raw green beans are submerged in a salty brine, their natural enzymes can cause them to become mushy or discolored over time. Blanching stops this process by briefly exposing the beans to boiling water, which inactivates the enzymes and helps lock in the vibrant green hue.
To blanch green beans effectively, simply submerge them in a large pot of boiling, salted water for 3-5 minutes. You can also use a steamer basket if you prefer. The goal is to cook the beans just until they lose their crunch, but still retain some firmness. Overcooking will result in an unappealing texture.
Blanching also helps remove any dirt or debris that may be clinging to the beans’ surfaces. This step is especially important when working with unwashed green beans, which can harbor bacteria and other contaminants. By blanching your green beans before pickling, you’ll end up with a more appealing, longer-lasting product that’s perfect for snacking or using in recipes.
Creating a Pickling Solution
To start pickling, you’ll need to create a solution that will preserve and flavor your green beans. This involves mixing salt, sugar, vinegar, and spices to create the perfect blend.
Understanding Acidity Levels
Acidity levels play a crucial role in creating a successful pickling solution. When it comes to preserving green beans, acidity helps to create an environment where bacteria and other microorganisms cannot thrive. This is essential for preventing spoilage and ensuring that the pickled beans remain safe to eat.
There are several types of acid commonly used in pickling solutions, including vinegar, lemon juice, and citric acid. Vinegar is a popular choice because it’s easily available and provides a tangy flavor. However, it’s worth noting that different types of vinegar have varying acidity levels, with white vinegar generally being more acidic than apple cider vinegar.
When working with acidity levels, it’s essential to understand that the recommended level for pickling green beans is between 4.6 and 4.7 pH. This range ensures that the solution is acidic enough to inhibit bacterial growth while still allowing for proper preservation. To achieve this balance, you can use a combination of acid types or adjust the quantity of each one. For example, using a mixture of vinegar and lemon juice can help achieve the desired acidity level.
A general rule of thumb is to use 1-2 tablespoons of acid per quart of pickling liquid. However, this ratio may need to be adjusted depending on the specific recipe and ingredients used. Always refer to tested recipes or reliable sources for guidance on achieving the optimal acidity level for your pickled green beans.
Customizing Your Pickling Liquid
When creating a pickling liquid for green beans, it’s essential to strike a balance between acidity and sweetness. To customize your pickling solution, start by selecting a base: vinegar (such as white wine or apple cider), brine (water with salt and sometimes sugar), or a combination of both. For a more complex flavor profile, consider adding aromatics like garlic, dill, or mustard seeds to the liquid.
You can also experiment with different spice blends, such as Indian-style garam masala or Japanese-inspired shichimi togarashi. When using spices, remember that a little goes a long way – start with a small amount and adjust to taste.
Some key considerations when customizing your pickling liquid include:
• Sugar content: Add 1-2 tablespoons of granulated sugar per cup of vinegar for a balanced flavor.
• Spice intensity: Start with a pinch (about 1/8 teaspoon) and increase as desired.
• Flavor enhancers: Try adding a few sprigs of fresh herbs like parsley or tarragon to the liquid.
Keep in mind that the type of green bean you’re pickling will also influence your pickling liquid’s flavor profile. For example, delicate beans may require a lighter hand with spices and aromatics. By experimenting with different combinations, you’ll develop a unique and balanced pickling solution that complements your green beans’ natural flavors.
Canning and Storing Pickled Green Beans
Now that you’ve mastered pickling your green beans, it’s time to learn how to store them properly, including canning techniques to keep them fresh for months. We’ll walk through the essential steps for preserving your pickled green beans.
Water Bath Canning
To water bath can pickled green beans, you’ll need a few pieces of specialized equipment. This includes a large pot with a heavy bottom, known as a canning pot, and a rack or trivet to elevate the jars above the bottom of the pot. You’ll also need a set of clean, sterilized jars and lids specifically designed for water bath canning.
Before starting, ensure your pot is at least 3-4 inches deep to allow for the water to cover the tops of the jars by about an inch. This depth is crucial for proper sterilization and prevention of spoilage. Fill the pot with enough water to meet this requirement, and bring it to a rolling boil.
Once boiling, carefully place the sterilized jars into the pot, making sure they’re fully submerged in water. Process the jars for 10-15 minutes from the time the water returns to a boil. This step is essential for killing off any bacteria that may be present on the surface of the pickled green beans or in the jar itself.
After processing, remove the jars from the pot and let them cool undisturbed for 12-24 hours before storing.
Storage and Shelf Life
Proper storage and shelf life management are crucial to maintaining the quality of pickled green beans. Store jars in a cool, dark place, away from direct sunlight and heat sources. Avoid storing them near ovens or radiators, as this can cause the liquid to spoil more quickly.
Factors that affect shelf life include acidity levels, which should remain between 4.6 and 4.7 pH for safe consumption. If your pickling solution is too alkaline, it may not be acidic enough to inhibit bacterial growth. Check the pH level regularly, especially if you’re using a new recipe or ingredient.
Typically, canned pickled green beans will last for 12-18 months when stored properly. However, factors such as jar quality, storage conditions, and handling can impact this timeframe. It’s essential to check jars every few months for signs of spoilage, including mold growth, off smells, or slimy textures.
To ensure optimal shelf life, keep jars away from strong-smelling foods and chemicals, as these can seep into the liquid. Also, avoid stacking jars on top of each other, as this can cause pressure to build up and potentially lead to jar leakage. By following these guidelines, you can enjoy your pickled green beans for an extended period while maintaining their flavor and quality.
Advanced Pickling Techniques
Now that you’ve mastered the basics of pickling green beans, it’s time to take your skills to the next level with advanced techniques for perfecting texture and flavor. We’ll cover expert methods for achieving crispy dill and sweet & spicy pickles.
Fermenting Green Beans
Fermenting green beans involves allowing them to break down naturally by lactic acid-producing bacteria. This process is often referred to as “lacto-fermentation.” The benefits of fermentation include preserving green beans without heat, retaining more nutrients and flavor compounds, and creating a tangy, slightly effervescent texture.
Compared to traditional pickling methods, fermentation can be more challenging due to the need for precise temperature control. Green beans typically require a warm environment (64°F to 75°F) to ferment effectively. Temperatures outside this range may lead to off-flavors or slowed fermentation rates.
A common misconception is that fermentation requires specialized equipment or vast amounts of space. However, you can successfully ferment green beans in a dedicated vessel or even a Mason jar with a weight pressing down the beans. Monitoring temperature and ensuring the presence of beneficial bacteria are key factors for success.
Keep in mind that fermented pickles will have a distinctive appearance, often developing a slightly cloudy or “sour” look due to the bacterial activity. This is entirely normal and does not affect their safety or quality.
Adding Flavor Enhancers
To add depth and complexity to your pickled green beans, consider incorporating a variety of flavor enhancers. Spices like garlic, mustard seeds, coriander, and dill are popular choices for adding warmth and brightness. Fresh herbs such as parsley, basil, or mint can introduce a fresh, garden-like quality.
For a more nuanced approach, try combining spices in different proportions to create unique flavor profiles. For example, pairing garlic with coriander creates a Middle Eastern-inspired taste, while mustard seeds and dill evoke a classic European flair. Don’t be afraid to experiment – some unexpected combinations can lead to surprising successes.
Other ingredients like ginger, chili peppers, or lemon zest can also contribute distinct flavors. Be mindful of the acidity levels in your pickling liquid, as adding too many acidic ingredients can overpower the other flavors. Use them sparingly and balance with more neutral elements to avoid overwhelming the palate.
Common Mistakes and Troubleshooting
We’ve all been there: a batch of pickled green beans that’s too salty, too soft, or just plain spoiled. Let’s go over some common mistakes to watch out for and how to fix them.
Identifying Spoilage
When working with pickled green beans, spoilage can be a significant issue if not addressed promptly. One common sign of spoilage is an off smell or slimy texture. If you notice your pickled green beans have developed a sour or vinegary aroma, it may indicate that the acidity level has become too high, potentially due to over-processing or using too much vinegar in the recipe.
Another indicator of spoilage is visible mold or yeast growth on the surface of the pickles. This can be caused by contamination during the preparation process or inadequate sterilization. Regularly inspect your pickled green beans for any visible signs of spoilage and discard them immediately if you notice anything unusual.
It’s also essential to check the color and texture of the pickles regularly. If they become discolored, soft, or develop an unpleasant slimy feel, it may be a sign that they have gone bad. To minimize the risk of spoilage, ensure you follow proper canning procedures, maintain a clean working environment, and store your pickled green beans in a cool, dark place.
Regularly check the seals of your jars for any signs of damage or leakage, as this can compromise the integrity of the seal and allow bacteria to enter.
Resolving Canning Issues
When canning pickled green beans, it’s common to encounter issues related to processing time. Under-processing can lead to spoilage and contamination, while over-processing can result in mushy or unappetizing texture. To resolve these problems, check the jar for visible signs of under-processing, such as bubbles or a soft spot on the lid.
If you suspect that your pickled green beans were not processed long enough, re-process them immediately. Place the jars back in the boiling water bath and maintain the processing time specified in the recipe (usually 10-20 minutes). For over-processing issues, remove the jars from the water bath as soon as the processing time is up.
To prevent these mistakes in the future, use a timer to keep track of processing time. Additionally, invest in a pressure canner or a water bath with an accurate temperature gauge. Regularly calibrate your equipment to ensure it’s working correctly.
Here are some general guidelines for troubleshooting common canning issues:
- Check the jar for visible signs of spoilage
- Re-process jars if under-processing is suspected
- Remove jars from boiling water as soon as processing time is up for over-processing
Frequently Asked Questions
Can I use pickled green beans as a topping for other dishes beyond sandwiches?
Yes. Pickled green beans can be used as a topping for salads, soups, pasta dishes, and even as a side dish on their own. They add a tangy, crunchy element that pairs well with a variety of flavors.
What if I accidentally over-process my pickles in the water bath canner?
If you notice your pickled green beans are too soft or mushy after canning, it’s likely due to over-processing. To recover, remove the jars from the canner and let them cool. Check for any signs of spoilage, such as mold or a sour smell. If all seems well, consider adjusting your processing time for future batches.
How do I know when my fermented pickled green beans are ready?
Fermented pickles are typically ready after 3-5 days at room temperature, depending on factors like temperature and desired level of sourness. Check on them daily by tasting a small sample; they should have developed a tangy flavor and slightly effervescent texture.
Can I use any type of vinegar for my pickling solution?
While white vinegar is commonly used in pickling, you can experiment with other types like apple cider or balsamic vinegar to create unique flavor profiles. Keep in mind that different vinegars will affect the acidity level and overall taste of your pickled green beans.
Is it safe to store pickled green beans in a glass jar without refrigeration if I’ve followed proper canning procedures?
Yes, as long as you’ve correctly followed water bath canning instructions and stored the jars properly, pickled green beans are shelf-stable at room temperature. However, always check for any signs of spoilage before consuming, and store them in a cool, dark place to maintain quality.

