
Making a hiking staff from scratch can be a game-changer for outdoor enthusiasts, providing a comfortable and reliable companion on long trails. A well-crafted staff not only offers support and balance but also helps distribute weight evenly, reducing fatigue and strain on joints. However, many hikers shy away from making their own staff due to perceived complexity or lack of knowledge about the process. In reality, crafting a durable and effective hiking staff requires minimal specialized tools and can be achieved with basic DIY skills. This article will guide you through choosing the right materials, designing your staff for optimal comfort and functionality, and assembling it into a reliable companion for your next hike. By the end of this tutorial, you’ll have the knowledge to create a custom-made hiking staff that meets your specific needs and preferences.
Choosing the Right Materials
When selecting materials for your hiking staff, consider durability, weight, and resistance to the elements – these factors will greatly impact its performance. A sturdy handle and reliable shaft are essential.
Selecting the Ideal Wood Type
When choosing wood for a hiking staff, several factors come into play. Durability is crucial, as you’ll be subjecting your staff to varying weather conditions and potential drops. Hardwoods like ash, oak, and maple are excellent choices due to their exceptional strength and resistance to decay.
Weight is also an essential consideration, especially if you plan on carrying your staff for extended periods. Lighter woods such as birch or alder can help reduce fatigue, but may compromise on durability. Some hikers opt for a heavier hardwood core wrapped in lighter wood for a balance between weight and strength.
Resistance to weather conditions is another vital aspect. For example, some woods are more prone to warping when exposed to moisture. Cedar and cypress are naturally resistant to rot and insects, making them suitable options for hiking staffs used in wet environments.
Considerations for Shaft Length and Diameter
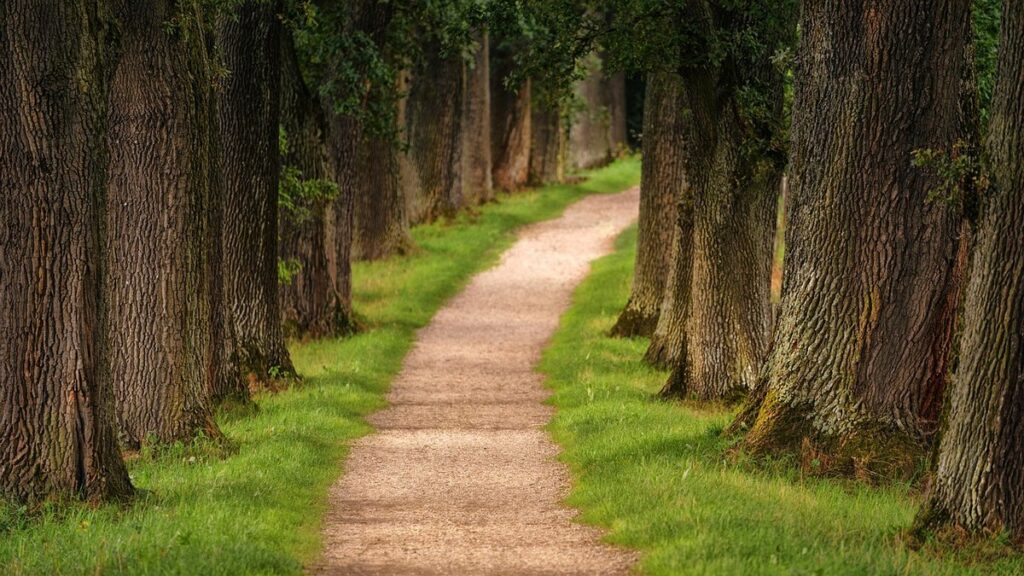
When selecting a shaft for your hiking staff, consider its length and diameter with your personal preferences, hiking style, and terrain in mind. A longer shaft can provide additional leverage and stability on uneven or rocky ground, but may be cumbersome in dense forests or when navigating tight spaces.
For most hikers, a shaft length between 48 and 56 inches (122-142 cm) is suitable for general use. However, if you’re planning to tackle steep inclines or traverse difficult terrain, a longer shaft can offer more support and control. Conversely, shorter staffs are ideal for backpackers or day hikers who need to navigate dense vegetation.
The diameter of the shaft also plays a significant role in its stability and maneuverability. A thicker shaft (typically 1-1.5 inches / 2.5-3.8 cm) provides more stability on uneven ground, but may be more difficult to store or transport. Thinner shafts are ideal for backpackers who need to stow their staff in a backpack.
Consider your personal strength and endurance when selecting a diameter – if you’re a smaller hiker, a thinner shaft may be more manageable.
The Importance of Grip Material and Design
A good grip material and design are crucial for a comfortable hike. Different materials offer unique benefits and drawbacks. Rubber grips, for instance, provide a soft, cushioned feel but can become slippery when wet. Foam grips are often more durable than rubber and tend to stay dry in damp conditions, but they can be stiff and uncomfortable for some users.
Contoured designs fit snugly around the user’s hand, reducing fatigue on long hikes. Textured grips offer extra traction and are a good choice for those with sweaty hands or who hike in wet environments. Wooden grips provide a natural feel and look but may require periodic oiling to maintain their grip.
When selecting a grip material and design, consider your hiking style and environment. If you’ll be hiking in wet conditions, a water-resistant foam or rubber grip might be the best choice. For those with smaller hands, a contoured or textured grip could provide a more secure hold. Ultimately, choose a grip that balances comfort and functionality to ensure a enjoyable hike.
Designing Your Hiking Staff
When crafting a hiking staff, choosing the right materials is crucial for both durability and comfort. Select woods that are lightweight yet strong to make your walking companion truly effective.
Basic Anatomy of a Hiking Staff
The shaft is typically the longest and thickest part of a hiking staff, often made from durable materials like wood, carbon fiber, or fiberglass. It provides the structural foundation for the entire staff, transferring weight and pressure to the handle and tip. When selecting a shaft material, consider its density, flexibility, and resistance to impact.
The handle is usually narrower than the shaft, serving as an ergonomic interface between your hand and the staff. Its design should fit comfortably in your palm, with a slight curve or tapering shape to reduce fatigue during long hikes. Some hikers prefer contoured handles for added grip security, while others opt for minimalist designs that allow for greater dexterity.
The tip is often a crucial component, as it interacts directly with the terrain. A sturdy tip can absorb shock and distribute pressure evenly, reducing strain on your joints. Common materials include metal (e.g., aluminum or steel), rubber, or even wood, each offering varying degrees of durability and traction. When choosing a tip, consider the terrain you’ll be hiking in most often – rocky surfaces may require more aggressive tips, while smoother trails can accommodate lighter designs.
Understanding Different Handle Styles
When crafting your hiking staff, one of the most critical components is the handle style. This decision greatly impacts comfort, balance, and overall performance on the trail. A straight handle offers a straightforward design, providing minimal weight distribution and ease of manufacturing. However, it may not accommodate varying hand sizes or preferences.
An angled handle is ideal for those who need to adjust their grip frequently, such as during long descents. This design helps distribute weight more evenly across your hands and forearms. For example, an angulation of 10-15 degrees can significantly reduce fatigue.
Offset handles are designed to fit the natural contours of the hand, offering improved comfort and control. They’re suitable for hikers who prioritize ergonomic considerations or have specific grip requirements due to injuries or conditions like arthritis.
When selecting a handle style, consider your hiking needs, personal preferences, and any physical limitations you may have. Experiment with different designs to find the one that suits you best, as this will directly impact your staff’s effectiveness on the trail.
Customizing Your Hiking Staff with Features and Accents
Built-in compasses and whistle attachments can enhance the functionality of your hiking staff. A built-in compass allows for hands-free navigation, while a whistle attachment serves as an emergency signaling device. Both features are particularly useful during inclement weather or when visibility is low.
Carved designs can add visual appeal to your hiking staff. Consider engraving your name, initials, or a meaningful message to make the staff more personal. Alternatively, you can choose from various woodburning patterns, such as geometric shapes or forest-inspired motifs. Keep in mind that both carved and painted designs should be made with durable materials, like food-grade varnish or marine-grade paint, to withstand harsh environmental conditions.
Some hikers prefer a minimalist design, while others enjoy adding unique features. When deciding on customizations, consider your hiking style and preferences. For instance, if you frequently hike in dense forests, a compass attachment might be more valuable than an engraved message. Be strategic when choosing add-ons to ensure they serve practical purposes without compromising the staff’s overall stability or balance.
Crafting the Shaft
When crafting the shaft of your hiking staff, you’ll want to focus on selecting the perfect type and size of wood for durability and balance. Let’s look at some popular options for creating a sturdy base.
Preparing the Wood for Shaping
Cutting the wood to the correct size is a crucial step before you can start shaping it. Use a crosscut saw or a chainsaw to make clean cuts, taking care not to split the wood. If using a chainsaw, consider investing in a safety chain and following proper operating procedures.
After cutting, use a planer to flatten one face of the wood. This will create a stable surface for shaping. Alternatively, you can use a table saw with a fence attachment to make a precise cut.
Next, sand the entire length of the shaft to smooth out any rough edges or splinters. Start with coarse-grit sandpaper (about 80-100 grit) and work your way up to finer grits (120-150). This will help remove imperfections and create a surface for applying finishes later on. Be sure to wear protective gloves and eyewear when sanding, as wood dust can be hazardous.
Finish by smoothing the ends of the shaft with a hand file or a small sanding block, making sure they are even and smooth.
Shaping the Shaft: Tips and Tricks
When shaping the shaft of your hiking staff, it’s essential to avoid common mistakes that can compromise its balance and sturdiness. One frequent error is over-rotating the wood during the shaping process, which can lead to a tapered section that’s prone to cracking under stress. To achieve a balanced design, aim for a gradual tapering from the base to the tip, with a gentle slope of about 10-15 degrees.
To ensure stability, the staff’s weight should be evenly distributed along its length. A good rule of thumb is to place the heaviest section (typically around the midpoint) at about one-third to one-quarter of the way up from the base. This positioning allows for optimal leverage and reduces the likelihood of fatigue during long hikes.
When shaping the shaft, consider the grain orientation as well. Typically, you’ll want to work with the wood’s natural grain pattern, rather than trying to force it against its natural direction. By doing so, you’ll create a more robust staff that can withstand the rigors of backpacking and trekking.
Finishing Techniques for a Smooth Finish
When it comes to protecting and enhancing the appearance of your hiking staff’s wood, various finishing techniques come into play. Oiling is a simple yet effective method, as it seals the pores and prevents moisture absorption while also conditioning the wood. Choose an oil that suits the type of wood used for your staff; for example, tung oil works well with hardwoods like oak or maple.
For a more durable finish, consider waxing instead. Wax not only protects against wear but also adds a layer of shine to your staff’s surface. Beeswax or plant-based waxes are good options, but avoid using furniture wax as it may leave a residue. When applying wax, follow the manufacturer’s instructions and apply thin coats for optimal results.
Varnishing is another popular option that provides long-lasting protection against moisture and scratches. However, be cautious when selecting a varnish type to ensure it adheres well with your wood type; some types of varnish can leave a sticky residue if not properly applied.
Assembling Your Hiking Staff
When choosing materials for your hiking staff, consider the weight, durability, and balance you need for your trek. Selecting the right woods can make all the difference in your finished product.
Attaching the Handle to the Shaft
When attaching the handle to the shaft, a secure bond is crucial to prevent it from coming loose during use. You can opt for adhesives such as wood glue, epoxy, or polyurethane-based products, which provide strong bonding properties and durability.
For a more permanent fix, consider using stainless steel screws or bolts with matching washers, ensuring they’re tightened firmly but not overtightened to avoid damaging the materials. Some users also use aluminum or brass inserts for added strength and ease of disassembly if needed in the future.
To enhance adhesion, ensure both the handle and shaft are clean and dry before applying any adhesive. This step is often overlooked, leading to weak bonds or delamination over time. If you’re using screws or bolts, apply a small amount of silicone-based lubricant to the threads for smoother assembly and reduced wear on the materials.
In terms of fastening methods, some hikers prefer using wooden dowels or pegs inserted into pre-drilled holes, providing additional support and stability while minimizing bulkiness.
Adding a Tip or Counterweight
When choosing a tip for your hiking staff, consider the terrain you’ll be traversing most often. Metal tips are durable and can withstand rocky surfaces, but they may damage smooth trails. Plastic or composite tips, on the other hand, are gentler on trails but might not hold up to rougher conditions.
You should also think about your hiking style: if you tend to lean on your staff for stability, a metal tip’s added weight might be beneficial. Conversely, if you prefer to use it more lightly, a plastic or carbon fiber tip could provide the balance you need without excessive weight.
A counterweight can be especially helpful in balancing out an uneven load distribution, particularly with heavier staff materials like ash or oak. A small metal or ceramic weight attached near the base of the staff can make a big difference in stability on uneven terrain. For example, attaching a 1-2 ounce metal washer near the base can help your staff feel more secure on rocky inclines. Experiment with different weights and locations to find what works best for you and your hiking needs.
Final Touches: Adjustments and Maintenance
As you complete your hiking staff, take a moment to assess its balance and length. If necessary, adjust the handle’s position or shorten/lengthen the shaft to achieve optimal ergonomics. For instance, if the staff feels too heavy or unwieldy at the shoulder, try moving the handle down by reattaching it with longer bolts or screws. Conversely, if you find yourself straining your back while hiking, consider adding a shorter section of rod between the handle and shaft.
Proper maintenance is equally crucial for ensuring your staff remains reliable over time. Regularly inspect your staff’s components for signs of wear, such as splintered wood or loose fasteners. Apply a waterproof sealant to protect the wood and prevent water damage. Additionally, store your staff in a dry environment when not in use, away from direct sunlight and extreme temperatures.
When hiking, take care to avoid placing excessive stress on any single joint or attachment. Avoid dropping your staff or using it as a makeshift climbing aid. By making these simple adjustments and taking proactive steps towards maintenance, you can ensure your hiking staff remains a trusted companion on the trail.
Additional Features and Accessories
Once you’ve crafted your perfect hiking staff, there are several accessories that can enhance its functionality and comfort. Here’s what else to consider adding for a more enjoyable hike.
Integrated Tools and Devices
When crafting a hiking staff, you can enhance its functionality by incorporating integrated tools and devices. A compass, for example, can be attached to the shaft of the staff, providing a convenient way to navigate through dense forests or during inclement weather. This is especially useful when traveling in areas with limited visibility.
Another essential tool to consider is a whistle. Its high-pitched sound can help you signal for help in emergency situations or alert other hikers to potential dangers. You can attach the whistle to the staff using a durable clip or lanyard, ensuring it remains accessible and secure.
Some hiking staffs also come equipped with built-in flashlights or LED lights. These can be particularly useful during early morning or late evening hikes when daylight is scarce. The light source can be positioned at an angle to illuminate your path ahead, reducing the risk of tripping over obstacles in low-light conditions. When selecting a hiking staff with integrated tools, consider the specific features you need for your typical hiking terrain and climate.
Customization Ideas and Inspiration
When personalizing your hiking staff, consider adding a symbolic or meaningful component that resonates with you. For instance, attach a small photo or charm of a cherished mountain peak, a favorite animal, or a significant date to the staff’s head or grip. You can also incorporate a unique design element, such as a carved wooden bead or a hand-wrapped cord, to add texture and visual interest.
Another creative idea is to integrate a functional feature that caters to your specific hiking needs. For example, you could attach a small container for storing snacks or a mini first-aid kit near the staff’s base. Alternatively, incorporate a built-in compass or a water bottle holder into the design. When selecting materials, choose those that are durable and lightweight, such as aluminum or carbon fiber, to ensure your customizations don’t compromise the staff’s functionality.
Some hikers also like to infuse their staff with personal history by incorporating elements from past hiking trips. This might involve attaching a small piece of trail-dropped trash-collected metal, a rock collected on a memorable summit, or a tiny handmade ornament created during downtime in camp.
Frequently Asked Questions
Can I use an existing hiking staff as a base for my own custom design?
Yes. Many people repurpose or modify existing hiking staffs to suit their needs. Consider what you like about your current staff and how you can build upon those features in your new, handmade design.
How do I know if the grip material I’ve chosen is suitable for cold weather conditions?
When choosing a grip material, consider its thermal conductivity and resistance to moisture. Materials with poor thermal insulation or high water absorption may become slippery or uncomfortable in cold temperatures. Consider alternative materials like rubber or foam specifically designed for winter hiking.
What if I’m not experienced with woodworking? Can I still make a sturdy hiking staff?
Yes. While experience is helpful, many of the steps involved in making a hiking staff can be learned through practice and patience. Start by following safety guidelines and gradually work your way up to more complex tasks like shaping the shaft or attaching the handle.
How do I balance my new staff to prevent fatigue or injury during long hikes?
Balance your staff according to your personal preferences, hiking style, and terrain. A good rule of thumb is to adjust the counterweight at the tip until you feel evenly balanced with both hands on the staff and no significant strain in your arms.
What if I encounter an obstacle that requires my staff’s tip to be used for leverage? How can I prepare for such situations?
Consider adding a sturdy, metal tip or investing in a removable tip attachment designed specifically for leverage. Practice using these features in a safe, controlled environment before taking them on the trail.

