
Knitting fingerless gloves is a great way to stay warm in cold weather while still having dexterity with your hands. This type of glove has become increasingly popular among outdoor enthusiasts and people who work with their hands, as it provides warmth without restricting movement. However, many beginners struggle to knit gloves that are both comfortable and durable.
If you’re new to knitting or looking for a project to challenge yourself, learning how to make fingerless gloves is a great place to start. This guide will walk you through the basics of yarn selection and basic techniques, as well as provide pattern variations to help you create unique designs. By the end of this article, you’ll be able to knit warm and durable fingerless gloves that fit your personal style.
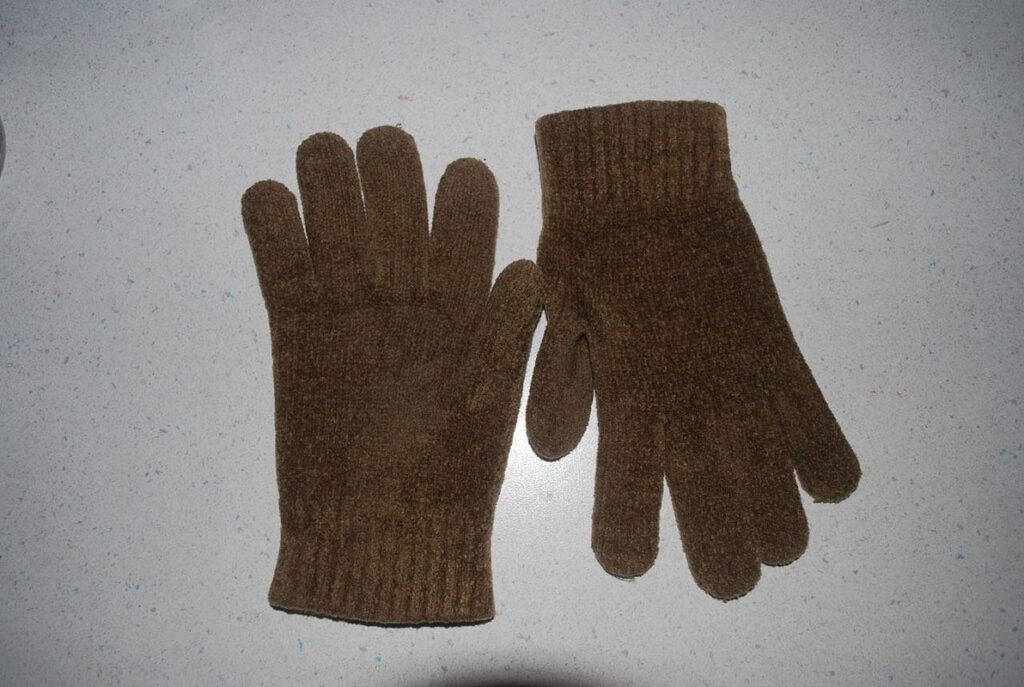
Choosing the Right Yarn and Needles
Selecting the right yarn is crucial for knitting gloves without fingers, as it will affect the fit, warmth, and durability of your finished project. Let’s take a look at some essential considerations when choosing yarn.
Selecting Warm and Durable Yarn
When choosing yarn for knitting gloves without fingers, warmth and durability are top priorities. Consider a yarn with a high wool content – typically 80% or higher – as it will provide excellent insulation against cold temperatures. Look for yarns made from natural fibers like merino wool, alpaca, or cashmere, which tend to be warmer and more breathable than synthetic options.
Weight is another crucial factor; opt for a yarn with a medium-weight gauge (around 4-5 on the Craft Yarn Council’s weight scale) for gloves that are neither too bulky nor too thin. This thickness will also help maintain durability, as thicker yarns tend to be less prone to pilling and wear.
Color is a personal preference, but consider a yarn with good stitch definition if you want to showcase intricate patterns or textures. Finally, think about the texture itself – a yarn with a subtle sheen can add depth and visual interest to your gloves. Avoid very soft or fuzzy yarns, as they may lose their shape over time. By considering these factors, you’ll be able to select a warm, durable, and suitable yarn for your fingerless glove project.
Essential Needles for Knitting Gloves
When knitting gloves without fingers, it’s essential to choose the right needles for a comfortable and even stitch. You’ll want to consider using straight needles, circular needles, or double-pointed needles (DPNs) depending on the pattern you’ve chosen.
Straight needles are ideal for simple patterns and small projects, but they can be cumbersome for longer gloves. Circular needles offer more flexibility and ease of use, especially when working on larger projects or shaping sleeves. DPNs are perfect for smaller projects with intricate details, as they allow for precise control over stitches.
In terms of material, aluminum and plastic needles are lightweight and easy to handle, making them suitable for most knitting projects. Wooden needles offer a smooth glide and warmth to the hands, but can be more expensive and may cause hand fatigue if used extensively. For beginners, it’s best to start with straight or circular needles made from aluminum or plastic, as they’re less likely to splinter or crack under repeated use.
Basic Knitting Techniques for Gloves
To get started on knitting gloves without fingers, you’ll first need to master some basic knitting techniques such as casting on and shaping. These essential skills will form the foundation of your glove project.
Understanding Knit and Purl Stitches
The knit and purl stitches are the fundamental building blocks of knitting gloves without fingers. To create a comfortable and durable glove, you need to understand how these basic stitches work.
To begin, hold your yarn in your non-dominant hand, with the end closest to your body. Insert the right needle into the stitch on the left needle, as if to knit it. However, instead of pulling the yarn through, simply slide the right needle under the left one and off again. This is a “purl” stitch. To create a “knit” stitch, insert the right needle into the stitch on the left needle and pull the yarn through.
Practice both stitches until you feel comfortable with them. It’s essential to keep track of whether you’re working in knit or purl rows as you knit your glove. You can use a row counter or keep track mentally by paying attention to the texture created by each stitch.
In knit rows, the fabric will look smooth and flat. In purl rows, it will create a subtle ridge. Switching between these two stitches creates a fabric that’s both durable and comfortable against the skin.
Casting On and Binding Off
When casting on for gloves without fingers, you’ll want to use a technique that creates a snug and flexible cuff. For beginners, the long-tail cast-on is an excellent choice because it produces a stretchy and comfortable edge. To do this, make a slipknot on your needle, then draw up a loop with the working yarn and place it on the second needle.
Next, insert the right needle into the first stitch on the left needle and pull the yarn through. You’ll now have two loops on the right needle. Repeat this process until you’ve cast on the desired number of stitches for your glove cuff. This technique allows for a bit of give, which is essential when creating fingerless gloves.
When it comes to binding off, use a basic bind-off method to secure the live stitches and prevent them from unraveling. For gloves without fingers, a stretchy bind-off like the knit two together (K2Tog) or the sewn bind-off works well. These methods will create a comfortable and secure cuff that allows for easy donning and doffing of your gloves.
Knitting Patterns for Gloves Without Fingers
These patterns will show you how to create a seamless, fingerless glove that’s perfect for cold hands on-the-go. You’ll find inspiration in simple yet stylish designs.
Simple Knit-Purl Pattern
To create a simple knit-purl pattern for gloves without fingers, start with a basic repeat of 6 stitches. Knit 3 rows to establish a foundation, then switch to purling for 2 rows. Continue this knit-2-rows-purl-2-rows pattern until your work reaches the desired length.
For a standard glove size, aim for a total stitch count between 40 and 50. You can adjust the stitch count by adding or subtracting single stitches from each row. For example, if you’re using a lighter-weight yarn, consider reducing the stitch count by 2-4 stitches per row to maintain a balanced fabric.
When working with a simple knit-purl pattern, it’s essential to pay attention to even tension and row gauge. Knit a swatch before starting your gloves to ensure that your gauge matches the intended pattern. A good rule of thumb is to aim for an approximate 20-22 stitches per 4 inches (10 cm) measured in stockinette stitch.
This simple knit-purl pattern provides a versatile foundation for gloves without fingers. You can customize it further by introducing texture with subtle increases or decreases, or experimenting with different yarn weights and colors.
Cabled Pattern for Added Texture
To add texture and visual interest to your fingerless gloves, you can incorporate a cabled pattern. Cables are created using specific increases and decreases that form twists in the fabric. To make cables, you’ll need to increase stitches while also creating a twist in the work.
For a basic cable pattern, try the following sequence: knit 4 rows, then purl 2 together (P2tog) for one stitch, followed by an M1R (make one right-sided). This will create a small twist that can be repeated throughout your design. To maintain symmetry, mirror the decrease on the other side of the work.
To incorporate this pattern into your glove design, cast on a multiple of 6 stitches plus 3 for an even number of cables. Knit in cable pattern as follows: knit 2 rows, purl 1 row, then repeat the sequence above (P2tog and M1R) to create a small twist. Continue this process until you have achieved the desired texture.
Keep in mind that cables can be time-consuming to work, especially for beginners. If you’re short on time or new to cabling, consider starting with a simpler pattern.
Shaping the Gloves for a Comfortable Fit
To create gloves that fit comfortably, you’ll need to shape them carefully around your hands, paying attention to both wrists and palms. This involves some gentle manipulation of stitches as you knit.
Understanding Thumb Gaps and Fingerless Design
When knitting gloves without fingers, it’s essential to consider the design implications on hand movement and comfort. Thumb gaps are a crucial aspect of fingerless glove design, as they allow for a natural range of motion between the thumb and other fingers. Without proper spacing, thumb gaps can cause restricted hand movement, leading to discomfort or even pain.
Common issues arise when designers neglect to prioritize thumb gaps in their pattern. For instance, if the gap is too small, it may force the thumb to ride up against the glove’s fabric, causing strain on the joint. Conversely, a gap that’s too large can lead to cold air entering and making the hand feel chilly.
To avoid these problems, consider using a gauge swatch to measure your stitch pattern’s true dimensions. This will help you determine an optimal thumb gap size for your specific yarn and needle combination. Typically, this gap should be about 1-2 inches (2.5-5 cm) deep, depending on the individual hand shape and glove design. By paying attention to these subtleties, you can create a fingerless glove that provides both comfort and functionality.
Creating Shaped Sleeves and Wrist Cuffs
To create shaped sleeves and wrist cuffs for a comfortable fit, start by measuring around the widest part of your hand to determine the glove’s circumference. You’ll want to add a small margin for ease of movement, typically 1-2 inches. To adjust the sleeve length, consider how you plan to use the gloves – if they’re for outdoor activities, you may prefer longer sleeves to protect your hands from wind and cold.
For shaped sleeves, try using a combination of knit and purl stitches to create a subtle texture that adds visual interest without compromising comfort. A simple way to achieve this is by working a single row of purl stitches after every 4-6 rows of knit stitches. This will create a gentle slope in the sleeve’s shape.
When it comes to wrist cuffs, you can use a cuff-down method or a cuff-up method, depending on your preference and the yarn type. For a cuff-down approach, cast on extra stitches at the beginning of the round and decrease them gradually as you work down the cuff. This will help create a snug fit around the wrist.
To add depth to the cuff, consider working a ribbed pattern or using a subtle cable texture.
Additional Tips and Troubleshooting
Even experienced knitters can encounter issues, so let’s go over some common problems you might face while knitting fingerless gloves and how to resolve them.
Common Mistakes When Knitting Gloves Without Fingers
When knitting gloves without fingers, beginners often make mistakes that affect the overall fit and appearance of their finished project. Uneven tension is a common issue, resulting from inconsistent yarn usage or incorrect needle size. This can cause the glove to pucker or sag unevenly. To avoid this, make sure to swatch your chosen yarn with the correct needles before starting your gloves.
Poorly shaped seams are another frequent mistake. This can occur when the cast-on and bind-off edges don’t match up properly, creating a wonky or loose seam. Check your stitch count at each join to ensure accuracy, and consider using a stretchy cast-on method for a more forgiving edge. Additionally, pay attention to the shaping of the thumb gaps – if they’re too wide or narrow, it can throw off the entire glove’s fit.
By being mindful of these common mistakes, you’ll be able to create gloves without fingers that are not only functional but also visually appealing. Take your time when knitting and double-check your work regularly to ensure a smooth, even finish.
Sizing and Alterations
When knitting gloves without fingers, it’s essential to consider hand shape and individual preferences when adjusting the fit. If you find the gloves are too tight, try loosening the tension by decreasing the number of stitches or using a larger needle size. Conversely, if the gloves are too loose, tighten the stitches or switch to a smaller needle.
To accommodate varying hand shapes, focus on the wrist cuff and thumb gap areas. For narrower wrists, reduce the number of stitches in these sections. If you have shorter thumbs, consider shortening the corresponding portion of the glove pattern.
Considerations for individual preferences include personal taste in fit (e.g., snug or relaxed) and activity level (e.g., athletic or sedentary). Some knitters prefer a more fitted glove for better dexterity while others prioritize warmth and comfort over flexibility. Think about your intended use for the gloves when deciding on the optimal fit.
When adjusting the size, pay attention to the thumb gap width as it directly affects the overall fit of the glove. A good starting point is to measure around the widest part of your hand (excluding thumb) and adjust the pattern accordingly.
Final Touches: Finishing Your Knitted Gloves
Now that you’ve completed the body of your gloves, it’s time to add some final details to ensure they’re cozy and long-lasting. We’ll cover the finishing touches to complete your project.
Blocking and Shaping the Gloves
Blocking and shaping are crucial steps in finishing knitted gloves without fingers. When you cast off, your gloves may still be a bit misshapen from the knitting process. This is where blocking comes in – a simple technique that uses moisture to relax the fibers and even out the stitches.
To block your gloves, start by wetting them gently with cool water. You can use a spray bottle or soak them briefly in a sink filled with water. Then, lay the gloves flat on a towel, smoothing out any wrinkles as you go. Use a blocking mat or a clean, dry towel to help maintain their shape.
Next, allow your gloves to air-dry completely – this may take several hours depending on the yarn and humidity levels. Once they’re dry, reshaping them is relatively easy. Gently stretch the fabric over the areas where it’s been blocked out, working from the wrist up towards the cuff. Make sure not to overstretch or distort the fabric.
For a professional finish, pay attention to the thumb gaps: gently press them open with your fingers to maintain an even gap between each hand. Finally, inspect your gloves for any loose ends and weave in those stray threads before they become a problem.
Adding Personalized Details or Embellishments
When adding personalized details to your fingerless gloves, you can create a unique and functional piece of knitting. One way to add embellishments is through embroidery. Choose a simple design that complements the yarn’s texture or pattern. For example, a small snowflake or leaf motif can add visual interest without overwhelming the overall design.
You can also incorporate buttons or other fasteners to make your gloves more functional. Consider using buttons made from natural materials like wood or bone to match the earthy tone of wool or fleece. Alternatively, use snap fasteners for a sleeker look. When choosing fasteners, consider the type of activity you’ll be wearing the gloves for and select a design that suits the task.
Other embellishments include appliques, which can add a pop of color or interest to your gloves. You can make your own using felt, fabric scraps, or even repurposed materials like old buttons or zippers. For a more subtle look, try adding a small patch or badge with a personal message or symbol. Remember to balance embellishments with the overall design and ensure they don’t compromise the fit or functionality of your gloves.
Frequently Asked Questions
Can I use leftover yarn for knitting gloves without fingers?
Yes, you can use leftover yarn to knit gloves without fingers. However, ensure that the yarn is sufficient in quantity and suitable in weight for the project. Consider factors like fiber content, color, and texture when deciding whether your leftover yarn will work.
What if I accidentally knit a glove with finger holes instead of thumb gaps?
Don’t worry; it’s easier to adjust the thumb gap than to remove finger holes entirely. Simply use a tapestry needle to carefully pick up stitches from the wrong side of the fabric, then reknit the area without fingers. This might require some frogging, but it’ll save you from starting over.
How do I add a wrist cuff or a ribbed band to my knitted gloves?
To create a wrist cuff or ribbed band for your knitted gloves, try adding a short row of knit-purl pattern before binding off. Use a stretchy stitch like garter stitch or seed stitch at the cuff’s edge for flexibility and comfort.
Can I use a single ball of yarn to knit both hands?
Yes, you can use a single ball of yarn to knit both hands if you’re working with a self-striping or variegated yarn. However, ensure that the color pattern will match up properly on both gloves. You may also consider using a contrasting yarn for the cuff or ribbed band to create a visually appealing effect.
Why do my knitted gloves without fingers feel stiff after washing?
Gloves made from wool or synthetic fibers can sometimes become stiff due to over-washing or incorrect drying methods. To avoid this, gently hand wash your gloves in cold water and reshape them while still damp. Allow them to air-dry away from direct sunlight, which may cause colors to fade.

