
Drawing a cute panda can be intimidating for beginners, but with some basic guidance, you can bring this adorable creature to life on paper. Let’s start by understanding the proportions and basic shapes involved in drawing a simple panda. A key aspect of drawing a realistic panda is getting its body shape right – long and sturdy legs and a round body are essential elements that will make your drawing look authentic. Once we cover these fundamentals, we can move on to adding details like facial features, ears, and paws. By the end of this guide, you’ll be able to confidently draw a cute panda, with basic shapes, proportions, and details all in place.
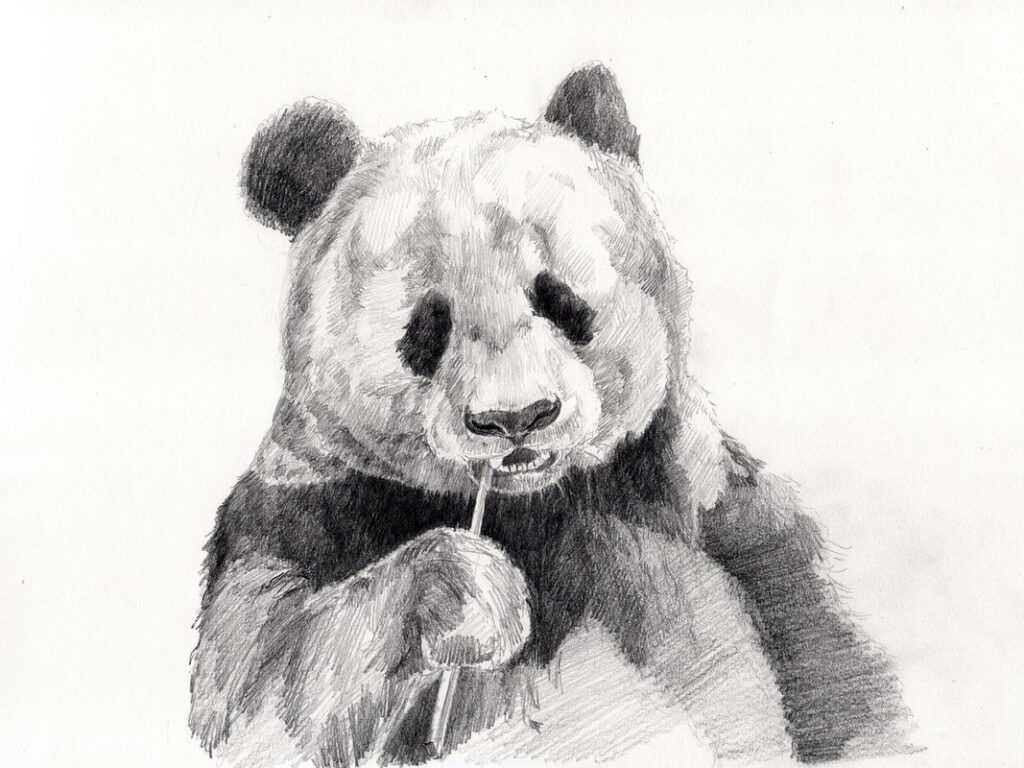
Getting Started with Drawing
To get started, you’ll want a pencil and paper handy, along with some basic drawing tools to help guide your lines. Let’s begin with the fundamentals of drawing a simple panda.
Understanding Basic Shapes
When drawing a panda, it’s essential to start with basic shapes. These building blocks will form the foundation of your simple panda. Begin by practicing basic lines – straight and curved. You’ll need these for the panda’s outline, limbs, and facial features.
Draw circles for the panda’s eyes and ears. Remember that the eyes are usually positioned close together and on a slight angle to convey a sense of cuteness. Don’t worry too much about perfection; it’s the overall appearance that matters.
Ovals will come in handy for the panda’s head, body, and limbs. Think of an oval as a circle with flattened ends – it’s a versatile shape that can be used to create various forms. Practice drawing ovals in different sizes and orientations to get a feel for their potential.
In your simple panda drawing, use these basic shapes to block out the overall form before adding details. This will help you achieve a more accurate and recognizable representation of the animal. By mastering basic lines, circles, and ovals, you’ll be well-equipped to tackle the step-by-step guide ahead.
Familiarizing Yourself with Proportions
When drawing a panda, it’s essential to get its proportions right. Start by sketching a vertical line down your paper – this will represent the panda’s body length. The average adult panda is about 4-6 feet long from head to tail. To measure your own panda’s body, draw another line about one-third of the way up from the bottom of the vertical line. This marks the top of the shoulders.
The head should be roughly a quarter of the total body length. Place it on the upper section of the neck, about two-thirds of the way down from the shoulder line. Remember that pandas have short, sturdy necks, so don’t make the head too far up or it will look unnatural.
Pay attention to limb placement as well – pandas have relatively short legs and long arms. Their front paws are often held close together while their hind paws are set slightly back from the shoulders. By keeping these proportions in mind, you’ll be able to draw a more accurate representation of your panda’s body.
Sketching the Basic Form
Start by sketching a rough outline of your panda, focusing on its basic shape and proportions: head, body, limbs, and tail. This simple form will serve as the foundation for your drawing.
Drawing the Body
When drawing the body of your simple panda, it’s essential to get the proportions right. Start by sketching a large oval for the head and neck area. The length of this oval should be about 1-2 times the width of the face. Hold your pencil vertically next to your sketch to ensure the height is roughly equal to the distance between the panda’s ears.
The body itself can be drawn as a slightly flattened egg shape, with the long axis running horizontally. Pay attention to the curve of the body, which should be smooth and continuous. A good way to achieve this is by imagining a gentle S-curve that follows the natural contours of the animal.
As you refine your sketch, use a soft pencil (HB or 2B) to lightly shade in the overall shape of the body. This will help you see the proportions more clearly and make any necessary adjustments. Remember, the goal here is simplicity – avoid adding too much detail at this stage, as it can lead to clutter and make it harder to achieve a clean, crisp finish. Focus on getting the basic form right before moving on to details like fur texture and facial features.
Adding the Head and Neck
When drawing the head and neck of your simple panda, start by placing two small circles on either side of the body, about one-third of the way down from the top. These will be the ears, so make sure they’re roughly even and not too far apart. The circles should also be fairly close to the back of the head.
Next, draw a slightly smaller circle for the nose, positioning it right below the center of the face. This circle should be about one-third of the way up from the bottom of the head. Make sure it’s centered and roughly in line with the ears.
Pay attention to the proportions here – if your panda’s ears are too big or too small, it can throw off the whole balance of the face. Think of the head as a triangle, with the nose at the apex. This will help you get the placement right.
Keep the neck fairly short and simple – just a gentle curve that leads from the base of the head to the body. You don’t need to draw any individual muscles or details here – we’ll focus on those in later steps.
Refining Facial Features
Now that we’ve established our panda’s overall shape, let’s refine its facial features by adding some key details to bring it to life. This includes defining the eyes and nose.
Drawing the Eyes and Eyelids
Draw the eyes slightly angled and positioned near the top of the head, with the left eye about one-third of the way down from the top. Use a gentle curve for each eye, making sure to leave space between them. The upper eyelid should be thin and delicate, while the lower lid is thicker and rounded.
To draw the eyes’ expressive nature, think about how you want your panda to look. Do you want it happy and bright-eyed or more relaxed? You can achieve this by adjusting the shape of the eyelids and adding some sparkle with a small dot in the center of each eye. The pupils should be small and rounded.
When drawing the eyes, remember that it’s okay if they’re not perfectly symmetrical – imperfections make your panda look more endearing. Pay attention to the proportions: the eyes are about one-third of the way down from the top of the head, but slightly closer together than they would be on a human face. Focus on capturing the overall expression and personality you want to convey through these simple yet essential features.
Crafting a Distinctive Nose and Mouth
When drawing a simple panda’s face, it’s essential to pay attention to its distinctive nose and mouth. The panda’s nose is typically small and rounded, with a slight indentation at the tip. To draw this feature accurately, start by sketching a gentle curve above the upper lip, making sure not to overextend it towards the forehead.
For the mouth, focus on creating a small, relaxed line that curves slightly upwards. Avoid drawing the mouth too wide or too narrow; a panda’s mouth is usually somewhere in between. You can also add a slight downturn at the corners of the mouth for a more natural look.
When adding these features, consider how they relate to each other and the rest of the face. The nose should be positioned centrally above the upper lip, while the mouth should be proportionate to the size of the panda’s face. Paying attention to these details will help you capture the essence of your simple panda’s expression.
Adding Texture and Patterns
Next, let’s add some visual interest to our panda by incorporating texture and patterns, such as fur texture and a fun collar design. This will bring your drawing to life!
Creating Fur Texture
To create texture that resembles a panda’s fur, you’ll want to focus on soft, rounded brushstrokes and gentle blending. Use short, gentle strokes with a small brush to suggest individual hairs, paying attention to the direction of each stroke to capture the natural flow of the fur.
For the body, use longer, more sweeping strokes to cover larger areas. Blend these strokes gently with a damp brush or your finger to merge them into soft, fluffy patches. Be mindful of creating sharp edges or distinct lines, as this can detract from the furry texture.
To enhance the illusion of fur, you can also use hatching and cross-hatching techniques in varying densities and directions. Varying the pressure on your pen or pencil will create different line weights and textures that mimic the layered look of a panda’s fur. For example, lighter lines can suggest sun-bleached areas, while darker lines can create shadows and depth. This layering effect is crucial for creating the convincing texture you want in your simple panda drawing.
Incorporating Black and White Stripes
When drawing your panda’s iconic black and white stripes, it’s essential to pay attention to their placement and pattern. Start by identifying where the main stripes will fall on your panda’s body – typically around the back, shoulders, and chest. Use a gentle, curved line to guide the placement of each stripe, making sure they’re evenly spaced.
For a simple panda design, aim for three or four broad, horizontal stripes along the back, with slightly narrower ones on the shoulders and chest. Consider using a range tool or ruler to help you draw these lines accurately. You can also use a pencil to lightly sketch out the placement of each stripe before committing to ink or paint.
When drawing individual stripes, focus on maintaining a consistent width throughout – typically around 1-2 cm for a simple panda design. To add some visual interest, you can introduce slightly thicker or thinner stripes towards the bottom of the back.
Adding Final Details and Touches
Now that you’ve completed the main features of your panda drawing, let’s focus on adding some final details to bring it to life. This is where personality really shines through in your artwork.
Defining Limbs and Paws
When defining the limbs and paws of your simple panda drawing, focus on proportion and balance. The front legs should be slightly thicker than the hind legs to create a natural stance. Ensure the back legs are positioned at an angle to give your panda a relaxed posture.
For the front paws, keep them relatively small in comparison to the body. Pay attention to the shape of each toe – they should curve gently and meet at the base of the paw. This will help you achieve a soft, rounded look. Use smooth lines for the edges of each toe pad, as these can become chunky if over-defined.
For the hind paws, consider using slightly larger toes to compensate for their reduced size compared to the front legs. As with the front paws, curve the toes gently and keep the edges clean. Balance is key: ensure your panda’s weight is evenly distributed on all four legs.
In a simple drawing like this one, small details can make a big difference in creating an accurate representation of a real-life panda.
Enhancing Background and Setting
When creating a simple background for your panda drawing, consider using subtle elements that don’t compete with the main subject. A light blue sky or a few stylized trees can effectively ground your panda without overpowering it. For instance, if you’re drawing a panda playing in a bamboo forest, incorporate gentle foliage and atmospheric shading to create depth.
To add more context, think about what’s relevant to the scene: where is the panda standing? Is it near water or in an urban area? Incorporate visual cues that hint at these settings without becoming overly detailed. Avoid over-accessorizing your background – a few strategic elements are often more effective than an abundance of clutter.
Incorporating natural textures and patterns can also add visual interest to your setting. For example, if you’re drawing a panda in a meadow, consider using loose brushstrokes or scribbles to suggest the grassy texture. These subtle details will enhance your overall composition without overwhelming the main subject.
Frequently Asked Questions
What if I’m not sure how to draw the panda’s body shape and proportions from memory?
Yes, it’s okay to refer back to the article for guidance on basic shapes and proportions. If you’re still unsure, try drawing simple oval and circle shapes together to get a sense of the overall form before adding more details.
How can I achieve a natural-looking posture for my panda’s limbs and paws?
To create a natural-looking posture, pay attention to the angles and placement of your panda’s limbs and paws. Practice drawing different poses by varying these angles and positions. You can also observe pictures of real pandas to get an idea of their relaxed stance.
Can I use digital tools or software to help with drawing my panda?
Yes, you can use digital tools like a graphics tablet or drawing apps to help create your panda drawing. However, keep in mind that practicing traditional drawing skills can improve your overall artistic ability and fine motor control.
What if I find it hard to balance the proportions of my panda’s head and body?
To achieve accurate proportions, break down each section into smaller parts (e.g., head size, ear placement, etc.). Measure or estimate these parts relative to each other before combining them. Practice makes perfect; don’t be discouraged if your first attempts don’t turn out as expected.
Can I add additional details or patterns to my panda’s fur beyond the basic black and white stripes?
Yes, you can certainly experiment with adding more textures, colors, or patterns to your panda’s fur. However, remember that less is often more; sometimes it’s better to stick with simple designs for a clean, minimalist look.
