
Drawing an eye can be intimidating, but with some basic knowledge of anatomy and a few simple tools, you can create a realistic one. The key to drawing a convincing eye is understanding its inner structure, which consists of a iris, pupil, sclera, and eyelids. To master this skill, it’s essential for beginners to grasp the fundamental concepts first, rather than diving straight into more complex techniques.
In this article, we’ll break down the process of drawing a simple eye into manageable steps. We’ll cover the basic anatomy of the eye, introduce you to some useful tools, and share simple yet effective techniques to help you achieve accurate results. By following our easy-to-follow guide, you’ll be able to draw a realistic eye with ease and confidence.
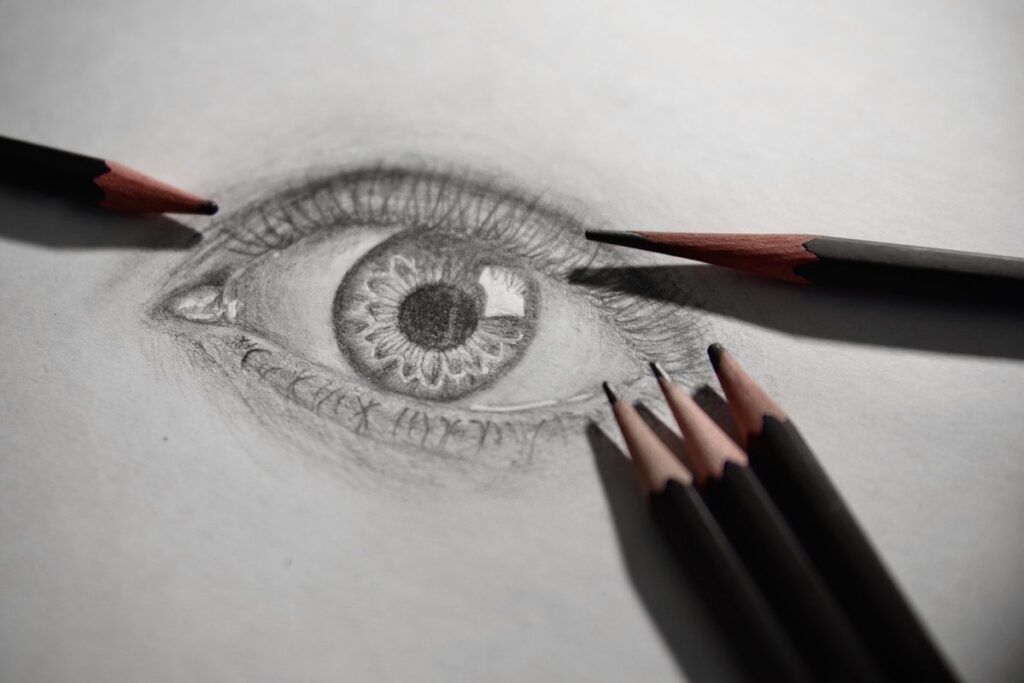
Understanding Basic Anatomy
To draw a simple eye, you’ll first need to understand its basic components: the shape of the eye socket, iris, and pupil. This essential knowledge will help guide your lines and shading.
Understanding Eye Structure
The eye is composed of several key features that contribute to its overall shape and proportions. One of the most distinctive aspects of the eye is the iris, which is the colored part surrounding the pupil. The iris is typically circular or slightly oval in shape, with a darker ring at the edge called the limbus.
The pupil itself is usually small compared to the size of the iris, but its size can change depending on lighting conditions. In bright light, the pupils constrict and appear smaller, while in low light, they dilate and appear larger. The sclera, or white part of the eye, covers about 80% of the eye’s surface and provides protection.
When drawing the eye, it’s essential to get these proportions right. A common mistake is making the iris too large or the pupil too small. To avoid this, try measuring the size of your own eyes or using a reference image to gauge the correct proportions. Keep in mind that individual variations are normal, and there’s no one-size-fits-all approach to drawing the perfect eye.
Key Features of the Eye
The iris is the colored part of the eye that surrounds the pupil. It’s typically spherical in shape and can vary greatly in color from person to person, ranging from deep brown to bright blue. When drawing an iris, consider its subtle curvature and how it meets at the edges with the sclera. A common mistake is to draw a flat or boxy iris – try observing photographs of eyes to get a sense of their rounded shape.
The pupil is the small opening in the center of the iris that lets light into the eye. It’s usually smaller than you’d think, but its size and shape can give important clues about the character’s emotions and mood. Draw a small circle for the pupil – if it’s too large or irregularly shaped, the eye may look unnatural.
Eyelids serve as both functional protection for the eye and expressive features that convey emotion. The upper eyelid typically extends slightly beyond the lower one, creating an asymmetrical shape. Pay attention to how the edges of the eyelids curve gently around the eye, especially at the outer corners.
Preparing Your Tools
To get started drawing a simple eye, you’ll first need to prepare your tools, which includes gathering a few essential supplies and making sure they’re in good working order. Grab your pencils and paper!
Choosing the Right Pencils
When selecting pencils for drawing a simple eye, you’ll want to focus on graphite-based pencils with varying levels of hardness. The most common range is HB (medium), 2B, and 6B, which offer increasing softness. For an accurate drawing, it’s essential to have a few pencils from each end of the spectrum.
Beginners often find it helpful to start with a set that includes a mix of hardness levels. This will allow you to easily experiment with shading and details without having to switch between multiple pencils too frequently. Look for pencils made by reputable manufacturers like Faber-Castell or Derwent, as they tend to hold their mark well.
For drawing an eye, it’s also crucial to have a sharpener on hand. A good quality pencil sharpener can help you achieve the precise tips needed for fine details and subtle shading. Invest in a dedicated sharpener rather than using a generic one, as this will ensure that your pencils stay sharp and ready for use throughout the drawing process.
Basic Drawing Techniques
When drawing a simple eye, establishing consistent lines and shading is crucial for creating an illusion of depth and dimension. To achieve smooth results, focus on basic drawing techniques such as varying line weight and using hatching patterns. A fine-tip pen or pencil is ideal for this task, allowing you to create precise lines with minimal effort.
To control line weight, pay attention to the pressure applied to your instrument. Lighter lines can be achieved by holding the tool at an angle or applying gentle pressure, while heavier lines result from firm pressure on the paper. For example, when outlining the eye’s shape, use a fine line for details and a slightly thicker one for broader strokes.
Hatching patterns involve layering parallel lines to create shading. Start with horizontal lines along the top of the eye and gradually shift to vertical ones as you move downwards. This technique helps define contours and adds depth to your drawing. Remember that consistent spacing between lines is key, allowing you to achieve a smooth transition from one area to another.
Step 1: Sketching the Eye Shape
Begin by sketching a rough outline of the eye shape, focusing on its overall proportions and size to establish a solid foundation for your drawing. Pay attention to the curves and angles that make up the eye’s unique shape.
Basic Shapes and Proportions
When drawing an eye, it’s essential to understand how to break down its basic shape into simpler forms. A sphere is a good starting point, as the eyeball itself can be approximated as a circular shape. Note that this doesn’t necessarily mean drawing a perfect circle – slight imperfections and subtle variations in curvature will add depth and character to your eye.
However, the eyeball is not a perfect sphere; it’s slightly flattened from top to bottom and has a distinctive curve around the outer corner. A cylinder can be used to approximate this shape, with the longer axis running from top to bottom and the shorter axis following the circular curvature of the eyeball.
When working out proportions for your eye, consider using simple ratios like 1:1.5 or 1:2 to divide the space between the eyeball’s equator and its outer corner. For instance, if you’re working on a quarter-size sketch, allocating about one-third of that area to the upper half will help you capture the overall shape of the eye.
Refining the Eye Shape
Start by adding more definition to the shape of the eye. Pay attention to the proportions – the width of the eye should be about 1.5 times its length. You can also use a gentle curve to suggest the rounded shape of the eye. Notice how the top of the eye is slightly higher than the bottom, creating a subtle asymmetry.
Next, refine the edges and corners. The edge where the iris meets the sclera (the white part of the eye) should be soft and gradual, not sharp or angular. Similarly, the inner corner of the eye (where it meets the nose) can be slightly rounded to create a more natural look.
Consider adding some basic shading to give your eye depth and dimension. You don’t need to worry about detailed shading at this stage – just aim for a rough sense of light and shadow. This will help guide your next steps in drawing the eye’s details, such as the pupil, eyelids, and lash line.
Step 2: Adding Details to the Iris
Now that you’ve established the shape of your iris, it’s time to add some details to bring it to life. We’ll focus on adding subtle shading and texture to create a realistic appearance.
Colors and Patterns
The iris is often considered the most challenging part of drawing an eye to get right. One reason for this is its subtle variations in color and texture, which can make a simple eye appear believable or not. The colors themselves are usually darker at the top and lighter towards the bottom. Start by adding a series of concentric circles that gradually change from dark to light.
When it comes to patterns within the iris, there’s no one-size-fits-all solution. Some irises have a marbled effect with small flecks of color scattered throughout, while others appear more uniform in their coloration. If you’re drawing an eye with a blue or brown iris, try creating a subtle gradient that shifts from the dominant color towards its complementary hue.
Avoid using bold, contrasting lines to indicate the edges of your circles, as this can make the iris look too defined and artificial. Instead, use gentle transitions between colors to create a soft focus effect. Remember that the goal is to suggest the texture of the iris rather than drawing it in precise detail – think of it more like painting than drawing.
Iris Shapes and Patterns
When it comes to drawing a simple eye, creating an authentic-looking iris is crucial. The iris itself has several distinctive shapes and patterns that can greatly vary from one person’s eyes to another. Typically, irises are round or slightly oval, with the rounded shape being more common in people of European descent.
To get started, consider the general type of iris you want your character to have: marbled, pebbled, flecked, or solid-colored. Marbled and flecked irises feature distinct patterns that can be created using thin lines or short strokes. For a pebbled effect, use small dots or short dashes. If you prefer a more subtle look, opt for a solid color or a light gradient.
Notice the way different colors interact with one another in the iris. The most common combination is brown or golden flecks against a blue background, but there are countless variations. In some cases, the iris can even appear to be multi-colored due to the unique distribution of pigment.
Step 3: Drawing Eyelids and Lashes
Now that you’ve drawn the eye socket, let’s focus on adding some essential details to give your simple eye some depth. We’ll start by drawing the eyelids and lashes, bringing it all together nicely.
Shaping Eyelids
To draw realistic eyelids, start by considering their overall shape. Eyelids are generally smooth and curved, with a subtle slope from the outer corner to the inner corner. Pay attention to proportion as well – the upper lid should be slightly shorter than the lower lid, and the outer corner of each lid should be slightly higher than the inner corner.
The outer edge of the eyelid is where most of its shape comes from. A gentle, subtle curve should define this edge. Avoid making it too angular or sharp, as this can give your drawing a cartoonish appearance. To achieve a smooth curve, try sketching the edge with a soft pencil and then refining it with a fine-tip pen or marker.
In terms of proportion, remember that the space between the lash line and the top of the upper lid should be roughly one-third to one-half the width of the eye itself. This will help create a balanced look and prevent your eyelids from looking too small or cramped.
Adding Eyelashes
When drawing individual eyelashes, it’s essential to capture their unique shape and texture. Start by sketching a few curved lines along the upper lash line, each one slightly shorter than the last. These represent the longer lashes at the outer corner of the eye. For the inner lashes, use shorter, more delicate strokes.
To create the illusion of depth and movement, vary the length and thickness of your lashes. You can also add a few stray lashes above or below the main group to suggest that they’re moving. Think about how eyelashes tend to curl outward at the ends – this will help you capture their organic shape.
When adding eyelashes, it’s not just about drawing individual hairs; it’s about capturing the overall sweep of the lash line. Study the way your own lashes fall or those in a photo you like. Observe how they curve and flare, especially toward the outer corner of the eye. This will help you draw lashes that seem dynamic and natural.
Step 4: Finalizing the Eye
Now that you have your eye shape and proportions just right, it’s time to add some final details to bring your simple eye to life. Let’s refine those features together!
Shading Techniques
Shading is what gives your simple eye its sense of depth and dimension. When done correctly, it can make a big difference between an eye that looks flat and one that appears lifelike. You’ve already got the basic shape and proportions down – now it’s time to add some shading techniques to create those all-important shadows and highlights.
Start by identifying the areas where light would naturally fall on the eye. This usually means the upper lid, the area just below the eyebrow, and the center of the iris. Use a range of values from very dark to very light to capture these areas in your drawing. For a realistic look, avoid using any shading that’s too uniform or flat – instead, aim for subtle gradations that suggest texture and dimension.
When creating shadows, think about where they would naturally fall in relation to the surrounding features. The crease of the upper lid is a good place to start, as it’s often one of the darkest areas on the eye. From there, you can build up layers of shading to create a sense of depth. Remember, the goal is to suggest volume and texture – don’t try to recreate every detail with shading alone.
Refining Details
Pay close attention to the pupil shape as it significantly impacts the overall appearance of the eye. Avoid making it too perfect, as this can give a robotic look instead of realism. A slightly off-center or irregularly shaped pupil is often more convincing.
Eyelid texture also plays a crucial role in creating a believable eye. Consider adding some gentle folds or creases to suggest movement and flexibility. These details don’t need to be overly precise; soft, subtle hints can be just as effective as sharp lines.
For overall realism, ensure that the eye’s proportions are correct. If the pupil seems too large or too small relative to the surrounding features, it will detract from the entire piece. A good starting point is to compare your drawing to reference images of eyes in different lighting conditions and expressions.
Incorporating these finer details can elevate a simple eye into something more sophisticated. Take note that excessive attention to detail can lead to overcomplication; remember that simplicity is key when striving for realism.
Common Mistakes to Avoid
As you work on drawing a simple eye, it’s easy to fall into some common pitfalls that can ruin an otherwise great piece of art. Let’s cover these mistakes now and avoid them altogether.
Overemphasis on Details
When drawing an eye, it’s easy to get caught up in trying to capture every intricate detail. However, overemphasizing certain features can actually make your simple eye look more complicated than it needs to be. For instance, paying too much attention to the eyelashes or eyebrows can lead you to neglect other essential details like the shape of the iris or the curve of the lower lid.
A common mistake is to focus solely on the eyes’ expressions, trying to convey a specific emotion through every subtle detail. While expression is crucial for realistic drawings, it’s not as important when creating a simple eye. Remember that a basic eye should be recognizable even from a distance, so prioritize the overall shape and proportions over fine details.
In reality, a simple eye typically has fewer eyelashes than its more detailed counterparts, and they’re often less curly or wispy. By scaling back on these features, you can create a clean, uncluttered look that’s still engaging and believable.
Comparison with Real-Life References
When drawing a simple eye, it’s easy to rely on generic guidelines and shapes. However, this approach can lead to inaccuracies and lack of realism. To avoid these mistakes, compare your work with real-life references, such as photographs or actual eyes.
Studying the anatomy of an eye will help you understand its unique features, like the curvature of the cornea and the shape of the iris. Notice how the eyelids create a natural crease, which can be challenging to replicate without proper reference. Look for images with varying lighting conditions to observe how it affects the appearance of the eye.
For example, take note of the subtle differences in shading on the upper and lower lids when viewing an image under natural light. Pay attention to the shape and size of the pupil in relation to the iris. These details may seem minor, but they significantly impact the overall accuracy and realism of your drawing. By incorporating real-life references into your practice, you’ll develop a more nuanced understanding of the eye’s structure and be able to capture its subtleties on paper.
Conclusion
Now that you’ve mastered drawing a simple eye, let’s summarize what we’ve covered and tie together all the key takeaways from this step-by-step guide.
Recap of Key Points
When drawing a simple eye, there are several key techniques and concepts to keep in mind. The guide has emphasized the importance of proportion and measurement, encouraging you to use a gentle, curved line to outline the shape of the eye.
You’ve also learned about the structure of the eye itself, including the iris, pupil, and surrounding features like the eyelids and eyebrows. Understanding these individual components helps create a more realistic representation of an eye in your drawing.
Another crucial aspect is attention to detail, particularly when rendering textures and shading. By observing the subtle nuances in the way light interacts with the eye’s surface, you can add depth and dimensionality to your artwork.
In terms of essential techniques, practicing smooth transitions between lines and curves has been a recurring theme throughout this guide. This allows for a more fluid, cohesive look that draws the viewer’s eye naturally through the different elements of the drawing.
As you continue to practice and refine your skills, remember that subtlety is key when working with simple forms like the eye. Avoid over-embellishing or adding unnecessary details that can detract from the overall simplicity of the design.
Some practical tips to keep in mind include regularly practicing measurement and proportion to develop muscle memory, experimenting with different materials and techniques to achieve unique textures and effects, and paying close attention to the overall balance and harmony of your composition. By following these guidelines and staying focused on the basics, you’ll be well-equipped to tackle more complex subjects in your art.
Frequently Asked Questions
Can I draw an eye using digital tools instead of traditional pencils?
Yes, you can use digital drawing software or apps to create a realistic eye. However, keep in mind that the techniques and principles learned from traditional media will still apply when working digitally. You’ll need to understand how to capture textures, shading, and proportions accurately.
How do I know if my iris is too large or too small compared to the rest of the eye?
Use reference images to compare the size and proportion of your iris in relation to the entire eye. A general rule of thumb is that the iris should be about 1/3 to 1/2 the diameter of the eyeball. Adjust your drawing accordingly, making sure the iris is not overpowering the rest of the features.
What if my eyelashes or eyelids don’t look smooth – how can I improve this?
To create smooth eyelids and lashes, pay attention to subtle curves and gentle lines when sketching them out. Practice blending edges and softening transitions between shapes for a more realistic appearance. It’s also essential to observe real-life references to understand the delicate proportions of these features.
When drawing an eye with glasses or contacts, what adjustments should I make?
When adding glasses or contacts, consider the way they intersect with the eyelids and lashes. Pay attention to how light reflects off the lenses or frames, and adjust your shading accordingly. Also, keep in mind that glasses can distort facial proportions slightly, so be mindful of these changes when drawing.
Can I draw an eye with unusual features like heterochromia or a prosthetic eye?
While it’s great to practice drawing realistic eyes, creating unique variations requires research and understanding of specific conditions or customizations. Study reference images carefully, taking note of how light interacts with the abnormal features. Approach these drawings as an exercise in observing and capturing unusual anatomical details accurately.

