
Drawing a realistic butterfly requires more than just flapping your pencil back and forth. To create a lifelike representation, you need to understand the intricate anatomy and body shapes that make up this delicate creature. The wings, in particular, are where many artists go wrong – but with practice and patience, you can master the subtle curves and patterns that give a butterfly its unique beauty. In this step-by-step guide, we’ll take you through the essential techniques for drawing a realistic butterfly, from understanding its anatomy to adding intricate details. We’ll also share expert tips on how to display your artwork proudly once it’s complete – so by the time you finish reading, you’ll be able to draw a stunning butterfly that will fly off the page.
Understanding Butterflies and Their Anatomy
To draw a butterfly accurately, it helps to understand its basic anatomy, including the layout of its wings, body, and other distinctive features.
This section will cover the key components that make up a butterfly’s physical form.
Identifying Key Features
When drawing a butterfly, it’s essential to capture its key features. Start by considering the wingspan – the distance from one wing tip to the other. This varies significantly between species, so research and reference images of your chosen butterfly’s wingspan to get an accurate measurement. Note that some butterflies have very narrow wingspans, while others are quite broad.
Next, pay attention to the body shape. Butterflies typically have slender bodies with a rounded abdomen. The thorax (the main body segment) is usually widest at the middle, tapering slightly towards the head and tail. Some species may have distinctive markings or patterns on their bodies, such as stripes or spots.
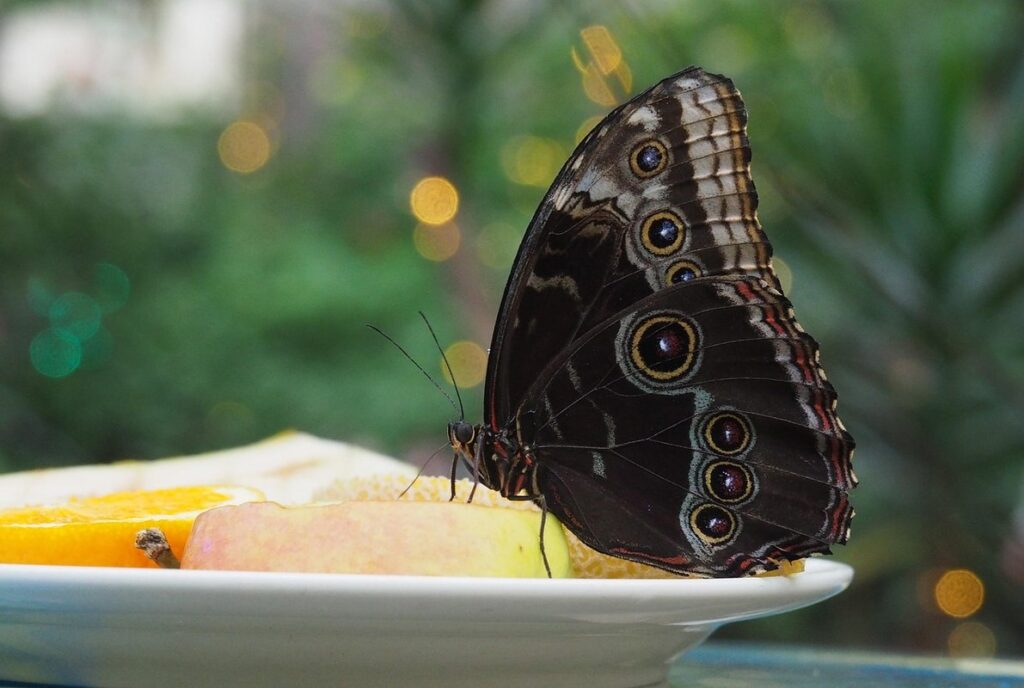
The wing patterns are also crucial to accurately drawing a butterfly. Observe the shape and arrangement of scales – tiny overlapping structures that cover the wings – and note any distinctive features like eyespots or veins. Different species display unique wing pattern variations, so it’s essential to study your reference images carefully to get these details right. By focusing on these key features, you’ll be able to create a more realistic and accurate drawing of your butterfly subject.
Researching Different Species
When studying butterflies, it’s essential to consider various species as reference points for drawing unique designs. Butterflies have evolved distinctive features over millions of years, resulting in diverse shapes and colors. Researching different species can provide valuable insights into their anatomy and characteristics.
For instance, the Monarch butterfly has striking black veins on its wings, while the Blue Morpho boasts iridescent blues that seem almost otherworldly. The Red Admiral’s dark brown body with white spots is another example of nature’s artistry. By studying these unique features, you can develop a more nuanced understanding of what makes each species distinct.
Look for online resources like butterfly databases or entomology websites that offer detailed information and images of various species. You can also visit local zoos or natural history museums to observe butterflies up close. When researching different species, pay attention to their wing patterns, body shapes, and coloration. This will help you identify the key characteristics that make each species stand out. By incorporating these details into your drawings, you’ll be able to create more realistic and unique butterfly designs.
Creating a Reference Image
To create an accurate drawing of a butterfly, you need a clear understanding of its anatomy. This begins with creating a reference image. Start by searching online for images of butterflies from different angles and species. Look for pictures that showcase the structure of the wings, thorax, and abdomen in detail. You can also use photographs or illustrations from entomology books or websites.
When examining these images, pay attention to the shape and proportions of the body parts. Notice how the wings are formed by scales, veins, and other intricate details. Study the way light reflects off the wings’ surface, which can affect their appearance in your drawing.
Take note of the differences between various species, such as the monarch’s distinctive orange and black pattern or the blue morpho’s iridescent blues. Familiarize yourself with these distinct features to ensure accuracy in your drawing. Choose a single image that you’ll use as your reference point throughout the process.
Sketching the Butterfly Body
Now that we’ve discussed the basics of drawing a butterfly, let’s focus on capturing its delicate body shape. In this next step, you’ll learn how to sketch the main parts of the butterfly’s body in proportion.
Basic Shapes and Proportions
The body of a butterfly is composed of three main parts: the thorax, abdomen, and wings. Start by drawing a large oval for the thorax, which is the middle section where the legs meet the wings. The thorax should be slightly narrower at the top than at the bottom to create a subtle tapering effect.
The abdomen, or body segment following the thorax, can be drawn as a smaller, more rounded oval that follows the natural curves of the butterfly’s body. Pay attention to proportion: in most butterflies, the abdomen is roughly one-third to one-half the length of the thorax.
The wings themselves are a crucial part of the body shape, and will influence the overall proportions of your drawing. In general, a butterfly’s wings take up about two-thirds of its body length. To help you gauge this, try sketching a large oval for the body and then using gentle curves to suggest the wing shapes on either side. Don’t worry too much about details at this stage – focus instead on getting the basic shape and proportions right.
Adding Details to the Body
Start by adding two small circles for the eyes, making sure they’re about one-third of the way down from the top of the head. You can also draw a short line below each eye to create the eyelid. Next, add a pair of antennae on top of the head, curving them slightly as you would expect in real life. The antennae should be fairly slender and no longer than one-third of the way down from the top of the head.
Moving down to the body, draw two short legs attached just below the thorax. Each leg consists of three parts: the femur (thigh), tibia (shin), and foot. Pay attention to their proportions – in reality, the femur is usually slightly thicker than the tibia, and the tibia is slightly thicker than the foot.
You can also add some details like veins on the wings by drawing short lines along the length of each wing. These veins help support the weight of the butterfly as it flaps its wings. Keep your lines thin and delicate to achieve a lifelike appearance.
Experimenting with Different Body Shapes
Experimenting with different body shapes can add a unique twist to your butterfly drawing. Start by sketching the overall shape of the body as an oval or egg shape, but don’t be afraid to experiment with other forms like circles, teardrops, or even irregular shapes.
Pay attention to the proportions of your body shape, making sure it’s in balance with the rest of the wing and head features. For example, if you’re using a more rounded body shape, you may want to make the wings slightly narrower and the head smaller. Conversely, a more angular body can be paired with broader wings and a larger head.
You can also try combining different shapes or adding subtle variations to create interest. For instance, use a smooth curve for the majority of the body but add a slight bump or indentation at the thorax. This will give your butterfly some personality while still maintaining overall balance. Remember that there’s no one “right” way to draw a butterfly body – it’s all about exploring different styles and techniques to capture the essence of these delicate creatures.
Drawing Butterfly Wings
Now that you have a beautiful butterfly body, let’s focus on creating those delicate wings. We’ll work on drawing each wing separately to achieve perfect symmetry and balance.
Understanding Wing Structure
Butterfly wings are made up of tiny scales that overlap and reflect light, giving them their characteristic sheen. These scales can be different colors depending on the species, but they usually follow a similar pattern of arrangement across the wing. The veins that run along the edges of the wing provide support for these delicate structures.
There are two main types of veins: primary and secondary. Primary veins are thicker and more prominent, often running from the body to the tip of the wing. Secondary veins branch off from the primaries, creating a network of lines that reinforce the shape of the wing. Understanding this structure is key to drawing wings accurately.
When studying butterfly wings, observe how the scales fit into the spaces between the veins. The scale pattern can vary greatly between species, so take note of any distinctive features you see in reference images. Pay attention to the way the edges of the scales meet at the vein intersections, as this creates a smooth transition between different colors and textures. By breaking down the wing structure into these individual components, you’ll be better equipped to draw realistic and detailed butterfly wings.
Sketching Wing Patterns
When sketching wing patterns, start by observing the overall shape and proportion of the wings. Note the placement and arrangement of stripes, spots, or other designs. For example, the monarch butterfly’s wings feature two rows of orange and black veins, with white spots at their bases.
To draw these distinctive veins, use a fine-tip pen or pencil to create gentle lines that radiate from the body towards the wing tips. Pay attention to their spacing and orientation – they should be evenly distributed but not perfectly symmetrical.
For spots or other small markings, start by sketching a rough outline of their shape and size using a soft pencil. Then, refine them with more precise strokes, making sure each spot is distinct from its neighbors. Consider the overall pattern’s balance: will it have equal numbers on both wings, or are some patterns asymmetrical?
Remember that natural patterns often feature subtle variations in size and placement. Don’t be afraid to add a few imperfections or nuances to your drawing to give it a more authentic look. This attention to detail will help your butterfly come alive with character.
Adding Color and Texture
When adding color and texture to your butterfly’s wings, remember that these elements should enhance the overall realism of your drawing. Start by deciding on a dominant color for each wing, considering the type of butterfly you’re depicting. Monarch butterflies, for example, have distinctive orange and black patterns.
To create a subtle gradient effect, blend colors with a soft brush or use gentle layering techniques in a digital art program. Avoid harsh lines between colors, as this can detract from your drawing’s realism. Adding texture can also help achieve a more lifelike appearance. Use short, curved strokes to suggest the veining on delicate wings, while longer strokes can convey the thicker veins found on larger species.
Pay attention to the butterfly’s natural habitat and diet when selecting colors – some species have specific adaptations or warning signals that should be reflected in their coloring. Keep your color palette consistent with the overall theme of your drawing to avoid visual dissonance.
Creating Realistic Butterfly Details
When drawing a butterfly, it’s all about the details that make it look truly lifelike. Now let’s focus on creating realistic patterns and colors in the wings.
Eyes and Facial Features
Butterflies have compound eyes made up of thousands of individual lenses, giving them nearly 360-degree vision. When drawing a butterfly’s eyes, you can depict them as large, spherical shapes with intricate details. Start by sketching the overall shape and then add texture and pattern to resemble the butterfly’s visual organs.
To convey expression and personality, observe real-life butterflies’ facial features. Notice how some species have more pronounced or subtle markings on their faces. For example, the monarch butterfly has distinctive black spots on its eyes, while others may have simpler patterns or no notable markings at all.
Pay attention to the position of the eyes in relation to the rest of the face. Typically, they are positioned slightly above the center of the head and tilted slightly upward. This will help create a sense of depth and balance in your drawing. When adding expression, consider how the butterfly might be perceiving its surroundings – is it alert, curious, or perhaps frightened?
Antennae and Body Hair
Butterflies have distinctive antennae and body hair that add character to their drawings. When drawing antennae, remember they’re usually thinner at the base and taper towards the tip. The antennae’s length varies between species, but most are roughly equal in length to the width of the head. Some butterflies, like the swallowtail, have a club-shaped tip on their antennae.
When it comes to body hair, think about where on the butterfly’s body they’d naturally occur – typically around the thorax and abdomen. Use short, curved lines to suggest the hair’s direction and texture. You can also use a gentle “V” shape to indicate individual hairs. For a more realistic look, pay attention to how the hair appears in different lighting conditions.
To achieve accurate antennae and body hair, observe photographs of various butterfly species or real-life specimens if possible. Take note of the proportions, textures, and patterns of these features. Practice drawing them regularly to develop your skills and build confidence in creating detailed butterfly drawings.
Experimenting with Different Materials
When it comes to drawing realistic butterfly details, experimenting with different materials can greatly enhance your artwork. Start by considering what type of look you want to achieve – do you prefer smooth, blended colors or bold, graphic lines? Pencils are a versatile choice for creating delicate veins and soft color gradations, but may not be suitable for more vibrant or opaque colors.
Markers, on the other hand, offer quick-drying ink that can create crisp, black outlines and bold strokes. However, some markers can bleed or feather, so it’s essential to test them on a scrap piece of paper before using them on your final drawing. Paint is another option for creating realistic butterfly details, allowing for subtle color blending and texture.
Consider experimenting with watercolor pencils, which combine the precision of a pencil with the expressiveness of watercolors. You can also try mixing different materials together – layering pencil marks under marker ink or combining paint with a small brush. Remember to work in thin layers, gradually building up details rather than applying too much pressure at once.
Tips and Tricks for Drawing Butterflies
Now that you’ve mastered the basics of drawing a butterfly, it’s time to add some personality to your artwork with our expert tips on proportions, wingspans, and more. Let’s get creative!
Practice and Patience
Drawing butterflies requires a delicate balance of precision and fluidity. As you practice drawing these creatures, it’s essential to remember that perfection is not an immediate goal. Begin by setting aside time each day or week to sketch simple butterfly shapes and gradually build up to more intricate designs.
Notice how the wings’ veins are typically positioned in relation to the body – this is a crucial aspect of creating a believable butterfly. With patience, you’ll develop your eye for these subtle details. Don’t be discouraged if early attempts appear amateurish; it’s through consistent effort that you’ll refine your skills.
Consider studying the work of various artists or observing real-life butterflies in their natural habitat to gain inspiration and insight into the subject matter. As your proficiency grows, so will your ability to capture the essence of these beautiful creatures on paper. With persistence and dedication, you can master the art of drawing butterflies that are not only visually appealing but also accurate representations of nature.
Overcoming Common Challenges
Drawing butterflies can be a delightful experience, but it’s not uncommon for artists to encounter challenges along the way. One common obstacle is capturing the delicate balance between proportions and details. To overcome this, focus on understanding the butterfly’s body structure: the thorax, abdomen, and wings. Practice measuring the relationships between these components to achieve accuracy.
Another challenge is rendering the intricate patterns found on a butterfly’s wings. The easiest approach is to break down the design into manageable sections, focusing on one pattern at a time. Start with simple shapes and gradually build upon them, paying close attention to texture and color transitions. This approach will help you create a cohesive and visually appealing wing pattern.
When drawing butterflies, pay particular attention to the delicate lines that separate the wings from the body. To avoid these areas looking clumsy or disconnected, practice creating smooth curves and subtle transitions between shapes.
Displaying Your Artwork
When you’ve completed your butterfly drawing, it’s time to display it proudly. Framing your artwork is a great way to add a professional touch and protect it from dust and damage. Choose a frame that complements the colors and style of your drawing, such as a wooden or ornate gold frame for a more traditional look.
Consider using acid-free mats and UV-filtering glass to ensure your artwork remains vibrant over time. If you’re exhibiting your drawing in a public space, like a school art show or local library, make sure to follow any guidelines or regulations provided by the venue.
When arranging multiple drawings together, create a visually appealing display by varying the frame styles and sizes. You can also add context with labels or captions that describe the inspiration behind each piece. Don’t forget to sign your artwork prominently, as this will help build your reputation as an artist. By taking the time to thoughtfully display your butterfly drawings, you’ll be able to share your creativity with others and showcase your artistic skills.
Frequently Asked Questions
Can I use different shapes and proportions for each wing?
Yes. While the article emphasizes the importance of understanding basic anatomy and proportions, it also encourages artists to experiment with creative freedom. Feel free to play around with unique shapes and proportions for each wing to create a more interesting design.
How do I know when my drawing is done?
You’ll know your drawing is complete when all details are accurately represented, including texture, color, and pattern. Take a step back from your work, evaluate it objectively, and make adjustments as needed. If you’re still unsure, try sketching the same butterfly again.
What if I’m struggling to draw realistic wings?
Yes, it’s normal to struggle with drawing realistic wings. Practice is key; start by practicing individual wing shapes and patterns separately before combining them into a full wing design. Refer back to your reference image regularly for accuracy. Don’t be discouraged if it takes time – mastering this skill requires patience.
Can I draw different stages of butterfly development?
Yes, you can create artwork that depicts various stages of butterfly development, such as from egg to caterpillar to adult. This will add a narrative element to your drawing and showcase the life cycle of these fascinating creatures. Research different species’ developmental patterns to ensure accuracy in your art.
How do I effectively display my butterfly artwork?
Consider framing or mounting your piece on high-quality paper or canvas, depending on the medium used. Display it in good lighting, away from direct sunlight, to preserve its color and vibrancy. If you’re showcasing multiple pieces, group them by theme or style for a cohesive exhibition.

