
Canning green beans is a simple way to preserve their flavor and crunch for year-round enjoyment, but it requires careful attention to detail to ensure safe and successful results. You’ve likely heard that canning is a great way to make your favorite vegetables last longer, and green beans are one of the most popular choices due to their tender texture and versatility in recipes. However, with so many different methods and techniques out there, it’s easy to get overwhelmed and unsure where to start. In this comprehensive guide, we’ll walk you through every step of the canning process for green beans, from preparing them to sterilizing jars and achieving perfect results every time. By following our expert advice, you’ll be able to safely can delicious green beans at home with confidence.
Preparing Green Beans for Canning
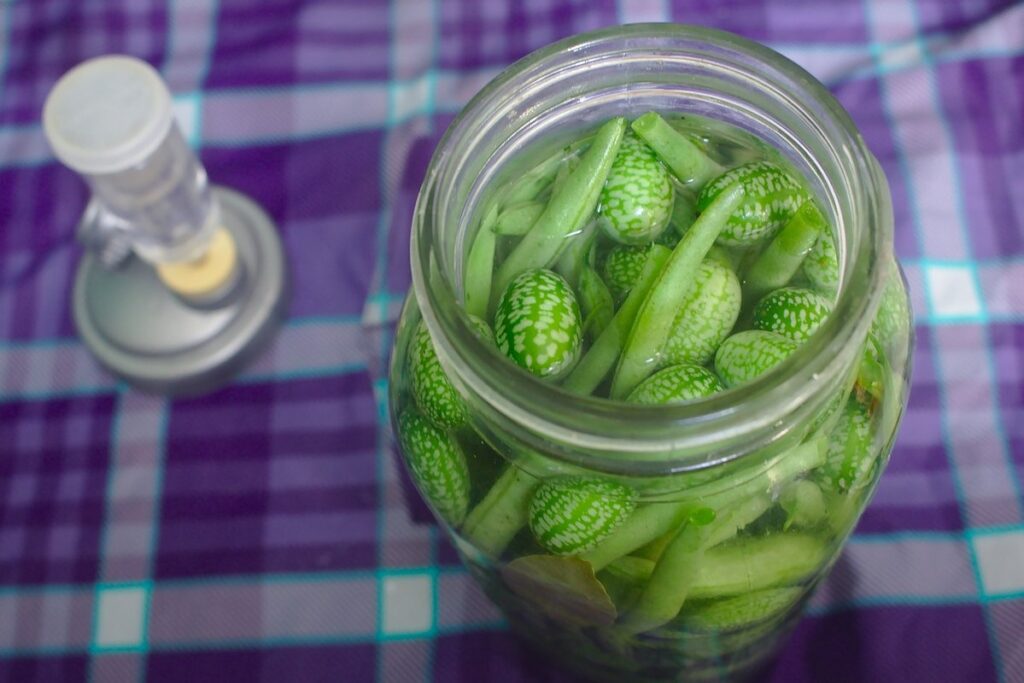
Before you start canning your green beans, it’s essential to prepare them properly by blanching and packing them into jars. This ensures a safe and delicious canned product.
Choosing the Right Variety
When it comes to canning green beans, not all varieties are created equal. You’ll want to choose a type that’s specifically suited for preserving through heat processing. Bush and pole beans are both popular options. Bush beans are compact, producing smaller crops of beans but with fewer strings. They’re ideal for small gardens or containers.
Pole beans, on the other hand, are vining plants that produce more abundant harvests but require more support as they grow. They often have more strings than bush beans, making them a bit more labor-intensive to prepare.
If you want to try something different, consider specialty varieties like Romano or Italian flat beans. These types tend to be less prone to stringiness and have a sweeter flavor profile. Regardless of the variety, make sure it’s specifically labeled as “suitable for canning” or “bush/pole bean.” This ensures that the beans will hold their texture and flavor during the canning process.
Some popular canning green bean varieties include ‘Blue Lake’, ‘Kentucky Wonder’, and ‘Romano’. These are all reliable options for home canners. When selecting a variety, consider factors like your available garden space, desired harvest size, and personal taste preferences.
Harvesting and Cleaning
Select fresh green beans that are tender and less than 6 inches long. Avoid overmature beans with tough or fibrous stems, as they may not retain their texture after canning. For optimal flavor and quality, choose beans with a bright green color and no signs of yellowing.
When harvesting, use scissors to snip the stem end close to the plant, leaving a small portion attached to the bean. This will help prevent damage to the bean during handling. You can also pick individual beans by hand, but be gentle to avoid bruising them.
Cleaning is an essential step in preparing green beans for canning. Rinse the beans under cold running water to remove any dirt or debris. Next, blanch them in boiling water for 3-5 minutes to inactivate enzymes and help preserve color and texture. After blanching, immediately submerge the beans in an ice bath to stop cooking. Once cooled, drain the beans and pat them dry with a clean towel to remove excess moisture.
Before packing green beans into jars, inspect them carefully for any signs of damage or spoilage. Remove any broken or discolored beans to ensure the quality of your final product.
Sterilizing Equipment and Canning Jars
Before we proceed to filling our jars, it’s essential to sterilize your equipment and canning jars properly to prevent contamination and ensure safe canning practices. Properly cleaning and sterilizing will make all the difference in the success of your canned green beans.
Understanding the Importance of Sterilization
Proper sterilization is a critical step in safe canning practices. It’s essential to understand why sterilization is crucial for preventing spoilage and ensuring the quality of your canned goods. When you fail to properly sterilize equipment and jars, you risk introducing bacteria into the jar that can cause the food to spoil or even make people sick.
Bacterial contamination can occur at any stage during the canning process, but it’s most likely to happen when equipment and jars are not adequately sterilized. This is because bacteria can cling to surfaces and transfer from one item to another, compromising the integrity of the seal and allowing oxygen to enter the jar.
To put this risk into perspective, consider that even a small amount of contamination can cause significant problems. For example, a single spore of Clostridium botulinum can produce enough toxin to kill an adult human. By following proper sterilization techniques, you can significantly reduce the risk of contamination and ensure your canned green beans are safe for consumption.
A basic guideline for sterilizing equipment is to submerge it in boiling water for 10-15 minutes before use. This will help eliminate any bacteria that may be present on the surface. Always read the manufacturer’s instructions for specific guidance on sterilizing your equipment, as different materials have varying temperature and time requirements.
Preparing Canning Jars and Lids
Properly washing and drying canning jars and lids is essential before use. Start by sorting through your jars and lids to ensure they are clean and free of any debris. For heavily soiled or corroded items, submerge them in a sink filled with hot water and mild detergent for 10-15 minutes. After soaking, scrub each item with a soft-bristled brush to remove any stubborn stains.
Next, rinse the jars and lids thoroughly with clean water to remove any remaining soap residue. Use a clean towel or dish rack to dry the items. This is crucial, as even a small amount of moisture can lead to spoilage during the canning process.
When preparing lids specifically, inspect them for any signs of wear or damage. Check the rubber seal for any cracks or holes, and discard any damaged lids. If you’re reusing lids from previous canning sessions, make sure they’ve been properly stored and not contaminated with bacteria or other debris. Once your jars and lids are clean and dry, you’re ready to proceed with filling them according to your recipe.
Basic Water Bath Canning Process
To ensure your green beans are safely canned, let’s start with the basic water bath canning process, which is a crucial step in preserving these tasty vegetables. This straightforward method involves several key steps to get you started.
Understanding Water Bath Canning
Water bath canning is a tried-and-true method for preserving green beans and other high-acid foods. The process relies on submerging sealed jars in boiling water to kill off bacteria, yeast, and mold spores. This heat treatment creates an acidic environment that inhibits the growth of pathogens. In this context, acidity refers not just to the pH level but also to the presence of natural preservatives like ascorbic acid found in green beans.
To can green beans using a water bath, fill clean, sterilized jars with the prepared beans and add a small amount of acidic liquid – such as lemon juice or vinegar – to the jar. This liquid ensures an optimal acidity level for safe preservation. Place the sealed jars into a boiling water bath and process for 20-25 minutes, adjusting time according to altitude.
A critical aspect of water bath canning is ensuring that the green beans are packed tightly enough to allow for proper heat distribution during processing. Overpacking or underpacking can lead to inconsistent results or even spoilage.
Preparing the Canning Environment
To prepare a safe and effective water bath canning environment, you’ll need a few essential pieces of equipment. This includes a large pot with a heavy bottom, such as a Dutch oven or a stockpot, to allow for even heat distribution. A rack or basket is also necessary to keep the jars off the bottom of the pot and ensure proper air circulation.
Before filling the pot with water, make sure it’s clean and free of any debris. Wash the pot in hot soapy water, then rinse thoroughly. Next, fill the pot with enough cold water to cover the jars by at least an inch. Bring this water to a rolling boil, which is essential for achieving the 212°F required for canning.
Check your pot’s size and depth against the manufacturer’s guidelines to ensure it meets the minimum requirements for water bath canning. Typically, a large pot with a capacity of 3-4 quarts is ideal for processing 6-12 jars of green beans.
Pressure Canning Green Beans
When canning green beans, pressure canners are a popular choice for achieving consistent results and optimal flavor preservation. Let’s explore how to successfully use a pressure canner to preserve your green beans.
Understanding High-Pressure Processing
High-pressure processing is a crucial step for canning green beans, especially when it comes to retaining their texture and nutrients. This method involves sealing the green beans in airtight jars and then heating them under high pressure to kill off any bacteria that may be present. The primary purpose of high-pressure processing is to ensure that the canned green beans are safe for consumption while also preserving their quality.
When compared to water bath canning, high-pressure processing offers several benefits. For one, it allows for higher temperatures and pressures, which in turn enable the destruction of more heat-resistant bacteria like Clostridium botulinum. This is particularly important when canning low-acid foods like green beans. Additionally, pressure canning helps to reduce the formation of off-flavors and off-odors that can occur during the water bath process.
In terms of applications for green beans, high-pressure processing makes it possible to can them in a way that maintains their crunchiness and vibrant color. This is because the high pressure prevents the breakdown of cell walls, which would otherwise lead to an unappetizing texture. By following proper guidelines and using the right equipment, you can successfully can delicious and nutritious green beans that will last for months to come.
Preparing Green Beans for Pressure Canning
To prepare green beans for pressure canning, you’ll need to blanch them first. This step is crucial because it helps preserve the color and texture of the beans, as well as kill off any bacteria that might be present. To blanch your green beans, submerge them in a large pot of boiling water for 3-5 minutes. The exact timing will depend on the age and size of the beans.
After blanching, immediately plunge the beans into an ice bath to stop the cooking process. This step is essential for helping the beans retain their nutrients and color. Once the beans have cooled, you can pack them into your pressure canning jars, leaving about 1 inch of headspace at the top. Pack the beans in a way that allows them to be easily removable from the jar later. A general rule of thumb is to pack the beans loosely, so they don’t become too compacted during processing.
When packing the beans, you should also add any desired seasonings or spices, such as salt and pepper. Just be sure not to overpack the jars, as this can lead to under-processing and spoilage.
Tips and Tricks for Successful Canning
To ensure a bountiful harvest of delicious canned green beans, we’ll share some expert tips and tricks to help you overcome common canning challenges. From packing techniques to troubleshooting, we’ve got you covered.
Troubleshooting Common Issues
When you encounter issues during the canning process, it’s essential to identify and address them promptly. Common problems include green beans not staying crunchy, lids not sealing properly, or jars developing off-flavors.
Check that you’re using the right water bath temperature – 212°F (100°C) is ideal for most canning applications. If you’ve been boiling at a lower temperature, reprocess your green beans to ensure they reach the recommended acidity level.
Lids not sealing might be due to inadequate sterilization or poor jar preparation. Ensure all equipment and jars are thoroughly cleaned before use. Wipe lids with a damp cloth before placing them on jars during the canning process.
To prevent off-flavors, store jars away from direct sunlight and strong-smelling foods. Keep in mind that some green bean varieties may be more prone to spoilage than others.
Some common signs of spoilage include mold growth, unusual odors, or a soft, soggy texture. If you notice any of these issues, discard the affected jar immediately.
Before reprocessing or discarding jars, inspect them for visible signs of spoilage. Be cautious when handling spoiled jars, as they may contain harmful bacteria.
Storage and Shelf Life Considerations
When storing canned green beans, it’s essential to keep them away from direct sunlight and heat sources. A cool, dark pantry is ideal, but if you don’t have one, a cupboard or shelf with minimal exposure will suffice. Ensure the cans are tightly sealed and stacked upright to prevent moisture accumulation.
To determine the shelf life of your canned green beans, follow these guidelines: For high-acid foods like green beans, the acidity level naturally inhibits bacterial growth, making them safe for consumption up to 12 months from the canning date. However, it’s crucial to check the cans regularly for signs of spoilage. Look for any bulging or swelling, which indicates a loss of vacuum and potential contamination.
When checking your canned goods, consider the following factors: the acidity level of the food, storage conditions, and the quality of the canning process. If you’ve followed proper canning techniques and stored the cans correctly, you can enjoy your homemade green beans for up to a year after canning.
Frequently Asked Questions
Can I use frozen green beans for canning?
Yes, you can use frozen green beans for canning, but make sure they are properly thawed and blanched before packing them into jars. Frozen green beans have already been blanched, so you’ll need to adjust the processing time accordingly.
What if I notice off-flavors or spoilage in my canned green beans?
Off-flavors or spoilage in canned green beans can be caused by improper sterilization, inadequate acidity, or contamination during packing. Check your equipment and techniques for any errors and re-can the affected jars using a tested recipe with proper acidification.
Can I pressure can green beans with a small amount of added salt?
Yes, you can pressure can green beans with a small amount of added salt to enhance flavor. However, be aware that excess salt can affect the texture and quality of the final product. Use a tested recipe as a guideline for safe salt levels.
How do I know when my water bath canner is at the correct temperature?
Use a candy thermometer to ensure your water bath canner reaches a rolling boil (212°F/100°C) before adding jars. This ensures that all bacteria are killed and your green beans are properly sterilized.
Can I store canned green beans in the freezer instead of on a pantry shelf?
No, you should not store canned goods in the freezer. Freezers are designed for short-term storage, and long-term storage can cause ice crystals to form inside jars, potentially leading to contamination or spoilage. Store your canned green beans in a cool, dark place with consistent temperatures between 50-70°F (10-21°C).

