
You’ve probably noticed that store-bought plant hangers can be quite pricey, and sometimes they just don’t match your home decor style. But did you know that making your own plant hangers is surprisingly easy? With a few simple materials and some basic crafting skills, you can create unique and stylish ways to display your plants while saving money. In this guide, we’ll walk through the process of creating your own plant hangers from scratch, covering everything from choosing the right materials to assembling the final product. We’ll also share some creative design tips to help you customize your plant hanger to fit your home’s aesthetic. By the time you finish reading this article, you’ll be able to create your own beautiful and functional plant hangers with ease.
Choosing the Right Materials
When selecting materials for your DIY plant hanger, it’s essential to choose durable and weather-resistant options that can support the weight of your plants. Consider factors like rope thickness, hook strength, and fabric durability.
Types of Rope or Cord
When it comes to choosing a rope or cord for your DIY plant hanger, you have several options. Cotton rope is a popular choice due to its softness and flexibility. It’s also relatively inexpensive and easy to work with, making it a great option for beginners. Jute twine, on the other hand, offers a more rustic look and feel. Its natural fibers are biodegradable and compostable, which can be an attractive feature for those looking for eco-friendly materials.
Macramé cord is another common choice, particularly among experienced crafters. It’s typically made from nylon or polyester and comes in a range of thicknesses and textures. Macramé cord is ideal for creating intricate patterns and designs, but it can be more challenging to work with due to its stiffness. When selecting a rope or cord, consider the look and feel you want to achieve, as well as any specific needs or challenges your project may present.
In terms of durability, cotton rope tends to be less resistant to moisture than other options, while jute twine is generally more prone to fraying. Macramé cord, on the other hand, is often treated with water-resistant coatings to extend its lifespan.
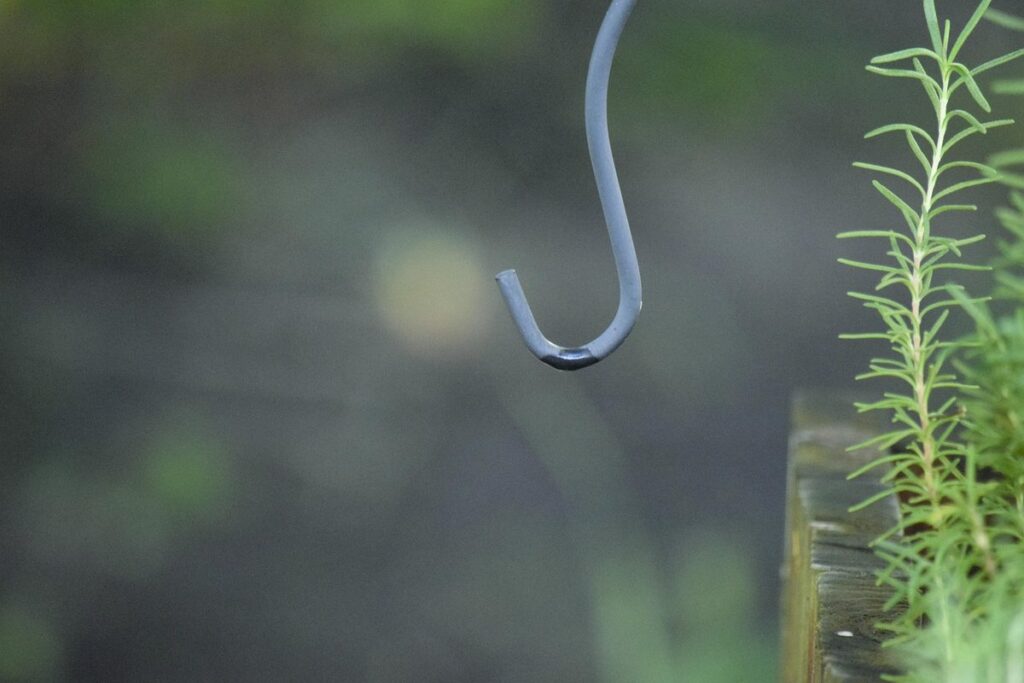
Selecting the Perfect Hook or O-ring
When selecting a hook or O-ring for your plant hanger, it’s essential to prioritize sturdiness and weight capacity. A sturdy hook or O-ring will support the weight of your plants, ensuring they remain secure and don’t topple over.
Look for hooks or O-rings made from heavy-duty materials like metal, stainless steel, or durable plastics. Avoid using thin or flimsy materials that may bend or break under the plant’s weight.
Consider the type of plants you’ll be hanging. For example, if you’re planning to hang a large pot with a heavy succulent, you’ll need a hook or O-ring that can support at least 10-15 pounds (4.5-6.8 kg). A good rule of thumb is to choose a hook or O-ring with a weight capacity that’s 20-30% higher than the plant’s estimated weight.
Some popular options for sturdy hooks and O-rings include:
- S-shaped hooks
- D-ring hooks
- Heavy-duty O-rings
- Metal eyelets
When selecting a hook or O-ring, also consider its design. A hook with a wide base will provide more stability than one with a narrow base. Additionally, ensure the hook or O-ring is easy to install and adjust. This will save you time and frustration in the long run.
Measuring and Cutting Materials
When measuring and cutting materials for your plant hanger, accuracy is crucial to avoid having too much or too little material. To ensure you have the right amount, measure each piece twice: once before making a cut, and again after the initial measurement has been verified. You can use a ruler or measuring tape for long pieces of rope or cord, but for smaller components like wooden dowels or metal rods, consider using calipers for greater precision.
To minimize waste when cutting materials, plan ahead by laying out your design on paper or using a digital tool to visualize the project. This will help you determine how much material is required and where cuts need to be made. When cutting, use sharp tools like scissors, a craft knife, or a miter saw to make clean, accurate cuts. For rope or cord, consider using a ruler with a built-in measuring guide to ensure consistent tension and prevent fraying.
When handling fragile materials like glass or crystal beads, wear protective gloves to avoid chipping or breaking them during the cutting process.
Designing Your Plant Hanger
Now that you have a plan, it’s time to think creatively about how to design your plant hanger to match your unique style and space. Consider the size, shape, and materials you’ll use for a truly personalized look.
Understanding Basic Knots and Macramé Patterns
To create a beautiful and functional plant hanger, you’ll need to master some basic knots and macramé patterns. These techniques may seem intimidating at first, but with practice, you’ll be able to produce stunning designs.
The square knot is a versatile and essential knot that’s used in many macramé patterns. It consists of two wraps around each other, forming an “X” shape. To tie a square knot, start by folding the working cord in half and then pass one end through the loop you’ve created. Pull the ends gently to tighten the knot.
Another fundamental knot is the lark’s head knot, which creates a secure attachment point for your plant hanger. To form a lark’s head knot, thread the working cord under the main cord and then pull it up through the loop that forms at the top. You’ll be left with a neat, adjustable knot that can be easily secured.
When experimenting with macramé patterns, remember to focus on balance and proportion. Practice tying knots in isolation before applying them to your design. This will help you develop muscle memory and ensure that your finished plant hanger looks polished and professional.
Creating a Simple Plant Hanger Pattern
To create a simple plant hanger pattern, you’ll need to combine basic knots with cord manipulation. Start by learning three fundamental knots: the Lark’s Head Knot, the Wrap Knot, and the Half Hitch Knot. These knots will form the foundation of your pattern.
The Lark’s Head Knot is used to secure the cord to the hook or O-ring. To create it, loop the cord around the hook, then pass the working end through the loop. Pull gently to tighten. The Wrap Knot adds a decorative element and helps maintain the plant hanger’s balance. To make one, wrap the cord around the main rope two to three times, then pass the working end through the loop.
When combining these knots with cord manipulation, you’ll create a series of interconnected loops that hold the plant in place. Experiment with different spacing between knots and adjust the length of the wraps to achieve the desired look. For example, a smaller space between knots will result in a more delicate pattern, while a larger space creates a more dramatic effect.
Practice these knots and combinations to develop your skills. Remember, patience is key when working with cord manipulation – take your time to ensure each knot is secure and evenly spaced.
Experimenting with Custom Designs
When experimenting with custom plant hanger designs, consider incorporating personal styles and preferences. Think about the aesthetic you want to achieve: modern, bohemian, minimalist, or eclectic? You can tailor your design by choosing materials that reflect these themes. For example, use natural fibers like cotton rope for a more rustic look, or opt for sleek metal chains for a contemporary feel.
Play with different knot patterns and macramé techniques to add visual interest. Experimenting with asymmetrical designs can create a unique, eye-catching plant hanger. You can also incorporate personal touches such as beads, shells, or other decorative elements to give your design a personalized flair.
To take your custom design to the next level, consider the functionality of your plant hanger. Think about the size and type of plants you’ll be using, and choose a design that accommodates their needs. For instance, if you’re using large pots, you may want to opt for a sturdy design with multiple support points.
Some popular techniques for creating custom designs include:
- Using different cord or rope thicknesses to create visual texture
- Adding decorative knots or tassels to add flair
- Experimenting with layering and overlapping different materials
Assembling the Plant Hanger
Next, it’s time to bring your plant hanger together by assembling all its parts, carefully following these simple steps to create a sturdy and beautiful piece. Let’s assemble the components one by one!
Attaching the Hook or O-ring
To attach the hook or o-ring to the end of the rope or cord, start by threading it through the last loop on the plant hanger. Make sure the hook or o-ring is seated properly and the rope or cord is not twisted. You can use a knot like the “overhand knot” to secure the hook or o-ring in place.
For a more permanent attachment, tie a knot around the stem of the hook or o-ring to prevent it from coming loose over time. This will ensure that your plant hanger remains stable and secure. If you’re using an o-ring, thread the rope or cord through both loops on either side, then tie a knot to hold them in place.
To avoid any damage to the rope or cord, make sure not to pull too tightly when attaching the hook or o-ring. This can cause the material to fray or even break. Instead, gently tug on the rope or cord while keeping the hook or o-ring steady.
For a more polished look, consider using a crimp or a ferrule to secure the hook or o-ring in place. These small metal devices fit over the stem of the hook or o-ring and provide an extra layer of protection against wear and tear.
Creating the Plant Support System
To create a sturdy support system for your plant, you’ll need to choose materials that can hold the weight of the pot and the plant. Wooden dowels or metal rods are popular options, but you can also use PVC pipes or even old broom handles. The key is to select a material that’s durable enough to withstand the weight of the plant without toppling over.
For small plants, you may only need one support rod, while larger plants require two or more. You can place the rods parallel to each other, about 6-8 inches apart, to provide even support. If using wooden dowels, consider wrapping them with a sturdy twine or wire to prevent splintering.
When placing the support system in the plant hanger, make sure it’s centered and evenly spaced to avoid putting too much pressure on one side. You can also use small clips or ties to secure the rods to the rope or cord for added stability. The goal is to create a stable base that allows the plant to grow freely without toppling over or getting tangled in the support system.
Adding Decorative Elements
When adding decorative elements to your plant hanger, consider what will complement the natural beauty of your plants. Beads, shells, and other embellishments can add a touch of elegance, but keep in mind that too many distractions can overwhelm the overall design.
Start by selecting a few statement pieces that tie in with the plant’s colors or texture. For example, use glass beads in pastel shades to create a whimsical look for a hanging fern. Shells can work well with coastal-inspired designs featuring sea grass or driftwood accents.
When arranging embellishments, distribute them evenly around the hanger to maintain balance. You can tie multiple strands of beads together or space shells apart to avoid visual clutter. Consider using knots or twists to secure items in place and keep them from shifting over time.
For a more intricate look, experiment with layering different materials. Combine beads with shells or use wire-wrapped elements like pinecones or small flowers. Just remember that excessive ornamentation can make the plant hanger difficult to clean or maintain – strike a balance between visual appeal and functionality.
Hanging Your Plants
Now that you’ve crafted your plant hanger, it’s time to decide where exactly it will hang – let’s talk about finding the perfect spot for your new DIY creation.
Determining the Optimal Hanging Spot
When hanging your plant hanger, it’s essential to determine the optimal spot for maximum growth and health. The amount of light your plants receive will largely dictate where you place them. Most houseplants prefer bright, indirect light but direct sunlight can scorch leaves. Consider the natural light patterns in your home, including any obstructions like curtains or furniture.
In addition to light, temperature also plays a significant role. If you have a plant that’s sensitive to cold temperatures, avoid hanging it near drafty windows or doors. Conversely, plants that thrive in warmer conditions can be placed closer to heating vents or radiators.
Consider the mature size of your plant when deciding on a location. A plant with a sprawling habit may require more space than one that stays compact. Leave enough clearance for the plant’s growth and any potential pruning.
Before making a final decision, observe the temperature fluctuations in different areas of your home. Some rooms may be warmer or cooler due to insulation, windows, or other factors. This can help you pinpoint an optimal spot where your plants will receive the right balance of light and heat.
Securing the Plant Hanger
When securing a plant hanger to a hook or nail, it’s essential to ensure a sturdy attachment. Start by identifying the type of wall or ceiling you’re working with. For drywall or plaster, use a molly bolt to create a secure anchor point. These bolts have a spring-loaded mechanism that expands when tightened, providing extra holding power.
For more robust surfaces like concrete or brick, drill directly into the material using a hammer drill and a high-quality wall anchor. If you’re working with a ceiling, consider using a ceiling hook specifically designed for plant hangers. This type of hook is typically made of sturdy metal and has a wide base to distribute weight evenly.
Before attaching the plant hanger, double-check that the hook or nail is securely in place. Then, thread the hanger’s loop or attachment point over the hook or onto the nail. Tighten any screws or bolts firmly, but avoid overtightening, which can damage the surrounding material. With a few simple precautions and the right hardware, you’ll be able to create a stable plant hanger that supports even the heaviest plants.
Adjusting and Maintaining Your Plant Hanger
Over time, your plant hanger will undergo natural wear and tear. To maintain its stability and aesthetic appeal, inspect it regularly for worn-out materials. Check the rope or cord for fraying or cuts that could compromise its strength. If you notice any damage, replace the affected section promptly to prevent further deterioration.
As plants grow, they may require adjustments in hanging spot to ensure optimal air circulation and sunlight exposure. Consider moving the hanger a few inches higher or lower depending on your plant’s growth stage. You can also adjust the spacing between plants to accommodate their increasing size.
To keep your plant hanger in pristine condition, clean it occasionally with a soft brush or cloth to remove dust and debris. Avoid using harsh chemicals that might damage the materials or harm nearby plants. Regular maintenance will not only extend the lifespan of your plant hanger but also prevent pest infestations and fungal growth that can be detrimental to your plants.
When replacing worn-out materials, use the same type and quality as the originals to maintain consistency. This is especially important if you’re using a specific type of rope or cord that’s designed for plant hangers.
Troubleshooting Common Issues
Don’t worry if your DIY plant hanger doesn’t turn out perfectly on the first try, common issues can arise and we’ll cover how to resolve them. We’ll address common problems like uneven weight distribution and droopy plants.
Dealing with Sagging or Swinging Plants
To address sagging or swinging plants, start by inspecting the support system of your plant hanger. Check if the knots are loose or if the cord has frayed over time. Tighten any loose knots and replace the cord if it’s damaged. If the issue persists, re-evaluate the balance of the plant weight on the hanger. Make sure the plants aren’t too heavy for the support system.
Adjusting the support system is often a simple fix. Try redistributing the weight by placing heavier plants lower down or adding more support with additional cords or knots. You can also add decorative weights, like ceramic balls or metal washers, to the hanger’s bottom to provide extra stability.
If re-hanging the plant doesn’t solve the issue, it may be due to the initial hanging spot. Consider a different location for your plant hanger, such as a sturdy beam or a wall bracket with screws. Secure the hook or O-ring firmly into place to prevent further swinging.
For plants that are prone to toppling over, like ferns or peace lilies, use a wider, more stable base or add extra support to the pot itself. In some cases, it’s not possible to completely eliminate sagging or swinging, but by making these adjustments, you can minimize the issue and keep your plants safe.
Handling Overloaded Plant Hangers
When a plant hanger becomes overloaded, the weight can cause it to sag or even collapse. To prevent damage and maintain the health of your plants, redistribute the weight by adding more support or adjusting the placement of the plants.
Start by assessing which plants are contributing most to the overload. You may need to re-pot smaller plants into larger containers or remove excess soil from the roots of overgrown plants. This will help reduce the overall weight and allow you to rebalance the hanger.
If redistributing the weight isn’t enough, consider reinforcing the supports with additional rope or cord. You can also add more hooks or O-rings to distribute the weight more evenly. Be cautious not to overload the new supports, as this could lead to further issues.
To prevent overloading in the future, ensure you’re using a sturdy plant hanger that can support the combined weight of your plants and any decorative elements. Regularly inspect your plant hangers for signs of strain or wear, making adjustments as needed to maintain their stability.
Repairing Damaged Plant Hangers
When a plant hanger sustains damage, it’s essential to repair or replace the affected parts promptly to prevent further wear and tear. Start by assessing the extent of the damage: is the rope or cord frayed, has the hook or O-ring come loose, or are knots undone? This will help you determine which materials need replacing.
Replace any damaged ropes or cords with new ones of equivalent material and thickness. Cut a fresh piece to the same length as the original and tie it in place using a secure knot. If the hook or O-ring is bent or broken, remove it and replace it with a new one. Ensure it’s securely attached to the hanger.
Re-tying knots requires patience but can be done easily. To re-tie a knot, gently pull the loose ends apart and retighten them by hand or with a tool. Use a clean, sharp edge to trim any excess material and prevent further fraying. If you’re unsure about repairing a specific part, consider consulting online tutorials or seeking guidance from a crafting expert. With these simple steps, you can breathe new life into your damaged plant hanger and keep it functioning as intended.
Frequently Asked Questions
Can I use plant hangers with small plants like succulents?
Yes, you can use plant hangers with small plants like succulents. In fact, they’re perfect for showcasing these delicate plants in a unique way. Just be sure to adjust the size and weight distribution of the plant hanger according to the specific needs of your succulent.
What if I accidentally over-tighten the knots or twist the cord too much?
Don’t worry if you make a mistake – it’s an easy fix! Simply use a pair of scissors to carefully cut the twisted section, then re-tye the knot or adjust the cord as needed. If you’re still unsure, try practicing on a scrap piece of material before working with your actual plant hanger.
How do I know when my plant hanger needs to be reinforced?
Keep an eye out for signs like sagging plants, loose knots, or creaking sounds from the materials. These can indicate that your plant hanger is overloaded or in need of reinforcement. In such cases, try redistributing the weight, re-tightening knots, or even adding a stabilizing rod to provide extra support.
Can I use plant hangers with heavy plants like ferns or peace lilies?
While it’s technically possible to use plant hangers with heavy plants, they may require additional reinforcement to prevent damage to your walls or ceiling. Consider using a sturdy hook or o-ring and adding extra support rods or a reinforced cord to distribute the weight evenly.
What if I want to reuse an old or damaged plant hanger? Can I repair it?
Yes, many plant hangers can be repaired or repurposed with some creativity and elbow grease! Inspect the damage carefully and decide whether you can fix it by re-tying knots, replacing broken materials, or even upcycling the old design into something new.

