
You’re probably no stranger to the world of artistic expression, but have you ever tried your hand at creating stunning glass art pieces? Glass painting is an incredibly versatile medium that allows you to bring your unique style and creativity to life. Not only can it be a fun and relaxing hobby, but it’s also a great way to add some personality to your home decor or gift something truly special to loved ones.
When working with glass paint, the right materials and techniques are essential for achieving professional-looking results. But where do you start? From choosing the perfect glass painting supplies to mastering various design styles and techniques, there’s so much to learn. In this article, we’ll share expert tips on getting started with glass painting, covering everything from basic materials to creative inspiration. By the end of it, you’ll be equipped with the knowledge and confidence to create stunning glass art pieces that showcase your unique style.
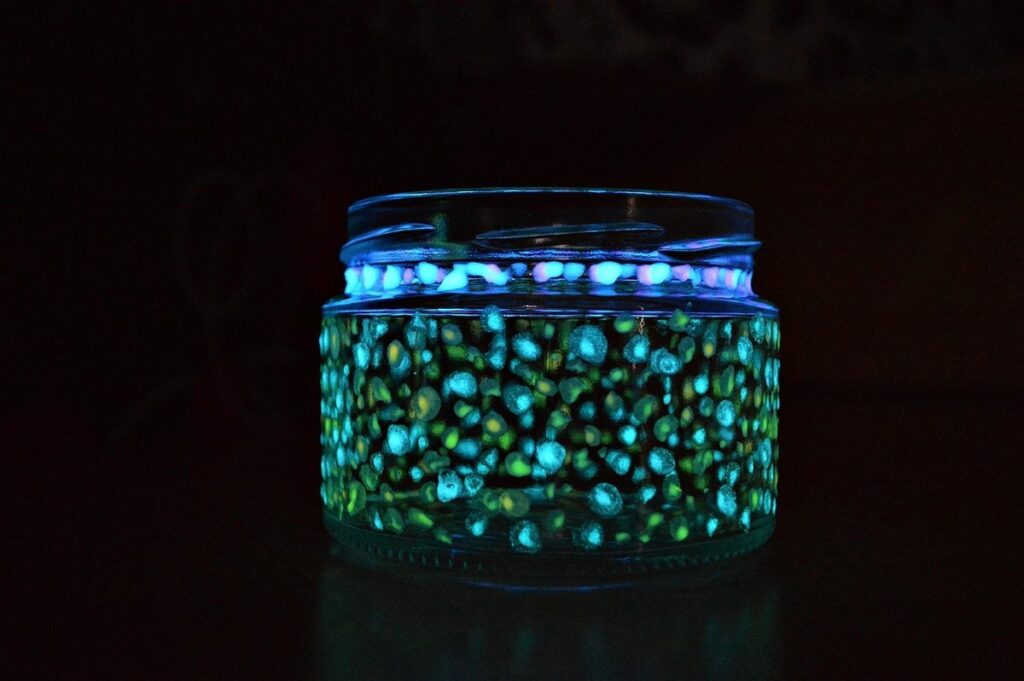
Exploring the Basics of Glass Painting
To get started with glass painting, you’ll need a solid foundation in basic techniques, including color selection and brushstrokes. Let’s start by covering these essential skills that form the building blocks of your art.
Understanding Glass Paint and Brushes
When it comes to glass painting, having the right materials is essential for achieving professional-looking results. Glass paint specifically designed for glass surfaces is available in two main types: water-based and solvent-based. Water-based paints are ideal for beginners as they’re easy to clean up with soap and water, but may require longer drying times. Solvent-based paints dry faster but can be more difficult to work with.
To choose the right paint, consider the surface you’ll be painting on, the design complexity, and your personal preference for working speed versus ease of cleanup. For beginners, it’s best to start with a water-based paint that suits your needs.
Brushes are another crucial tool in glass painting. Natural hair brushes work well with water-based paints, while synthetic brushes are better suited for solvent-based paints. Look for brushes with flexible ferrules (the metal band that holds the bristles) to ensure optimal paint flow and control.
When selecting a brush set, consider the range of tip sizes and shapes offered. A basic starter kit should include a variety of round and flat brushes in different sizes to accommodate various design elements and details.
Basic Strokes and Techniques
To create beautiful designs on glass, you’ll want to master basic brushstrokes and techniques. The flat brush is ideal for broad strokes, while the round brush excels at details. Start by practicing simple lines: vertical, horizontal, and diagonal. You can also use a credit card or similar tool to create straight edges.
For smooth, even coverage, try using a “wet-on-wet” technique: apply one color while the previous layer is still wet. This helps prevent streaks and ensures vibrant colors. To achieve subtle shading, gently blend colors with a damp brush. For instance, you can merge two blues to create a gradient effect.
Some essential patterns include stripes, polka dots, and chevrons. Use these as building blocks for more complex designs. Remember that less is often more – start with simple compositions and gradually add details. Practice makes perfect, so don’t be afraid to experiment with different strokes and techniques. Experimenting with basic brushstrokes will help you develop muscle memory, allowing you to focus on creativity rather than technique.
Design Inspiration for Glass Painting Projects
Let’s take a closer look at some of the most breathtaking glass painting designs that have inspired artists around the world. From florals to abstract patterns, we’ll explore what makes them truly unique.
Nature-Inspired Designs
Nature-inspired designs are a timeless and versatile choice for glass painting projects. You can find inspiration in the intricate patterns of flowers, leaves, and trees, which can be stylized to fit various artistic styles. For example, you might create a delicate floral design with subtle color gradations or a bold, graphic representation of branches.
When working with organic motifs, consider the shape, texture, and proportions of your subject. A single large bloom can dominate a piece, while a cluster of small flowers creates a sense of movement. Leaves and branches often pair well together, as their curved lines create visual interest and depth.
To add an extra layer of realism to your nature-inspired design, experiment with different brushstrokes and techniques. For instance, use drybrushing to suggest the texture of tree bark or wet-on-wet blending for soft petal edges. You can also use colored pencils or markers to enhance details like veins on leaves or the subtle nuances of flower petals.
Some popular nature-inspired motifs include:
• Delicate wildflowers with intricate centers
• Stylized branches with geometric shapes
• Abstract representations of water and ripples
Whimsical and Abstract Designs
Whimsical and abstract glass painting designs offer a world of creative possibilities. These unconventional themes can add a unique touch to your art, making it stand out from more traditional approaches. For instance, consider incorporating fantasy creatures like dragons or unicorns into your design. You could also explore surreal landscapes or dreamlike scenarios.
To incorporate these themes into your art, start by brainstorming ideas that resonate with you. Think about what sparks your imagination and inspires you to create. Consider the colors, textures, and shapes that come to mind when envisioning a fantastical world. Don’t be afraid to experiment with unconventional materials like metallic paints or iridescent glazes to add depth and dimensionality to your design.
Some popular examples of whimsical glass painting designs include:
• Mermaids swimming in underwater scenes
• Flying horses soaring through the sky
• Enchanted forests filled with glowing mushrooms
• Abstract patterns inspired by natural forms, such as clouds or waves
Remember, the key to creating successful whimsical and abstract designs is to tap into your own creativity and imagination. Don’t be afraid to take risks and try new things – it’s often the most unexpected ideas that lead to the most stunning results.
Step-by-Step Glass Painting Tutorials
Now that you’ve got your creative juices flowing, let’s get started on some hands-on projects with these detailed step-by-step tutorials for glass painting. Follow along and master each technique.
Beginner-Friendly Projects
For beginner-friendly projects, consider starting with simple designs like stripes, polka dots, or geometric shapes. These patterns require minimal experience and can be completed quickly. A good example is a set of glass coasters featuring alternating blue and white stripes.
To create this design, you’ll need basic materials such as glass paint, brushes in various sizes, and a clear coat sealant. The estimated time required for completion is about 30 minutes to an hour, depending on the size of your project.
A list of beginner-friendly projects includes:
- A single-color vase with a simple floral pattern
- A set of plain-colored wine glasses
- A decorative glass plate with a geometric design
When working on these projects, remember to use a well-ventilated area and follow proper safety precautions when handling glass paint. Make sure to apply thin layers, allowing each coat to dry before adding the next.
For a more detailed plan, including materials list and estimated time requirements, you can refer to our step-by-step tutorial for a simple striped design.
Intermediate and Advanced Techniques
Intermediate and advanced glass painters can push their craft further by mastering techniques like layering, texture, and intricate details. One approach is to build up layers of paint, allowing each coat to dry before adding more color or design elements. This technique works particularly well with transparent or iridescent paints, which can create a sense of depth and luminosity.
To add texture, experiment with different brushstrokes, such as using the tip of the brush for fine details or applying thicker strokes for a more textured look. You can also use household items like sponges, lace, or even modeling paste to achieve unique textures.
Intricate details require patience and precision, but they can elevate your artwork to new heights. Consider using a small paintbrush to add fine lines, patterns, or even miniature designs within larger compositions. For example, you could create a delicate floral pattern on a vase or add tiny stars to a night sky design on a plate.
Some common techniques for adding intricate details include stenciling, dotwork, and stippling. Stenciling involves using a stencil to apply precise shapes and patterns, while dotwork and stippling involve creating images from small dots of paint.
Tips for Working with Different Glass Types
When working with different glass types, it can be challenging to achieve consistent results. Understanding how each type of glass behaves is key to producing beautiful and long-lasting artwork.
Painting on Clear Glass
When working with clear glass, it’s essential to understand how paint interacts with its transparent surface. Unlike colored glass, which can add depth and complexity to your design, clear glass requires a more deliberate approach to achieve vibrant colors.
To prevent fading, use opaque or high-iron content paints specifically designed for glass painting. These pigments retain their color intensity on the glass and are less prone to fading over time. On the other hand, transparent or low-iron content paints can sometimes appear dull or washed out on clear glass.
For optimal results, it’s crucial to apply a primer or an undercoat before painting. This layer helps the paint adhere evenly and prevents uneven color distribution. You can use a specialized glass primer or even a coat of white acrylic paint as a substitute. Additionally, consider using a fixative or topcoat to seal your design and protect it from scratches and fading.
A simple yet effective technique for achieving rich colors on clear glass is to layer multiple thin coats of paint, allowing each layer to dry completely before adding the next.
Techniques for Colored Glass
When painting on colored glass, it’s essential to consider how the existing color will affect your design. You can either enhance or mute colors using specific techniques. To enhance colors, use paint that is one to two shades lighter than the background glass. This creates a harmonious and balanced look. On the other hand, if you want to mute colors, choose paints that are one to two shades darker. However, keep in mind that this may not be suitable for all designs.
A good rule of thumb is to test your paint on a small, inconspicuous area before starting your project. This ensures that the color will not become too overpowering or washed out. Additionally, consider the type of colored glass you’re working with. Tinted glass, such as opalescent or iridescent, can be more challenging to work with due to its unique properties.
When pairing colors on colored glass, think about creating contrast while also considering the color wheel. For example, if your background is a cool blue, use warm colors like orange or yellow to create visual interest. Remember that it’s not just about following traditional color theory; experiment and find what works best for your art.
Common Mistakes to Avoid in Glass Painting
As you refine your glass painting skills, it’s essential to steer clear of common mistakes that can ruin a beautiful piece. These errors are often avoidable and can save you time and frustration in the long run.
Understanding Color Theory
When working with color theory in glass painting, it’s essential to understand how colors interact and affect each other. A common mistake is choosing a palette without considering the emotional impact of individual colors on the viewer. Warm colors like orange and red can evoke feelings of energy and excitement, while cool colors such as blue and green can create a calming atmosphere.
To achieve balance in your color scheme, consider the 60-30-10 rule: allocate 60% of the dominant color, 30% of the secondary color, and 10% for an accent color. This ratio creates visual harmony without overwhelming the viewer. For example, if you’re painting a garden scene on clear glass, use blue as your dominant color (60%), add green as a secondary color (30%), and incorporate yellow as an accent (10%).
When selecting colors, remember that analogous colors – those next to each other on the color wheel – create smooth transitions and cohesive designs. Complementary colors, on the other hand, make bold statements when used in contrast. Consider these principles when pairing colors for your glass painting project.
Troubleshooting Techniques
When working on a glass painting project, it’s not uncommon for issues like bubbles, uneven coats, and faded colors to arise. To resolve these problems quickly and efficiently, you can try a few troubleshooting techniques. For example, if bubbles appear during the drying process, gently scrape them off with a soft brush or a credit card before they set.
If your paint is applying unevenly, check your brushstrokes for consistency. Make sure you’re using the right type of brush for your paint and glass surface. Also, ensure that your workspace is well-ventilated and free from drafts, which can cause the paint to dry too quickly or unevenly.
To prevent faded colors, avoid exposing your work to direct sunlight or extreme temperatures. If colors have already begun to fade, you can try applying a clear coat to protect them. Another option is to touch up the affected areas with a small brush and a matching paint color.
In some cases, it may be necessary to start over if the issue is severe. However, by catching problems early on, you can save time and prevent costly mistakes in the long run. Regularly inspecting your work as you go along will help you identify potential issues before they become major problems.
Showcasing Your Glass Painting Masterpiece
Now that you’ve created a stunning glass painting, let’s talk about how to showcase it effectively so it gets the admiration and attention it deserves. From framing options to display ideas, we’ll cover it all.
Displaying and Preserving Your Art
When it comes to showcasing your glass painting masterpiece, proper display and preservation are crucial. Start by choosing a frame that complements the artwork’s style and colors. Wooden frames with a matte finish work well for traditional pieces, while sleek metal frames suit modern designs.
To hang your glass painting safely, consider using picture hooks or screws specifically designed for heavy artwork. You can also use museum putty to secure the piece to the wall without damaging it. When not on display, store glass paintings in a protective case or wrapped in acid-free tissue paper to prevent scratches and fading.
For long-term preservation, avoid direct sunlight exposure by hanging your artwork near east- or west-facing windows. Also, maintain a consistent room temperature between 60°F and 70°F (15°C and 21°C) to prevent thermal shock. Regularly clean the glass surface with distilled water and a soft cloth to prevent mineral deposits from forming.
Consider displaying your piece in a protective glass-front cabinet if you live in an area prone to dust or extreme temperatures. Finally, keep your artwork away from moisture, such as bathrooms or kitchens, to ensure it remains vibrant for years to come.
Selling Your Handmade Art
To sell your handmade glass painting art effectively, you need a solid understanding of marketing strategies and pricing. Start by identifying your target audience – are you selling to local galleries, online marketplaces, or directly to customers? Knowing your audience will help you tailor your marketing approach.
When it comes to pricing, research what similar artists are charging for their work. Consider the time, materials, and expertise that go into each piece. You may also want to factor in any additional costs, such as framing or shipping. As a general rule, start with a lower price point and adjust as you gain more experience and confidence in your pricing.
Some online platforms, like Etsy or eBay, can help you reach a wider audience. Be sure to follow each platform’s guidelines for selling handmade items and use high-quality photos that showcase your artwork from multiple angles. You may also want to consider participating in local art fairs or craft shows to connect with potential customers in person.
When pricing and marketing your glass painting art, remember that every piece is unique – what sets it apart? Highlight the distinctive characteristics of each work to make it more appealing to buyers.
Frequently Asked Questions
Can I use glass painting techniques on other materials besides glass?
Yes, many glass painting techniques can be adapted for use on ceramics, wood, and even fabric. However, keep in mind that each material requires its own unique handling and preparation. Experiment with different materials to discover their potential.
How do I achieve a smooth, even finish when layering colors on my glass painting?
Achieving a smooth finish involves using the right brushstrokes and allowing each layer to dry completely before adding the next. Use gentle, sweeping motions with soft-bristled brushes and work from light to dark layers for optimal results.
What if I accidentally paint over a design element or color that’s supposed to be prominent?
If you’ve painted over an important design element or color, don’t panic! Try using a fine brush and some careful scraping to carefully remove excess paint. If the mistake is minor, you can also try layering additional coats of transparent paint on top.
Can I use regular acrylic paint instead of specialized glass painting supplies?
While it might be tempting to save money by using regular acrylic paint, it’s not recommended for glass painting. Regular acrylics don’t bond well with glass and may flake off or peel over time. Invest in high-quality glass-specific paints for long-lasting results.
How do I store and preserve my finished glass paintings to ensure they remain vibrant and intact?
To keep your glass paintings looking their best, store them away from direct sunlight and moisture by hanging them on walls with UV-filtering window treatments. Avoid exposing the artwork to extreme temperatures or humidity levels. For more delicate pieces, consider using acid-free framing materials and storing in a protective box when not displayed.

