
Drawing a flamingo can be a daunting task for beginners, but with the right guidance, anyone can master the art. When it comes to capturing the majestic beauty and unique features of these birds on paper or canvas, attention to detail is crucial. Flamingos have distinct anatomy, including their long necks, legs, and signature pink feathers, which require precise proportions and techniques to draw realistically. Many artists struggle with accurately depicting the flamingo’s posture and movement in various landscapes, from serene wetlands to vibrant savannas. In this comprehensive guide, we’ll cover the essential techniques for drawing realistic flamingos, including anatomy, proportions, and tips for capturing their signature poses and habitats. By the time you finish reading, you’ll be able to confidently draw a stunning flamingo portrait or landscape that showcases your artistic skills.
Understanding the Basics of Flamingo Drawing
To get started with drawing a flamingo, it’s essential to understand its unique physical characteristics, from its long neck and legs to its distinctive beak shape. Let’s break down these basics first.
What is a Flamingo?
Flamingos are wading birds known for their distinctive appearance and unique characteristics. They have a long neck, legs, and feet, which enable them to stand in shallow water and feed on small aquatic plants. One of the most recognizable features of flamingos is their bright plumage, typically pink or reddish-pink due to their diet rich in beta-carotene.
Their habitat varies from tropical to temperate regions around the world, with some species found in saltwater environments and others in freshwater lakes and rivers. Flamingos are social birds that often live in large colonies, forming long-lasting monogamous relationships. They are also known for their ability to stand on one leg while sleeping or resting, a behavior that helps them conserve energy.
In terms of physical characteristics, flamingos have a unique beak shape that is adapted for filtering small plants and algae from the water. Their wings are relatively short but powerful, allowing them to fly with great agility and speed. Understanding these characteristics will help you accurately depict flamingos in your drawings, focusing on their distinctive features and behaviors.
Basic Shapes for Flamingo Drawing
To draw a flamingo accurately, it’s essential to start with basic shapes. Begin by drawing a large oval for the body, making sure it’s tall and narrow. This will provide the foundation for the rest of the bird’s proportions. Next, add two smaller ovals for the head and neck, connected to the main body by a gentle curve.
The beak can be drawn as a long, thin triangle or a curved line, depending on the desired shape and expression. Two short lines extending from the top of the head will form the base of the neck feathers. To draw the legs, start with two small circles for the knees and then add a few curved lines to indicate the muscles.
When drawing the wings, remember that flamingos have long, slender limbs and a distinctive S-shaped posture when standing. A large circle or oval can serve as the foundation for each wing, connected to the body by short lines. The feathers on the neck and back can be indicated with short, curved lines and gentle hatching. By breaking down the flamingo’s shape into basic forms, you’ll establish a solid foundation for more detailed drawing.
Understanding Proportions and Measurement
When measuring and proportioning a flamingo’s body for drawing, it’s essential to pay attention to specific details. Start by determining the beak length, which should typically range from 1/4 to 1/2 of the bird’s head height. This can vary depending on the species, but it’s crucial for creating an accurate representation. Next, focus on neck proportions – a flamingo’s neck should be roughly the same length as its head and body combined.
To achieve this, divide your drawing paper into thirds both horizontally and vertically, using these guidelines to help you place key features such as the head, wings, and legs. For instance, if you’re drawing a standing flamingo, place the line representing the upper leg about one-fifth of the way down from the top edge.
When it comes to leg placement, consider the flamingo’s weight distribution – its legs should be positioned under its body with the feet shoulder-width apart.
Flamingo Anatomy for Drawing
To draw a flamingo that looks realistic, it’s essential to understand its unique anatomy, including its distinctive beak and legs. Let’s take a closer look at these features.
The Beak: A Crucial Part of a Flamingo’s Identity
The flamingo’s beak is a distinctive and crucial part of its identity. Its shape, size, and color vary across different species. The Greater Flamingo has a long, slender beak that can reach up to 18 centimeters in length. In contrast, the Lesser Flamingo’s beak is shorter and more rounded.
The shape of the beak is not just for aesthetic purposes; it plays a crucial role in feeding habits. Flamingos use their beaks to filter small plants and animals from the water. The shape and size of the beak allow them to strain these tiny particles, which are then pushed up into their mouths by the movement of their tongues.
When drawing a flamingo’s beak, it’s essential to get its proportions correct. Measure the length and width of the beak relative to the head. Typically, the beak is around one-third to one-half the size of the head. Pay attention to the subtle curve of the beak, as this can greatly affect the overall appearance of the bird.
In addition to size, color variations across different species are also notable. The Greater Flamingo’s beak is a deep pinkish-red, while the Lesser Flamingo’s beak has a more muted yellowish hue.
Wings and Feathers: Understanding Their Structure
Flamingos’ wings are a crucial aspect of their anatomy, enabling them to fly and engage in various behaviors like courtship displays. To accurately depict these wings in your drawings, it’s essential to understand their structure.
The wingtips, also known as the alula, play a significant role in steering during flight. These small feathers help control the direction of airflow around the wing, contributing to stability and maneuverability. When drawing the wingtips, pay attention to their shape and placement on the wing; they’re typically positioned near the tip.
The primary feathers, which make up the bulk of the wing, are long and stiff. They provide lift during flight by creating a pressure difference between the upper and lower surfaces of the wing. Secondary feathers, shorter and softer than primaries, fill in the gaps between them and help to smooth airflow. When drawing these feathers, consider their arrangement and texture: primaries are typically longer and more rigid, while secondaries are shorter and softer.
When depicting a flamingo’s wings, it’s essential to capture the subtle curvature of the wing and the delicate arrangement of primary and secondary feathers. This attention to detail will help create a more realistic and engaging drawing.
Legs and Feet: Unique Features of Flamingos
Flamingos’ legs and feet are often overlooked but play a crucial role in their unique appearance. When drawing a flamingo’s lower extremities, it’s essential to note their distinctive shape and size. A flamingo’s legs are long and slender, typically around one-third the length of its body. This is an adaptation for wading, allowing them to move through shallow water with ease.
The feet themselves are large and paddle-shaped, with a unique arrangement of three toes in front and one toe at the back. The middle two toes are webbed, which helps to distribute pressure while wading. This unusual foot shape enables flamingos to stand upright on one leg while resting, a behavior known as “leg-lifting.” When drawing, pay attention to this detail to capture the bird’s signature stance.
In terms of size, flamingo legs and feet can be quite variable depending on the species. The greater flamingo, for example, has longer legs than the lesser flamingo. When depicting these differences in your artwork, consider using reference images or studying the unique characteristics of each species to ensure accuracy. By incorporating these details into your drawings, you’ll add depth and realism to your flamingos’ lower halves.
Drawing Techniques and Tips
Now that you’ve mastered the basics of flamingo drawing, let’s focus on some advanced techniques to take your artwork to the next level. You’ll learn how to add depth and dimension to your flamingos’ feathers.
Basic Strokes and Lines for Realism
When drawing a flamingo, it’s essential to master basic strokes and lines for realism. One fundamental technique is hatching, which involves creating parallel lines that follow the shape of the subject. This can be used to suggest texture and depth on areas like the feathers or beak. Start by experimenting with different line weights and directions – thicker lines can create a more dramatic effect, while thinner lines can produce a softer look.
Another technique is cross-hatching, which involves layering hatching strokes at different angles to achieve shading and dimension. This can add depth and visual interest to areas like the flamingo’s neck or wings. To master cross-hatching, focus on varying line weights and densities – using thick lines with short hatch marks can create a more intense shadow effect.
Stippling is another valuable technique for achieving realism in your drawings. By creating small dots that build up an image, you can capture intricate details like feathers or textures. Experiment with different dot sizes and spacings to achieve varying effects – closely packed dots can create a smooth surface, while larger gaps between dots can suggest texture.
A key tip when using these techniques is to pay attention to the direction of your strokes – this will help guide the viewer’s eye through the drawing and create a sense of movement.
Creating Realistic Feathers with Texture and Pattern
To create realistic feathers with texture and pattern, focus on capturing the intricate details that set each feather apart. Begin by observing the shape and structure of a single feather – notice how it’s typically teardrop-shaped with a hooked tip. Use short, curved strokes to block out the basic shape, gradually building up layers of detail.
Varying line weights and hatching techniques can create a sense of texture and dimensionality on the feathers. For example, use gentle hatching for the soft, fluffy underparts and more deliberate, scratchy lines for the stiffened edges. To achieve this subtle interplay between texture and pattern, pay attention to contrast – both within each feather and across the entire bird.
In a flamingo’s plumage, you’ll often see characteristic patterns like the pinkish-gray stripes or patches that run along the neck and back. These markings can be achieved with simple lines and shapes, allowing for greater flexibility in your drawing style. Experiment with different brushstrokes to convey the delicate, lacy quality of some feathers and the coarser texture of others.
Mastering Facial Expressions: Capturing Emotions in Flamingos
Capturing the subtleties of a flamingo’s facial expression can be a challenging task for artists. To draw authenticity, consider the bird’s emotional state and convey it through gentle, nuanced strokes. A happy flamingo, for instance, might have a slight tilt to its head, with a softening around the eyes that suggests contentment.
To achieve this, pay close attention to the shape of the beak and the subtle contours of the face. The feathers surrounding the beak can also convey emotion – a relaxed bird’s feathers may appear fluffed or slightly rumpled, while a tense flamingo’s might seem more tightly coiled.
When drawing neutral expressions, focus on capturing the quiet intensity in a flamingo’s gaze. Study the way light interacts with the feathers and beak to create depth and dimension. Avoid over-accessorizing the face – too many details can detract from the bird’s natural beauty.
Some key characteristics to note when drawing different emotions include:
- The curvature of the beak, which changes subtly depending on the flamingo’s mood
- The tension or relaxation in the feathers surrounding the face
- The direction and intensity of the gaze
Advanced Techniques for Realistic Flamingo Drawing
To take your flamingo drawing skills to the next level, we’ll be covering advanced techniques for creating incredibly realistic and detailed flappingo portraits. These expert methods will help you master the subtleties of plumage and posture.
Adding Depth and Dimension with Shading and Contrast
When creating depth and dimension in a flamingo drawing, shading and contrast play crucial roles. Understanding how to balance light and dark areas effectively can make a significant difference in the overall realism of your artwork. One technique is to use gradual transitions between values, rather than abrupt shifts. For example, instead of having a harsh line where the feathers meet the neck, blend the colors so that they melt into each other.
Pay attention to the way light interacts with different textures and surfaces. On a flamingo’s feathers, for instance, the softness of downy plumage will appear lighter than the coarser, more rigid feathers on its back. Use this to your advantage by creating subtle gradations in value that reflect these differences. When applying shading, focus on areas where the light would naturally fall – such as under the wing or along the neck – and use gentle, sweeping strokes to suggest depth.
To enhance contrast, experiment with different color combinations and saturation levels. In a flamingo’s plumage, warm tones like pink and orange can be balanced by cooler grays and blues in the shadows. By manipulating these values and colors, you can create a sense of volume and three-dimensionality that draws the viewer into your drawing.
Capturing Movement and Action: Dynamic Poses for Flamingos
When capturing the dynamic movement of flamingos, it’s essential to consider their various behaviors and poses. Running flamingos often have their legs stretched out in front of them, with their feet barely touching the ground. This stance is achieved by elongating the leg lines and slightly angling the knee joints.
Flying flamingos can be depicted with their wings spread wide, creating a sense of momentum and energy. The feathers on their neck and body should be ruffled, conveying the wind resistance they’re facing in mid-air. Pay attention to the subtle droop of the head and tail when illustrating a flamingo in flight.
Flamingos feeding can also make for engaging dynamic poses. They often bend their long necks to scoop up food from shallow waters or mudflats. This pose requires capturing the subtle curvature of the neck and the slight lean forward, as if they’re about to dip into the water.
Combining Techniques for Realistic Portraits and Landscapes
When combining techniques to create realistic portraits and landscapes featuring flamingos, it’s essential to balance detail with context. Start by establishing a solid foundation with basic shapes and proportions, as discussed earlier. For portraits, focus on capturing the subtleties of feather texture and pattern, while also considering the bird’s facial expression and beak shape.
To add depth and dimension to your portrait, experiment with layering techniques such as glazing or scumbling. Apply warm colors to capture the soft glow of feathers in sunlight or cool tones for more dramatic lighting effects. Consider depicting the flamingo in its natural habitat by incorporating subtle suggestions of water, sky, and vegetation.
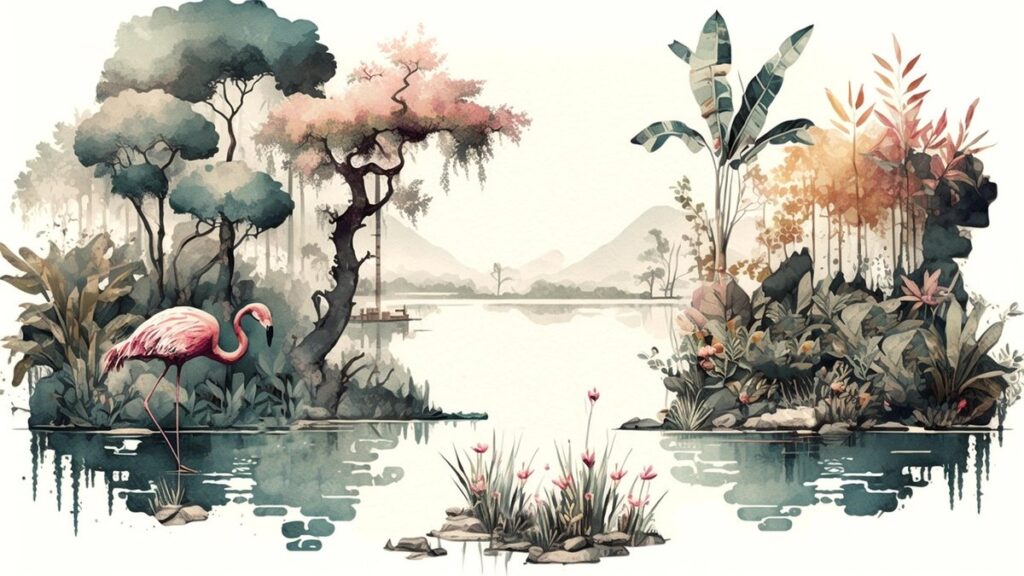
When creating landscapes, prioritize accurate depictions of flora and fauna that coexist with flamingos. This includes tall grasses, reeds, and mangroves, as well as other bird species and marine life. Balance your composition to ensure the flamingo remains a central focal point while still integrating its environment. A mix of loose and detailed brushstrokes can effectively convey the contrast between the delicate bird and its surroundings.
Incorporate subtle visual cues to suggest movement or action, such as wind-blown feathers or water ripples in the background. This approach will help create a dynamic and immersive scene that transports the viewer into the world of flamingos.
Frequently Asked Questions
Can I use different mediums to draw flamingos besides pencils and paper?
Yes, you can experiment with various mediums like charcoal, pastels, or even digital drawing tools. Each medium will produce unique textures and effects, allowing for creative interpretations of the flamingo’s anatomy.
What if I struggle to capture realistic facial expressions in my drawings?
Capturing facial expressions requires practice and observation. Study real-life photos of flamingos, paying attention to their posture, eye placement, and beak shape. Use reference images to help you achieve more authentic expressions in your drawings.
How do I ensure accurate proportions when drawing a flock of flamingos together?
When drawing multiple flamingos, it’s essential to maintain consistent proportions throughout the group. Measure and compare the size and scale of each bird relative to one another, using guides or measuring tools as needed.
Can I use this guide for drawing other types of birds, or is it specifically tailored to flamingos?
The techniques and principles outlined in this guide are adaptable to various bird species, but keep in mind that each type has unique characteristics. For example, penguins have distinct beak shapes and feather patterns compared to flamingos.
What if I’m having trouble capturing the subtle nuances of shading and contrast in my drawings?
Shading and contrast can be challenging to master. Experiment with different techniques like hatching, cross-hatching, or stippling, using reference images to observe how shading affects the appearance of textures and features on a flamingo’s feathers.

