
Drawing a beautiful basic flower can be a fun and rewarding experience for artists of all skill levels. However, it can also be intimidating to start from scratch, especially if you’re new to drawing or don’t know where to begin. You might find yourself struggling to capture the delicate petals and shapes that make a flower so visually appealing.
To create a realistic basic flower, there are several key characteristics to focus on, including the overall shape, proportions, and details such as the center of the bloom. By breaking down these elements into manageable steps, you can build your skills and confidence in drawing flowers from scratch. This guide will walk you through the essential techniques and shapes required for a beautiful basic flower drawing, covering everything from the basics to more advanced methods. By following along, you’ll be able to draw a stunning basic flower that brings life and beauty to any piece of artwork.
Understanding the Basics of Flower Drawing
To get started, let’s begin with the basics: understanding the different parts of a flower and learning how to draw its simple, yet elegant shape. This foundation will help you create a beautiful basic flower.
What Makes a Flower Look Like a Flower?
Flowers are instantly recognizable due to their unique combination of characteristics. One essential aspect is the arrangement of petals, which come in various shapes and sizes. Typically, a flower has multiple petals, often symmetrical around the center. This radial symmetry creates a sense of balance and harmony. However, some flowers have irregular or asymmetrical petal arrangements, adding diversity to their appearance.
The number and shape of petals can vary greatly between different species. For instance, roses have large, rounded petals, while daisies have smaller, more delicate ones. Some flowers, like sunflowers, have huge, petal-like structures called ray florets. Understanding these variations is crucial for drawing a realistic flower.
Another key characteristic is the presence of a distinct center, often containing stamens and pistils. This central cluster serves as a focal point, drawing the viewer’s eye to the flower’s heart. The shape and size of this center can also differ between species, adding to their unique appearance. By studying and observing these characteristics, you’ll be better equipped to draw a basic flower that looks like, well, a flower.
Common Shapes and Forms in Flowers
Petals are often teardrop-shaped, but you’ll also find oval, lance-shaped, and even star-like petals. Some flowers have smooth, flat petals, while others have ruffled or wavy edges. Consider the shape of a daisy’s petal – it’s typically rounded at the tip with a pointed base. In contrast, the petals of a rose are more irregularly shaped and often have a delicate, curved edge.
Stamens, which include the anthers and filaments, can vary in length and thickness. Some stamens are short and stout, while others are long and thin. The anthers themselves might be round or oval, and they’re typically clustered at the top of each filament. Look at a sunflower – its large, prominent stamens are a defining feature.
Pistils, which include the stigma and style, are usually longer than the stamens. They often have three distinct parts: the stigma (the receptive surface), the style (the narrow tube connecting the stigma to the ovary), and the ovary (which contains the seeds). The shape of pistils can vary greatly between species – some are short and stout, while others are long and slender. When drawing a basic flower, focus on these common shapes and forms as a starting point.
Choosing Your Drawing Tools and Mediums
To get started, you’ll need to decide on the drawing tools and mediums that work best for your style and preferences. This means choosing between pencils, markers, or paint, and considering what each has to offer.
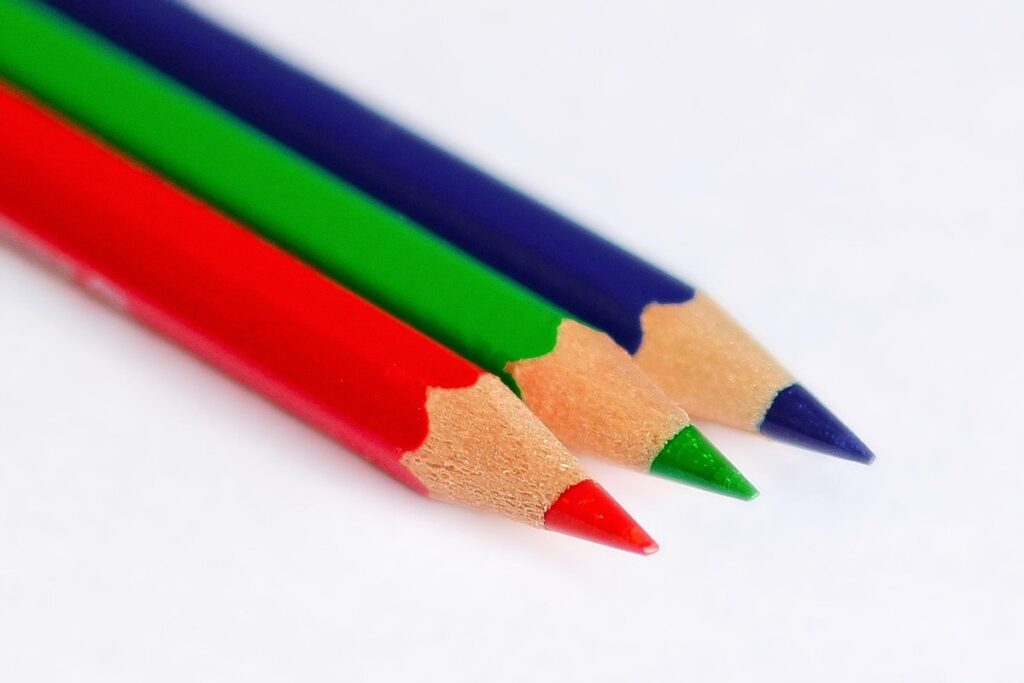
Selecting the Right Pencils for Flower Drawing
When it comes to drawing flowers, the right pencil can make all the difference. You’ll want to choose a pencil that suits your style and the level of detail you’re aiming for. Graphite pencils are a popular choice for flower drawing because they offer a range of hardness levels, from soft (B) to hard (H). A softer pencil will give you more expressive lines and subtle shading, while a harder pencil will provide finer details.
Colored pencils can also be used to add depth and vibrancy to your flowers. Look for brands that have a wide range of colors, including skin tones, leaf greens, and petal pastels. Pastel pencils are another great option, as they produce soft, blendable lines and gentle color transitions. When choosing colored or pastel pencils, consider the type of effect you want to achieve: do you want smooth blends or crisp edges?
If you’re new to flower drawing, it’s a good idea to start with a set of graphite pencils (HB, 2B, 4B) and see how they feel on your paper. For more detailed work, consider investing in a range of colored or pastel pencils.
Other Drawing Tools and Materials You May Need
When drawing flowers, having the right tools and materials can make a big difference. In addition to pencils, you may want to have an eraser on hand to correct any mistakes or remove unwanted graphite marks. A pencil sharpener is also useful for keeping your pencils sharp and ready to use.
You’ll also need some paper to draw on. Watercolor paper or Bristol board are good choices because they’re smooth and won’t cause your pencils to scratch or smudge easily. If you’re using colored pencils, look for paper that’s labeled as “colored pencil friendly” or has a special coating to prevent the colors from bleeding.
Other useful tools include a ruler or straightedge to help with drawing straight lines, and a blending stump or tortillon to smooth out transitions between different shading areas. You may also want to have some correction tape or a fixative on hand to secure your drawings in place.
Basic Flower Anatomy
Every flower has its own unique characteristics, but most share some basic parts that make up their overall structure. Let’s break down these essential components starting with the sepals and petals.
The Center of the Flower: Stamens and Pistils
At the center of most flowers lies the reproductive organs – stamens and pistils. The stamens are the long, thin structures responsible for producing pollen, which plays a crucial role in fertilization. Typically, there is a cluster of stamens arranged around the center of the flower, often with different numbers depending on the type of plant.
To draw the stamens accurately, focus on their length and arrangement. The longer stamens are usually positioned towards the outside, while shorter ones are closer to the center. You can depict the shape as cylindrical or slightly tapered at the tip. Remember that stamens often overlap each other, so it’s essential to gauge their proportions correctly.
The pistils, on the other hand, consist of a central column (style) topped with a stigma. The style usually connects the ovary, where seeds develop, to the surface of the flower. When drawing the pistil, consider its length and thickness relative to the stamens. Typically, the pistil is shorter than the stamens but still visible from the outside.
Petals 101: Understanding Shape and Form
When it comes to drawing petals, understanding their shape and form is crucial for creating a realistic flower. Petals can take on various forms, with curved being one of the most common shapes. These petals are typically rounded or oval in shape and often have a soft, gentle appearance.
Pointed petals, on the other hand, have a sharp tip and are usually narrower than curved petals. They can be found in flowers like roses and poppies, where their pointed tips add to the overall drama of the bloom. Rounded petals are another common shape, with these petals being rounded at both ends and often having a smooth appearance.
It’s worth noting that petals can also have different textures and patterns, which can affect their overall shape and form. For example, some petals may be slightly ruffled or have small ridges along their edges, while others may be smooth to the touch. When drawing petals, pay attention to these details to add depth and realism to your flower. Typically, curved petals are found in full-bodied flowers, while pointed petals are often associated with more delicate blooms.
In general, petals that curve outward from the center of the flower tend to create a softer appearance, while those that point inward can give the impression of being more closed or compact.
Drawing a Simple Flower
Let’s start by drawing the basic flower itself, focusing on its simple yet elegant shape and proportions. We’ll begin with a basic oval for the center of the flower.
Step 1: Sketching the Center of the Flower
Start by lightly sketching the center of the flower. This is where you’ll place the stamens and pistils. Begin with a small circle to represent the base of the flower, which contains these reproductive organs. Pay attention to its position: it should be slightly above the center line of your drawing.
The stamens typically emerge from this central point, so draw 5-10 short lines radiating outwards from the center. These can be thin and delicate or thicker and more robust – it depends on the type of flower you’re drawing. The pistils usually appear as a single long stem that rises above the stamens.
For accuracy, consider observing real flowers under magnification to see how these parts are arranged in nature. Note also that the stamen’s direction can vary depending on whether your flower is pollinated by bees or wind. Some basic shapes and proportions will serve you well here: a small circle for the center, straight lines or curved stems for the stamens and pistils, and gentle tapering where they emerge from the center.
This simple sketch sets the foundation for adding petals in the next step.
Step 2: Adding Petals to Your Flower
When adding petals to your flower, consider their shape and form. Petals can be symmetrical, with two identical halves on either side of the center, or asymmetrical, with each petal unique in size and shape. Typically, flowers have between five to ten petals, but some varieties may have more or fewer.
For a simple flower drawing, start by adding three to five large petals around the center. These should be teardrop-shaped, with the pointed end facing towards the center of the flower. You can use a gentle, curved line to suggest the petal’s shape. Pay attention to their placement: they should overlap slightly in the middle to create a natural-looking arrangement.
To add more depth and interest to your flower, you can also include smaller petals or sepals (the green, leaf-like structures that protect the flower bud). These can be added around the edges of the larger petals, using shorter, more delicate lines. Remember, it’s okay if your petals don’t look perfect – a simple, hand-drawn flower is all about charm and character.
Advanced Techniques for Realism
Now that you’ve mastered the basics, let’s take your flower drawing skills to the next level by exploring advanced techniques that add realistic depth and dimensionality. This is where subtlety and nuance come in.
Shading and Texture in Flower Drawing
When adding shading and texture to your flower drawings, consider the subtle nuances of each petal. Shading can be achieved by varying the pressure applied to your pencil. For delicate petals, use gentle strokes with a soft pencil (HB or 2B) to create soft, feathery edges. To add dimension to sturdier petals, apply more pressure with a harder pencil (H or 2H), creating deeper, more defined shadows.
Texture can be introduced by layering different lines and strokes. For example, the center of a rose often features delicate, curved lines that resemble fine threads. Use short, gentle strokes with a soft pencil to suggest this texture. In contrast, the outer petals may feature slightly longer, more expressive strokes that evoke the rougher surface of the petal.
To create realistic textures, study photographs of flowers under magnification. Observe how the ridges and veins on each petal interact with light. You can also experiment with different pencil techniques, such as hatching or cross-hatching, to build up layers of texture and depth in your drawing.
Creating Depth and Dimension in Your Flowers
To create depth and dimension in your flower drawings, focus on layering and overlapping techniques. Start by sketching the center of the flower with a range of values from light to dark, creating a sense of depth immediately. This can be achieved by varying the density and texture of lines and shapes.
When adding petals, experiment with different overlap patterns to create a sense of movement and energy. Some flowers have petals that wrap around the center in a spiral pattern, while others have more linear overlaps. Consider the type of flower you’re drawing and replicate its unique characteristic. You can also use hatching and cross-hatching techniques to suggest texture and add dimension.
To enhance depth, pay attention to the placement of your petals’ edges. Those at the back of the flower should be softer and less defined than those in front. This creates a sense of layering and makes the drawing feel more three-dimensional.
Troubleshooting Common Mistakes
We all make mistakes when trying a new skill, and drawing can be especially tricky. Let’s fix common errors that might be making your flower drawings look less-than-perfect.
Overlapping or Underlapping Petals
When drawing petals, it’s essential to pay attention to their placement and orientation. Overlapping or underlapping petals can make a flower look unnatural and unbalanced. To avoid this issue, start by sketching the center of the flower accurately, as covered earlier. This will provide a solid foundation for your petal placement.
Petals typically overlap each other slightly, especially in the middle of the flower. However, too much overlap can create a crowded appearance. To achieve a natural look, try to place petals at an angle, allowing them to curve around each other. Avoid straight lines and sharp edges, as these can give your flower a stiff or artificial feel.
Consider the type of flower you’re drawing. Some flowers, like roses, have very overlapping petals, while others, such as daisies, have more underlapping petals. Study reference images to get a sense of how the petals interact with each other in different varieties.
When you notice that your petals are not fitting together correctly, try adjusting their position or angle slightly. You can also experiment with adding or removing petals to achieve a balanced look. Remember that practice makes perfect, and it may take some trial and error to get the hang of drawing realistic flowers.
Drawing Proportions and Sizes Incorrectly
When drawing a flower, it’s easy to get the proportions and sizes of its parts wrong. Petals can appear too large or too small, while the center of the flower might be exaggerated or underemphasized. This can make the entire image look unbalanced and unnatural.
To correct these mistakes, pay attention to the size relationships between different parts of the flower. Start by sketching a rough outline of the petals in proportion to each other. Typically, three or five petals are most common in simple flowers, but some may have as many as seven or more. Keep your initial sketch loose, focusing on getting the proportions right rather than perfect lines.
A good rule of thumb is to make sure the center of the flower is roughly one-third to one-half the size of the largest petal. This will help create a sense of balance and harmony in your drawing. If you’re unsure about the sizes of different parts, try using a pencil or eraser to lightly block out rough shapes before committing to final lines. By focusing on proportions and taking it one step at a time, you can avoid common mistakes like misjudging petal size.
Frequently Asked Questions
How to Practice Drawing Flowers Regularly?
To practice drawing flowers regularly, set aside time each week to draw different types of flowers using various techniques. Start by dedicating 15-30 minutes daily to sketching flowers from observation or reference images. As you become more confident, increase the duration and frequency of your practice sessions.
Can I Use Digital Tools to Draw Flowers?
Yes. You can use digital tools like drawing tablets or graphics software to draw flowers. These tools allow for precise control over line width and shape, making it easier to achieve realistic results. Familiarize yourself with the interface and basic functions before starting a new project.
What If My Petals Keep Overlapping or Underlapping?
When petals overlap or underlap, try adjusting their size and placement relative to each other. You can also experiment with different petal shapes and forms to create a more balanced composition. Practice drawing flowers with varying numbers of petals to develop your skills in managing overlapping elements.
How Can I Achieve Realistic Shading on My Flowers?
To achieve realistic shading, focus on capturing the subtle transitions between light and dark areas. Use gentle strokes and layering techniques to build up texture and dimension. Study the work of other artists for inspiration and practice observing the way light affects flowers in real life.
Is It Okay If My Flower Drawing Doesn’t Look Realistic?
No. While it’s okay to experiment with stylized or abstract flower drawings, a realistic representation is often what beginners aim for when starting out. Focus on mastering basic techniques before exploring more advanced styles. Remember that practice and patience are key to improving your drawing skills.

