
We all know that clutter can quickly accumulate in our homes, making it difficult to find what we need when we need it. But did you ever think about how much money and waste could be saved by simply having more storage space? One of the most cost-effective and eco-friendly solutions is creating your own DIY storage containers. Not only can you customize them to fit your specific needs and style, but you can also reuse materials that would otherwise end up in a landfill. In this comprehensive guide, we’ll walk you through the process of designing and building your own storage containers from start to finish, covering everything from material selection to labeling. By the time you’re done reading, you’ll be able to create your own functional and customizable storage solutions that fit your space and budget perfectly.
Choosing the Right Materials
When selecting materials for your DIY storage container, consider durability, sustainability, and aesthetics, as these factors can greatly impact its overall performance and longevity. You’ll want to choose a combination that suits your needs and style.
Types of Containers Suitable for DIY Projects
When it comes to choosing materials for DIY storage containers, you have a variety of options available. One popular choice is plastic, which is lightweight, easy to clean, and resistant to moisture. However, it may not be the best option for heavy or bulky items, as it can become brittle over time.
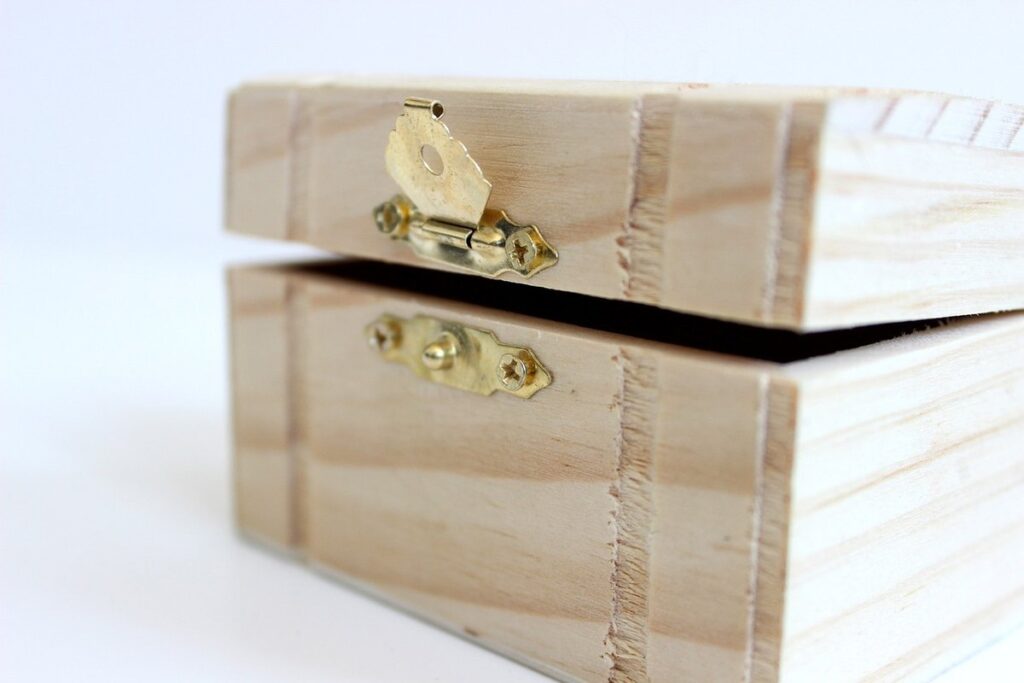
Wooden containers are another common choice, offering a natural look and feel that can complement any room’s decor. They’re also relatively inexpensive and easy to work with. However, wood requires regular maintenance to prevent rot and insect damage, which can be time-consuming and costly.
Metal containers provide durability and strength, making them suitable for heavy-duty storage needs. They’re also resistant to moisture and pests, but may require additional hardware for assembly. Fabric containers are a great option for storing soft items like linens or cleaning supplies, as they allow for easy visibility and airflow.
Consider the specific needs of your project when selecting materials. For example, if you’re building a container for outdoor storage, metal or plastic may be a better choice due to their moisture-resistant properties.
Measuring and Planning Your Storage Needs
To measure and plan your storage needs effectively, start by taking precise measurements of the space where you’ll be placing your DIY containers. Note down the dimensions of the area, including any obstacles or irregularities that might affect container placement. Consider factors like accessibility: are there narrow aisles or doorways that require containers to be narrower or shorter? Think about visibility too – will you need to see into the containers easily, or can they be stacked out of the way?
Think about ease of maintenance as well. Will you have trouble reaching certain areas, or will the containers obstruct regular cleaning tasks? Consider the type of items you’ll be storing and how often you’ll access them. For instance, if you’re planning to store frequently used items like cleaning supplies or tools, choose a location with easy access.
To determine the most effective container size, use the “3-foot rule” – ensure that containers are no taller than 3 feet so they can fit in standard doorways and hallways. Also, consider the width and depth of your DIY storage units to accommodate the items you’ll be storing. By taking these factors into account, you’ll be able to choose the right container size and type for your space, ensuring both functionality and aesthetics.
Designing Your DIY Storage Containers
Now that you have a solid understanding of what materials to use, let’s move on to designing your DIY storage containers for optimal functionality and style. This is where creativity meets practicality.
Basic Container Designs for Beginners
When building a basic DIY storage container, it’s essential to start with a simple design. For beginners, consider creating a rectangular box with a flat top and bottom. This design allows for easy access and can be modified as needed.
A great starting point is the “cube” design. To assemble this container, you’ll need two long sides, two short sides, a top, and a bottom. Use screws or nails to attach the sides together, ensuring they are flush and secure. Next, add the top and bottom pieces, using hinges if desired for easy opening.
Another basic design is the “shelf unit.” This involves creating a rectangular container with multiple shelves, perfect for storing books, clothes, or kitchen utensils. To assemble this design, attach the sides to each other first, then add the shelves inside. Finally, attach the top piece and any additional features like handles or labels.
When building your basic DIY storage containers, keep it simple by using a single material for all components. This will make assembly and disassembly easier in the long run. With these designs as a starting point, you can easily create functional and stylish storage solutions for your space.
Customizing Your Containers with Decorative Touches
When it comes to adding a personal touch to your DIY storage containers, you can get creative with paint, labels, and other embellishments. Start by selecting a color scheme or theme that complements your space’s decor. For a rustic look, consider using earthy tones like sage green or sandy beige on your container exterior.
Paint is an easy way to add some personality to your containers. You can use acrylic or latex-based paints specifically designed for outdoor use if you plan to place them in a garage, basement, or other area exposed to moisture. Choose a paint with good adhesion properties to ensure it sticks well to the material of your container.
Labels are another simple way to customize your containers. Use a marker or a label maker to add labels with contents, categories, or even inspirational quotes. You can also get creative by using decorative stickers, stamps, or stencils to create unique designs. Consider using clear labels for contents that might change frequently, such as cleaning supplies or seasonal decorations.
Some other embellishments you can try include adding a coat of varnish or sealant to protect the paint and make it easier to clean, attaching decorative metal or wooden accents, or even upcycling old containers into planters or pen holders.
Building and Assembling Your DIY Storage Containers
Now that you have your materials, it’s time to bring your DIY storage containers together by assembling them according to the manufacturer’s instructions. Follow these steps for a sturdy and functional build.
Step-by-Step Instructions for Assembly
Begin by preparing your workspace and gathering all necessary materials. For most DIY storage containers, you’ll need a flat surface, such as a table or countertop, to assemble your project. Ensure the area is clear of clutter and debris to prevent accidents.
For assembly, you’ll typically require a few basic tools, including a drill, screwdriver, hammer, tape measure, and level. Double-check that all parts are included and accounted for before proceeding. If using pre-made containers, follow the manufacturer’s instructions for any specific requirements.
To start assembling your container, attach the sides to the bottom panel using screws or nails. Ensure the corners are secure and evenly spaced. Next, add the top panel, aligning it with the edges of the sides. Secure the top in place using screws or hinges, depending on the design.
When working with heavy containers or complex designs, consider enlisting a helper for added stability. Always follow safety guidelines when handling power tools and materials.
Tips for Ensuring Durability and Longevity
When it comes to ensuring the durability and longevity of your DIY storage containers, several key factors come into play. Material selection is critical, as some materials are more prone to wear and tear than others. For example, using high-quality lumber or composite materials can help resist rot and insect damage.
Construction quality also plays a significant role in determining the lifespan of your containers. Ensure that all corners are securely reinforced and joints are tight. A sturdy frame will provide added stability and support for heavy loads. Additionally, consider applying a waterproof sealant to prevent moisture from seeping into the container.
Regular maintenance is another essential aspect of extending the life of your DIY storage containers. Clean them regularly to remove dirt and debris that can cause damage over time. Check for any signs of wear or damage, such as cracks or loose joints, and address them promptly. By following these simple tips, you can help ensure your DIY storage containers remain functional and in good condition for years to come.
Inspect your containers every 6-12 months for signs of wear, and replace worn-out parts as needed.
Labeling and Organizing Your Storage Containers
Now that you’ve created your DIY storage containers, it’s time to keep them organized by labeling and categorizing their contents. This ensures easy access to what you need.
The Importance of Clear Labels
Clear labels are essential for organizing your storage containers effectively. When everything is labeled correctly, you can easily find what you need without having to rummage through every container. This saves time and reduces frustration when trying to locate a specific item.
To create clear and concise labels, start by using a standard font that’s easy to read, such as Arial or Helvetica. Avoid using fonts with too much flair, like script or cursive, as they can be difficult to decipher. Use uppercase letters for the main label and lowercase for any additional information, like the contents of the container.
Keep your labels short and to the point. Aim for a maximum of 5-7 words per label, depending on the size of the container. For example, if you have a container labeled “Kitchen Utensils,” it’s better to use “Kitchen Tools” or simply “Utensils” instead. This helps prevent cluttered labels that can make your storage containers look messy.
When labeling your containers, consider using colored stickers or markers to categorize them by room or type of contents. For instance, you can use blue for kitchen items and red for bathroom supplies. This visual system makes it easy to identify what’s inside each container at a glance.
Organizing Systems for Efficient Access
When implementing organizing systems within your DIY storage containers, consider the type of items you’ll be storing and how frequently you access them. For example, if you’re using a container for kitchen utensils, you might install a sliding tray or a small drawer to keep essentials like oil, spices, or frequently used tools within easy reach.
To maximize vertical space, use stackable shelves or baskets that can hold lightweight items such as linens, cleaning supplies, or toys. You can also incorporate hanging rods or hooks for items like bikes, coats, or bags. For a more customized approach, think about the “zone” concept: designating specific areas within your container for different categories of items.
Some popular organizing systems include:
• Adjustable dividers to separate and contain items
• Drawer organizers with compartments for small items
• Stackable bins or containers with labels
• Hooks for hanging bags, keys, or accessories
When choosing an organizing system, consider the size and shape of your container, as well as the types of items you’ll be storing. Be mindful of the materials used – opt for durable, easy-to-clean options that can withstand frequent use. By implementing a well-designed organizing system, you’ll be able to access your belongings quickly and efficiently while keeping clutter at bay.
Securing Your DIY Storage Containers
Now that you’ve built and customized your DIY storage containers, it’s time to focus on securing them effectively. We’ll cover the essentials of protecting your investment from tampering and damage.
Options for Anchoring and Stabilizing Containers
To prevent your storage containers from tipping over, you’ll need to secure them to walls or floors. This can be achieved through various anchoring and stabilizing methods. One common approach is to use wall anchors, which come in different types such as plastic, metal, or molly bolts. These anchors are designed to hold a specific weight, so make sure to choose the right type for your containers.
Another option is to install floor flanges or tracks, which provide more stability and support for heavy containers. You can also use anti-tip brackets that attach directly to the container and wall, ensuring it remains upright even when fully loaded. When choosing an anchoring method, consider factors such as container weight, size, and material.
A good rule of thumb is to anchor containers that weigh over 50 pounds or are taller than 3 feet. For smaller containers or lighter loads, you can opt for non-permanent solutions like adhesive strips or suction cups, but be aware these may not provide the same level of security as more robust anchoring methods.
Safety Precautions When Using Heavy Containers
When working with heavy storage containers, it’s essential to prioritize your safety and the stability of the container. One critical aspect is proper lifting techniques. Avoid bending or twisting while lifting a container, as this can put unnecessary strain on your back and joints. Instead, lift with your legs by bending at the knees and keeping the weight close to your body.
When placing heavy containers in a fixed location, ensure they are anchored securely to prevent tipping over. You can use wall-mounted brackets or anti-tip straps specifically designed for storage containers. Make sure the container’s center of gravity is low enough to maintain stability.
Proper placement is also crucial when using heavy containers. Avoid placing them near stairs, doorways, or other areas where people may accidentally bump into them. Securely fasten any loose items inside the container to prevent shifting during transport or storage.
When handling multiple containers, consider enlisting help from a friend or family member to avoid overexertion. Wear gloves and closed-toe shoes to protect your hands and feet from potential hazards.
Troubleshooting Common Issues with DIY Storage Containers
We’ve all been there: your beautiful DIY storage container is suddenly failing to serve its purpose, and it’s frustrating to figure out why. Let’s troubleshoot common issues together to get you back on track.
Identifying and Resolving Structural Problems
When building DIY storage containers, structural problems can arise due to poor design, inadequate materials, or incorrect assembly. One common issue is container collapse under weight, which can lead to damaged contents and compromised safety. Inspect your containers regularly for signs of wear, such as loose joints, warping, or sagging shelves.
Check that your containers are properly braced and anchored, especially if they’ll be storing heavy items like books, tools, or equipment. Consider using corner supports or reinforcement strips to add stability. For example, you can attach a 2×4 board between two corners of a container using screws or nails.
To resolve structural problems, start by identifying the root cause. If it’s due to inadequate materials, replace them with sturdier alternatives. If the issue is with design, reassess your plans and make adjustments accordingly. In some cases, reassembling the container may be necessary to correct any mistakes made during initial construction. Remember that prevention is key: use sturdy materials, follow proper assembly techniques, and inspect your containers regularly to prevent structural problems from arising in the first place.
Tips for Extending the Life of Your Containers
Regular cleaning and maintenance are crucial for extending the life of your storage containers. Start by inspecting your containers regularly for signs of wear and tear, such as cracks, dents, or rust. Clean them with mild soap and water to remove dirt and debris that can cause damage over time.
For wooden containers, apply a waterproof sealant every 6-12 months to protect against moisture. You can also use a furniture wax to repel dust and prevent scratches. For metal containers, wipe down the exterior with a soft cloth and dry thoroughly to prevent rust.
Replace any worn-out or damaged parts, such as hinges or latches, promptly to avoid further damage. Consider replacing wooden containers with new ones after 5-7 years, depending on usage and exposure to elements. When repurposing old containers, ensure they are clean, dry, and free of pests before using them for storage.
To minimize replacement needs, use a coat of clear varnish or polyurethane on wooden containers to protect against scratches and fading. Regularly check the condition of your containers and take preventive measures to extend their lifespan.
Frequently Asked Questions
Can I use DIY storage containers in areas with high humidity or moisture?
Yes, but it’s essential to choose materials that can withstand moisture, such as water-resistant plastic or metal. Additionally, consider adding ventilation to prevent condensation buildup.
What if I have limited space for storing my DIY storage containers when not in use?
To save space, you can stack your containers on top of each other using sturdy shelves or brackets. You can also label the containers with their contents and store them in a designated area, like underbed storage or garage organizers.
How do I ensure that my DIY storage containers are secure and won’t tip over when filled?
For added stability, anchor your containers to walls or floors using screws, nails, or anti-tip brackets. You can also place heavy objects at the bottom of the container for better balance.
Can I use my DIY storage containers as a freestanding piece in a room, like a bookshelf?
Yes, you can convert your DIY storage containers into a freestanding piece by adding casters or legs to create stability and mobility. This can be a great option for small spaces where built-in shelving isn’t feasible.
What if I want to reuse an old container but it has a stubborn stain or odor? How do I clean and disinfect it?
Before reusing your container, scrub off any stubborn stains with a mixture of soap and water. For odors, try using baking soda and vinegar to neutralize the smell. Make sure to dry the container thoroughly before repurposing it.

