
Painted rock designs have become a beloved hobby for many, with their small size and vibrant colors making them perfect for decorating spaces or creating thoughtful gifts. But where do you start when it comes to designing these tiny masterpieces? With so many styles to choose from, including geometric patterns that add a modern touch and nature-inspired themes that bring the outdoors in, the possibilities are endless.
For beginners, the process can be overwhelming, but with some guidance and practice, anyone can create stunning painted rock designs. In this article, we’ll cover the basics of painting techniques, sharing tips on how to achieve smooth lines and even colors. We’ll also explore display ideas for your finished rocks, from arranging them in a decorative bowl to using them as bookends or paperweights. By the end of this guide, you’ll have the confidence to create beautiful painted rock designs that bring joy to yourself and others.
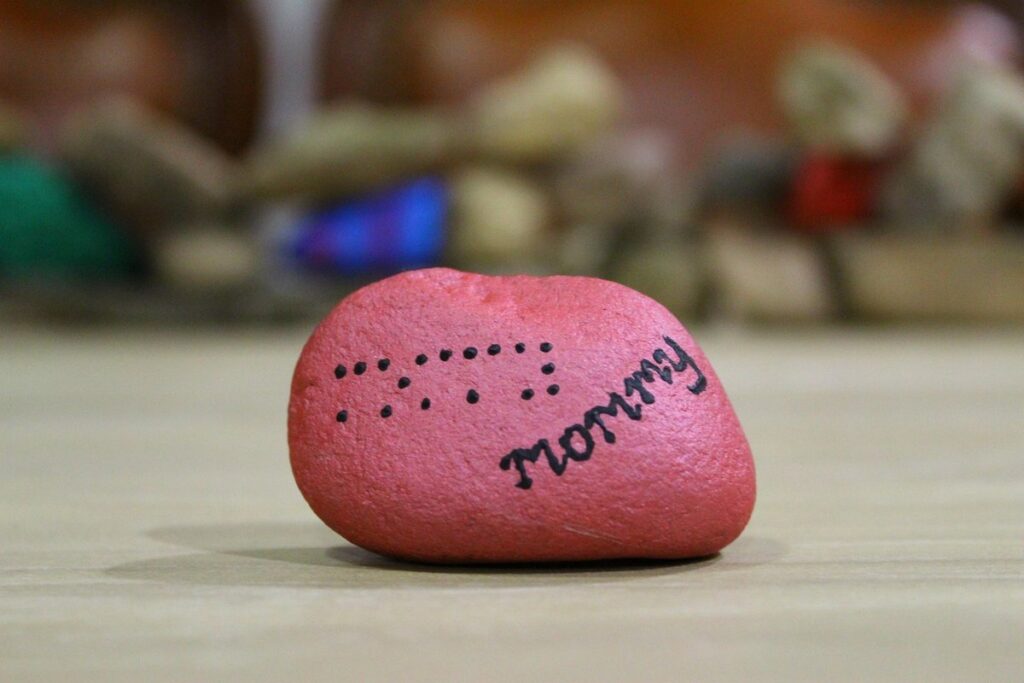
Choosing Your Painted Rock Designs
Now that you’ve got a good idea of what your painted rock design theme is, it’s time to think about the specific designs that will bring your vision to life. What kind of patterns and images will you feature on your rocks?
Simple yet Timeless Geometric Patterns
Geometric patterns have been a cornerstone of art and design for centuries, and their simplicity is part of their enduring appeal. You can create visually striking designs using just a few basic shapes, such as triangles, squares, and circles.
A classic example of a simple geometric pattern is the chevron, which consists of repeating triangles pointing in opposite directions. This design works particularly well with bold colors and crisp lines. To achieve a clean look, use contrasting colors for the triangle points and background.
Another timeless option is the herringbone pattern, made up of alternating squares or rectangles. You can experiment with different color combinations to create a unique visual effect. For instance, pairing dark blue with light gray can give your design a sophisticated feel.
To add some visual interest to your geometric patterns, consider incorporating circles and arcs. These shapes can be used to create subtle texture or dynamic movement in your designs. Remember that the beauty of geometric patterns lies in their simplicity; avoid over-accessorizing with too many details or complicated elements.
Whimsical Nature-Inspired Designs
Nature has a way of inspiring some of the most beautiful and intricate designs. When it comes to creating whimsical nature-inspired designs on painted rocks, think beyond the obvious – leaves, flowers, birds, and trees are just the beginning. Consider incorporating elements like waves, ripples, or subtle textures that evoke the feeling of water or stone.
For a more abstract approach, try mimicking the patterns found in nature, such as the swirling shapes of clouds or the intricate details of shells. You can also draw inspiration from specific landscapes – think mountain ranges, sunsets, or starry skies.
To achieve these designs, use a mix of bold brushstrokes and delicate details. Don’t be afraid to experiment with different colors and layering techniques to create depth and dimension. Some popular materials for adding texture and interest include glitter, stickers, or even real leaves.
Some tips to keep in mind when creating whimsical nature-inspired designs: focus on capturing the essence of a particular element rather than trying to draw it exactly as you see it. This will help your design feel more fluid and organic. Additionally, don’t be afraid to get creative with color – a muted palette can often evoke a sense of calm and serenity, while bold colors can add energy and vibrancy.
Preparing Your Rocks for Painting
Before you start painting, it’s essential to prepare your rocks properly by cleaning and drying them thoroughly. This simple step will ensure a smooth finish and long-lasting design.
Cleaning and Smoothing the Surface
A smooth surface is essential for achieving a professional-looking finish on your painted rocks. Dirt, grime, and oils from the rock’s natural texture can interfere with paint adhesion, leading to uneven coats or peeling. To clean your rocks, start by gently scrubbing them with soap and warm water using a soft-bristled brush or a non-abrasive sponge. For particularly stubborn stains, mix baking soda and water to create a paste that won’t scratch the rock’s surface.
Once you’ve cleaned the rock, it’s time to smooth out any remaining imperfections. Use fine-grit sandpaper (220-320 grit) to gently buff away rough spots, taking care not to over-sand and expose the underlying stone. You can also use a rock tumbler or a rotary tool with a diamond-coated bit to polish the surface, but these methods may be more suited for larger rocks or those requiring extreme smoothing.
To avoid creating scratches or swirl marks, work in small circular motions and apply gentle pressure. If you’re new to sanding, practice on a spare rock to get a feel for the process before tackling your actual project. By taking the time to clean and smooth your rocks’ surfaces, you’ll be able to achieve vibrant, long-lasting paint jobs that bring your designs to life.
Drying Times and Preparing the Rock for Paint
Before applying paint to your rock, it’s essential to ensure it’s dry and prepared. The drying time will depend on the type of sealant or primer you’ve used. A general rule of thumb is to wait at least 24 hours after sealing or priming before painting. This allows the surface to fully cure and prevents any potential issues with paint adhesion.
If you’re using a spray-on sealant, it’s typically dry to the touch within a few minutes. However, it may take up to an hour for the surface to be completely dry. In contrast, if you’ve applied a brush-on primer, it can take anywhere from 2-4 hours to fully dry.
To prepare your rock for paint, make sure it’s free of dust and debris. Gently wipe down the surface with a soft cloth or brush to remove any remaining particles. This will ensure even paint adhesion and prevent any imperfections in your design.
When preparing your rock, consider the type of paint you’ll be using. Acrylic paints work well on smooth surfaces, while enamel paints are better suited for more textured areas.
Tips for Choosing the Right Size and Shape Rocks
When selecting rocks for painting, size and shape are crucial factors to consider. For simple designs like stripes or polka dots, a small to medium-sized rock (about 2-4 inches in diameter) is ideal. This allows the design to be bold and eye-catching without overwhelming the rock’s surface.
For more intricate designs, larger rocks (5-7 inches in diameter) can provide ample space for detailed work. However, keep in mind that bigger rocks may require more paint and drying time.
In terms of shape, round rocks tend to work best for most designs, as they provide a smooth surface area. But don’t dismiss flat or irregularly-shaped rocks entirely – these can add unique character to your designs.
When choosing the right rock size and shape, also consider the overall theme and style of your painted rock design. For example, if you’re creating a miniature landscape, a smaller rock with a more textured surface may be perfect. Conversely, if you want to create an abstract piece, a larger flat rock can provide endless possibilities.
A general rule of thumb is to choose rocks that are roughly symmetrical and have minimal imperfections – this will make your design stand out rather than competing with the rock itself.
Painting Techniques for Unique Effects
To create truly one-of-a-kind painted rocks, you’ll want to learn some creative painting techniques that add unique textures and effects. We’ll explore three innovative methods to get started.
Basic Stippling and Dotting Techniques
To create unique textures and patterns on your painted rocks, you can try basic stippling and dotting techniques. Stippling involves applying small dots of paint to create an image or design. You can use a toothpick or a small brush to achieve this effect. To get started, begin by selecting a pattern or image that suits the stippling technique.
For example, a simple geometric shape like a triangle or square can be created using stippling. Apply small dots in a uniform pattern, gradually building up the design as you go. You can also experiment with different dot sizes and spacings to create varying textures and effects.
Dotting is another basic technique that involves applying small dots of paint without creating an image. This technique is useful for adding subtle texture or visual interest to your designs. To try dotting, apply small dots of paint randomly across the rock’s surface using a toothpick or small brush. Experiment with different patterns and densities to create unique effects.
When working with stippling and dotting techniques, remember that patience is key. These techniques require time and attention to detail, but they can add a beautiful, handmade quality to your painted rocks.
Ombre Effect and Gradual Color Transitions
Achieving an ombre effect on a painted rock involves creating a gradual transition from one color to another. To start, you’ll need to mix two colors with distinct undertones. For instance, if you’re working with blues and purples, combine a light blue base coat with a small amount of purple to create a soft gradient. Apply the mixed paint in thin layers, starting at the top of the rock and gradually blending it down towards the bottom.
To maintain control over the ombre effect, work from light to dark and avoid applying too much paint at once. This will prevent muddying or streaking. You can also experiment with different brushstrokes, such as drybrushing or stippling, to achieve unique textures and visual interest within your color transition.
When planning your design, consider the shape and size of the rock. For example, a narrow ombre effect may work well on a long, thin rock, while a wider transition might suit a broader stone. Additionally, balance your ombre effect by pairing it with complementary colors or textures to create visual harmony.
Layering and Blending Different Colors
When layering and blending different colors, it’s essential to consider the color properties and how they will interact. Start by choosing a base coat that complements the dominant color in your design. For example, if you’re working with bright blues, choose a base coat of a slightly darker blue or neutral tone like gray.
Next, apply layers of transparent paint in thin coats, allowing each layer to dry before adding more. This will help prevent muddying and allow for crisp edges. To blend colors seamlessly, use soft brushstrokes to merge the edges of adjacent colors.
Consider using a wet-on-wet technique by applying one color directly over another while still damp. This creates subtle gradations and blends without harsh lines. Experiment with different ratios of paint to medium or water to achieve varying levels of transparency and saturation.
When blending colors, pay attention to the color wheel: analogous colors (next to each other on the wheel) will create harmonious transitions, while complementary colors (opposite each other on the wheel) can produce striking contrasts.
Advanced Techniques: Stencils, Masks, and More
Now that you’ve mastered the basics of painting rocks, it’s time to elevate your designs with advanced techniques like stenciling and masking. Let’s explore some creative ways to add intricate details to your artwork.
Using Stencils for Precise Designs
Using stencils is a fantastic way to achieve precise designs on your painted rocks. One of the most significant advantages of using stencils is their ability to produce intricate patterns and details with ease. For instance, if you’re looking to create a delicate floral design or a geometric pattern with fine lines, stencils are an excellent choice.
When selecting stencils for your project, consider the size and shape of your rock as well as the complexity of the design. A larger stencil may not fit on smaller rocks, while a more intricate design might require a smaller stencil to avoid overcrowding. Additionally, choose stencils made from durable materials that can withstand multiple uses.
To apply stencils effectively, place them onto the rock and secure them with tape or a small amount of paint. Use a credit card or similar tool to gently press the stencil into place, ensuring it’s flat against the rock surface. This technique will help prevent paint from seeping under the edges of the stencil, resulting in crisp, clean lines.
Creating Custom Painted Rock Stamps
To create custom painted rock stamps, you’ll need a few basic materials: soft, flexible rubber or silicone sheets, a craft knife or sharp utility blade, and a surface for carving. Start by sketching out your design on paper, considering the size and intricacy of the elements. Transfer this design onto the rubber sheet using a pencil, making sure to mirror it so that the image will be reversed when stamped.
Cut out the design carefully with the craft knife or utility blade, using gentle sawing motions. If you’re creating a multi-part stamp, consider separating the individual elements and arranging them on a separate piece of rubber for easier use. Once your stamps are cut, test them on a scrap rock to ensure they’re transferring evenly.
For best results, experiment with different materials – some artists find that softer rubbers produce smoother impressions while others prefer the more defined lines from harder silicones. Consider adding a small handle or grip to the stamp for easier handling and control. Keep in mind that custom stamps can be more detailed than store-bought options, making them perfect for intricate designs and patterns.
Using Paper Transfers for Intricate Details
When it comes to adding intricate details to your painted rock designs, paper transfers are a versatile and effective technique. You can create custom images using a cutting mat, craft knife, and printer. Simply print your design onto transfer paper, cut out the image, and apply it to the rock using a small brush or sponge. This method is ideal for adding fine lines, textures, or patterns that would be difficult to paint freehand.
For best results, use a high-quality transfer paper designed specifically for this purpose. You can also experiment with different printing techniques, such as layering or combining images, to achieve unique effects. To ensure the image adheres properly, apply a small amount of water or specialized adhesive and gently rub it in with your finger.
Some common uses for paper transfers include adding intricate patterns, floral designs, or even tiny quotes. You can also use them to create custom icons, symbols, or other decorative elements that add visual interest to your rock. When applying the transfer, be careful not to smudge or distort the image, as this can affect the overall appearance of your design.
Displaying Your Handiwork: Ideas and Tips
Now that you’ve created a beautiful painted rock, it’s time to showcase your handiwork. Here are some creative ways to display your designs for all to see!
Displaying Your Painted Rocks Indoors
When displaying your painted rocks indoors, consider the space and lighting where they’ll be placed. A well-lit area with gentle natural light is ideal for showcasing the colors and details of your artwork. Avoid placing them near direct sunlight or harsh artificial lighting that may cause fading or discoloration.
For a cohesive look, group similar-sized rocks together on a shelf or in a decorative bowl. You can also create a vignette by arranging rocks of varying sizes and shapes to add visual interest. Consider using a tray or pedestal to elevate the display, creating a sense of drama and emphasis.
To make your painted rock display more engaging, incorporate other elements like plants, shells, or small decorative objects that complement the colors and themes of your artwork. For example, pair rocks with ocean-inspired designs near a beach-themed vase or shell collection. This will help tie the entire space together and create a unique visual narrative. By thoughtfully curating your display, you can transform a plain room into a visually appealing and personalized space.
Creating a Rock Garden or Display
When creating a rock garden or display, consider the overall aesthetic you want to achieve. A natural, meandering path can lead visitors through the arrangement, while grouping similar colors or themes together creates visual interest. For example, a “mini-garden” theme might feature a cluster of rocks painted with tiny flowers, surrounded by smooth stones and greenery.
To add depth and dimension, incorporate varying heights and textures into your display. This can be achieved by placing larger rocks at the back and smaller ones in front, or by incorporating natural features like boulders or tree stumps. Consider the surrounding environment and choose a location that receives suitable sunlight and is protected from harsh weather conditions.
When arranging your rocks, think about creating focal points and visual flow. You can use a small number of statement pieces to draw attention to specific areas, while grouping smaller rocks together creates a sense of movement and energy. Experiment with different patterns and arrangements until you achieve the desired look – it’s often helpful to start with a loose plan and adjust as needed based on how the display evolves.
Selling Your Painted Rocks Online or In-Person
Consider consigning a few of your more intricate designs to local craft fairs or online marketplaces like Etsy. This can be a great way to monetize your creative talents and gain exposure for your work. When selling online, make sure to take high-quality photos from multiple angles, as well as capture details of any textured elements.
For online marketplaces, it’s essential to follow the platform’s guidelines for pricing and product descriptions. You’ll also want to research keywords relevant to your designs to optimize visibility in search results. On Etsy, consider using specific tags like “painted rock art” or “hand-painted stone decoration.”
If you prefer selling in-person, focus on local events that attract a crowd interested in handmade goods. Be prepared to discuss the inspiration behind each design and how you achieved certain effects. Consider offering custom orders or commissions to attract repeat customers.
When pricing your work, factor in time spent creating each piece, as well as materials used. You may also want to consider offering discounts for bulk purchases or loyalty programs to incentivize repeat sales.
Troubleshooting Common Issues
We all know that even the most seasoned rock painters can encounter problems, so let’s tackle some of the common issues you might face when designing and painting your rocks.
Over- or Under-Saturation: How to Balance Color
When working with colors on small surfaces like painted rocks, it’s easy to over- or under-saturate a design. This can lead to an overpowering or washed-out look. To achieve balance, consider the 60-30-10 rule: allocate 60% of the rock’s surface to a dominant color, use 30% for a secondary hue, and reserve 10% for accent colors.
A well-balanced design often starts with a subtle base coat. Use a lighter shade to cover the entire rock, then build up layers with more saturated colors. This approach helps prevent overwhelming the viewer’s eye. For example, if you’re creating a nature-inspired scene, use a soft blue or green as your base, then add richer tones for foliage and darker shades for tree trunks.
Pay attention to the size of the design elements in relation to the rock’s surface area. Tiny designs can quickly become overwhelming on small rocks, while large designs may get lost on larger surfaces. Experiment with different compositions to find a balance that works for your specific project. If you’re unsure, start with a simple design and gradually add more colors or details until you achieve the desired effect.
Tips for Fixing Mistakes and Imperfections
When mistakes happen on a painted rock, it’s essential to act quickly to minimize their impact. Start by assessing the mistake and determining the best course of action. For small errors, such as uneven paint or minor smudges, a touch-up with a fine brush and matching paint can be sufficient.
For more significant issues, like paint drips or pooling, use a craft knife to carefully scrape off excess paint. Be cautious not to scratch the rock’s surface. If you’re dealing with an over-saturated area, try applying a thin layer of clear varnish to seal it in. This will help prevent further damage and create a more even finish.
If you’ve made a mistake during the painting process, consider using a paper towel or soft cloth to gently blot the affected area before attempting to correct it. Avoid rubbing or scrubbing, as this can spread the mistake further. Remember that sometimes, less is more – instead of trying to cover up an error entirely, focus on subtly blending the area with surrounding colors.
To avoid mistakes in the first place, always work in a well-ventilated area and use gloves to prevent oils from your skin affecting the paint’s adhesion.
Frequently Asked Questions
Can I use acrylic paint on any type of rock?
Yes, but it’s essential to ensure the rock is smooth and dry before applying paint. This will prevent peeling or flaking off over time.
How long does it take for a painted rock to fully cure and be water-resistant?
The curing time depends on various factors, including temperature, humidity, and type of paint used. As a general guideline, allow at least 24-48 hours for the paint to dry completely before exposing your rocks to moisture or extreme temperatures.
What if I’m not comfortable with free-hand painting? Can I still create unique designs?
Yes! Using stencils, masks, or even paper transfers can help you achieve intricate designs without requiring extensive artistic skills. These techniques are covered in more detail in the article’s Advanced Techniques section.
Can I sell my painted rocks online, and what platforms should I use?
Yes, many online marketplaces allow selling handmade goods like painted rocks. Popular options include Etsy, eBay, and social media platforms like Instagram or Facebook Marketplace. When choosing a platform, consider your target audience and the type of designs you’re creating.
How do I prevent my painted rocks from fading over time, especially when exposed to sunlight?
To minimize fading, use high-quality paint specifically designed for outdoor use and apply a clear sealant once the paint is fully dry. This will provide an extra layer of protection against UV rays and extend the lifespan of your designs.

