
Spring is finally here, bringing with it the perfect excuse to shake off the winter blues and get creative. As the days grow longer and sun shines brighter, our homes can feel dull and stale after months of indoor hibernation. But with a few simple crafts, you can transform your space into a vibrant reflection of the season’s beauty. From delicate paper flower arrangements that add a touch of whimsy to your living room, to DIY decorations that capture the essence of spring’s renewal, there are countless ways to brighten up your home with seasonal crafts. In this article, we’ll explore some creative ideas perfect for spring enthusiasts of all ages, from easy-to-make decorations to more intricate paper flower arrangements. By the end of it, you’ll be equipped with inspiration and practical tips to make your home shine like a blooming garden in full bloom.
Welcoming Spring with DIY Decorations
As we welcome the warmth and vibrancy of spring, let’s add a personal touch to our homes with some delightful DIY decorations that are easy to make and bring in the season’s charm. From colorful flowers to whimsical wreaths, get creative!
Decorating Your Porch with Fresh Flowers
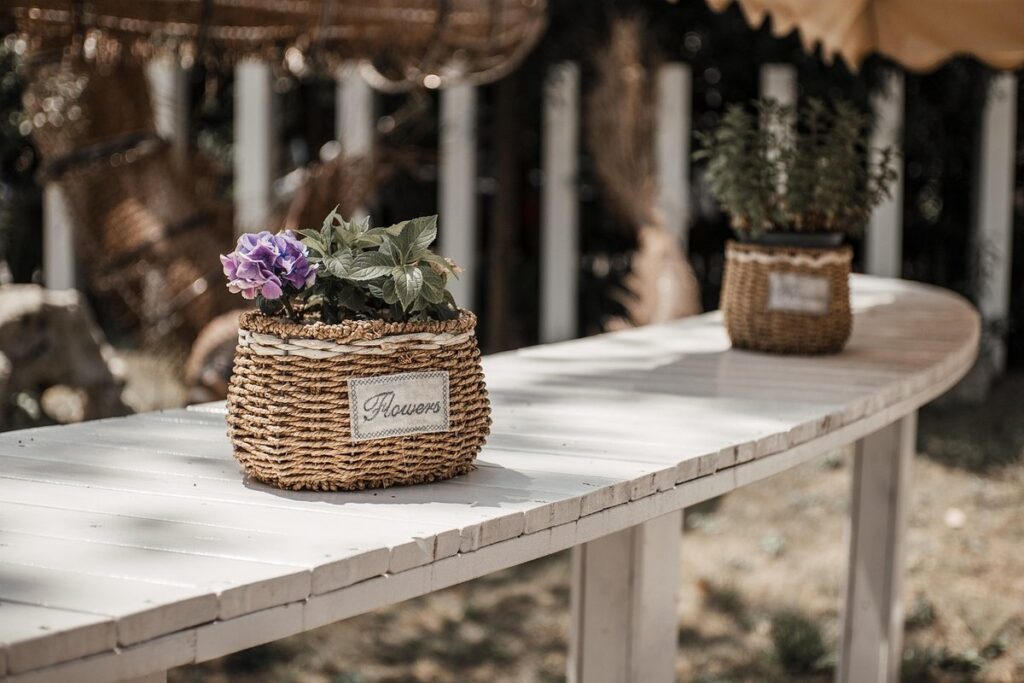
When decorating your porch with fresh flowers, consider the overall aesthetic you want to achieve. For a classic look, pair simple vases with single stems of tulips or daffodils. Alternatively, create an elaborate arrangement by combining multiple blooms and greenery in a large vase or urn.
To add depth and texture, incorporate various shapes and sizes of containers. Fill small terracottas with violas or pansies for a whimsical touch, while larger planters can showcase more dramatic arrangements like peonies or hydrangeas. Consider grouping vases and planters in odd numbers to create visual interest.
For an effortless yet striking look, use greenery as the primary focus. Place a few sprigs of fresh rosemary or eucalyptus in a small vase or attach them directly to your porch railing using floral wire. This adds fragrance and a subtle pop of color without overwhelming the space.
When working with fresh flowers, remember that their natural beauty lies in their imperfections. Avoid overly pruning or perfecting each stem – instead, let their unique shapes and quirks shine through. By embracing the organic charm of seasonal blooms, you’ll create a porch decor that’s both beautiful and inviting.
Spring-themed Wreaths for Your Front Door
You can create a beautiful and welcoming spring-themed wreath for your front door using materials like paper flowers, ribbons, and pastel-colored decorations. These DIY wreaths are perfect for reflecting the renewal of spring and adding a pop of color to your home’s exterior.
To make a simple paper flower wreath, start by cutting out petal shapes from colored paper or cardstock in various shades of pink, yellow, and blue. Use a hot glue gun to attach the petals to a wire or foam base, arranging them in a circular pattern. Add some green leaves made from paper or foil for a finishing touch.
For a more elaborate look, try using ribbons and bows in pastel colors to create a layered effect. Simply tie the ribbons around the door frame or wreath form, overlapping them slightly to achieve a full and lush appearance. You can also add some decorative picks or flowers made from felt or fabric for added texture.
Some popular materials for spring-themed wreaths include:
• Pastel-colored flowers made from paper or foam
• Ribbons in soft colors like pale pink, baby blue, and mint green
• Decorative picks with floral motifs or spring-themed designs
• Felt or fabric flowers in various sizes and shapes
Crafting a Spring-inspired Welcome Mat
Create a personalized welcome mat with DIY stencils, paint, or decoupage techniques that add a pop of color to your entryway. Spring is an excellent time to refresh your home’s exterior and make a great first impression on guests.
To get started, gather materials such as a plain welcome mat, acrylic paint, or decoupage glue, along with any stencils or designs you’d like to use. You can also repurpose items like old book pages, flower pressings, or even hand-painted ceramics for added texture and visual interest.
For a spring-inspired look, consider using pastel colors or soft florals in your design. Stencil out simple shapes like leaves or flowers, or use decoupage to adhere small images of blossoms or branches onto the mat. If you’re feeling more adventurous, try hand-painting a custom message or phrase, such as “Welcome Spring” or “Blooming Beautiful.”
When choosing materials and colors, remember that your welcome mat will be exposed to the elements, so select items that are durable and weather-resistant. This is also an opportunity to express your personal style and add some whimsy to your entryway – have fun with it!
Seasonal Crafts for Indoor Spaces
Spring is a perfect time to refresh your indoor spaces, and one of the best ways to do that is by creating beautiful seasonal crafts that bring warmth and personality to any room. From wreaths to wall hangings, we’ve got some fantastic ideas for you!
Paper Flower Arrangements for Your Living Room
To create stunning paper flower arrangements for your living room, explore various techniques for crafting realistic flowers and foliage. Start by mastering basic paper folding and cutting skills to achieve natural curves and textures. Experiment with different paper types, such as cotton or vellum, to capture subtle color nuances.
For a cohesive look, choose a limited palette of colors that evoke springtime – soft pinks, baby blues, and mint greens are popular choices. Consider adding some greenery like eucalyptus or ferns to bring depth and freshness to the arrangement. You can also add decorative elements like ribbons or beads to enhance visual interest.
When creating a paper flower arrangement, balance scale and proportion by mixing large blooms with smaller ones. For a more dynamic look, experiment with different shapes and sizes of flowers. To achieve a sense of movement, place stems at varying heights and angles within the arrangement.
Hand-painted Spring-themed Canvas Art
When working with canvas art, you can use a variety of materials and techniques to create unique spring-themed pieces. Acrylic paints are a popular choice for their vibrant colors and fast-drying properties, allowing you to layer colors quickly and achieve bold effects. You can also incorporate stencils into your design, either store-bought or hand-made using cardstock or acetate sheets.
For an even more natural look, consider using materials found outdoors like leaves, twigs, or flower petals as stamps or textures on the canvas. Simply apply a thin layer of paint to the back of the material and stamp it onto the canvas for a unique design element. This approach not only celebrates spring’s beauty but also reduces waste by repurposing natural elements.
To add an extra dimension to your art, experiment with different brushstrokes or use household items like sponges or cloth to create textured patterns. When working with natural materials, be sure to seal the canvas with a varnish once complete to protect it from fading or damage.
Spring-inspired Terrariums for Your Kitchen Table
Miniature gardens in glass containers have long been a staple of indoor decor, but they take on a new charm when infused with spring’s vibrant colors and textures. To create a spring-inspired terrarium for your kitchen table, start by selecting a clear glass container that will allow the beauty of the plants to shine through.
Choose low-maintenance plants like succulents or mosses that thrive in indoor conditions and can tolerate varying levels of light. Add some decorative rocks or pebbles at the bottom of the container for drainage and visual interest. Next, select a few small spring-themed decorations such as tiny ceramic flowers, miniature garden figurines, or even a small wooden bird to add personality to your terrarium.
For a pop of color, consider adding a handful of pastel-colored glass beads or a few sprigs of fresh greenery like eucalyptus or ferns. Finally, arrange the plants and decorations in a way that creates visual balance and harmony within the container. To ensure the longevity of your terrarium, avoid overwatering and provide sufficient indirect light. With proper care, your spring-inspired terrarium will become a delightful focal point on your kitchen table, bringing the beauty of nature indoors all season long.
Outdoor Crafts for Gardening Enthusiasts
If you’re a gardening enthusiast, get ready to take your passion to the next level with these creative outdoor crafts that bring life and beauty to your garden. From planters to trellises, create something truly special.
Garden Markers Made from Recycled Materials
When repurposing old items for garden markers, start by gathering materials like mason jars, wooden dowels, and metal tags. These can be transformed into unique markers that add a personal touch to your garden. To create a marker from a mason jar, label the jar with the plant’s name using a paint pen or a permanent marker.
You can also use old wooden dowels as stakes for plant labels. Cut the dowel to the desired length and write the plant’s name on it with a marker. Alternatively, attach metal tags to the stake using wire or string. This is a great way to reuse materials you might otherwise throw away.
In addition to these materials, consider using old coins, buttons, or other small items as markers. Simply tie them to a stake or attach them to a plant tag using string or wire. These decorative markers can add a whimsical touch to your garden and make it easier to identify different plants. Be creative with the materials you use and have fun repurposing old items into functional and decorative garden markers.
DIY Birdhouses and Feeders Using Natural Materials
Crafting bird-friendly homes is a wonderful way to attract these feathered friends to your garden. You can create DIY birdhouses and feeders using natural materials like reclaimed wood, twigs, and pinecones that blend seamlessly with your garden’s surroundings.
Reclaimed wood is an excellent choice for building birdhouses because it provides a sturdy structure while also being eco-friendly. Simply collect wooden planks from old pallets or fencing, and assemble them into a house shape. Add a roof made from a piece of cedar or cypress wood to protect the birds from harsh weather conditions.
To create a feeder, gather twigs and branches of varying sizes and arrange them in a tree or on a pole. Tie the structure together with twine or wire, leaving space for a small tray or dish to hold seeds or nuts. This will attract birds like finches and sparrows that love to feed on these treats.
When building your birdhouse or feeder, consider adding some decorative touches like pinecones, shells, or leaves to give it a natural, earthy look. You can also hang them in different locations around the garden to create a sense of exploration for the birds.
Upcycled Planters for Your Spring Garden
When it comes to adding a personal touch to your spring garden, upcycled planters are an excellent choice. By repurposing old containers like plastic bottles, cardboard tubes, or wooden crates, you can create unique and eco-friendly planters that add visual interest to your garden beds.
Start by collecting various materials around the house or scavenging at local thrift stores. Clean and dry the containers thoroughly before decorating them with paint, markers, or decoupage glue. For a rustic look, consider leaving some of the original surface intact and adding embellishments like twine or ribbons.
To ensure your upcycled planters are functional, make sure to drill drainage holes in the bottom and add a layer of gravel for better water retention. Some popular container options include:
- Plastic bottles with the bottom cut off and the neck transformed into a mini-greenhouse
- Cardboard tubes from paper towel rolls or toilet paper rolls, which can be lined with plastic bags for added durability
- Wooden crates or pallets, perfect for creating larger planters for shrubs or perennials
Remember to get creative with your designs and have fun experimenting with different materials and techniques. Your upcycled planters will not only add a touch of personality to your garden but also help reduce waste and promote sustainability.
Seasonal Crafts for Kids and Families
Bring springtime joy into your home with these fun and easy seasonal crafts that are perfect for kids of all ages to enjoy together as a family. From flower crowns to paper plate butterflies, get creative!
Paper Plate Butterflies and Flowers
Creating paper plate butterflies and flowers is a delightful way to introduce kids to spring-themed crafting. Start by gathering materials: paper plates, scissors, glue, markers, and construction paper in various colors. For the butterflies, cut out two wing shapes from the paper plate, leaving a small tab at the top for attaching antennae. Cut antennae from pipe cleaners or straws and attach with glue. Use markers to add eyes and veins.
For flowers, cut out petal shapes from construction paper and help kids arrange them on the plate. Glue in place and add a center using a paper circle or a small button. You can also use real flower petals for added realism. To create a bouquet, have kids assemble multiple flowers on a single plate or attach them to a stick.
Tips: Use bright colors to capture the essence of spring, and consider adding some greenery like leaves or stems to enhance the display. This project is perfect for little ones as it requires minimal supervision and allows for creative freedom. As you work on these crafts, encourage kids to experiment with different shapes, sizes, and colors to create unique pieces that reflect their personality.
Spring-themed Sensory Bottles for Kids
Creating spring-themed sensory bottles for kids is a fun and engaging activity that can stimulate their minds and senses. You can fill these bottles with various materials such as water, oil, beads, rice, or sand to create unique textures and visual effects. For example, you can add some green food coloring to water and mix in some small plastic flowers or beads to create a spring-inspired scene.
Some other materials you can use include glitter, sequins, or even tiny toys like mini cars or animals. You can also experiment with different shapes and sizes of bottles to create varying effects. For instance, using a tall, clear bottle filled with colored water and small beads can create a beautiful, flowing effect when the light passes through it.
When making these sensory bottles, remember to use materials that are safe for children to handle and won’t pose any choking hazards. You can also involve your child in the process of selecting the materials and designing their own unique bottle. This will not only make it more enjoyable but also help them develop their creativity and problem-solving skills.
Family-friendly Outdoor Activities Using Natural Materials
Get your kids outside and exploring nature with these family-friendly outdoor activities using natural materials. Scavenger hunts are a great way to encourage kids to interact with their surroundings, whether it’s searching for specific types of leaves or counting the number of different bird species seen on a single outing.
For younger children, try creating a simple nature scavenger hunt list that includes items like rocks, sticks, and flowers. You can also hide small objects around the yard or a nearby park for kids to find. For older kids, consider a more complex scavenger hunt with clues and riddles that lead them on an adventure through nature.
Other outdoor activities include bird-watching, where you can set up a simple binoculars station in your backyard or visit a local bird sanctuary. You can also try exploring nearby streams or ponds to see what types of aquatic plants and animals live there. To make these activities even more engaging, consider creating a nature journal with kids to record their observations and draw pictures of the things they see. This encourages critical thinking and creativity while promoting an appreciation for the natural world.
When setting up your outdoor activities, be sure to provide kids with any necessary materials, such as binoculars or magnifying glasses, and encourage them to collect items like leaves or rocks in a designated area.
Advanced Spring Crafting Techniques
Now that you’ve mastered the basics, let’s take your spring crafting skills to the next level by exploring some advanced techniques to add depth and sophistication to your projects. From intricate embroidery to delicate paper flowers, we’ll show you how.
Natural Dyeing Methods for Your Fabrics and Papers
When exploring natural dyeing methods, you can use a variety of plants and spices to create unique colors on fabrics and papers. For instance, turmeric produces a vibrant yellow hue, while indigo leaves yield a deep blue color. You can also experiment with flowers like marigold and pomegranate rinds for their respective shades of orange and pink.
To get started, you’ll need to prepare your natural dyes. This may involve boiling or simmering the ingredients in water to extract their pigments. Once the dye is ready, you can submerge your fabrics or papers into it, allowing them to steep until the desired color intensity is achieved.
Some plants, like beets and berries, also produce intense colors when cooked down. Be sure to use gloves when handling these ingredients, as their juices can stain skin. Keep in mind that natural dyes may not have the same level of colorfastness as synthetic dyes, which means they might fade over time when exposed to light or washing.
If you’re new to natural dyeing, it’s a good idea to start with small test batches to gauge the results and make adjustments as needed.
Mixed Media Collage Techniques Using Spring-themed Materials
To create intricate collages that reflect the beauty of spring, you can combine various materials like paper, fabric, and natural elements. Start by gathering a range of textures and colors that evoke the season’s freshness. Consider using watercolor paper for its soft, absorbent quality or scrapbook paper with floral patterns to add visual interest.
Natural elements like leaves, twigs, and flowers can be incorporated into your collage to bring an organic feel. You can also use fabric scraps in pastel shades or incorporate lace trim to add a delicate touch. When combining materials, think about how they relate to each other in terms of texture, color, and shape.
To create depth and dimension, experiment with layering different materials. For example, you could adhere a piece of watercolor paper to a canvas using a decoupage medium, then add fabric scraps or natural elements on top. Alternatively, use a gel medium to attach lightweight materials like tissue paper or vellum to create translucent layers.
Some specific techniques to try include:
- Using a mixture of matte and glossy papers to create contrast
- Incorporating yarn or thread to add texture
- Experimenting with different adhesives, such as decoupage medium or gel medium, to achieve unique effects
Advanced Paper Crafting with Hand-made Stencils
Creating realistic flowers, leaves, and other designs with hand-made stencils requires a combination of patience, attention to detail, and practice. To get started, you’ll need some basic materials like paper, cardstock, scissors, and a craft knife or X-Acto knife. You can also use everyday objects like old credit cards, bottle caps, or leaves as stencil templates.
Begin by designing your stencil on paper, taking note of the intricate details and textures you want to capture. For instance, a realistic flower might require stencils for individual petals, center pieces, and stems. Cut out each component carefully, using a craft knife or scissors to achieve clean edges. You can also use a cutting mat to help guide your cuts.
To add an extra layer of realism, experiment with combining different materials like paper, fabric, or even natural fibers like leaves or grasses. For example, you could create a stenciled flower with hand-cut petals and a center made from a small piece of fabric or a real leaf. This technique is ideal for adding intricate details to your crafts without sacrificing precision.
Frequently Asked Questions
Can I use natural materials for paper crafting if I have sensitive skin?
Yes, it’s essential to choose natural materials that are gentle on the skin. When working with leaves, twigs, or other plant-based materials, make sure to wash them thoroughly before using them in your crafts. This will minimize any potential irritation and ensure a safe creative experience.
How can I prevent my DIY decorations from getting damaged by weather conditions?
To extend the life of your outdoor decorations, use UV-resistant materials whenever possible. Also, consider applying a clear coat or sealant to protect against moisture and extreme temperatures. Regularly inspect your decorations for signs of wear and tear, making necessary repairs promptly.
Can I make natural dyes using plant-based ingredients in large quantities?
While it’s technically possible to scale up your natural dyeing process, keep in mind that working with larger quantities can be more challenging and may require additional equipment or precautions. Start by testing small batches to ensure the desired color results and to avoid any potential accidents.
What if I’m new to crafting and don’t have experience with paper flower arrangements?
Don’t worry – creating realistic flowers is all about practice! Begin with simple tutorials and gradually move on to more complex designs as you gain confidence. Experiment with different techniques, materials, and tools until you find what works best for you. Online resources and craft communities can also provide valuable guidance and inspiration.
How do I store my DIY crafts and decorations during the off-season?
Proper storage is crucial to maintaining your creations’ condition over time. Store delicate or fragile items in protective containers or wrap them carefully before placing them away from direct sunlight and moisture. Label each container with its contents, so you can easily identify what’s inside when you need it next season.

