
Creating a Christmas wreath is one of the most beloved holiday traditions, adding a touch of warmth and personality to any home. However, store-bought wreaths can be expensive and lack the personal charm that comes with making your own DIY Christmas wreaths. With a few simple materials and some basic crafting skills, you can create stunning and unique decorations for your front door, mantel, or even as a centerpiece for your dining table.
In this guide, we’ll walk through the process of making your own Christmas wreaths, covering the essential shapes, materials, and decorating ideas to bring out the best in your creation. From evergreen branches and pinecones to ribbons and ornaments, we’ll cover everything you need to know to create a beautiful DIY Christmas wreath that reflects your personal style and adds a special touch to your holiday decor. By the end of this guide, you’ll have the skills to craft a gorgeous and one-of-a-kind DIY Christmas wreath that will be a highlight of your holiday season.
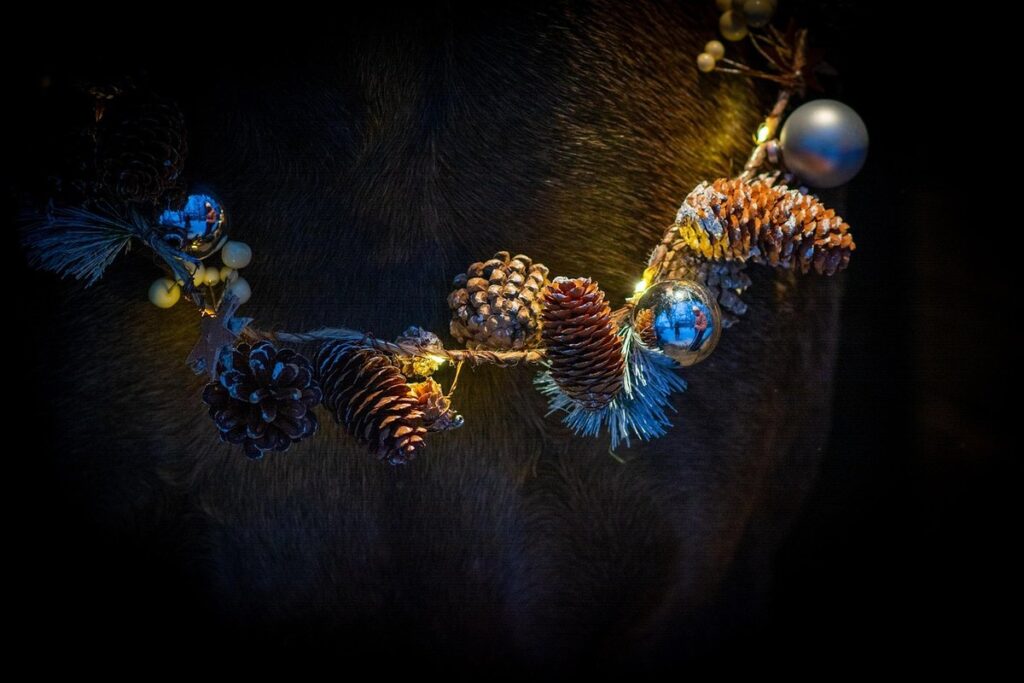
Understanding the Basics of a Perfect Wreath
A perfect Christmas wreath starts with a solid foundation, so let’s begin by understanding what makes one truly special and how to create that signature look. We’ll cover the essential elements of a stunning DIY wreath.
Choosing the Right Shape and Size
When choosing a wreath shape and size, consider the space where it will be hung. Small doors require compact wreaths that don’t overwhelm the area. Opt for circular shapes with diameters between 12 to 18 inches or choose oval designs measuring about 15 by 10 inches.
For larger spaces like walls or expansive entryways, you can go bigger. Rectangular wreaths are suitable for these areas, with dimensions typically ranging from 24 to 36 inches wide and 6 to 8 inches deep. You can also experiment with oversized circular wreaths, measuring up to 30 inches in diameter.
Keep in mind that the size of your wreath will also affect how full it looks when decorated. A smaller wreath may appear too sparse if it’s not densely packed with greenery and decorations. Conversely, a large wreath can easily accommodate more embellishments without looking cluttered.
When deciding on a shape, think about the architectural style of your home and the surrounding decor. For example, if you have a traditional or classic-style door, an ornate oval wreath may complement it nicely.
Selecting Materials for Your Wreath
When selecting materials for your wreath, you’ll want to choose items that reflect your desired theme and style. Evergreen branches are a classic choice for Christmas wreaths, offering a fragrant and festive touch. Consider using fir or spruce branches for their full, lush texture.
Flowers can add a pop of color and whimsy to your wreath. Choose flowers that match the season, such as poinsettias or holly berries, for an authentic look. Fruits like cranberries, oranges, or apples can also be used for added visual interest. When incorporating fruits, consider their texture and size to ensure they fit harmoniously with other elements.
Ribbons are a versatile material that can add both function and aesthetics to your wreath. Use them to create a bow, tie on decorations, or even as a base layer for more elaborate designs. Choose ribbons in seasonal colors like red, green, or gold to reinforce the holiday theme. When selecting materials, remember to balance texture, color, and shape to create a visually appealing and cohesive look that reflects your personal style.
Gathering Essential Supplies and Tools
To make a beautiful DIY Christmas wreath, you’ll need some basic supplies and tools to get started. Gather these essentials before diving into the crafting process!
Must-Have Items for Your Crafting Station
When creating a crafting station for making DIY Christmas wreaths, you’ll want to have essential supplies and tools within arm’s reach. Floral wire is a must-have item, as it provides structure and support for your wreath design. Choose from various types of floral wire, such as green or brown, to complement the color scheme of your project.
Scissors are another crucial tool for cutting and trimming various materials like burlap, ribbon, or foliage. Invest in good-quality scissors that can handle thick and thin materials. A hot glue gun is also necessary for attaching heavier items like pinecones, ornaments, or decorative accents.
Other must-have items include wire cutters, a craft mat or work surface, and a pair of tweezers for precise placement of small elements. A tape measure or ruler can help you achieve even spacing and balance in your design. Keep your crafting station well-organized by storing supplies in designated containers or trays to avoid clutter and make the creative process more efficient.
Optional Materials for Unique Touches
You can take your DIY Christmas wreath to the next level by incorporating unique materials. Consider adding a few pinecones for a rustic touch, or use decorative picks with berries or flowers to create a pop of color. These extras not only add visual interest but also allow you to personalize your wreath.
When working with pinecones, be sure to gently press them into the greenery to secure them in place. This helps prevent them from falling out over time and ensures they stay looking their best throughout the holiday season. You can also experiment with different types of pinecones, such as small ones for a more delicate look or larger ones for a statement piece.
In addition to pinecones, other items you might consider using include ribbons, garlands, or even ornaments. These can be draped over the wreath in a loose bow or tied onto individual branches for added texture and interest. When choosing materials, remember that less is often more – too many embellishments can overwhelm your wreath and detract from its overall beauty.
Creating the Base of Your Wreath
Start by selecting a sturdy base for your wreath, such as a grapevine wreath form or a wire frame, to provide a solid foundation for your decorations. This will make it easier to shape and hold your design in place.
Working with Evergreen Branches
Start by grasping a small bunch of evergreen branches and gently squeeze them together to create a loose cluster. This will give you a sense of how they’ll hold their shape once attached to your wreath base. Hold the cluster against your wreath form or a Styrofoam ring, and begin to arrange the branches in a way that creates a balanced and visually appealing pattern.
As you work with evergreen branches, remember that fir tips face outward for maximum visibility. You can also use spruce or cedar if you prefer their scent and texture. Hold each branch against your wreath form, experimenting with different orientations until you find one that looks harmonious to you. Typically, a small minority of the stems will need to be trimmed slightly to create a more cohesive look.
For a lush base, focus on distributing the branches evenly around the wreath form. Avoid overcrowding in some areas and sparse spots elsewhere; instead, aim for a consistent layering effect that gives your wreath depth and texture. Use floral wire or twine to secure any stray stems as you go, but be gentle not to damage the foliage.
Integrating Flowers and Fruits into Your Design
When adding flowers and fruits to your wreath design, consider their textures and colors to create a visually appealing combination. Fresh eucalyptus leaves add a silvery sheen, while red cranberries provide a pop of color. You can use a mix of artificial and real elements for a more realistic look. For example, combine dried hydrangeas with fresh rosemary sprigs for a contrasting texture.
To incorporate flowers effectively, choose ones that are in season and have a long vase life to minimize maintenance. Roses, carnations, and baby’s breath are popular choices during the winter months. When selecting fruits, consider their size and shape – small items like cranberries and pinecones work well for filling gaps between branches.
For a cohesive look, balance your flowers and fruits with plenty of greenery. This will help prevent overcrowding and create visual interest. To secure loose elements like berries or small flowers, use floral wire or twine to attach them to the wreath base. Experiment with different arrangements to find a combination that suits your design style.
Adding Embellishments and Finishing Touches
Now that you’ve created your wreath base, it’s time to add some personality and flair with decorative items like ribbons, bows, and other embellishments. Let’s get creative with these finishing touches!
Using Ribbons and Bows to Add Personality
When choosing ribbons and bows for your DIY Christmas wreath, you can add personality with a variety of textures and colors. Grosgrain ribbons are great for adding a rustic touch, while satin ribbons create a more elegant look. Burlap ribbons and twine add a homespun feel, perfect for country-themed wreaths.
You can also mix and match different types of ribbons to achieve a unique look. For example, pair a rich red satin ribbon with a natural burlap ribbon for a striking contrast. Consider the theme or color scheme of your holiday decor when selecting ribbons. For instance, if you’re going for a vintage-inspired look, opt for ribbons in muted colors like dusty rose or moss green.
To add an extra layer of personality to your wreath, use decorative bows as accents. You can tie them around ornaments or use them as a finishing touch on the end of a branch. Experiment with different bow sizes and shapes to create visual interest. By incorporating a mix of ribbons and bows in various textures and colors, you’ll add a personal touch to your DIY Christmas wreath that’s sure to impress.
Incorporating Decorative Elements for a Unique Look
When it comes to making a DIY Christmas wreath truly stand out, incorporating unique decorative elements is key. Consider adding pinecones, fresh or artificial berries, or even shells to give your wreath a distinctive look. These natural materials can add texture and interest, and their seasonal associations will further enhance the festive feel of your creation.
For added depth and visual appeal, try layering different textures. For example, you could pair smooth pinecones with the delicate, papery appearance of seed pods or the softness of dried flowers. When selecting decorative elements, think about the color palette and overall aesthetic of your wreath. Berries, for instance, come in a range of colors – from vibrant red to deep purple – that can add pops of color to an otherwise monochromatic design.
To incorporate these elements effectively, start by gathering your materials and experimenting with different arrangements. Don’t be afraid to try out unusual combinations or pair seemingly disparate items together – it’s often the unexpected juxtapositions that yield the most intriguing results. By embracing unique decorative elements, you’ll infuse your DIY Christmas wreath with personality and make it truly unforgettable.
Displaying and Preserving Your Wreath
Now that you’ve finished crafting your beautiful Christmas wreath, let’s talk about how to showcase it at its best and ensure it remains a stunning addition to your home all season long.
Tips for Long-Lasting Fresh Wreaths
To keep a fresh wreath looking vibrant throughout the holiday season, it’s essential to maintain its moisture levels. You can do this by regularly misting the arrangement with water. Spray a fine mist over the foliage and flowers, but avoid getting the wire or foam base wet, as this can cause damage.
Another crucial tip is to choose the right type of materials for your wreath. For example, using eucalyptus or ferns will help keep your wreath fresh longer than using evergreen branches like fir or spruce. These latter types tend to dry out quickly and may require more frequent misting.
You should also avoid placing your wreath in direct sunlight or near heat sources, as this can accelerate drying. If possible, position it in a shaded area or use a sheer curtain to filter the light. By following these simple tips, you can keep your DIY Christmas wreath looking its best throughout the holiday season.
Ideas for Indoor and Outdoor Placement
Consider placing your finished wreath near a front door to create an inviting first impression for guests. A brightly lit entryway can make the colors and textures of your wreath stand out even more. Alternatively, you might choose to hang it above a mantel or on a wall as a festive centerpiece. When choosing an indoor spot, keep in mind that a wreath with artificial flowers may shed some petals over time.
For outdoor use, a sturdy wreath can add charm to your porch or patio railing. To protect your creation from the elements, ensure that any wire or foam base is securely attached to the frame and consider applying a waterproof sealant or clear coat. Hanging your wreath in a covered area like an awning or overhang can also help shield it from direct sunlight and rain. Just be sure to check local regulations before displaying anything outside your home during the holiday season.
Troubleshooting Common Issues and Mistakes
We’ve all been there: a tangled mess of evergreen branches, a squished bow, or an unbalanced wreath shape. Don’t worry, we’ll walk you through common issues and mistakes to avoid.
Identifying Potential Problems with Your Wreath Design
When working on your DIY Christmas wreath design, it’s not uncommon to encounter issues with uneven branches or loose materials. To address these problems, start by examining each component individually. Check if any branches are bent or crooked, which can disrupt the overall shape of the wreath. Consider gently shaping or trimming them to achieve a more balanced look.
Loose materials, such as greenery or decorations, can also detract from your design. Inspect your wreath for any areas where components seem loose or precarious. Secure these elements by tying them in place with floral wire or twine, taking care not to over-tighten and damage the surrounding material.
Some common issues arise when using certain types of foliage. For example, fir branches can become brittle and prone to breakage if not handled carefully. Similarly, pinecones may fall off due to their weight or design choice. To mitigate these problems, choose materials that complement each other in terms of texture and flexibility, and use a sturdy base for added stability.
By addressing these potential problems early on, you can refine your design and create a cohesive, visually appealing Christmas wreath that enhances your home’s holiday decor.
Tips for Making Repairs and Adjustments
As you work on your DIY Christmas wreath, it’s inevitable that you’ll encounter some issues or mistakes. Perhaps a branch broke off during assembly, or maybe the glue didn’t dry as expected. To salvage your project, it’s essential to know how to make repairs and adjustments on the fly.
One common issue is unevenly spaced decorations. To fix this, simply gently twist the items apart and reattach them to the desired position. Another problem might be a loose wire or twine holding the wreath together. In this case, try wrapping additional wire around the stem of the branch to secure it in place.
For more substantial repairs, like broken branches or torn ribbons, you can use floral tape or hot glue to reinforce the area. Be cautious not to add too much weight, which could cause the entire structure to collapse. When adjusting the overall shape, consider removing and re-attaching individual elements rather than trying to reshape the entire wreath.
Frequently Asked Questions
Can I reuse evergreen branches for multiple wreaths?
Yes, evergreen branches can be reused for multiple wreaths by simply cleaning and drying them after use. This is a great way to reduce waste and make your DIY project more sustainable.
How do I prevent my fresh wreath from drying out too quickly?
To keep your fresh wreath looking vibrant throughout the holiday season, ensure that you choose evergreen branches with a high moisture content and store them in a cool, humid environment before assembling the wreath. You can also mist the wreath regularly to maintain its freshness.
What if I accidentally damage my wreath while displaying it – how do I fix it?
If your wreath gets damaged, don’t worry! Simply assess the extent of the damage and repair or replace the affected area as needed. For minor issues like loose materials or uneven branches, you can use floral wire or hot glue to make quick repairs.
Can I make a wreath with non-traditional materials, such as recycled items?
Absolutely! One of the best things about making your own DIY Christmas wreaths is that you can get creative and experiment with unique materials. Consider using recycled items like old ornaments, cardboard tubes, or even fabric scraps to add a personal touch to your design.
What’s the best way to display my wreath on a front door that gets direct sunlight?
To ensure your wreath looks its best on a front door exposed to direct sunlight, consider using UV-resistant materials or placing the wreath in a shaded area during peak sun hours. You can also use a wire or foam base to provide extra support and prevent damage from wind or weather conditions.

