
Canning pears in light syrup is a simple yet effective way to preserve fresh fruit for months to come. Not only does this method allow you to enjoy your favorite varieties year-round, but it’s also a great way to reduce food waste and stock up on healthy snacks. The process itself is quite straightforward, involving selecting the right type of pear, preparing them for canning, and following safe procedures to ensure that your jars are properly sterilized and sealed. By the end of this guide, you’ll have learned how to select the perfect pears for canning, prepare them correctly, and safely can them in light syrup so that you can enjoy homemade canned goods all year round. With these skills, you’ll be able to put up a batch of deliciously preserved pears to enjoy throughout the seasons.
Choosing the Right Variety of Pears
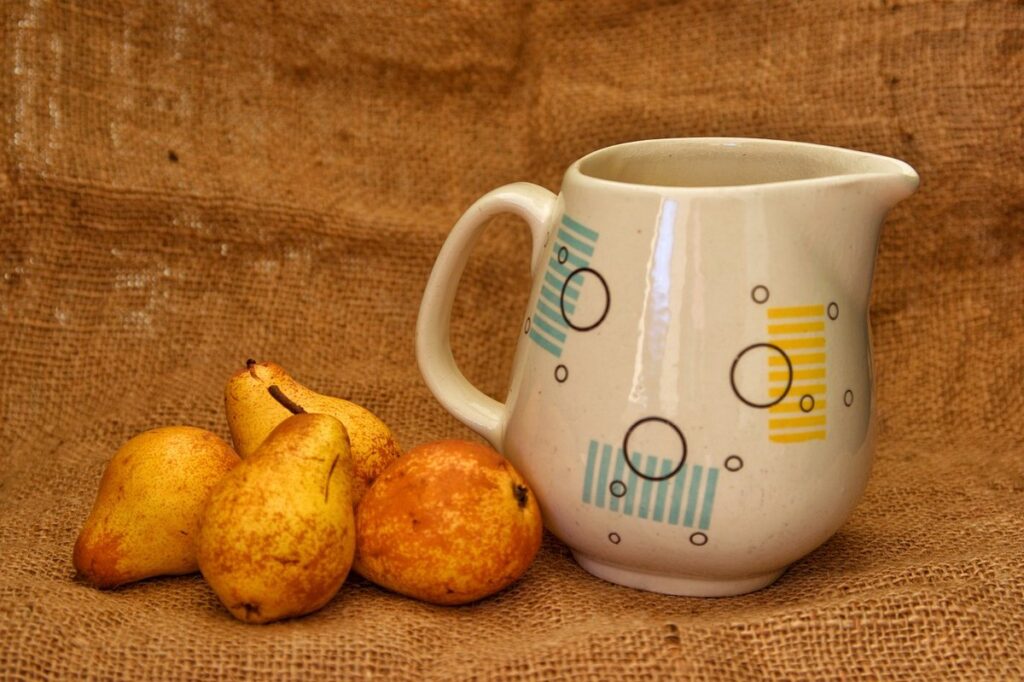
When it comes to canning pears, selecting the right variety is crucial for flavor and texture. Bartlett, Anjou, and Bosc are popular options that work well in light syrup.
Selecting Sweet and Firm Pears
When selecting pears for canning, it’s essential to choose varieties that are both sweet and firm. For a light syrup canning process, you’ll want pears with a naturally high sugar content to minimize added sugars during processing. Opt for pear varieties like Bartlett, Anjou, or Bosc, which are known for their sweetness level.
When evaluating the sweetness of a pear variety, consider its sugar content percentage, usually indicated on the label or by the grower. Typically, pears with a sugar content above 15% will yield better results in light syrup canning.
Firmness is also crucial for canning. Pears that are too soft may break down during processing and create an unappealing texture in your canned pears. Look for pears with a slight give when pressed, but still hold their shape.
In terms of specific sugar content and firmness levels, aim for pears that will yield around 17-20% sugar after cooking. For example, if using Bartlett pears, which typically have an initial 15% sugar content, they should reach the desired level after cooking in light syrup. This combination of sweetness and firmness ensures that your canned pears retain their flavor and texture when stored and served.
Understanding the Importance of Sugar Content
When selecting pears for canning in light syrup, it’s essential to consider their natural sugar content. Pears with a high sugar content will produce a sweeter syrup and more flavorful canned peaches. On the other hand, underripe or tart varieties may require additional sweeteners during processing.
Pears like Bartlett, Anjou, and Bosc tend to have a higher sugar content than varieties like Red Anjou or Forelle. These differences can significantly impact the final product’s taste and texture. For example, using pears with high sugar content will result in a syrup that’s too sweet if not balanced with spices or other ingredients.
To determine a pear’s sugar content, you can use a refractometer to measure its Brix levels (a unit of measurement for sugar concentration). However, this is not always necessary. A more practical approach is to taste the pears and assess their sweetness level. Generally, choose varieties that are sweet and firm, as these will yield the best results in light syrup canning.
Factors Affecting Pear Quality for Canning
When it comes to canning pears in light syrup, several factors affect their quality. Ripe but firm pears are ideal for canning, as they hold their shape and texture better than overripe ones. A flavor profile that’s sweet and slightly tart is also important, as this will balance out the sweetness of the syrup.
In terms of texture, a pear with a smooth, even skin is best, as this will help prevent any off-flavors or bitterness from developing during canning. Additionally, pears with a higher sugar content tend to hold their shape and flavor better than those with lower sugar levels.
When selecting pears for canning, it’s essential to choose varieties that are specifically bred for cooking and canning. These varieties typically have a higher acidity level, which helps preserve the fruit during the canning process.
Some examples of pear varieties well-suited for canning include Bartlett, Anjou, and Bosc. It’s worth noting that while some pears may be labeled as “canning” or “cooking” varieties, not all of them will have the same level of acidity or sugar content. Always check the specific characteristics of a pear variety before using it for canning.
Preparing Pears for Canning
Before you start canning, it’s essential to prepare your pears by washing, peeling, and coring them to ensure they’re ready for processing. This step is crucial for achieving perfect results in light syrup.
Washing and Peeling Pears
When washing pears for canning, it’s essential to remove any dirt, debris, and bacteria from the surface. Start by rinsing the pears under cold running water, then gently scrub them with a soft-bristled brush to dislodge any stubborn particles. For particularly dirty or waxed pears, soak them in a mixture of 1 tablespoon of white vinegar per quart of water for about 10-15 minutes.
After washing, dry the pears thoroughly with a clean towel to prevent water spots and promote even peeling. To peel the pears, use a vegetable peeler or a sharp paring knife to remove the skin in long strips, starting from the top of each pear and working your way down. For Bartlett or Anjou varieties, you can also score the skin with a knife and then blanch them in boiling water for 30 seconds to loosen the skin.
For best results, peel pears when they’re still firm, as overripe fruit is more difficult to peel cleanly. If using a machine peeler, be aware that it may leave small nicks or imperfections on the surface of the pear – these can still be safely canned but will affect their appearance.
Sterilizing Equipment and Jars
Sterilizing equipment and jars is a crucial step before canning pears in light syrup. Failure to sterilize properly can lead to contamination and spoilage of the canned goods. You’ll need hot water, a large pot, or a dishwasher for this process. Start by washing all equipment, including jars, lids, and utensils, with soap and warm water.
Next, submerge them in boiling water for 10-15 minutes. This will kill any bacteria that may be present. Alternatively, you can run your clean equipment through a hot water cycle on your dishwasher. For jars specifically, make sure to sterilize the rims as well, as these are often prone to contamination.
After sterilization, remove the equipment from the boiling water with a clean utensil or tongs, and dry it thoroughly with a clean towel. This step is essential in preventing any bacterial growth during the canning process. It’s also worth noting that some newer dishwasher models come equipped with a sanitize cycle, which can be used for sterilization as well. Always check your equipment’s manual for specific instructions on how to use this feature.
Preparing Light Syrup and Spices
To prepare light syrup and spices for canning pears, you’ll need a combination of sugar, water, and flavorings. The basic ratio is 1 cup of granulated sugar to 2 cups of water. However, this can be adjusted depending on the sweetness level you prefer and the type of pears being used.
For a classic light syrup, use a 1:2 sugar-to-water ratio. You can also add spices like cinnamon sticks, cloves, or citrus peel for extra flavor. A common combination is to add 1/4 teaspoon of ground ginger and 1/4 teaspoon of ground cinnamon per cup of sugar. If you’re using whole spices, simply tie them in a piece of cheesecloth or a spice bag.
For a more intense syrup, reduce the water ratio to 1:1 or even 2:3. This is ideal for pears that are naturally sweet or for those who prefer a sweeter preserve. Experiment with different flavor profiles by adding other spices like nutmeg, cardamom, or star anise. Just be sure to taste and adjust as you go to avoid overpowering the pear flavor. Keep in mind that the syrup will thicken slightly during cooking, so it’s better to err on the side of a lighter consistency.
Canning Pears in Light Syrup
Now that you’ve prepared your pears and light syrup, it’s time to fill your jars with a deliciously sweet and tangy treat. This section will guide you through the canning process step-by-step.
Basic Canning Procedure
Fill a large pot with enough water to cover the jars by at least an inch. Bring the water to a boil and reduce the heat to a simmer. Carefully place the sterilized jars into the pot, making sure they are fully submerged.
Processing times vary depending on altitude and jar size. For pints at sea level, process for 20 minutes. If you live in a high-altitude area (above 1,000 feet), add 5-10 minutes to the processing time. Use a canning rack or a heavy plate to hold the jars off the bottom of the pot.
Once the processing time has elapsed, turn off the heat and let the jars rest in the water for 5 minutes. This is called “cooling the jars.” After 5 minutes, carefully remove the jars from the pot with a clean canning tool or tongs. Place them on a wire rack to cool completely. Do not disturb the jars during this time.
When the jars have cooled, check the seals by pressing on the top of each lid. If the lid does not move and the seal is tight, the jar is sealed properly. Store sealed jars in a cool, dark place for up to 12 months.
Using a Water Bath Canner
When using a water bath canner for sterilizing jars and processing canned goods, follow these key steps to ensure proper equipment maintenance. First, ensure your canner is large enough to hold at least 1-2 inches of water above the tops of the jars. A general rule of thumb is to use a canner with a capacity of 4 quarts or more for this process.
Next, fill the canner with water and bring it to a boil over high heat. Once boiling, carefully add the clean, sterilized jars to the canner, making sure they are covered by at least 1 inch of water. Process the pears in light syrup using a gentle simmer or a boil for 10-20 minutes, depending on altitude.
It’s essential to maintain a steady temperature during processing: too low and bacteria may not be killed; too high and the jars might crack. For added safety, use a thermometer to monitor the internal temperature of the water bath canner. The ideal temperature is between 212°F and 240°F (100°C and 115°C).
Troubleshooting Common Issues
Under-processing can lead to undercooked pears and a poor texture, while over-processing can result in mushy or even burnt pears. To avoid these issues, ensure you’re monitoring the processing time correctly. For 4-ounce jars, the recommended processing time is typically around 10 minutes at altitudes below 1,000 feet. However, if you’re using a water bath canner and living at higher elevations, adjust your processing time accordingly.
Some common signs of under-processing include undercooked pears or unsealed jars. To check for seal integrity, press the center of each lid to ensure it’s concave – this indicates a proper vacuum seal. On the other hand, over-processing symptoms can manifest as excessively soft or even burnt pears. If you notice any off-odors or mold during inspection, discard those jars immediately.
Another potential issue is spoiled jars, which might be caused by contamination from equipment or storage environments. Regularly sterilize your equipment and store sealed jars in a cool, dry place to minimize the risk of spoilage.
Safety Precautions and Best Practices
Before you start canning, it’s essential to understand the safety guidelines that will ensure your pears are preserved properly. This includes sterilizing equipment and following tested recipes.
Understanding Pressure Canning
Pressure canning is a critical technique for preserving low-acid foods like pears. Unlike water bath canning, which is suitable for high-acid foods like jams and pickles, pressure canning uses high temperatures to ensure that all bacteria are killed, including those that thrive in lower acidity environments.
The primary reason for using pressure canning with pears is the relatively low acidity of these fruits. Pears typically have a pH level between 4.5 and 6.0, which is not acidic enough to inhibit bacterial growth without additional processing steps. By using a pressure canner, you can raise the temperature inside the jar to 240°F (115°C), creating an environment where even Clostridium botulinum – a potentially deadly bacterium that thrives in low-acid conditions – cannot survive.
When working with pears, it’s essential to follow tested recipes and guidelines for pressure canning. This typically involves adjusting the processing time based on factors like altitude and jar size. Consult reputable resources or your local extension office for specific guidance on pressure canning pears in light syrup.
Maintaining a Clean Environment
Maintaining a clean environment is crucial during the canning process to prevent contamination and spoilage. This includes keeping all equipment, jars, and work surfaces sanitized throughout the procedure. To begin, make sure you have dedicated cleaning supplies, such as a sanitizing solution or bleach, on hand.
Before preparing each batch of pears, wash your hands thoroughly with soap and warm water. Then, sanitize any equipment that will come into contact with the fruit or jars. This includes utensils, cutting boards, and even the countertop where you’ll be processing the pears. Use a clean cloth to wipe down all surfaces and ensure they’re free of dust, dirt, and any other contaminants.
When working with jars, be sure to sanitize them as well. Remove any labels or residue from previous use, and wash the jars in hot soapy water. Then, sterilize them by submerging them in boiling water for 10-15 minutes. This will help prevent any existing bacteria from spoiling your canned pears.
By following these simple steps, you can maintain a clean environment during the canning process and ensure that your homemade pear preserves are safe to eat.
Storage and Shelf Life
Store canned pears in a cool, dark place to preserve their quality and extend shelf life. The ideal storage temperature is between 50°F and 70°F (10°C and 21°C). Avoid storing them near direct sunlight, heat sources, or moisture-prone areas.
Label each jar with the date it was canned, contents, and any relevant notes about processing. This helps you keep track of which jars are oldest and ensures that older jars are consumed before newer ones. Store jars upright to prevent syrup from leaking onto shelves or floors.
Shelf life for canned pears in light syrup is typically 12 to 18 months when stored properly. However, it’s essential to check jars regularly for signs of spoilage, such as swelling, rust, or leakage around the lid. If you notice any issues, discard the jar immediately.
For long-term storage, consider transferring jars to a root cellar or a climate-controlled environment. This can help extend shelf life by several months. Remember that even if pears appear and taste fine, they may have degraded over time due to chemical changes during storage.
Advanced Techniques and Variations
Now that you’ve mastered the basic canning process, let’s explore more advanced techniques to give your light syrup pears a unique twist. We’ll cover some creative variations to elevate your recipes.
Spicing Up Your Canned Pears
When adding flavor to canned pears, consider incorporating a blend of warm spices like cinnamon, nutmeg, and cardamom. These aromatic spices complement the sweetness of the pears without overpowering them. A pinch of ground ginger or a few cloves can also add depth to the syrup.
For a more subtle approach, try infusing your light syrup with herbs like mint, basil, or lemongrass. This is particularly suitable for pear varieties with a sweeter flavor profile. Experiment with different combinations and ratios to find the perfect balance of flavors.
Some other ingredients that can enhance the taste of canned pears include citrus zest, orange blossom water, or a drizzle of honey. Be cautious when using acidic ingredients like lemon juice, as they may affect the pH level of the syrup.
To incorporate these flavors into your canned pears, try adding them to the light syrup during the sterilization process or mixing them in just before sealing the jars. This will allow the flavors to meld together and infuse the pears evenly.
Experimenting with Different Syrups
When experimenting with different syrups, keep in mind that they can add varying levels of sweetness and distinct flavors to your canned pears. Honey, for instance, has a robust flavor profile that pairs well with the natural sweetness of pears. Agave nectar, on the other hand, is a popular choice due to its mild taste and lower glycemic index.
If using honey or agave nectar, start by substituting 1/4 cup of light syrup with the new sweetener in your recipe. Monitor the flavor and adjust to taste. Keep in mind that some syrups, like maple syrup, have stronger flavors and should be used sparingly. Consider combining different syrups for unique flavor profiles.
You can also experiment with flavored extracts or oils, such as almond extract or lemon oil, to add depth and complexity to your canned pears. When using these additives, start with a small amount (about 1/4 teaspoon) and adjust to taste. This will allow you to balance the flavors without overpowering the natural sweetness of the pears.
Some popular syrup combinations include honey and rosewater or agave nectar and lime juice. Feel free to experiment and create your own signature flavor profiles by mixing different syrups and spices in various ratios.
Using Other Types of Fruits in Light Syrup
While many recipes for light syrup call specifically for pears, you can experiment with other fruits to create unique flavor combinations. Apples and peaches are popular choices because they pair well with cinnamon and nutmeg, common spices used in pear preserves. Apples add a hint of tartness, while peaches bring a sweet and slightly tangy taste.
When substituting pears with apples or peaches, keep the following tips in mind: use firmer varieties like Granny Smith for apples and ripe but firm peaches for light syrup. Also, adjust the amount of sugar according to the fruit’s natural sweetness level. For instance, peaches typically require less added sugar than pears.
To make apple light syrup, combine 3 pounds of sliced apples with 2 cups of granulated sugar and 1 cup of water in a saucepan. Bring the mixture to a boil, then reduce heat and simmer until the apples are tender. Alternatively, you can use a combination of fruits like pears and apples or add other spices like ginger or cloves to create distinct flavor profiles.
Tips and Tricks for Beginners
As you begin canning pears, it’s essential to follow some key tips and tricks that’ll make your process smoother and more successful. We’ve gathered our top beginner-friendly advice to share with you now.
Common Mistakes to Avoid
When canning pears in light syrup, beginners often make mistakes that can lead to spoilage, undercooked fruit, or even injuries. One common error is not following the recommended sterilization procedures for equipment and jars. This can introduce bacteria into the canning process, contaminating the fruit and potentially causing botulism. To avoid this, ensure all equipment is properly sterilized before use, and wash your hands thoroughly before handling jars.
Another mistake is overpacking jars with too many pears or syrup, which can cause them to become sealed improperly or even explode during processing. Leave about 1/2 inch of headspace in each jar to allow for expansion during heating.
Additionally, some beginners may not monitor the temperature and pressure levels accurately, leading to undercooked or overcooked fruit. Use a candy thermometer to ensure the syrup reaches the recommended temperature (220°F), and check your pressure canner’s gauge regularly to avoid overcooking.
Essential Tools and Equipment
To ensure a successful canning experience, you’ll need some essential tools and equipment. Start with a large pot for boiling the pears, as well as a water bath canner to process the jars. A ladle or utensil for filling the jars is also necessary.
For preparing your light syrup, have a saucepan and a candy thermometer on hand. The candy thermometer will help you reach the precise 220°F temperature needed to create a gel-like consistency in the syrup. You’ll also need a fine-mesh strainer or cheesecloth to strain the syrup before filling the jars.
Don’t forget about sterilization: a large pot for water bath canning, and a rack or steamer basket for holding the jars above the boiling water are both crucial. For peeling the pears, a vegetable peeler or sharp knife is necessary. Finally, have a clean workspace and dedicated area for preparing your ingredients to prevent cross-contamination.
When it comes to specific tools, you may want to consider investing in a canning funnel, which makes filling jars easier and reduces spills. Additionally, having a set of jar lifter tongs will help you manage the hot jars safely during the processing time.
Encouraging Children to Get Involved
Getting children involved in the canning process is a great way to teach them about food preservation, nutrition, and family traditions. Not only will they learn valuable skills, but it’s also an excellent opportunity for bonding and creating lasting memories.
To encourage children to participate, start by assigning them simple tasks, such as washing the pears or stirring the light syrup. This will help build their confidence and make them feel more invested in the process. Consider creating a chart or list with pictures and instructions for each task, so they can follow along and take ownership of their responsibilities.
Make it fun by playing music while you work together, or turning canning into a game by seeing who can prepare the most jars in a row. Be sure to praise their efforts and acknowledge their contributions, no matter how small they may seem. By involving children in the canning process, you’ll not only be teaching them important skills but also fostering a sense of responsibility and teamwork within your family.
Frequently Asked Questions
Can I use any type of pear for canning in light syrup?
Yes, you can use various types of pears for canning in light syrup, but some varieties like Bartlett and Anjou hold their shape well during the canning process. Experiment with different types to find your favorite flavor and texture.
What if I accidentally over-process my canned pears in light syrup? Can I still eat them?
No, unfortunately not. Over-processing can lead to a loss of nutrients, flavor, and texture. If you suspect you’ve over-processed your canned goods, it’s best to err on the side of caution and discard them.
How long do canned pears in light syrup typically last when stored properly?
Canned pears in light syrup can last for up to 12 months when stored in a cool, dark place. Always check the seals and look for signs of spoilage before consuming your canned goods.
Can I use honey or agave nectar as an alternative sweetener in my light syrup recipe?
Yes, you can experiment with different sweeteners like honey or agave nectar to create unique flavor profiles. However, keep in mind that these alternatives may affect the texture and shelf life of your canned pears.
What if I run out of equipment or supplies during the canning process? Can I still complete the recipe?
Yes, you can purchase essential tools and equipment specifically designed for home canning at most kitchen supply stores. If you’re unable to find a particular item, consider postponing your canning project until you have all the necessary supplies.
How do I know if my canned pears in light syrup are properly sterilized? What signs should I look out for?
Properly sterilized jars will be sealed tightly and show no signs of spoilage. Check for any visible defects, such as cracks or chips, before processing your canned goods. After canning, store your jars in a cool, dark place to ensure they remain sterile.

