
We’ve all been there – scrolling through online marketplaces or garage sales, spotting an old dresser that could be transformed into something beautiful for our homes. But instead of letting it gather dust in a landfill, why not breathe new life into it? Repurposed dressers are not only eco-friendly and budget-friendly, but they also add a unique touch to any room’s decor. By giving an old piece a fresh coat of paint or some creative refinishing, you can turn it into a one-of-a-kind statement piece that reflects your personal style. In this article, we’ll walk you through the step-by-step process of transforming an old dresser into a stunning piece of furniture, from preparation to finishing touches, and show you how to reduce waste and save money on home decor expenses in the process. By the end of it, you’ll be able to create your own repurposed dresser masterpiece that adds character to any room.
Understanding the Benefits of Repurposed Dressers
Repurposing a dresser can breathe new life into an old piece, but what are the benefits of giving it a second chance? Let’s explore how repurposed dressers can add value to your space.
The Environmental Impact of New Furniture Purchases
Buying new furniture can have a significant environmental impact. For instance, the production of new furniture requires large amounts of raw materials, such as wood and metal, which are often sourced from unsustainable sources. Additionally, the manufacturing process itself is energy-intensive and generates substantial greenhouse gas emissions. According to the United States Environmental Protection Agency (EPA), it’s estimated that the average American household generates about 100 pounds of textile waste per year, with a significant portion coming from furniture.
In contrast, repurposing old dressers offers a more sustainable option. By breathing new life into existing pieces, you’re reducing the demand for new materials and minimizing waste. Moreover, repurposed items often have a lower carbon footprint than newly manufactured ones. For example, if you choose to repaint or refinish an old dresser, you’ll be using significantly less energy and resources compared to producing a brand-new piece of furniture.
Cost-Effective Solutions for Home Decor
Upcycling an old dresser is a cost-effective solution for home decor, allowing you to breathe new life into an existing piece rather than purchasing new furniture. Consider the average cost of a single dresser unit: often ranging from $200 to over $1,000, depending on quality and size.
In contrast, repurposing an old dresser requires minimal investment – usually just some paint, sandpaper, or other basic materials. This drastic reduction in expenses can be attributed to several factors:
- The cost of the original piece is already factored into its purchase price.
- No additional materials are needed beyond what you have on hand or can source inexpensively.
- Labor costs are minimal since you’re doing the work yourself.
To maximize savings, think creatively about potential uses for your upcycled dresser. For example, you could repurpose it as a kitchen island, bathroom vanity, or even a room divider.
Emotional Connection to Repurposed Items
Keeping original pieces of furniture in your home can evoke a strong emotional connection. This is especially true when it comes to repurposed dressers, which often hold memories and sentimental value. Many people attach emotional significance to the furniture they grew up with or inherited from family members.
For instance, a dresser that’s been passed down through generations may carry stories of loved ones who once used it to get ready for school or work. Even if it’s no longer functional as a dresser, the item can still serve as a reminder of happy memories and family history.
When deciding whether to repurpose an old dresser, consider its emotional significance in addition to its practical use. You might find that keeping certain items intact is more important than giving them a new purpose. In some cases, simply refinishing or repainting the piece can be enough to breathe new life into it while preserving its original character.
Ultimately, the decision to keep an original piece of furniture intact comes down to personal preference and what you value most – its functionality, aesthetic appeal, or emotional significance.
Preparing and Cleaning the Old Dresser
Before you start giving your old dresser a new life, it’s essential to prepare and clean its surfaces to ensure a smooth upcycling process. This step is crucial for removing dirt, grime, and any existing finishes that may affect your new design.
Assessing the Condition of the Dresser
When evaluating the condition of the dresser, it’s essential to inspect each component carefully. Start by checking for any visible damage, such as dents, scratches, or cracks on the surface. Look for worn-out joints, loose screws, or broken hardware that may need replacement. Check the drawers’ rollers and tracks for smooth operation.
Next, examine the dresser’s finish, considering factors like fading, discoloration, or unevenness. Check if the original finish is intact, or if it needs to be stripped before re-finishing. Inspect the interior, including the shelves, drawers, and any other compartments. Look for signs of water damage, pest infestation, or musty odors that could indicate deeper issues.
Check each drawer’s functionality by opening and closing them repeatedly. Check for proper alignment, smooth gliding, and even distribution of weight. If you notice any issues with the drawers’ operation, it may be worth investigating further before proceeding with upcycling.
When assessing the condition, it’s also essential to consider the overall stability of the dresser. Lift it gently to check its balance and ensure that it doesn’t tip or wobble excessively. This will help you identify potential structural weaknesses that need attention before reassembling the piece.
Disassembling and Cleaning the Dresser
Start by removing all hardware from the dresser, including knobs and handles. This will give you clear access to the drawers and make it easier to clean. If the hardware is rusted or stuck, use a lubricant like WD-40 to loosen it. Next, disassemble any removable parts such as the top panel, shelves, or mirror frame.
To disassemble the drawers, remove the slides or rollers that allow them to move in and out. You may need to use a screwdriver or Allen wrench for this step. If the drawers are stuck due to old adhesives or warping wood, gently pry them open using a flathead screwdriver or putty knife.
Once you’ve removed all hardware and disassembled any parts, it’s time to clean the dresser thoroughly. Start by dusting the entire piece with a soft-bristled brush or a microfiber cloth. Then, mix a solution of mild soap and warm water, and use a damp cloth to wipe down all surfaces, including drawers, shelves, and the exterior.
If there are any stubborn stains or grime buildup, use a gentle scrubber like a non-abrasive sponge or a toothbrush to remove it. Finally, dry the dresser with a clean towel to prevent water spots from forming.
Repairing or Replacing Damaged Parts
When assessing the condition of your old dresser, you’ll often find broken parts that need repair or replacement. This can be a daunting task, but with the right approach, it’s manageable. Start by identifying the damaged components, such as drawers, shelves, or hardware. For minor issues like loose joints or worn-out drawer glides, consider using wood glue or replacing these parts entirely.
For more extensive repairs, you may need to replace entire sections of the dresser. This could involve reattaching a broken leg or reinstalling a damaged shelf. In some cases, it’s more cost-effective and time-efficient to replace the part altogether rather than attempting a complex repair. A good rule of thumb is to assess whether the damage can be fixed without compromising the structural integrity of the piece.
Some common parts that require replacement include drawer pulls, knobs, or handles. If you’re not comfortable with DIY repairs or if the damage is extensive, consider consulting a professional for assistance. In general, it’s essential to prioritize functionality and safety when making repairs or replacements, ensuring your repurposed dresser remains stable and secure for years to come.
Designing and Planning Your Repurposed Dresser
Now that you’ve chosen your dresser, it’s time to think about how you’ll repurpose it. Let’s start by designing a functional layout that maximizes your space and meets your needs.
Brainstorming Ideas for Upcycling
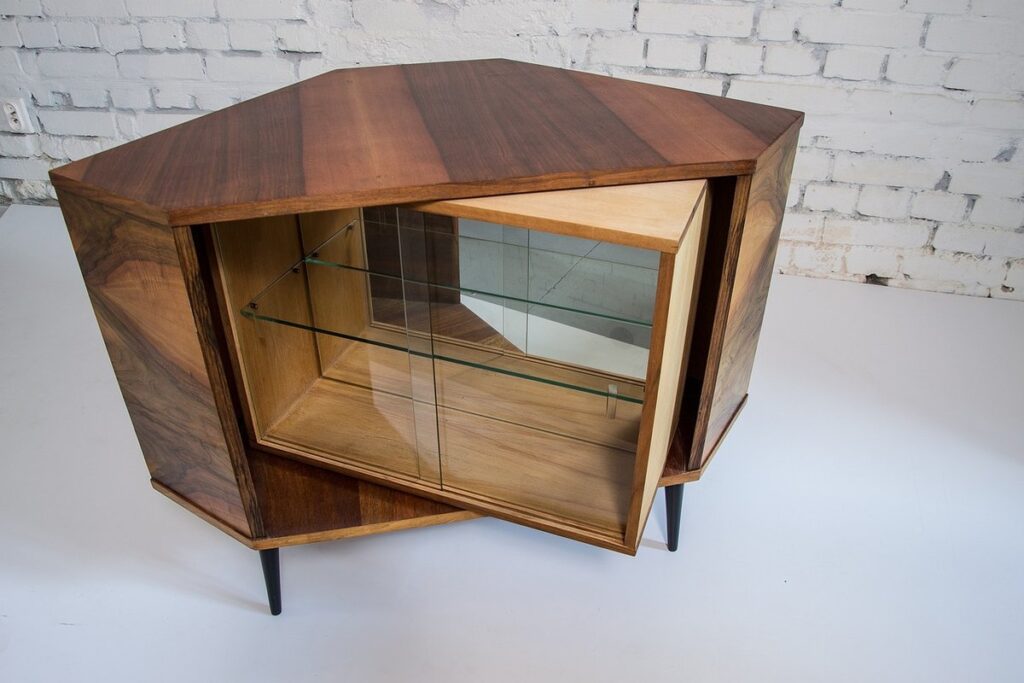
Start by examining the old dresser’s original purpose and how it can be adapted for a new function. For example, you might transform a vintage dresser into a kitchen island with built-in utensil holders or convert a small dresser into a nightstand with storage for personal items.
Consider repurposing the dresser as a room divider, using its existing shape and size to create a unique partition that separates spaces while maintaining an open feel. Alternatively, disassemble the drawers and use them as planters or storage containers for linens in a laundry area.
Think about how you can incorporate other materials into your upcycled project. Add a reclaimed wood top to create a functional desk with built-in storage. Use glass or metal inserts to give the dresser a modern twist. Even consider repurposing hardware, such as turning old knobs into unique coat hooks or using metal handles as plant labels.
When brainstorming ideas, remember that you can mix and match different components to create a one-of-a-kind piece of furniture. Think about your personal style and what types of items you need to store or display in the space where the dresser will be located. By combining creativity with practicality, you can turn an old dresser into a truly unique upcycled masterpiece that reflects your individual taste and needs.
Measuring and Mapping the Space
Measuring and mapping the space where your repurposed dresser will live is a crucial step before starting the upcycling process. It’s essential to consider the dimensions of the dresser, as well as the size and shape of the room it will occupy. Take note of any obstructions, such as doorways or corners, that may impact the final placement.
Measure the space carefully, using a tape measure or a measuring app on your phone. Note down the length, width, and height of the area where you plan to put the dresser. Consider the “walking path” around the piece – how much clearance do you need between the dresser and any adjacent furniture? For example, if you’re placing the dresser in front of a wall, make sure there’s enough space for a comfortable walking path.
Take photos or create a sketch of your room to help visualize the layout. This will also give you an opportunity to identify any areas where the dresser may not fit or may need adjustments. By accurately measuring and mapping the space, you’ll avoid costly mistakes down the line and ensure that your repurposed dresser fits seamlessly into its new home.
Choosing a Theme or Style
A repurposed dresser can seamlessly transition from a functional storage piece to a statement decorative item by incorporating various themes and styles. Consider a coastal vibe by painting the dresser white and adding weathered wood accents, or go for a vintage look with distressed finishes and ornate hardware.
For a modern twist, pair a sleek black finish with clean lines and minimalist drawer pulls. Alternatively, add some whimsy with bright colors and playful patterns, such as stripes or florals.
Some key elements to consider when choosing a theme or style include the overall aesthetic you want to achieve in your room, the existing furniture and decor, and personal preferences. Think about the color palette, texture, and pattern to create a cohesive look.
To help narrow down your options, ask yourself: Do you prefer classic and timeless, or trendy and bold? Are there any specific design styles that inspire you, such as mid-century modern or bohemian chic? By considering these factors, you can create a unique and functional piece of furniture that reflects your personality and style.
Painting and Decorating Your Upcycled Dresser
Now that you’ve given your old dresser a new life, it’s time to give it some personality! We’ll show you how to add color and style to your upcycled masterpiece.
Preparing the Surface for Paint
When preparing your upcycled dresser for paint, it’s essential to create a smooth surface that will allow the new finish to adhere properly. Start by inspecting the dresser for any existing finishes or coatings that may need to be removed before painting. These can include old varnish, polyurethane, or wax, which can prevent the new paint from bonding correctly.
Begin by gently scraping off loose particles with a putty knife or sandpaper block. This will help loosen any dirt or debris that’s accumulated over time. Next, switch to finer grit sandpaper (about 120-150) and sand the entire surface of the dresser, working in small sections to avoid creating scratches. Focus on removing any imperfections, dents, or old finish residue.
After sanding, use a tack cloth to wipe away any remaining dust particles. This will help ensure a smooth finish when you apply primer. If your dresser has a particularly uneven or porous surface, consider applying a coat of primer specifically designed for furniture before painting.
Choosing the Right Paint and Finishing Techniques
When it comes to painting and decorating your upcycled dresser, selecting the right type of paint is crucial. You have several options: latex-based paints for a smooth finish, oil-based paints for durability, or chalk paints for a distressed look. Consider the surface texture and condition of your dresser when choosing a paint type.
Latex-based paints are water-soluble and suitable for most upcycling projects. They dry quickly and can be easily cleaned with soap and water. Oil-based paints, on the other hand, provide a hard-wearing finish but require solvents for clean-up and have strong fumes. Chalk paints, popular in shabby chic designs, are another option, offering a soft, matte finish.
In addition to paint type, think about the finishing techniques you want to achieve. You can use a primer to create a uniform base coat or apply a glaze for added depth. Consider using stencils or stamps to add patterns and designs. For a distressed look, try sanding between coats or using a texture paste.
Adding Decorative Elements or Hardware
When it comes to adding decorative elements or hardware to your upcycled dresser, you have a wide range of options to choose from. Consider replacing old knobs with new ones made of materials like glass, metal, or ceramic. You can also add decorative handles, such as crystal or wooden pulls, to give your dresser a unique touch.
To ensure a secure fit, make sure the new hardware is compatible with the type of door or drawer you’re working on. For example, if you’re replacing knobs on a drawer, choose ones with screws that are specifically designed for this purpose.
If you prefer a more subtle look, consider adding decorative elements like metal straps, wooden corbels, or even antique pieces like vintage keys or locks. These can add visual interest to your dresser without overwhelming its overall design.
When selecting hardware or decorative elements, think about the style and theme of your upcycled dresser. For instance, if you’re going for a rustic look, choose items with a distressed finish or a natural material like wood.
Final Touches and Assembly
Now that you’ve stripped, sanded, and painted your old dresser, it’s time to bring everything together with some final touches. In this next step, you’ll learn how to assemble all the pieces seamlessly.
Reassembling the Dresser
Reassembling a repurposed dresser requires patience and attention to detail. Start by laying out all the hardware you’ve collected during disassembly, including screws, bolts, and handles. This will make it easier to locate each piece as you reattach them.
Begin with the drawers, if your design includes them. Make sure they’re properly aligned and attached to the frame using the correct hardware. If you’ve replaced any damaged parts, ensure they fit securely before moving on to the next step.
Next, focus on the main body of the dresser. Reattach any panels or shelves that were removed during disassembly, using a level to ensure straight alignment. Tighten all screws and bolts firmly, but avoid overtightening which can damage the wood.
As you reassemble, double-check your measurements to guarantee everything fits together smoothly. If necessary, make adjustments on the fly to avoid costly mistakes down the line. Remember that each piece of hardware has a designated spot, so take your time and don’t force anything into place. By following these steps, you’ll be able to put all the pieces back together with confidence.
Adding Finishing Touches
To add a professional finish to your upcycled dresser, consider applying a coat of clear wax or polish. This not only protects the paint and finish but also enhances its appearance. When choosing a wax or polish, select one that’s suitable for your furniture type – wood, laminate, or metal require different products.
For wood surfaces, opt for a water-based wax to prevent yellowing or discoloration. Apply it with a clean cloth in circular motions, working from the top down to avoid drips and streaks. Allow the wax to dry completely before buffing with a soft cloth to achieve a high-gloss finish.
If you’re looking for an alternative to wax, consider using a furniture oil. These oils condition the wood while providing a subtle sheen. Some popular options include linseed oil, tung oil, or Danish oil. Always read the instructions and test a small area first to ensure compatibility with your dresser’s finish.
When applying any protective coating, make sure to follow the manufacturer’s guidelines for application and drying times. This will help prevent uneven finishes and ensure a professional-looking result.
Putting It All Together: Tips for a Smooth Finish
To ensure a smooth finish and avoid common mistakes when upcycling an old dresser, it’s essential to double-check your work as you reassemble the pieces. This involves verifying that all parts are accounted for, properly aligned, and securely fastened. A small mistake can compromise the stability or appearance of the finished piece.
Before applying any finishing touches, inspect the dresser from multiple angles to catch any errors or areas that need attention. Consider using a level to ensure shelves are straight and drawers glide smoothly. If you’re adding decorative hardware or trim, make sure it’s securely attached and evenly spaced.
Common mistakes to watch out for include over-tightening screws, which can damage surrounding wood, and underestimating the amount of time needed for finishing tasks. Plan your schedule accordingly, allowing sufficient time for each step, especially if you’re working with a large or complex project. By taking these precautions and being methodical in your approach, you’ll be able to achieve a professional-looking finish that showcases your upcycled dresser.
Maintenance and Long-Term Care
Now that you’ve given your upcycled dresser a fresh new look, let’s talk about keeping it looking its best over time. Regular maintenance is key to extending the life of your repurposed furniture.
Understanding the Importance of Regular Maintenance
Regular maintenance is crucial for extending the life of your upcycled dresser. Without proper care, even the most beautifully restored piece can fall victim to wear and tear. Dust, dirt, and spills can damage finishes and compromise the structural integrity of the furniture.
Clean your dresser regularly using a soft cloth and mild soap solution. This will help prevent scratches and stains from building up over time. Pay particular attention to areas around hardware and joints, which are prone to collecting dust and debris.
In addition to cleaning, it’s essential to inspect your dresser periodically for signs of damage or wear. Check for loose joints, warped panels, and cracked finishes. Addressing these issues promptly can prevent more extensive problems from developing.
To maintain the finish on your upcycled dresser, avoid placing hot items directly on its surface, as this can cause discoloration or damage to the finish. Instead, use coasters or trivets to protect the surface. By incorporating regular maintenance into your routine, you’ll be able to enjoy your repurposed dresser for years to come.
Cleaning and Dusting Tips
When cleaning and dusting your repurposed dresser, it’s essential to use gentle products that won’t damage the finish or compromise the integrity of the materials. Start by dusting the entire piece with a soft-bristled brush or a microfiber cloth, paying particular attention to any intricate carvings or details.
For tougher stains or spills, mix a solution of equal parts water and white vinegar in a spray bottle. Dip a clean cloth into the solution, wring it out thoroughly, and gently blot the stain. Avoid rubbing the area, as this can scratch the surface. If you’re dealing with oil-based stains, such as wood wax or polish, try using a gentle wood cleaner specifically designed for your dresser’s type of finish.
When it comes to dusting, focus on the hardware, handles, and any other areas prone to dust accumulation. Use a soft cloth to wipe down these surfaces, paying attention to any crevices or grooves where dust can collect. Regular cleaning and dusting will help maintain your repurposed dresser’s appearance and prevent damage over time.
Preventing Damage and Wear
To prevent damage and wear on your upcycled dresser, start by applying a clear coat of varnish or polyurethane to protect the finish. This will create a barrier against spills, dust, and scratches. Regularly wiping down the surface with a soft cloth can also help remove dirt and oils from skin, which can cause discoloration.
When it comes to hardware, consider replacing old knobs with new ones made of durable materials like metal or glass. These are easier to clean and less likely to become damaged over time. If you’re using drawers, make sure to lubricate the runners regularly to keep them sliding smoothly.
To prevent wear on the finish, avoid placing hot items directly on the surface, as this can cause scorching or discoloration. You can also use felt pads or coasters under heavy objects to distribute weight evenly and reduce pressure on specific areas. By taking these simple precautions, you can enjoy your upcycled dresser for years to come without worrying about damage or wear.
Frequently Asked Questions
Can I repurpose an old dresser with a broken drawer or two?
Yes. While it’s ideal to repair or replace all drawers for optimal functionality, you can still upcycle the dresser even if some drawers don’t work properly. Focus on creating a visually appealing piece and consider adding decorative elements to distract from any functional issues.
What if I’m not comfortable with disassembling or repairing furniture?
Don’t worry; repurposing an old dresser doesn’t have to be a DIY project. Consider enlisting the help of a friend or family member, or hiring a professional to do the work for you. The process can be fun and rewarding, but safety should always come first.
How long does it take to complete a repurposed dresser project?
The time required will depend on the scope of your project, the condition of the original dresser, and your level of comfort with DIY tasks. Plan to spend at least 2-5 days working on the project, assuming you’re tackling most of the steps yourself.
What if I decide I don’t like the design or theme I initially chose?
It’s not uncommon for creatives to change their minds mid-project! If this happens, reassess your goals and preferences. You can repurpose parts of the dresser into a completely different piece or start over entirely. It’s all about flexibility and having fun with the process.
Can I use any type of paint or finish on my upcycled dresser?
While many types of paint and finishes are suitable for furniture, some may not adhere well to certain materials or require specific preparation. Always read the instructions on your chosen product and test it on a small area before applying it to your entire project.

