
Boiling canning jars is a crucial step in the preservation process, ensuring that your homemade creations are properly sterilized and sealed for long-term storage. However, many home canners struggle with determining the right amount of time to boil their jars, leading to inconsistent results and potential spoilage. You’ve probably encountered conflicting advice online or received mixed signals from well-meaning friends, leaving you unsure about how to proceed. To clear up any confusion, this guide will walk you through the safe boiling times for various types of canning jars, examine the essential utensils needed, and explore advanced techniques for achieving perfect preservation results every time. By the end of this article, you’ll know exactly how long to boil your canning jars, ensuring that your home-canned goods remain fresh and delicious for months to come.
Choosing the Right Canning Jars and Utensils
To ensure your canning projects are a success, selecting the right jars and utensils is crucial, as it affects the overall quality of your homemade goods. Choose from a variety of sizes and types to suit your needs.
Types of Canning Jars and Their Uses
When it comes to canning, the right jar is crucial for safe and successful preservation. Different types of jars are designed for specific uses, and choosing the wrong one can lead to inconsistent results or even spoilage.
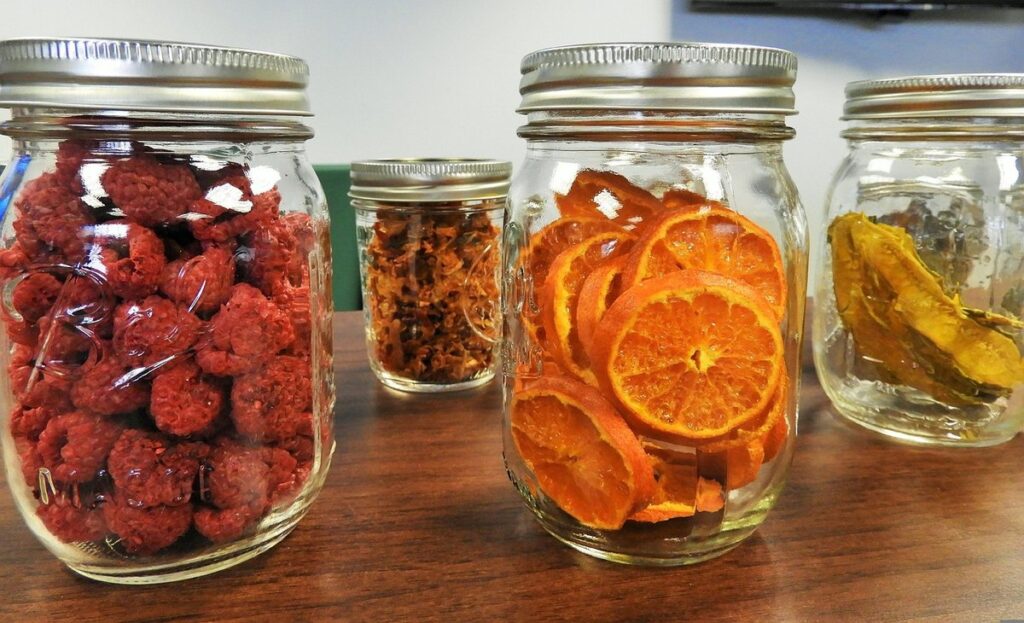
The most common type of canning jar is the Ball or Kerr brand Mason jar, available in various sizes: 4 oz, 8 oz, 16 oz, and quart. These are ideal for jams, jellies, pickles, and small-batch canning. For larger quantities or more substantial foods like meats and soups, consider using a wide-mouthed mason jar or a smaller number of larger jars.
Some specialized jars include:
- Canning straws or pint-sized jars for acidic foods like sauerkraut or kimchi
- Wide-mouthed jars with a 2.25″ opening, suitable for canning large quantities of vegetables or meats
- Regular mouth mason jars, best suited for jams and preserves
When selecting the right jar, consider the acidity level and water content of your food. Acidic foods like pickles require smaller jars to prevent over-processing and spoilage. Fats and oils also play a role; using a larger jar can help them dissipate evenly during processing.
Keep in mind that improper jar selection is a common mistake among home canners, leading to compromised seal integrity and safety risks.
Understanding Canning Utensil Requirements
To ensure safe and proper canning, you need a few essential utensils beyond just the jars themselves. Lids and rings are crucial components of the canning process, but not all lids and rings are created equal. Look for lids specifically designed for canning, as they have a special sealing compound that helps create an airtight seal.
When it comes to rings, you’ll need two types: new rings and used (or “re-usable”) rings. New rings provide the best seal and should be used for the first few uses of a lid. Used rings can still produce a good seal, but they might not be as effective over time.
In addition to lids and rings, you may also need other accessories, such as a lid lifter or a magnetic lid remover. These tools make it easier to handle hot jars and prevent accidents. Some people also swear by using a jar wrench for tightening the rings securely. However, this can sometimes damage the threads on the jar, so use with caution.
When shopping for lids and rings, consider purchasing them in bulk or as part of a starter kit to save money and ensure you have enough supplies for your canning needs.
Understanding the Boiling Process
When boiling canning jars, getting the timing just right is crucial to ensure that your jars are properly sterilized and sealed. This next step will walk you through the process of determining how long to boil those precious jars.
The Science Behind Boiling Jars
A rolling boil is essential for sterilizing canning jars, lids, and utensils. This process involves bringing a large amount of water to a vigorous, bubbling boil that’s difficult to stir down. The intense heat from the boiling water kills off bacteria, yeast, and mold spores on the surfaces, creating a clean environment for packing and sealing food.
The rolling boil is crucial because it ensures a consistent temperature throughout the jars. This helps prevent under-processing, which can lead to spoilage or contamination, and over-processing, which can cause the food to become mushy or discolored. A minimum of 212°F (100°C) must be reached for 10 minutes at sea level, adjusting for altitude as needed.
In a rolling boil, water is churning rapidly, creating a whirlpool effect that lifts the jars off the bottom of the pot. This ensures even heat distribution and prevents scorching or hotspots. To achieve a rolling boil, use a large enough pot to hold at least 3-4 quarts of water for each jar being processed.
Factors Affecting Boil Time
When boiling canning jars, several factors can influence the boil time. Altitude is a significant consideration: as you ascend to higher elevations, water boils at a lower temperature due to decreased atmospheric pressure. This means that if you’re canning at an altitude above 1,000 feet, you’ll need to increase your boil time by about 2-3 minutes for every additional 1,000 feet of elevation.
Water depth also affects boil time: the deeper the water, the longer it takes for the jars to heat up. Aim to have at least 1 inch of water above the tops of the jars to ensure even heating and prevent scorching. Jar size is another factor: larger jars take longer to heat than smaller ones. Generally, you can expect a 10-15% increase in boil time for each additional quart-sized jar added to the pot.
To adjust your boil times according to these conditions, it’s essential to note that boiling times are not just about reaching a specific temperature, but also about maintaining that temperature for a sufficient period. This ensures that any bacteria or other microorganisms present on the jars’ surfaces are killed.
Determining Boil Time for Specific Foods
To ensure perfectly sterilized jars, you’ll need to know how long to boil your canning jars depending on their size and the specific foods you’re processing. Let’s break down the guidelines for each type of food.
Fruits and Vegetables: Boiling Times and Techniques
When boiling canning jars filled with fruits and vegetables, it’s essential to follow specific guidelines for each type of produce. For instance, tomatoes require a slightly longer boil time than green beans, typically 10-15 minutes at altitudes up to 1,000 feet. Green beans, on the other hand, need only 5-7 minutes in boiling water.
Peaches and other stone fruits should be boiled for about 8-12 minutes, while bell peppers take around 10-15 minutes. It’s also crucial to adjust the boil time based on altitude – every 1,000 feet above sea level adds an extra minute or two to the recommended boil time.
Some techniques can help ensure even cooking and prevent overcooking. For example, you can add a tablespoon of lemon juice or vinegar to the water when boiling tomatoes, which helps maintain their color and texture. When boiling peaches, consider adding a few sprigs of fresh mint or basil for added flavor.
Keep in mind that these boil times are general guidelines. Always consult your canning recipe and follow any specific instructions provided by the manufacturer. Additionally, it’s vital to monitor the temperature of your water – a rolling boil is ideal, but avoid overcrowding the pot, as this can lead to inconsistent results.
Meat and Seafood: Special Considerations
When working with meats and seafood, it’s essential to consider their unique characteristics during the boiling process. Cured meats like bacon and ham require longer boil times due to their high salt content, typically 10-15 minutes at a rolling boil. Fresh fish and shellfish usually take between 5-7 minutes to reach the recommended temperature of 212°F (100°C).
Poultry, on the other hand, needs slightly more time – about 8-12 minutes for boneless cuts and 10-15 minutes for bone-in pieces. However, it’s crucial to ensure that the meat is fully submerged in water during boiling to prevent uneven heating.
If you’re canning sausages or cured meats with a rind, increase the boil time by an additional 5-7 minutes to account for the thicker exterior. Remember to always follow tested recipes and guidelines from reputable sources when working with these types of foods.
Troubleshooting Common Issues
Got stuck with a batch of jars that just won’t seal? This section will help you identify and fix common issues that can arise when boiling canning jars.
Leaks and Bubbling: Causes and Solutions
Leaks and bubbling during the boiling process can be a frustrating experience for home canners. A leaky jar is not only unappetizing but also poses a risk to food safety. Bubbling, on the other hand, can indicate that the jars are not properly sealed or that there’s trapped air inside.
Common causes of leaks and bubbling include overpacking the jars, not leaving enough headspace, and using low-quality lids or rings. Another possible cause is improper sterilization of equipment or jars. To prevent these issues, it’s essential to follow proper canning procedures, including ensuring the jars are clean and dry before filling.
To troubleshoot leaks and bubbling, check the seals for any signs of damage or wear. If a seal is damaged, replace the lid immediately. For bubbling issues, try re-sealing the jar using a clean, damp cloth to remove any air pockets. In some cases, it may be necessary to re-process the jars in a boiling water bath. To avoid these problems altogether, maintain a consistent canning routine and follow reputable guidelines for sterilization and sealing procedures.
When inspecting seals, look for signs of damage or wear on the lid’s rubber gasket, such as cracks or discoloration.
Other Issues: Warping, Cracking, or Unsealed Jars
Warping or cracking jars can occur due to excessive heat or uneven cooling. This is often evident when you notice a jar’s glass becoming misshapen or developing fine lines. To minimize warping, ensure that the water bath is at a gentle simmer rather than a rolling boil. Avoid placing jars near direct heat sources or hot surfaces.
If you do experience warping, it may not be catastrophic for the seal, but it can compromise the jar’s structural integrity. Cracked jars are more serious and should be replaced immediately to prevent potential explosions during processing. Unsealed containers can also pose a risk; check for signs of failure by inspecting the lid for proper sealing.
When examining your jars post-processing, look for any visible signs of damage or weakness. If you find a cracked or warped jar, discard it and replace it with a new one. It’s essential to use high-quality jars that can withstand the heat and pressure involved in boiling. Regularly inspecting your equipment will help prevent issues before they arise.
A common indicator of warping is visible stress lines on the glass surface.
Advanced Canning Techniques
As you progress in your canning journey, mastering advanced techniques will elevate your preservation skills and give you more control over your jars. This section explores expert methods for achieving perfectly sterilized containers every time.
Water Bath vs. Pressure Canning: When to Use Each
When using a water bath canner, you’re typically safe with high-acid foods like pickled items, jams, and most fruits. These foods are acidic enough to inhibit bacterial growth, making them suitable for the lower temperatures of a water bath canner. However, if you’re working with low-acid foods such as meats, poultry, seafood, or vegetables, pressure canning is the only safe option.
Pressure canners operate at much higher temperatures than water baths, allowing for the destruction of bacteria and other microorganisms that can cause spoilage. This makes them essential for preserving a wide range of foods beyond high-acid items. For example, if you’re canning green beans or corn, pressure canning is necessary to ensure they remain safe to eat.
It’s also worth noting that some specialty products like canned soups and broths often require pressure canning due to their complex formulations and potential for spoilage. If in doubt about which method to use, consult the USDA’s guidelines for home canners or check the specific requirements for your food item.
Specialized Canning Methods: Pickling, Fermenting, and More
When experimenting with unique flavor profiles and textures, canners often turn to specialized techniques like pickling and fermenting. Pickling involves submerging food in a brine solution, which can be acidic or sweet, to create a tangy or sour taste. A classic example is traditional dill pickles, where cucumbers are submerged in a vinegar-based brine with dill seeds. The acidity of the vinegar helps preserve the pickles and creates a distinctive flavor.
Fermenting, on the other hand, involves allowing food to break down naturally by microorganisms like bacteria or yeast. This process can be time-consuming but yields unique flavors and textures. For instance, sauerkraut is made by fermenting shredded cabbage in its own juices with the help of lactic acid-producing bacteria.
Other specialized methods include pressure canning for low-acid foods like meats and poultry, and water-bath canning for high-acid foods like fruits and pickled vegetables. If you’re new to these techniques, it’s essential to follow tested recipes and guidelines from trusted sources, such as the USDA’s Complete Guide to Home Canning. This will help ensure safe and successful results.
Safety Precautions and Regulations
Before we proceed, it’s crucial that you understand the essential safety guidelines for boiling canning jars to ensure your jars are properly sterilized and prevent any potential spoilage. Always follow these critical steps carefully.
Understanding USDA Guidelines for Home Canners
When following USDA guidelines for home canners, it’s essential to understand the importance of acidity levels in food preservation. The USDA recommends using a tested recipe from a trusted source, such as the USDA’s Complete Guide to Home Canning or the National Center for Home Food Preservation. These resources provide recipes with established pH levels, ensuring safe and healthy canning.
To ensure accurate processing times, it’s crucial to check the acidity level of your food before canning. The USDA categorizes foods into three groups: high-acid (pH 4.6 or lower), low-acid (pH 4.7-5.2), and neutral (above pH 5.2). High-acid foods, such as pickled vegetables and fruits, require short processing times, while low-acid foods, like meats and seafood, need longer boiling periods.
For home canners, the USDA recommends using a pressure canner for low-acid foods to prevent spoilage. When boiling jars, follow these key guidelines: maintain at least 10 inches of water above the jar’s lid, ensure the canning rack is centered, and keep the temperature between 212°F (100°C) and 240°F (115°C). By adhering to these USDA guidelines, home canners can produce safe and healthy food that lasts throughout the year.
Staying Up-to-Date: Latest Research and Recommendations
To stay current with the latest research and recommendations on home canning practices, it’s essential to consult reputable sources. The USDA’s Complete Guide to Home Canning is a comprehensive resource that provides up-to-date guidelines for safe canning practices. This guide includes information on processing times, acidity requirements, and equipment maintenance. You should also check the USDA’s website (usda.gov) for any recent updates or changes to their guidelines.
Other reliable sources of information include peer-reviewed journals like the Journal of Food Science and the Journal of Food Protection. These publications often feature research studies on various aspects of canning, including food safety, processing times, and equipment performance. You can also look for online forums and discussion groups focused on home canning, where experienced canners share their knowledge and best practices.
When evaluating new research or recommendations, consider the credibility of the source and the study’s methodology. Look for studies that are well-designed, statistically significant, and transparent in their findings. You should also be wary of information from unverified sources, as it may not be based on sound scientific principles. By staying informed through reputable channels, you can ensure your home canning practices are safe, effective, and up-to-date with the latest research.
Frequently Asked Questions
What if I’m canning at high altitude and my boil time is longer than recommended? Should I adjust the temperature instead?
Yes, you should adjust both the boiling time and the water depth to compensate for high altitude. This will ensure that your jars are properly sterilized and sealed.
Can I use a pressure canner to shorten boil times or do they only work with certain types of food?
Pressure canners are specifically designed for foods that require longer cooking times, such as meats and stews. They can be used to shorten boil times, but it’s essential to follow the manufacturer’s guidelines and recommended times for your specific food.
How long should I let my jars cool after boiling before storing them in a pantry or cupboard?
Allow your jars to cool on a wire rack for at least 12-24 hours before storing them. This allows any remaining heat to dissipate, which is essential for ensuring the seal remains intact and preventing spoilage.
What if I notice that some of my jars are warped or cracked during the boiling process? Can I still use them?
Unfortunately, no. Warped or cracked jars cannot be used for canning as they may not seal properly, leading to spoilage or even foodborne illness. Discard any damaged jars and replace them with new ones.
What’s the best way to store my boiled canning jars after they’ve cooled completely? Should I put them in a cupboard or on a shelf?
Store your boiled canning jars in a cool, dark place such as a pantry or cupboard. Avoid storing them near direct sunlight or heat sources, which can cause the lids to seal improperly or promote spoilage.

