
Sketching animals can be intimidating, especially if you’re new to drawing. You might struggle to capture their unique features or proportions, but with practice and guidance, anyone can learn to sketch animals with confidence. Understanding animal anatomy is key to creating realistic sketches, which is why it’s essential to focus on the underlying structure of the creature. This guide will walk you through basic techniques for sketching different types of animals, including how to observe and draw their features, posture, and movement. We’ll also cover advanced methods for adding texture, pattern, and other details that bring your sketches to life. By the end of this article, you’ll have a solid foundation in animal sketching, enabling you to tackle even the most challenging subjects with ease and precision.
Understanding Your Subject
To get started, let’s take a closer look at what makes your subject tick – whether it’s the majestic lion or the agile gazelle, understanding its unique characteristics is key.
Choosing an Animal to Sketch
When choosing an animal to sketch, consider starting with subjects you’re familiar with. This can make the process more enjoyable and help you focus on technique rather than trying to understand complex anatomy. For example, if you have a pet dog at home, drawing it could be a great way to practice your skills.
However, working outside of your comfort zone can also lead to new discoveries and improved skills. If there’s an animal that fascinates or interests you, consider giving it a try. You might find yourself learning more about its unique characteristics and adapting your approach accordingly.
Some animals may be more challenging than others due to their complexity or unusual features. For instance, drawing birds in flight requires understanding of movement and perspective. In contrast, simple shapes and profiles can make sketching snakes easier.
Consider what you want to achieve with your sketch. Do you aim for realistic details or a loose impression? This will help guide your choice of subject and ensure that you’re not struggling with aspects that don’t align with your goals.
Observing Animal Anatomy
When sketching an animal, it’s essential to have a good understanding of its anatomy. This includes observing both the skeletal system and muscle structure. The skeleton provides the foundation for the animal’s overall shape and proportions, while the muscles determine how the body moves and holds its pose.
Study the skeletal system by imagining the bones beneath the skin. Observe how they articulate with each other to form joints, and how this affects the animal’s movement. For example, a cat’s flexible spine allows it to twist and turn with ease, whereas a giraffe’s long neck is supported by strong cervical vertebrae.
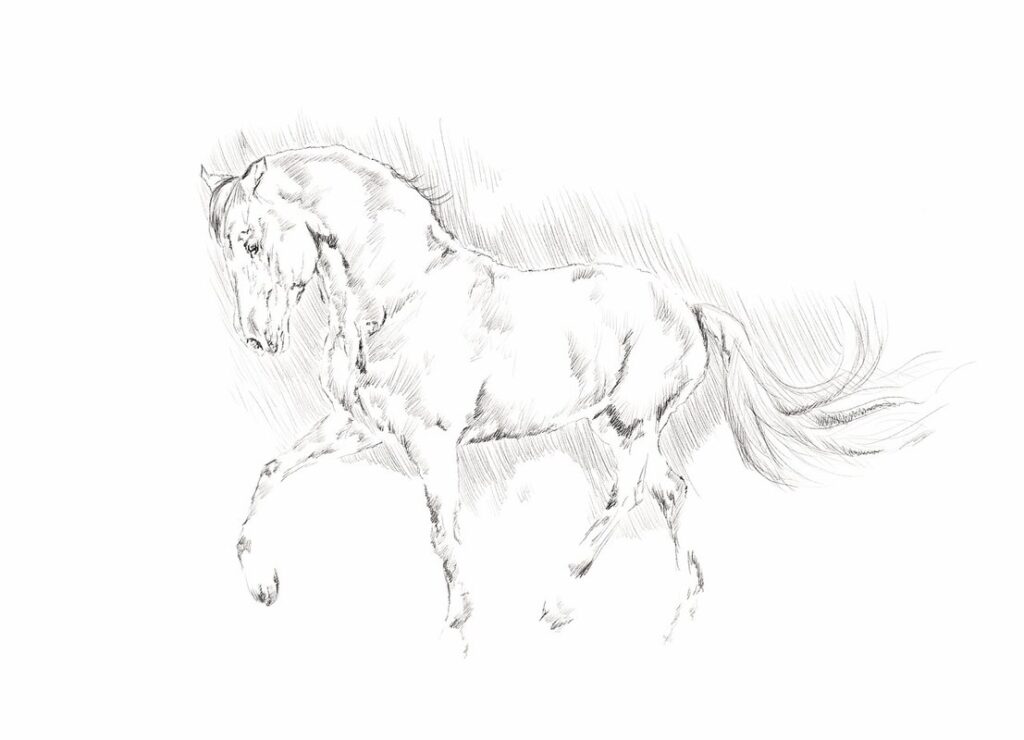
The muscle structure is equally important for capturing an animal’s dynamic pose. Observe how muscles attach to bones and work together to produce movement. In a running horse, for instance, the powerful gluteal muscles propel it forward, while the smaller muscles in its legs help control its stride.
To accurately depict an animal’s anatomy in your sketches, try observing its posture and movement from different angles. Take note of how the skeletal system and muscle structure interact to create balance and fluidity.
Basic Drawing Techniques
Mastering basic drawing techniques is essential for capturing the essence of animal sketches, so let’s start with the fundamentals of line work and shape. We’ll cover the basics of hatching and cross-hatching to create texture and depth in your drawings.
Understanding Perspective and Proportion
Perspective is a fundamental concept in drawing animals, as it helps to create a sense of depth and space on a flat surface. Imagine you’re standing in front of a real-life animal: if you look directly at its body, the legs appear shorter than they actually are due to their distance from your viewpoint. To draw this accurately, use one-point perspective by placing the horizon line (the imaginary line where the ground meets the sky) at eye level and having the legs converge slightly towards it.
Proportion is just as essential in drawing animals. Most mammals have a roughly symmetrical body plan, with the head, neck, torso, and limbs forming a balanced whole. Measure your subject’s proportions by dividing its body into simple shapes, such as spheres for the head and body, cylinders for the legs, and cones for the tail. Use these basic forms to help you draw the animal in proportion.
A useful exercise is to draw an animal from different angles, observing how the proportions change. For example, a profile view shows more of the animal’s side than its front or back. Practice drawing animals from multiple viewpoints to develop your understanding of perspective and proportion.
Line Art and Shading Basics
When creating line art and shading for animal drawings, it’s essential to understand the different types of lines and basic shading methods. Lines can be broadly categorized into two main types: hatching and cross-hatching. Hatching involves using closely spaced parallel lines that follow the contours of the subject, while cross-hatching involves layering lines at a 90-degree angle to create depth and texture.
To achieve a range of values in your shading, you can experiment with different line weights and techniques. Thicker lines can be used for darker areas, such as shadows, while thinner lines can be used for lighter areas, like highlights. Pay attention to the direction of your lines, as this can greatly affect the overall mood and feel of your piece.
For animal drawings, it’s often helpful to focus on capturing the subtle play of light on fur or feathers. This can be achieved by using gentle hatching lines that follow the texture and contours of the subject. For example, when drawing a cat’s whiskers, use short, delicate lines to suggest their softness and flexibility.
In terms of basic shading methods, you can start with simple tone-on-tone techniques, where you gradually build up layers of value to create depth and dimension. This approach allows you to focus on capturing the overall shape and form of your subject before adding finer details.
Advanced Techniques for Realism
As you refine your skills, it’s time to tackle more intricate techniques that will breathe life into your animal sketches. This is where advanced methods like layering, texture, and subtle shading come into play.
Capturing Texture and Fur Patterns
When capturing texture and fur patterns in animal drawings, it’s essential to employ layering and blending techniques. Start by blocking in the overall shape of the fur, using a gentle touch to suggest the direction of individual hairs. Then, gradually build up layers of hatching and cross-hatching to create depth and dimension. The key is to balance smooth transitions with clear definition.
To achieve realistic texture, pay attention to the way light interacts with the animal’s fur. Observe how it catches in certain areas, creating highlights and deepening shadows. You can use a range of line weights and textures to convey this effect. For example, a light touch with a fine-tip pen might suggest the softness of rabbit fur, while thicker lines and coarse textures could evoke the roughness of bear skin.
When blending fur patterns, consider the individual characteristics of your subject. Some animals, like cats and dogs, have smooth coats that can be blended quickly with gentle strokes. Others, like wolves or horses, require more defined texture and layering to capture their distinctive patterns. Experiment with different techniques and reference images to find what works best for each animal you sketch.
Eye and Facial Expression
When capturing realistic eye and facial expressions in animal drawings, it’s essential to observe the subtleties of emotion and personality. Note how different breeds and species display unique characteristics through their facial features. For example, a horse’s expression can convey confidence or fear, while a cat’s eyes may gleam with mischief.
Pay attention to the shape and size of the eyes, as well as the spacing between them. In many animals, the eyes are proportionally larger than those found in humans, which can create a more intense gaze. The angle of the eyebrows can also add depth and emotion to the face. Some species, like dogs, have expressive eyebrows that help convey their mood.
To capture these subtleties, study real-life examples or reference photographs of animals with distinct personalities. Practice drawing different facial expressions, experimenting with subtle variations in eye shape, eyebrow direction, and mouth curve. A small tilt of the head or a relaxed jawline can make all the difference in conveying an animal’s unique personality.
Sketching Different Animal Types
When sketching animals, it’s essential to capture their unique characteristics and features, which can vary significantly between different species. This is particularly true when drawing mammals versus birds or reptiles.
Mammals: Fur and Whiskers
When sketching mammals, two distinctive features often get overlooked: fur and whiskers. To capture these characteristics accurately, pay close attention to texture and pattern. Study how different breeds of dogs or cats have unique coat patterns – stripes, spots, or tabby markings. Notice the way their fur lies flat against their bodies, with some areas thicker than others.
Observe the direction of individual hairs in your subject’s fur. You can use short, curved lines to suggest this texture. For example, when drawing a cat’s back, use gentle, rounded strokes to convey the softness and smoothness of its fur. When depicting a dog’s coat, consider the way it ruffles or lies flat depending on the breed.
Whiskers are another crucial detail in mammal sketches. They add expressiveness and help define the animal’s features. When drawing whiskers, use thin lines to suggest their length and direction. Pay attention to how they relate to the rest of the face – the angle at which they protrude from the muzzle or chin.
When combining fur and whiskers, remember that subtlety is key. A light touch will help you convey a sense of softness and texture without overwhelming the other features in your sketch.
Birds: Feathers and Flight
Birds have some of the most intricate and challenging features to capture in a sketch. Their feathers are incredibly diverse, with varying lengths, thicknesses, and textures, making it difficult to replicate their softness and delicacy on paper. To achieve realism, focus on the layering effect created by overlapping feathers. Observe how individual feathers blend into one another, rather than drawing each as a distinct entity.
When depicting flight, consider the bird’s wings in motion. Pay attention to the subtle curvature of the wingtips, the tension in the muscles, and the softness of the feather edges. A common mistake is to draw stiff, static wings; instead, aim for a sense of fluid movement.
To capture the essence of feathers and flight, practice drawing different bird species from reference images or life observations. Study the way light interacts with their plumage, creating shadows and highlights that add depth and dimensionality. Note the subtle variations in feather patterns, such as the soft downy underlayers and stiff, pointed quills. By paying attention to these details, you’ll be able to convey a sense of airiness and freedom in your bird sketches.
Tips and Tricks for Improvement
To take your animal sketches to the next level, we’ll share some expert tips on refining proportions, capturing textures, and adding movement to bring your drawings to life.
Practice and Experimentation
Regular practice is essential to improving your animal sketching skills. Set aside a specific time each week to draw and stick to it. Begin with simple exercises like observing the structure of different animal body parts or practicing basic lines and shapes that make up their forms. You can also try drawing from life, where you observe an actual animal in person, or from photographs.
Experimentation is another crucial aspect of developing your skills. Try drawing animals with different textures, such as a cat’s fur or a bird’s feathers, to get a sense of how to capture these details accurately. Practice rendering various facial expressions and body language to convey the emotions and personalities of the animals you draw. Don’t be afraid to try new techniques or mediums – for instance, switching from pencils to charcoal or paint can open up fresh possibilities.
As you experiment with different approaches, pay attention to what works and what doesn’t. Take note of the results and make adjustments accordingly.
Common Mistakes and How to Avoid Them
One common mistake many artists make when sketching animals is paying too much attention to individual features and not enough to the overall structure. This can lead to a disjointed, unbalanced drawing. To avoid this, take a step back from your paper or screen and evaluate how the animal’s body parts relate to each other. Check if the proportions are correct and the placement of limbs and organs makes anatomical sense.
Another pitfall is overemphasizing detail at the expense of basic form. Focusing too much on textures and patterns can obscure the underlying shape and movement of the animal. Remember, a sketch should capture the essence of your subject, not just its surface-level characteristics. Practice observing animals in motion to get a feel for how their bodies move and interact with each other.
In addition, be cautious when trying to depict intricate features like fur or feathers. It’s easy to become overwhelmed by the complexity of these textures, but this often results in an overly busy drawing that lacks clarity. To achieve balance, focus on capturing the overall flow and movement of the animal’s fur or feathers, rather than trying to render every single strand or feather.
Advanced Applications: Animal Illustration
Now that you’ve mastered basic animal illustration, it’s time to take your skills to the next level by exploring advanced techniques for creating stunning, detailed portraits of animals. In this section, we’ll show you how to bring your illustrations to life with texture and atmosphere.
Creating Realistic Animal Portraits
To create realistic animal portraits, you must capture individual personality and traits. This requires a deep understanding of the subject’s behavior, temperament, and physical characteristics. Study reference images of animals from various angles to get a sense of their unique features, such as the shape of their ears or the pattern on their fur.
When sketching an animal portrait, consider its posture, facial expression, and body language. A relaxed animal will have a more open and natural pose, while a tense one will be more stiff and alert. You can also observe how the animal interacts with its environment to get a sense of its personality.
To convey individuality, focus on capturing subtle details such as eye shape, whisker placement, or the texture of their fur. Use soft, gentle lines to suggest the contours of their features, rather than harsh ones that might give them a cartoonish appearance. For example, if you’re sketching a cat, pay attention to the angle of its ears and the way its whiskers curve around its face.
When capturing personality, remember that it’s not just about depicting realistic features but also about conveying emotion and attitude.
Using Sketches in Storytelling and Education
Sketches can be a powerful tool for conveying emotional depth and complexity in storytelling. By focusing on an animal’s body language and facial expression, artists can create nuanced and relatable characters. This is evident in the work of animators like Nick Park, who uses detailed sketches to bring his claymation characters to life.
In education, sketches can be used to teach students about science and conservation. For example, a sketch of an endangered species can help raise awareness about its habitat and behavior. Students can also learn about the anatomy of different animals by creating sketches from reference images.
Sketches can also be used in therapeutic settings to help patients cope with anxiety or stress. By focusing on the gentle lines and curves of animal forms, individuals can calm their minds and develop a sense of relaxation. This approach is often used in art therapy programs for children and adults alike.
To effectively use sketches in storytelling and education, it’s essential to create accurate and detailed depictions of animals. This involves observing their behavior, studying their anatomy, and practicing rendering different textures and patterns. By mastering these skills, artists can bring their animal subjects to life on paper and engage audiences with compelling narratives.
Frequently Asked Questions
How Often Should I Practice Sketching Animals to See Improvement?
Start by setting aside a specific time each week for sketching animals. Aim to practice at least an hour or two a day, three times a week. This consistent effort will help you develop muscle memory and improve your skills faster.
Can I Use Digital Tools to Create Realistic Animal Portraits?
Yes. Many digital art programs, such as Adobe Photoshop or Illustrator, offer advanced features for creating realistic animal portraits. Familiarize yourself with these tools to enhance your work and achieve professional-looking results. Experiment with different brushes and textures to capture the intricacies of fur and feathers.
How Do I Know When My Animal Drawing Is Finished?
A good rule of thumb is to step back from your drawing regularly and ask yourself if you’ve captured the essence of the animal. Check for balance, proportion, and texture. If you’re unsure, try sketching over your initial lines with a soft pencil or eraser to refine details without altering the overall composition.
Can I Use My Animal Sketches in Commercial Projects or Sell Them Online?
Yes. With proper attribution and model releases (if applicable), you can use your animal sketches in various commercial projects. You may also sell them online through platforms like stock image websites, but ensure you comply with any terms of service or licensing agreements.
What If I Want to Sketch an Animal That’s Not Typically Found in My Environment?
When sketching animals that are not native to your region, research their anatomy and behavior thoroughly. Study reference images from experts or conservation organizations to get accurate details on their habitats, physical characteristics, and movements. This will help you create a more realistic representation of the animal.

