
Drawing outdoors can be intimidating, especially for those who are new to art or prefer the comfort of their own studio. However, capturing the beauty of nature on paper is one of the most rewarding experiences an artist can have. To do it with confidence, you need to understand how to choose the right tools and use them effectively in various lighting conditions.
You’ll also want to develop your observation skills to accurately capture the subtleties of light and shadow that make outdoor scenes so captivating. Our expert tips and techniques will show you how to overcome common challenges and create stunning outdoor art that’s more than just a pretty picture. By the end of this article, you’ll know exactly how to improve your outdoor drawing skills and be able to capture the beauty of nature with confidence.
Getting Started with Outdoor Drawing
You’re eager to capture the beauty of nature on paper, but where do you begin? Let’s start with the basics of setting up your outdoor drawing kit and choosing a suitable location.
Understanding Your Medium
When drawing outdoors, you’ll need to adapt your medium to suit the conditions. Pencils are a good starting point, as they’re versatile and can handle various weather situations. Graphite pencils work well for most outdoor settings, but consider bringing a range of hardness levels to capture subtle details in bright sunlight or soft, hazy light.
Charcoal is another option, ideal for sketching loose gestural drawings or capturing the textures of natural forms. It’s particularly effective when used with a brush or blending stumps to create smooth transitions and rich tonal values. However, be aware that charcoal can smudge easily in wet conditions, so take precautions to protect it.
Watercolors are best suited for dry, overcast days when you want to capture delicate colors and subtle shifts in light. Choose watercolor pencils or pan sets specifically designed for outdoor use, as they’ll hold their color better than regular watercolors exposed to the elements. Remember that these mediums can be unpredictable outdoors – expect changes in texture, tone, and consistency due to wind, humidity, or temperature fluctuations.
Setting Up Your Easel or Sketchbook
Choose a spot with good light and shelter from the elements. If using an easel, set it up on level ground to prevent your drawing surface from tilting. This will also give you room to move around your setup without bumping into anything.
Consider investing in a portable easel or one designed for outdoor use. These often come with features like adjustable legs and weather-resistant materials. Some artists prefer sketchbooks instead of easels, which can be easily stashed away when not in use.
If drawing on location is a regular occurrence, you might want to consider using a smartphone app that allows you to digitize your sketches quickly. This way, you can save time reviewing your work and also share it with others more easily. Just make sure the app’s interface is user-friendly, especially if you’re not tech-savvy.
Some artists prefer working in small, intimate spaces like gardens or courtyards. Others may need to draw from a car window or while standing on a busy sidewalk. Regardless of where you work, prioritize setting up your workspace for comfort and convenience so that you can focus on the act of drawing.
Mastering Observation Skills
Developing strong observation skills is crucial for capturing the beauty of nature on paper. We’ll explore how to cultivate a keen eye and improve your ability to accurately depict the world around you in this section.
Seeing Beyond the Surface Level
When you observe the world around you for outdoor drawing, it’s easy to get caught up in capturing the obvious details – like the shape of a tree branch or the color of a flower. But improving your skills requires seeing beyond the surface level. Start by noticing the relationships between different elements in nature. For instance, how does the trunk of that tree interact with its surroundings? Does it provide shade for a nearby shrub, or block the view to a distant mountain?
Pay attention to textures as well – not just the rough bark of trees, but also the smoothness of rocks, the softness of moss, and the intricate patterns on leaves. These subtle details can add depth and character to your drawings. Notice how different materials interact with each other in interesting ways, like the way water flows over a rocky surface or the way light filters through foliage.
By observing these relationships, textures, and interactions, you’ll begin to see the world as a complex web of shapes, patterns, and details that can be captured on paper. Try to break down your subjects into their constituent parts – branches, leaves, roots – and study how they fit together. This will help you develop a more nuanced understanding of the natural world and translate it onto paper with greater accuracy and sensitivity.
Capturing Light and Shadow
Accurately capturing light and shadow is crucial for creating realistic outdoor drawings. Light can greatly impact a scene’s mood and atmosphere, while shadows add depth and dimensionality to an otherwise two-dimensional representation of reality. To capture these elements effectively, start by identifying reference points on the subject – such as the position of a tree’s branches or the slope of a hillside. Measure the length and angle of these shadows against nearby objects or landmarks.
When measuring shadows, consider the time of day and how it affects the light source’s position in the sky. For example, mid-morning sunlight casts long shadows with defined edges, while late afternoon light produces shorter, softer shadows. Be aware that the human eye perceives shadows as darker than they actually are, so avoid overemphasizing their darkness.
To practice this skill, try creating a simple still-life composition outdoors using natural objects like rocks or branches. Measure and draw the shadows cast by these objects, taking note of how they interact with each other and their surroundings. As you become more confident in your ability to capture light and shadow, apply this knowledge to more complex subjects – such as landscapes or wildlife.
Techniques for Different Environments
Drawing outdoors can be challenging, but having techniques tailored to specific environments makes all the difference. From cityscapes to wilderness areas, we’ll explore methods for adapting your art to each setting.
Drawing Landscapes: Skies, Trees, and Hills
When drawing landscapes, capturing the play of light on clouds is a crucial element. Start by observing the cloud formations and noting their shapes, sizes, and positions in relation to one another. Pay attention to how the light affects these forms, creating soft, white highlights or darker, more defined shadows.
To render realistic tree branches, focus on their varied textures and growth patterns. Observe the way branches twist and curve, sometimes thickening into trunks or thinning out into delicate twigs. Note the direction of growth, with younger branches often pointing upwards towards the sky. Use a range of line weights to convey this texture and movement.
Rolling hills can be challenging to capture on paper, but breaking them down into simpler shapes can help. Divide the hillside into sections, noting the changing textures and colors as you move from base to peak. Pay attention to the way light catches the ridges and valleys, creating subtle shadows and highlights that add depth and interest to your drawing.
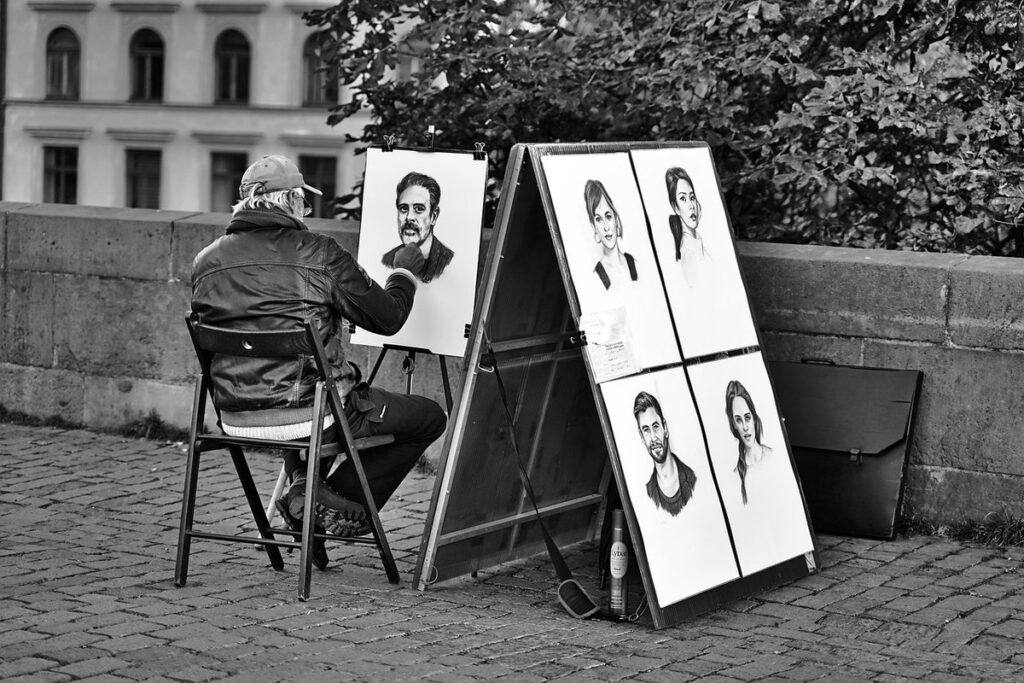
Drawing Portraits in Nature: Animals and People
When drawing portraits in nature, you’ll often encounter animals and people interacting with their surroundings. To capture the essence of these subjects, focus on their facial expressions and body language. Observe how they respond to their environment – a curious bird may tilt its head as it inspects a nearby insect, while a hiker might look up at the sky in awe.
When drawing an animal’s portrait, pay attention to the texture and patterns of its fur or skin. Note how the light catches the individual hairs or scales, creating a sense of depth and dimensionality. You can use a range of values – from dark shadows to light highlights – to convey the subject’s texture and three-dimensionality.
If you’re drawing people, consider their posture and how it relates to the surrounding landscape. For example, a figure sitting on a rock may appear more relaxed than one standing at the edge of a cliff. Experiment with different poses and angles to capture the subtleties of human expression in an outdoor setting.
Safety and Comfort Considerations
When venturing out into nature to draw, it’s essential to consider your safety and comfort so you can focus on capturing the beauty around you. Let’s cover some practical tips for staying protected and relaxed in the great outdoors.
Protecting Yourself from the Elements
When drawing outdoors, you’re exposed to various weather conditions that can impact your comfort and health. Extreme temperatures, direct sunlight, and precipitation are just a few factors to consider when protecting yourself from the elements.
To shield yourself from the sun’s intense rays, use a hat with a wide brim, a scarf or bandana to cover your neck, and apply sunscreen with a high SPF rating before you start drawing. Wear lightweight, light-colored clothing that allows for airflow and won’t trap heat. A breathable umbrella can also provide shade when needed.
Insect-borne illnesses like mosquito-borne diseases are another concern in outdoor settings. Use insect repellent containing DEET or picaridin to deter mosquitoes, and consider wearing long sleeves and pants to cover exposed skin.
When working in wet conditions, prioritize your sketchbook’s protection by using a waterproof bag or case. If you’re drawing on location with water-based media, choose a surface that won’t become too slippery when wet, such as a plastic sheet or a non-slip easel pad.
Remember to stay hydrated and take breaks in shaded areas if possible.
Choosing Safe Locations for Outdoor Drawing
When selecting a location for outdoor drawing, safety should be your top priority. Avoid areas with restricted access, such as private property without permission or protected wildlife habitats like national parks or nature reserves. These zones often have specific rules and regulations that you may not be aware of.
Be cautious when choosing locations near water sources, such as rivers, lakes, or oceans. Steep slopes, rocky terrain, and uneven ground can also pose a risk to your safety. Make sure to check the weather forecast beforehand and plan accordingly, avoiding areas prone to flash floods, landslides, or strong winds.
When in doubt, opt for public spaces like parks, gardens, or beaches with designated art-friendly zones. These locations usually have minimal restrictions and are designed for public use. Always respect local regulations and signs indicating restricted access.
Some key questions to ask yourself when evaluating a location include: Are there any warning signs or notices indicating potential hazards? Is the area well-lit, especially if you plan to draw during early morning or evening hours? Are there nearby amenities like restrooms, water fountains, or food vendors in case of emergencies?
By being mindful of your surroundings and taking necessary precautions, you can enjoy a safe and successful outdoor drawing experience.
Advanced Techniques and Projects
As you continue to hone your outdoor drawing skills, it’s time to take on more challenging projects that push the boundaries of your creativity. We’ll share expert tips for tackling intricate scenes and ambitious pieces.
Using Perspective and Composition in Outdoor Drawings
When applying perspective and composition principles to outdoor drawings, it’s essential to consider the unique challenges of capturing a scene on location. Start by establishing a strong horizon line, often achieved by finding a vantage point with a clear view of the surrounding landscape. This will help create a sense of depth and distance in your drawing.
To enhance composition, look for leading lines that can guide the viewer’s eye through the scene. These might be roads, paths, or even the contours of hills and mountains. Consider using a rule of thirds approach to balance elements within the frame, placing important features along these imaginary lines.
In outdoor drawings, it’s also crucial to pay attention to negative space – the areas between and around subjects. This can help create a sense of breathing room and visual flow in your composition. Experiment with different viewpoints, such as drawing from below or above eye level, to add dynamic interest to your piece.
A simple exercise is to break down the scene into thirds both horizontally and vertically, placing key elements along these intersections. This will help you achieve a more balanced and visually appealing composition that showcases the beauty of the outdoor setting.
Creating a Body of Work: Portfolio-Building Strategies
When building a portfolio of outdoor drawings, it’s essential to curate a selection of standout pieces that showcase your skills and artistic vision. This can be achieved by identifying a common thread or theme among your favorite works, such as capturing the play of light on water or conveying the textures of natural materials.
Start by selecting 5-10 drawings that you’re particularly proud of, and group them together under a clear heading or category. Consider creating a physical portfolio with high-quality prints, or building an online platform using platforms like Behance or Instagram.
To make your work easily accessible to potential clients, collectors, or fans, create a grid-style presentation that allows viewers to quickly scan through your pieces. You can also use captions or descriptions to provide context about each drawing, including the location, time of day, and any specific challenges you faced while creating it.
When promoting your portfolio online, share a selection of your best work on social media platforms, using relevant hashtags to reach a wider audience. Consider setting up an email newsletter or blog to share behind-the-scenes stories, artistic inspiration, and upcoming projects – this can help build a loyal following and generate interest in your work.
Frequently Asked Questions
Can I still draw outdoors in areas with heavy tree cover or dense foliage?
Yes, you can still create stunning outdoor drawings even in shaded areas. Focus on the dappled light filtering through the leaves and branches to capture unique textures and patterns.
How do I deal with drawing animals in motion without freezing up?
It’s normal to feel intimidated when trying to draw moving subjects! To overcome this, try breaking down the animal into simple shapes and focusing on capturing its overall movement and energy. Practice observing animals in their natural habitats to develop your skills.
What if I don’t have a lot of space to set up my easel or sketchbook – can I still draw outdoors effectively?
Yes, you can still create great outdoor drawings even with limited space. Consider using a compact easel or a portable sketchbook that allows for flexibility in tight spaces. Experiment with different techniques and media to find what works best for your situation.
Can I use digital drawing tools instead of traditional media when drawing outdoors?
Yes, many artists successfully use digital drawing tools like tablets and smartphones to capture their outdoor experiences. Consider investing in a portable power source and protective case to ensure you can keep working even in remote locations.

