
Many people assume that creating beautiful line drawings requires years of practice and natural talent. However, with a few fundamental principles under your belt, you can start producing simple yet striking artworks in no time. The beauty of line drawing lies in its ability to convey emotion and mood through minimalistic compositions, making it an accessible medium for artists of all skill levels.
To get started, we’ll explore the basic tools needed for line drawing, such as pencils, pens, and paper types. From there, we’ll dive into advanced techniques like hatching and cross-hatching to add depth and texture to your artwork. By mastering these fundamental principles, you’ll be able to take your simple art skills to the next level with consistent practice, developing a consistent style that showcases your unique perspective.
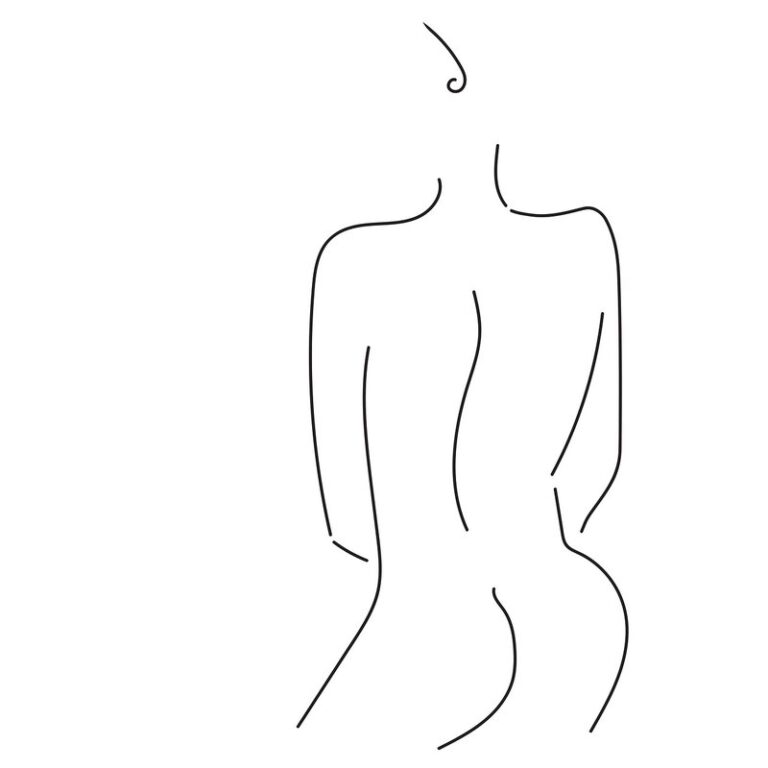
Getting Started with Line Drawing
To get started with creating easy line drawings, let’s begin by understanding the basics of line art and how to set up your workspace for drawing simplicity.
The Basics of Line Art
Line drawing is all about lines – their length, width, and value. Understanding these basic principles is essential for creating effective line drawings. Let’s start with the different types of lines: straight, curved, diagonal, and zigzag. These can be combined to create more complex shapes and forms.
The weight of a line refers to its thickness or thinness. A thick line creates bold, expressive strokes, while a thin line produces delicate details. Practicing varying line weights will help you achieve the desired contrast in your drawings.
Line value is another critical aspect of line drawing. It’s not just about the darkness or lightness of a line but also how it relates to other lines and shapes in the composition. For example, a bold black line against a white background can create high contrast, while a thin gray line blending with its surroundings can produce soft, subtle effects.
To develop your line drawing skills, practice observing the world around you – from simple forms like bottles or vases to more complex subjects like people or landscapes. Study how different lines interact and combine to create textures, patterns, and movement. Regular practice will help you internalize these principles and improve your ability to capture subjects with ease.
Basic Tools for Line Drawing
For beginners, getting started with line drawing often requires a simple yet effective setup. You’ll need basic drawing tools and materials to bring your ideas to life. A set of graphite pencils (HB, 2B, and 6B) is an essential starting point, as they allow for varying line weights and shades. A range of fine-tip pens, such as Micron or Faber-Castell Pitt Artist Pen, can also be useful for creating crisp lines.
In addition to physical tools, you’ll need a suitable surface for drawing. Look for smooth paper with a medium weight (around 80-100 gsm), which is forgiving yet responsive to your line work. Erasers are another must-have, as they allow for quick corrections and changes to your design. Digital tools can also be a great option for line drawing, particularly if you prefer working on a computer or tablet.
Consider using a graphics tablet with a stylus, such as the Wacom Intuos, which offers natural drawing experience. Alternatively, digital drawing apps like Procreate or Autodesk Sketchbook can provide a range of brushes and tools tailored to line work.
Understanding Proportions and Measurement
Mastering proportions is crucial for creating realistic line drawings, so let’s explore how to accurately measure and draw objects from different perspectives. We’ll cover some essential tips on using measurement techniques effectively.
Measuring Objects for Accurate Proportions
Measuring objects accurately is essential for creating line drawings with correct proportions. When drawing from life or reference images, it’s easy to get proportions wrong if you don’t measure carefully. For example, try drawing a cat without measuring its body length compared to its tail length – the result will likely be an unbalanced and unrealistic representation.
To achieve accurate proportions, use a ruler or a measuring tool specifically designed for artists, such as a set of dividers or a caliper. Measure lengths and widths multiple times to ensure accuracy. You can also use ratios to guide your measurements. For instance, if you know the ratio of the cat’s body length to its tail length is approximately 5:1, you can use this information to measure the proportions accurately.
Another technique is to break down complex objects into simpler shapes, such as cylinders and rectangles, which are easier to measure. This approach helps ensure that your measurements are accurate and proportional, resulting in more realistic line drawings. By focusing on measuring objects carefully, you’ll be able to achieve better results and improve your overall drawing skills.
Transferring Measurements onto Paper
To accurately transfer measured proportions onto paper, you can use a grid drawing method. Create a square grid on a separate piece of paper by lightly drawing 1-inch squares with a ruler. This will serve as a guide to help you proportionally scale up the measurements from your original reference image.
You’ll then need to divide each line or element in the reference image into equal segments, corresponding to the number of squares on your grid paper. For example, if the line is 5 inches long and your grid has 10 squares per inch, draw a mark every two squares along that length.
Alternatively, you can use proportional scaling by measuring specific points on the original reference image and transferring those measurements directly onto your drawing paper. This method works well for more complex compositions where individual lines or shapes may be harder to divide into uniform segments. Remember to label each segment clearly so it’s easy to match them up with corresponding parts of the reference image.
Building Line Drawings from Simple Shapes
Start by mastering the basics of creating line drawings, and that begins with building simple shapes into more complex forms. This process is easier than you think!
The Power of Basic Geometries
Using basic geometries is a fundamental aspect of creating line drawings. Circles, squares, and triangles are some of the most essential shapes you’ll use as building blocks for more complex forms. These simple shapes can be combined to create a wide range of subjects, from everyday objects to fantastical creatures.
For example, a circle can become an eye or a wheel, while a triangle can morph into a roof or a sail. Squares and rectangles are perfect for drawing buildings, boxes, and other rectangular structures. To combine these shapes effectively, try using them in tandem – for instance, pairing a square with two triangles to create a window.
When combining basic shapes, remember that less is often more. Aim for simplicity and clarity, rather than trying to include every detail. By focusing on clean lines and straightforward compositions, you’ll be able to emphasize the essence of your subject and create a more engaging drawing. With practice, you can develop your own unique style using these fundamental building blocks.
Adding Details with Lines and Shapes
When adding texture and patterns to simple shapes, think beyond just varying line thickness. Experiment with different types of lines to create depth and interest. Hatching – short, closely spaced lines following a pattern – is particularly effective for creating textures resembling wood grain or stone.
Using basic shapes, you can create repeating patterns like chevrons or herringbone designs. Break down the pattern into its constituent parts: draw a single shape or unit of the design, then duplicate and space it according to your desired effect. Experiment with different spacing and alignment variations to achieve unique results.
For more complex textures, try combining different shapes and lines in a single drawing. For instance, use a rectangle as a base and add hatching lines radiating from its corners to create a stone wall appearance. Alternatively, combine rectangles and circles to form a tile pattern that looks convincing even without color or shading.
Creating Realistic Line Drawings
Now that you have a basic understanding of line drawing fundamentals, let’s focus on creating realistic line drawings by mastering key techniques and practices. With these tips, your artwork will take on a more polished appearance.
Capturing the Essence of Form and Volume
To create realistic line drawings, it’s essential to capture the essence of form and volume. This is achieved by conveying light, shadow, and depth through lines. Begin by observing how different shapes and volumes interact with each other. For instance, a cube can be broken down into simpler forms like rectangles and squares.
When drawing a cube, focus on suggesting its volume through gentle curves and subtle changes in line weight. Avoid making the lines too sharp or angular, as this can make the form appear rigid and unnatural. To convey light and shadow, use hatching and cross-hatching techniques. Varying the density of lines can create a sense of depth and dimensionality.
Consider using different types of lines to define areas of high and low contrast. For example, heavier lines can be used for darker shadows, while finer lines can suggest lighter highlights. Pay attention to how light interacts with curved surfaces, creating soft, smooth transitions between values. By mastering these techniques, you’ll be able to capture the essence of form and volume in your line drawings, resulting in more realistic and engaging artwork.
Understanding Value and Contrast in Line Art
Value and contrast are essential elements in creating a realistic line drawing. You can create a sense of depth and atmosphere by using different values, which refer to the lightness or darkness of a line. In simple terms, value is about how thick or thin a line appears on the page.
When working with line art, it’s crucial to balance high-value lines (those that appear thicker and darker) with low-value lines (those that appear thinner and lighter). This contrast between values creates visual interest and helps guide the viewer’s eye through your drawing. For instance, you can use high-value lines for shadows or details in a scene, while using low-value lines for highlights or textures.
To practice value and contrast, try creating a simple still life drawing with a range of values. Use a pencil or pen to draw a basic outline of the objects, then add layers of value by gradually increasing or decreasing the thickness and darkness of your lines. Pay attention to where the light sources are placed in relation to each object, as this will greatly impact the overall value and contrast of your drawing. By mastering value and contrast, you’ll be able to create more engaging and realistic line drawings with ease.
Advanced Techniques for Line Drawings
As you become more confident in your line drawing skills, it’s time to experiment with more complex techniques that add depth and visual interest to your art. We’ll explore some of these advanced methods next.
Using Negative Space and Overlap
Using negative space effectively can elevate a line drawing from simple to striking. By incorporating empty space around and within your subjects, you create visual breathing room, allowing each element to stand out. For instance, when drawing a group of animals, leave some space between them to avoid clutter and allow the viewer’s eye to move freely. Conversely, overlap elements can add depth and energy to a composition.
When using overlap, it’s essential to balance the amount of covered and exposed areas. A general rule is to cover about 30-50% of each element with other shapes or lines. This balance creates visual interest without overwhelming the viewer. You can also experiment with different levels of overlap to achieve various moods. For example, a light touch may suggest delicacy, while a more substantial overlap could convey complexity.
Remember that negative space and overlap are not mutually exclusive techniques. In fact, combining them can create dynamic tension in your line drawings. By embracing empty space and strategic overlapping, you’ll be able to add visual sophistication to even the simplest subjects.
Creating Movement with Lines and Gestures
To convey movement and energy through lines, you can use a range of techniques, starting with simple gestures. Try drawing loose, flowing motions with your pen or pencil to create a sense of dynamism. Scribbles can also be effective – think of them as expressive marks that add life to your drawings.
For example, you might draw a sweeping curve to indicate movement, or use short, staccato lines to suggest energy and tension. The key is to let the lines flow naturally from one to another, without overthinking or trying to make each stroke perfect. As with any form of drawing, practice makes a difference here – try experimenting with different gestures and scribbles until you start to feel comfortable creating them.
Remember, it’s not about creating precise, realistic movements but rather conveying a sense of energy through your lines. Think about the actions or emotions you want to depict in your drawings, and let that guide your line work.
Putting it All Together: Tips for Practice and Improvement
Now that you’ve mastered some basic line drawing techniques, it’s time to put them into practice and see how you can improve your skills. Focus on regularly sketching simple subjects to build confidence and muscle memory.
Setting Realistic Goals and Expectations
When you start creating line drawings, it’s easy to get caught up in the excitement of making progress and producing artwork. However, setting unrealistic expectations can lead to frustration and disappointment. You might expect yourself to master a new skill or create intricate designs within a short period. This approach often backfires, leaving you feeling discouraged.
Consistent practice is key to improving your line drawing skills. Set aside dedicated time each day or week to focus on sketching. Begin with simple exercises like drawing basic shapes, straight lines, and gentle curves. As you become more confident, gradually introduce more complex forms and techniques. Aiming for a daily or weekly goal can help maintain momentum and make progress feel tangible.
Patience is also essential in line drawing. Developing muscle memory and fine-tuning your skills takes time. Avoid comparing yourself to others who have been practicing for longer. Focus on observing your own growth, no matter how slow it may seem. By being realistic about your goals and the effort required to achieve them, you’ll cultivate a more positive and supportive learning environment that encourages steady improvement.
Troubleshooting Common Issues with Line Drawings
When creating line drawings, it’s common for beginners to struggle with proportion and perspective. One mistake is drawing objects too large or too small, which can quickly disrupt the balance of a composition. To avoid this issue, try measuring your subjects against each other before starting to draw. For example, if you’re drawing a person, measure the height of their head in relation to their body.
Another common problem is poor proportions within individual elements. This might mean that a character’s arms are too long or their face is distorted. To correct this, focus on simple shapes and basic forms when breaking down your subjects into simpler components. You can also use visual aids like grids or measuring tools to help ensure accuracy.
If you find yourself consistently making these mistakes, it may be worth revisiting the fundamentals of line drawing and proportion. Practice exercises that emphasize measurement and accurate representation will help improve your skills over time. Remember, practice is key – don’t be afraid to make mistakes and try new approaches as you work through a piece.
Conclusion and Inspiration
Now that you’ve mastered the basics of easy line drawings, let’s talk about how you can take your skills to the next level and inspire others with your art. You’ll find inspiration and ideas in this section to keep creating.
Final Tips for Inspiration and Progression
As you’ve worked through the exercises and techniques in this guide, remember that progress may feel slow at first. Don’t be discouraged by initial frustration or imperfections – it’s normal for beginners to take time adjusting to drawing with lines.
Keep in mind that line drawings are all about simplicity and control of line weight. Focus on observing shapes and forms rather than trying to render intricate details. Practice observing the world around you, paying attention to the way light interacts with surfaces, textures, and patterns.
To continue making progress and staying inspired, set achievable goals for yourself. This might mean dedicating a certain amount of time each week to practicing line drawings or experimenting with new techniques. Having a clear idea of what you want to achieve will help keep your practice focused and engaging.
Some final tips to keep in mind: Experiment with different materials and tools – a range of pencils, pens, and paper can breathe new life into even the simplest subject matter. Explore various styles and genres within line drawing, such as minimalist art, cartoons, or abstract expressionism. Visit museums and galleries to observe how professional artists use lines and composition to convey emotion and meaning.
Remember that mastering line drawings is a long-term process, and it’s essential to be patient and compassionate with yourself. Celebrate small victories along the way – finishing a simple drawing, successfully creating texture or pattern, or experimenting with new techniques. These milestones will help build your confidence and motivation, keeping you on track as you continue improving your skills.
Frequently Asked Questions
Can I use watercolors or oil paints for line drawings?
Yes, while traditional media like pencils and pens are ideal for line drawings, you can also experiment with using watercolors or oil paints to achieve unique textures and effects. However, keep in mind that these mediums may require additional techniques and practice to master.
How do I know if my proportions are accurate when drawing from observation?
Pay attention to the overall balance of your composition and compare it to real-life observations. Use a measuring device or take multiple measurements to ensure accuracy. Don’t be afraid to make adjustments as needed, and remember that proportional scaling is key for accurate drawings.
What if I struggle with capturing light and shadow in my line drawings?
Start by observing how light falls on objects in real life, paying attention to the values and contrasts created. Practice rendering simple forms and gradually build up to more complex subjects. Use a range of line weights and hatching techniques to convey depth and dimension.
Can I combine digital tools with traditional media for creating line drawings?
Yes, many artists successfully integrate digital tools into their practice. For example, you can use a graphics tablet or software like Procreate to create digital sketches that you can then refine with traditional media. Experiment with different combinations to find what works best for your style and workflow.
How often should I practice line drawing to see improvement?
Consistency is key when it comes to improving line drawing skills. Aim to set aside dedicated time each week for practice, even if it’s just 15-20 minutes a day. Focus on regular exercises and projects that challenge you, and don’t be discouraged by slow progress – with patience and persistence, your skills will eventually develop.

